Some links on this page are affiliate links: if you buy through them we may earn a commission, at no extra cost to you.
A reliable single-ply roof is a designed assembly, not a roll of membrane. The deck, air or vapor control layer, insulation, cover board, membrane, attachment method, flashings, penetrations, drains, and edge securement must work together and match a tested system. Begin with the building’s use, climate, code jurisdiction, wind exposure, drainage, fire requirements, and energy objectives; then select a membrane family and install it strictly to the current manufacturer instructions.
What a complete single-ply roof system includes
Low-slope roofs are commonly built from several coordinated layers. A typical specification addresses:
As an Amazon Associate I earn from qualifying purchases.
Recommended Free Tools
- The structural deck and its condition
- Air and vapor control layers where the hygrothermal design requires them
- Rigid insulation, including attachment and staggered board joints
- A cover board where separation, impact protection, fire performance, traffic resistance, or joint support is needed
- The membrane and its approved seam method
- Mechanical fasteners, plates, adhesives, or other attachment components
- Base flashings, penetration flashings, drains, scuppers, edge metal, and terminations
- Perimeter and corner securement designed for project wind pressures
Performance classifications apply to this complete combination of components. A membrane name by itself does not establish wind uplift, fire rating, compatibility, or warranty eligibility.
How to choose a single-ply membrane family
The principal families in NRCA’s overview are EPDM thermoset membranes and thermoplastic PVC, TPO, and KEE membranes. The most visible difference is how seams are made, but the decision also involves substrate compatibility, attachment, fire and impact requirements, flashing materials, available tested details, and the manufacturer’s repair procedures.
#1 Best Overall
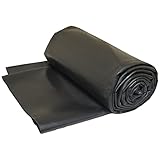
- 45-Mil Liner: The Most Popular Material for New And Re-Roof, Low Slope, Roofing Applications
- Outstanding Durability And Low Life Cycle Cost Means Excellent Value
- Easily Contours to Unusual Roof Shapes. Perfect for Do-It-Yourself Homeowners or Roofing Contractors
- Flexible Material Allows Design Versitility and Easy Installation
- NOTE: If using for a deck or a roof, make sure you order a liner size slightly larger than your dimensional needs. We don't want to sell you more than you need, but getting an EXACT size will not be sufficient to cover your deck or roof correctly.
| Family | Typical seam method | Design and specification points |
|---|---|---|
| EPDM | Compatible adhesive or seam tape | Current product instructions define primers, tapes or adhesives, substrate preparation, and detail work. Confirm compatibility of the membrane, insulation facer, cover board, and flashing accessories. |
| PVC | Hot-air welding | Formulation, thickness, chemical compatibility, and approved assemblies are product-specific. Specify the tested system rather than relying on the generic PVC label. |
| TPO | Hot-air welding | Use current product data and tested assemblies. A historical thickness recommendation is not a present code requirement or a universal specification. |
| KEE | Hot-air welding | Verify that the selected product meets the applicable material standard and distinguish it from other PVC alloys. Follow the product manufacturer’s current data. |
No membrane family can be ranked universally as the longest-lasting, least expensive, or best-performing option from the available evidence. Those outcomes depend on the selected formulation, assembly, exposure, workmanship, maintenance, and repair practices.
Design the assembly before ordering materials
1. Collect project criteria
Record the building location, occupancy, climate, adopted code edition and amendments, structural deck type and condition, existing roof layers, equipment, penetrations, fire requirements, energy targets, and owner constraints. Identify whether the work is new construction, a tear-off, or a recover application. Have the design professional and, where appropriate, the manufacturer’s technical representative resolve conflicts before materials are purchased.
What’s actually slowing this PC down?
Pick the symptom - the matching free tool is one click away.
The NRCA Roofing Manual: Membrane Roof Systems—2023 is the current detailed reference identified for deck, air and vapor retarders, rigid insulation, membranes, fasteners, accessories, configurations, reroofing, and construction details.
2. Resolve drainage early
Lay out the roof so water reaches drains, scuppers, or other designed outlets without relying on membrane deflection or random field cuts. Coordinate slope, crickets behind curbs, saddles at changes in elevation, overflow provisions, and transitions to adjacent roofs.
An NRCA article published in February 2015 discussed a 2% slope (one-quarter unit vertical in 12 horizontal) in the context of the 2012 International Building Code. Treat that figure as a historical code example, not a universal current requirement. Verify the code edition adopted by the project jurisdiction, local amendments, and the drainage criteria in the contract documents.
Rank #2

- Durable Construction: The EPDM waterproofing membrane is extremely durable and has a life expectancy of over 50 years in outdoor applications
- Robust Design: EPDM waterproof membrane is very robust thanks to its fiber reinforcement and overall thickness of 52 mil
- Weather-resistant Performance: EPDM waterproof membrane has an EPDM top layer that is suitable many applications and exposure to the weather conditions which makes it remain flexible and dont break even for decades
- Peel and Stick Installation: EPDM waterproof membrane is quick and easy to install, without the need for special knowledge or tools
- Clean Appearance: The EPDM waterproof membrane has a clean looking top layer in black which doesnt reflect the sun like aluminum does
Check the finished deck and insulation layout for unintended low spots. Positive drainage is a design objective; it is not created by choosing a particular membrane.
3. Calculate wind pressures and roof zones
Establish the project’s design wind pressures using the applicable code and the building’s height, geometry, exposure, enclosure classification, and location. Divide the roof into field, perimeter, and corner zones as required by the design method. Then select a membrane assembly with uplift documentation applicable to those pressures and provide the required perimeter and edge securement.
NRCA identifies wind-load design resources, including its Roof Wind Designer for many common building types, and guidance addressing edge-metal testing. The attachment pattern, fastener type, plate, adhesive, substrate, and edge detail all affect the tested result. Do not substitute a similar-looking fastener or reduce the specified pattern without a documented design revision.
4. Design the deck, vapor control, insulation, and cover board
Confirm that the deck is structurally adequate, dry enough for the proposed work, and suitable for the specified fasteners or adhesives. Resolve irregularities, abandoned penetrations, wet insulation, and incompatible existing materials before the membrane is installed.
Air and vapor control layers belong in the building-physics design, not as an afterthought. Their location depends on climate, interior humidity, deck construction, insulation placement, and drying potential. A roof that needs vapor control can still experience condensation if continuity at walls, curbs, and penetrations is lost.
Rank #3
- 60-Mil Liner: The Most Popular Material for New And Re-Roof, Low Slope, Roofing Applications
- Outstanding Durability And Low Life Cycle Cost Means Excellent Value
- Easily Contours to Unusual Roof Shapes. Perfect for Do-It-Yourself Homeowners or Roofing Contractors
- Flexible Material Allows Design Versitility and Easy Installation
- NOTE: If using for a deck or a roof, make sure you order a liner size slightly larger than your dimensional needs. We don't want to sell you more than you need, but getting an EXACT size will not be sufficient to cover your deck or roof correctly.
Set insulation board joints in a stable, staggered layout. Coordinate tapered insulation with drains and crickets, and avoid placing joints where concentrated traffic or abrupt substrate changes will stress the membrane.
NRCA describes several cover-board functions:
- Separating materials that should not contact each other
- Protecting insulation and membrane from impact and construction traffic
- Contributing to a required fire classification
- Supporting staggered insulation joints
- Providing a more durable surface below the membrane
Select the board, facer, thickness, and attachment as part of the tested assembly. A board that is acceptable under one membrane or adhesive may be incompatible with another.
5. Specify the membrane and accessories together
Contract documents should identify the membrane product and defining material characteristics, approved attachment method, fasteners or adhesives, primers, seam materials, flashings, bonding adhesives, terminations, edge metal, drains, walkway pads, and other accessories. Drawings and specifications should agree on thickness, sheet width, fastening zones, substrate, and detail requirements.
NRCA’s February 2015 article recommended a minimum conventional PVC thickness of 45 mils and at least 60 mils for TPO. These are recommendations from that article, not universal code minimums. Confirm current project criteria, product data, tested assemblies, and any owner or warranty requirements before using a thickness value.
Free tools Windows power users keep installed
One-click scans. No signup required.
Installation practices that protect system performance
There is no universal field recipe for every single-ply roof. The selected manufacturer’s current instructions govern ambient limits, substrate preparation, seam equipment, welding or bonding settings, primers, adhesives, fastener spacing, and detail construction.
Rank #4
- Durable Construction: The EPDM waterproofing membrane is extremely durable and has a life expectancy of over 50 years in outdoor applications
- Robust Design: EPDM waterproof membrane is very robust thanks to its fiber reinforcement and overall thickness of 52 mil
- Weather-resistant Performance: EPDM waterproof membrane has an EPDM top layer that is suitable many applications and exposure to the weather conditions which makes it remain flexible and dont break even for decades
- Peel and Stick Installation: EPDM waterproof membrane is quick and easy to install, without the need for special knowledge or tools
- Clean Appearance: The EPDM waterproof membrane has a clean looking top layer in black which doesnt reflect the sun like aluminum does
Prepare the work area
Keep the deck and insulation free of standing water, frost, oil, dust, sharp projections, and loose debris. Protect completed layers from damage by other trades. Confirm that drains are open and temporarily protected from construction debris without blocking the designed flow path.
Plan sheet delivery and staging so rolls are supported, dry, and positioned without overloading the structure. Mark penetrations, curbs, expansion joints, and changes in elevation before laying membrane sheets.
Lay out sheets and attachment
Follow the approved shop drawings or manufacturer layout for sheet direction, laps, fastener rows, induction-welded plates where applicable, and perimeter enhancements. Keep seams away from abrupt substrate steps and concentrated fastener lines when the system detail requires it. Do not assume that a field attachment pattern can be used at corners or perimeters; wind zones commonly require closer spacing or additional securement.
Quick wins for a faster PC:
Scan for outdated or missing drivers - takes under a minuteDriver Scan →Clear out junk files and repair common Windows errorsFree Scan →Fix the driver behind crashes, sound loss and screen glitchesFind Drivers →Control seams
EPDM seams commonly use compatible adhesive or seam tape. Surface cleaning, primer application, splice preparation, rolling pressure, and cure time are product-specific.
PVC, TPO, and KEE seams are typically joined by hot-air welding. Welding temperature, speed, nozzle condition, overlap, and weather conditions must be set and verified according to the product instructions and equipment guidance. A visually continuous bead is not, by itself, proof of a sound weld.
Best Value
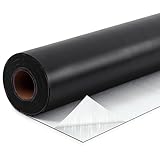
- Vulcanized Epdm Rubber: made from vulcanized EPDM rubber, This 50 mil thick roofing membrane delivers exceptional tensile strength is built to handle tearing while keeping its structure intact; Engineered to withstand UV exposure, extreme temperature fluctuations, harsh weather conditions without cracking, shrinking, or degrading over time
- Butyl Rubber Adhesive Backing: bonded with an aggressive butyl rubber adhesive layer, this membrane creates a permanent waterproof seal the moment it contacts the surface; the butyl backing conforms tightly to irregular surfaces, eliminating gaps and preventing water infiltration at every edge and seam
- Waterproof & Ice/water Barrier Protection: creates a fully sealed, watertight barrier that prevents water infiltration, ice dam leaks, and moisture damage. conforms seamlessly to irregular surfaces, corners, and penetrations to eliminate vulnerable leak points on flat and low-slope roofs
- Versatile Fit For Multiple Applications: each roll covers 39" x 10ft (3.1m x 1m) and is ideal for rv roofs, garden sheds, garages, patios, gutters, skylights, and hvac duct sealing. the flexible rubber membrane adheres to wood, metal, concrete, and most roofing substrates with a permanent bond
- Reinforced Construction with Finish: the EPDM sheet keeps its surface integrity under standing water weather exposure; The white release liner ensures clean, precise peel stick application every time; A reliable waterproofing solution suitable for both residential commercial roofing projects
Record the equipment settings and perform the manufacturer-required test welds when conditions change. Inspect seams after cooling and probe or otherwise test them using the approved quality-control method. Repair voids, fishmouths, contamination, and incomplete welds before covering the work.
Detail penetrations, corners, drains, and terminations
Most leaks originate at changes in plane and interruptions, not in the middle of an intact sheet. Use the system’s details for pipe penetrations, equipment curbs, inside and outside corners, expansion joints, roof drains, scuppers, parapets, termination bars, and edge metal.
Keep field seams out of drain bowls and other locations where water, fasteners, or movement can concentrate stress unless the approved detail specifically permits them. Seal and secure membrane edges at penetrations; do not rely on caulk as a substitute for a properly formed flashing.
Respect weather limits
Temperature, wind, humidity, rain, dew, dust, and surface moisture affect adhesives and hot-air welding. Stop when conditions exceed the product’s limits or when the substrate cannot be kept clean and dry. If work must pause, temporarily secure and weatherproof exposed insulation and membrane edges so wind cannot lift or contaminate them.
Independent reader supportYour contribution helps us test, update, and keep practical guides available for everyone.Inspection, documentation, and handover
Quality control should continue from deck preparation through final detailing.
- Compare delivered materials with the approved submittals, including membrane identification, insulation, cover board, fasteners, plates, adhesives, and flashing components.
- Verify deck condition, insulation attachment, board-joint layout, air or vapor-control continuity, and cover-board installation before membrane placement.
- Check sheet alignment, lap dimensions, attachment patterns, perimeter zones, and transitions against the approved drawings.
- Inspect bonded or welded seams using the system’s required visual and physical checks. Mark defects, repair them, and document the correction.
- Inspect drains, scuppers, overflows, penetrations, curbs, corners, terminations, edge metal, and walkway pads before they are concealed.
- Preserve test reports, product data, approved details, change orders, inspection records, and maintenance instructions in the project closeout package.
Performance classifications depend on coordinated assembly documentation. Keep the tested assembly report and manufacturer instructions with the project record so future repairs do not introduce unapproved materials.
Common design and installation mistakes
- Choosing by membrane name alone: The same family can have different formulations, thicknesses, flashings, and tested wind assemblies.
- Using a dated slope or thickness value as a code rule: Historical NRCA recommendations must be checked against the current adopted code and project specifications.
- Ignoring perimeter and corner wind zones: Field attachment may be inadequate where uplift is highest.
- Mixing accessories from different systems: Adhesives, primers, tapes, plates, and flashings may be chemically or mechanically incompatible.
- Covering defects: Wet insulation, contaminated seams, incomplete welds, and damaged flashings become difficult to locate after concealment.
- Leaving drainage to the installer: Slope, outlets, crickets, overflow paths, and transitions must be resolved in design documents.
- Assuming a generic repair will preserve warranty or performance: Use the system provider’s documented repair materials and methods.
A practical pre-installation checklist
- Adopted code edition, amendments, fire criteria, and energy requirements identified
- Deck type, condition, moisture status, and fastener capacity confirmed
- Drainage layout, overflow provisions, crickets, and transitions coordinated
- Design wind pressures and roof zones calculated
- Tested membrane assembly selected for the actual substrate and attachment
- Air or vapor-control strategy coordinated with insulation and wall details
- Cover board selected for compatibility, fire, impact, and traffic requirements
- Membrane seams, flashings, edge metal, drains, and penetrations detailed
- Current manufacturer installation instructions available to the crew
- Inspection, seam testing, repair, and closeout documentation assigned
The most dependable single-ply roofs result from this sequence: define the building and code criteria, design drainage and wind resistance, coordinate every layer as one assembly, and install and inspect the selected system exactly as documented. The NRCA manual and current manufacturer literature should be used together; neither a membrane label nor a recycled detail can replace project-specific design.
Quick Recap
Product prices and availability are accurate as of the date/time indicated and are subject to change. Any price and availability information displayed on Amazon at the time of purchase will apply.

