What’s actually slowing this PC down?
Pick the symptom - the matching free tool is one click away.
Some links on this page are affiliate links: if you buy through them we may earn a commission, at no extra cost to you.
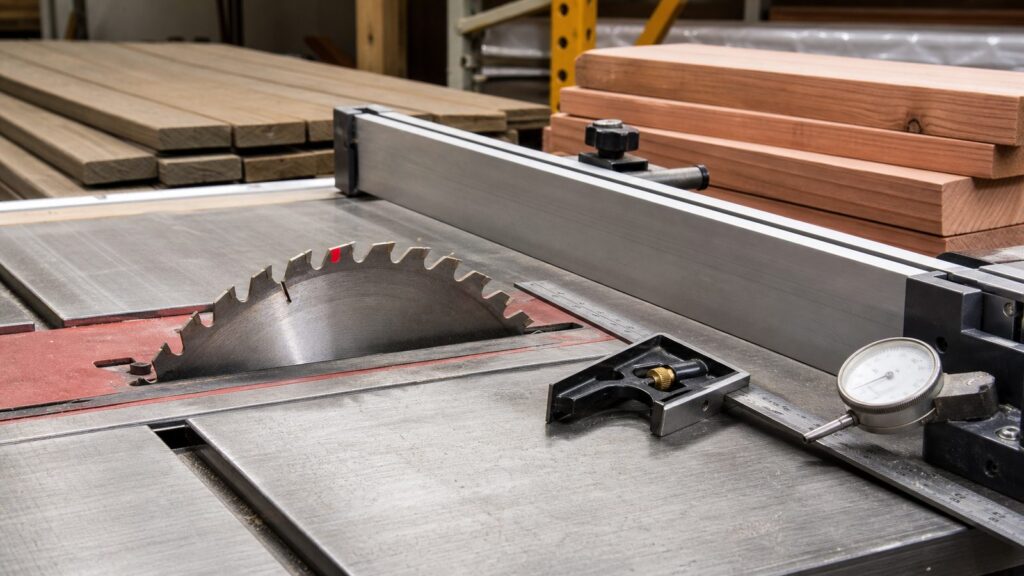
The proper rip-fence alignment is simple in principle: align the table saw blade parallel to the miter slot first, then align the rip fence parallel to that same miter slot and blade. For most homeowners, remodelers, and jobsite crews, dead parallel is the right target. A very slight rear toe-out is sometimes used by experienced woodworkers, but the rear of the fence should never toe in toward the blade.
That last point matters. Toe-in means the fence is closer to the blade at the back than at the front. That narrows the path as the board exits the cut, pinches the stock into the rising rear teeth, and raises the risk of kickback. On a table saw, kickback is not a minor nuisance. It can launch a board across a garage or jobsite faster than a person can react.
As an Amazon Associate I earn from qualifying purchases.
On our job sites, we treat rip-fence alignment as both a quality check and a safety check. Clean rips on deck boards, fence pickets, trim stock, blocking, cedar, pressure-treated lumber, and composite boards depend on a saw that tracks straight. But alignment is only one part of the setup. A straight fence will not save a warped 2x board with a closing kerf, a missing riving knife, a dull blade, or a 16-foot board hanging off the back of a saw with no support.
The Short Answer: Parallel First, Tiny Toe-Out Only If You Know Why
If you want one practical rule, use this: set the blade parallel to the miter slot, then set the rip fence parallel to the miter slot. That gives the workpiece a consistent path past the blade. The cut is more predictable, the board is less likely to burn, and the offcut has less reason to get trapped against the rear teeth.
Popular on Amazon

- 【Professional Table Saw Gauge】Neoteck table saw gauge is designed according to the standard miter grooves(3/8 inch x 3/4 inch). It can check table saw miter slot to blade squareness, blade and fence alignment, arbor and blade run-out, or any other alignment and measurement you want, in order to make the table saw in its best condition, which is suitable for most table saws and can be widely used for aligning and calibrating work,shop machinery,band saws,drill presses.
- 【Accurate Digital Dial Indicator】The measuring range of the digital indicator is from 0 - 1 inch (0 ~ 25.4 mm) with high resolution up to 0.0005 inch (0.01 mm),also it is switchable between mm and inch with zero setting function. Compared with the dial gauge, Neoteck digital indicator can provide more convenient use experience and quickly help you finish the alignment work.
- 【CNC Anodized Aluminum Bars】2PCS 3/4 inch adjustable, CNC-machined anodized aluminum bars with 3 chute partitions for enhanced stability and usability. The rod features 6 holes for a digital dial indicator, facilitating precise adjustments across various workshop machines, regardless of differences in chamfer groove and blade distances.(Note: Suitable for table saws with a groove width of 3/4" (19mm) or more; adjustable via screws for optimal fit if the groove width exceeds 3/4" (19mm))
- 【Easy to Install】You can quickly set-up, tune up and check the accuracy of your shop's tools. This system is the self-adjusting “Smart Bar” that will stay tight in a miter slot that isn’t the same size along it’s slot length. You only need to adjust the spring plungers once, and after that, its a perfect fit in the miter slot, which is more efficient and convenient.
- 【Practical Package】Package includes: 2 x anodized aluminum Bar, 1 x digital dial indicator, 1 x back cover, 2 x plum blossom nut, 2 x spring plunger, 2 x hexagon socket nut, 2 x hexagon socket wrench, 2 x metal shop. What's more,the practical storage case can well protect your table saw gauge set and it is more convenient for you to store the gauge and can be carried with you to everywhere.
Some experienced woodworkers set the rear of the fence a hair farther from the blade than the front. That is called toe-out. The numbers are small: about 1/64 inch at the outfeed end, or roughly .003 to .005 inch depending on the measuring method and saw. That is not visible by eye. If you can clearly see the fence angled away from the blade, it is too much for normal ripping and will cause tapered, rough, or inconsistent cuts.
Toe-out is sometimes used to reduce rubbing at the back of the blade, especially on saws or stock that tend to burn. But it is not a substitute for proper blade alignment, a riving knife or splitter, sharp blade, push sticks, featherboards, and outfeed support. For a homeowner tuning a saw in a garage or a contractor setting up a portable jobsite saw, parallel is the safest and cleanest default.
Why Rip-Fence Alignment Matters More on Outdoor-Structure Work
Cabinet shops often work with dry, flat, milled hardwood or sheet goods. Outdoor-structure work is less polite. Decking, fence rails, pergola parts, stair blocking, skirt boards, and exterior trim are often long, heavy, wet, cupped, or slightly twisted. Pressure-treated lumber can release internal stress while you rip it. Cedar can be light and flexible. Composite decking can heat up, drag, and behave differently than wood. Those materials expose every weakness in your saw setup.
When the fence is properly aligned, the board has the best chance of moving in a straight, controlled line through the cut. When the fence is off, the symptoms show up fast:
- Burn marks along one edge of the rip
- A board that gets tighter as it exits the blade
- A cut that measures wider at one end than the other
- A need to push harder near the end of the cut
- Chatter, vibration, or a board that wants to lift
- Repeated kickback scares on narrow strips
With exterior materials, those symptoms are not always caused by the fence. A wet 2×10 can close behind the blade no matter how accurately the saw is tuned. A bowed deck board can ride the fence at the front and drift at the rear. A dull construction blade can burn wood even when the fence is perfect. That is why we diagnose in order instead of chasing the fence after every bad cut.
The Right Order: Blade, Fence, Riving Knife, Test Cut
The miter slot is the fixed reference on most table saws. The fence and blade should both be checked against it. If you align the fence to a blade that is already skewed, you can end up with two errors that appear to cancel each other at one rip width but fail at another.
1. Align the blade to the miter slot
Raise the blade high enough to measure from the same tooth at the front and back. Pick one tooth and mark it with a marker. Measure from that tooth to the miter slot at the front of the blade. Then rotate the blade by hand so the same tooth is at the rear, and measure again. Using the same tooth cancels out small differences between carbide teeth and keeps you from mistaking blade runout for alignment error.
If the measurement is different front to back, adjust the saw according to the manual. On some contractor and jobsite saws, that means shifting the trunnion assembly. On many cabinet saws, the table or trunnion setup is adjusted differently. The target is the same: the blade should be parallel to the miter slot.
2. Align the rip fence to the miter slot
Once the blade is correct, lock the fence at a normal working width, such as 6 inches or 12 inches from the blade. Measure from the miter slot to the fence at the front and rear. The readings should match for a parallel setup. If you choose a slight toe-out, the rear measurement should be only a few thousandths wider, not visibly angled.
3. Recheck the fence at several widths
A fence can be parallel at 3 inches and out at 24 inches. This is common on lightweight jobsite saws with rack-and-pinion rails that have been bumped around in trucks, folding stands, or trailers. Lock the fence at several rip widths and measure again. If the alignment changes significantly from one setting to another, the problem may be rail adjustment, fence deflection, or the locking mechanism.
The Tool Desk
Outbyte PC Repair FREERepair Windows errors before they cause bigger problemsFix Now →Outbyte Driver Updater FREEScan for outdated or missing drivers - takes under a minuteDriver Scan →4. Check the riving knife or splitter
A riving knife or splitter should sit in line with the blade and match the blade kerf. It helps keep the cut from closing behind the blade and reduces kickback risk. In professional practice, we do not treat it as optional for ordinary through-rips. Workplace safety guidance also emphasizes spreaders, anti-kickback devices, sharp blades, proper stock support, and staying out of the kickback line.
5. Make a test cut in straight, dry scrap
Before blaming the saw, rip a straight, dry scrap board. If that scrap cuts cleanly but pressure-treated lumber binds, the lumber condition is probably the issue. Wet, bowed, or stressed stock can pinch even on a well-aligned saw.
How to Check Rip-Fence Alignment Without Expensive Tools
You do not need a premium gauge to make a safe, useful alignment check. Better tools make the job faster and more repeatable, but the core process is the same.
Also popular on Amazon

- MACHINE PRECISION & ACCURACY - Aligning workshop machinery can be frustrating. A tape measure and a firm fist bump often aren't sufficient. For optimal performance, consider the A-LINE-IT DELUXE Machinery and Tool Alignment System with Digital Indicator. Achieve precise results without overspending—because your machinery deserves the best care!
- TABLE SAW DIAL INDICATOR - One of the most common machines that need to be aligned and maintained is our table saws. As we use them, the fence and saw blade amongst other parts tend to slightly shift over time. With the A-LINE-IT DELUXE, easily identify saw blade straightness, fence run-out, arbor run-out and flange run-out.
- SELF-ADJUSTING “SMART BAR” - One of the reasons you’ll appreciate this system is the self-adjusting “Smart Bar” that will stay tight in a miter slot that isn’t the same size along it’s slot length. You only need to adjust the spring plungers once, and after that, its a perfect fit in the miter slot. This makes the measuring process much more efficient.
- VERSATILITY - It's not just a table saw gauge. The A-Line-It Basic can be configured to do various tests in your shop. You can also check saw arbor run out, saw blade run out, rip fence alignment, rip fence straightness, jointer depth of cut, planer alignment, drill press squaring, arbor flange and drill press chuck run out.
- EVERYTHING YOU NEED - Everything you need to thoroughly check your machines in one package. The spring and nut assembly makes the A-LINE-IT DELUXE the only tool in the US that will allow you to determine whether the run-out in the saw blade is caused by the blade, the arbor, or a combination of both. Being able to determine this is vitally important to achieve the best running table saw possible.
For a basic homeowner setup, gather a combination square, feeler gauges or digital calipers if you have them, a pencil or marker, a clean blade, and a straight scrap board. Unplug the saw before measuring. Raise the blade, mark one tooth, and use that tooth for both front and rear measurements. Then lock the fence and compare front and rear fence measurements to the miter slot.
Free tools Windows power users keep installed
One-click scans. No signup required.
A good alignment check takes 20 to 45 minutes if the saw is close. If the saw has been transported, dropped, stored in a damp shed, or fitted with a replacement fence, plan on 60 to 90 minutes. Portable saws can take longer because small rail adjustments can move more than expected when the fence is locked down.
Here is a practical 2026 cost breakdown for alignment tools and related safety gear:
| Item | Typical 2026 Cost | Best Use |
|---|---|---|
| Combination square, scrap, basic feeler gauges | $0-$20 | Basic homeowner checks and rough tune-ups |
| Digital calipers or feeler gauges | $10-$40 | More repeatable front-to-back measurements |
| Budget dial indicator and magnetic base | $20-$60 | Checking blade, fence, and miter-slot relationships more precisely |
| Table-saw alignment gauge | About $50-$260 | Faster, more accurate setup for frequent saw users |
| Push sticks, push blocks, featherboards | $10-$80 | Low-cost safety upgrades for controlled ripping |
| Replacement or upgraded rip fence | $80-$700+ | Useful when the existing fence will not lock square or stay aligned |
| Clean ripping or construction-grade blade | $30-$150+ | Fixes many burning, wandering, and rough-cut problems |
| Professional saw tune-up | About $100-$300+ | Good option when alignment requires parts, trunnion work, or fence replacement |
For one deck repair, a careful combination-square setup may be enough. For a contractor ripping trim, decking, and framing stock every week, a dedicated alignment gauge pays for itself quickly in saved time and fewer bad cuts.
Parallel vs. Toe-Out vs. Toe-In
The debate usually comes down to three positions: dead parallel, slight toe-out, and toe-in. Only the first two belong in a safe conversation, and parallel should be the baseline.
Do these 3 things before closing this tab:
1Clear out junk files and repair common Windows errors2Fix the driver behind crashes, sound loss and screen glitches3Repair Windows errors before they cause bigger problemsDead parallel
Dead parallel means the distance from the blade or miter slot to the fence is the same at the front and rear. This is the best default for jobsite saws, homeowner saws, and most construction ripping. It produces straight cuts, predictable sizing, and avoids steering the board into the blade.
Slight toe-out
Slight toe-out means the rear of the fence is barely farther from the blade than the front. The key word is barely. We are talking about a few thousandths of an inch, not 1/16 inch. If a highly experienced user chooses toe-out, it should be intentional, measured, and tested. Too much toe-out produces tapered rips because the board can drift away from the blade as it exits.
Toe-in
Toe-in means the rear of the fence is closer to the blade than the front. Do not set up a rip fence this way. It can pinch the workpiece against the rising rear teeth and increase kickback risk. If a board feels like it is being squeezed harder as it passes the blade, stop and check the setup before continuing.
Common Alignment Mistakes We See in the Field
The most common mistake is starting with the fence. The blade has to be aligned to the miter slot first. If the blade is off and the fence is adjusted to match it, the saw may seem acceptable for one cut but behave poorly with a miter gauge, sled, or different fence setting.
The second mistake is measuring from different blade teeth. Carbide teeth are not all perfect reference points. Mark one tooth, measure it at the front, rotate that same tooth to the rear, and measure again.
The third mistake is using side pressure to force the board through a bad setup. A rip cut should require firm, steady feed pressure, not a wrestling match. If you are pushing hard enough to flex the fence, shift the saw, or bow the board against the blade, something is wrong.
The fourth mistake is putting featherboards in the wrong place. Featherboards should hold the stock against the fence before the blade. Do not position a featherboard after the blade in a way that pushes the offcut or closing kerf into the rear teeth.
The fifth mistake is ignoring support. A 12-foot deck board hanging off the outfeed side will lever itself upward or sideways as the cut finishes. Set outfeed support level with the saw table before turning the saw on. For long stock, also consider infeed support or a helper trained to support without steering.
Crashes, No Sound, or Screen Glitches?
Random freezes, missing sound and display glitches usually trace back to one bad driver. Find and replace yours safely.Free scan · under a minuteWindows Errors? Fix Them Before They Spread
Repair common Windows errors and clear accumulated junk for a smoother, more stable PC - no reinstall needed.Free scan · no reinstallAlso popular on Amazon

- High Precision Digital Measurement: BOBOVAV digital table saw alignment gauge features a digital dial indicator with 0.0005" (0.01mm) resolution; supports inch/mm switch and zero-setting for intuitive clear readings that save you time interpreting data; eliminates errors from mechanical dials; easily checks blade parallelism arbor run-out and fence alignment to keep your table saw in optimal condition and ensure precise cuts every time
- CNC Machined Stable Aluminum Structure: Crafted with CNC-machined anodized aluminum alloy bars (processing accuracy up to 0.02mm); anodized surface resists oxidation for long-lasting use; ensures no wobble during operation; minimizes measurement deviations so you get consistent reliable results that take the guesswork out of woodworking calibration
- Wide Compatibility: Designed to fit standard 3/4" (19mm) slots and compatible with wider non-standard slots; use the plunger screw and plum blossom nut to adjust width and fill gaps; achieves a snug secure fit regardless of your slot size so you don’t have to worry about ill-fitting tools disrupting measurement accuracy
- Extended 18cm Rod: Boasts an 18cm dial gauge rod that offers a wider operating range compared to standard 13cm rods; covers diverse measurement needs for small DIY projects large-scale woodworking tasks and various equipment sizes so you can tackle most of your alignment jobs with one tool
- Durable & Ready-to-Use Design: The digital dial indicator is designed for durability, allowing for immediate out-of-the-box use. It includes 2 hex keys, so you can start calibrating your tools right away without the need for extra preparation
Safety Notes for Contractors and Homeowners
Table saw safety is not only about the fence. A properly aligned fence reduces risk, but it does not eliminate the need for guards, riving knives, push sticks, push blocks, anti-kickback devices, and correct body position.
For professional work, use the guard and riving knife or splitter whenever the cut allows it. Keep blades sharp and suitable for the material. A 24-tooth ripping blade may be right for fast framing-stock rips, while a higher-tooth blade may be better for trim or composite where surface quality matters. A dirty, dull, warped, or wrong-tooth-count blade can mimic a fence problem by causing burning, wandering, and heavy feed pressure.
Stand out of the direct kickback line. That means your torso should not be directly behind the board. Use push sticks or push blocks for narrow rips. For repeated thin strips, use a purpose-built thin-rip jig instead of setting your hands close to the blade. Keep the workpiece flat on the table and tight to the fence through the front of the cut, but do not push the offcut sideways into the blade.
There is no building permit for aligning a table saw, but there are workplace obligations. Contractors, shops, schools, and employers must follow applicable safety rules for machine guarding, training, and equipment use. For homeowners, the practical standard should be just as serious: if the guard is missing, the riving knife is out, the fence will not lock, or the board is too unstable to control, stop the cut.
What Tolerance Is Acceptable?
For everyday construction ripping, if the fence measures the same at the front and rear using a reliable reference, you are in the right zone. If you are using a dial indicator, many careful users aim for dead parallel or a slight rear toe-out in the .003 to .005 inch range. With a tape measure alone, you will not reliably see a few thousandths, so do not pretend a tape can do machine-gauge work.
A practical homeowner tolerance is this: the saw should rip a straight, dry scrap board without burning, binding, tapering, or requiring excessive feed pressure. The front and rear measurements should match as closely as your tool can reasonably confirm. If using a combination square, look for a repeatable no-gap or same-gap reading at both ends rather than chasing a number beyond the tool’s accuracy.
For finish-grade exterior trim, gate parts, built-ins, or repeated rips where small errors stack up, use a dial indicator or alignment gauge. For rough blocking hidden inside a deck frame, the tolerance can be less fussy, but the safety standard does not change. Toe-in is still wrong.
Independent reader supportYour contribution helps us test, update, and keep practical guides available for everyone.When the Fence Is Not the Real Problem
It is easy to blame the fence because it is visible and adjustable. In the field, we often find that the fence is only part of the issue.
Quick wins for a faster PC:
Repair Windows errors before they cause bigger problemsFix Now →Scan for outdated or missing drivers - takes under a minuteDriver Scan →Clear out junk files and repair common Windows errorsFree Scan →If the saw burns one side of the board, check the blade. Pitch buildup, dull carbide, heat damage, or the wrong blade can all cause burning. A clean, sharp blade in the $30 to $150-plus range can solve problems that fence adjustment will never fix.
If the board pinches halfway through the rip, inspect the stock. Pressure-treated lumber and wet framing stock can close the kerf as internal tension releases. A riving knife helps, but some boards are simply poor candidates for a table saw rip. If the board is bowed, twisted, or cupped badly enough that it will not sit flat and ride the fence consistently, use a safer cutting approach.
If the cut is straight at one width but tapered at another, check the fence rails and locking mechanism. Lightweight jobsite fences can deflect when locked or when side pressure is applied. Some fences need adjustment; others are worn or too light for repeated heavy ripping.
If the back of the blade rubs but the fence is parallel, check blade-to-miter-slot alignment again. A blade that is skewed relative to the slot can cause the same symptoms as a bad fence.
Recommended Free Tools
When to DIY vs. When to Hire a Pro
DIY alignment makes sense when the saw is in good condition, the fence locks firmly, the manual is available, and you are comfortable making small mechanical adjustments. Expect to spend 30 to 90 minutes. Basic tools may cost nothing if you already own a square, or $10 to $60 if you add feeler gauges, calipers, or a budget dial indicator.
Also popular on Amazon

- 【Precision Calibration】GOINGMAKE table saw gauge provides 0.01mm accuracy dial indicator. It is precision to use and easy to align between the table saw blade and miter slot. Also easy to adjust your rip fence to be parallel to the miter slot. And you can sliding the table saw gauge stable with the extra support base. There are 2 adjust ring in the miter bar ensure no slop and zero fit the miter slot.
- 【Easy to Setup】GOINGMAKE table saw gauge dial indicator is easy to setup. Including the adjustable miter bar ensure you can easily to use and make no slop and zero fit table saw slot. Just slide into the table saw miter slot and ajdust two rings until no slop. Make the dial indicator touch the table saw blade or rip fence. And you can slide the table saw gauge and check the dia indicator and adjust your table saw blade right.
- 【Fits for Most Table Saw】GOINGMAKE dial indicator table saw gauge fits for most table saw, band saw and router table. Fits for 3/4 inch wide table saw slot.
- 【Versatilty】GOINGMAKE table saw gauge provides a wide adjustable range from 4 inch to 8.85 inch. You can easily adjust the length to fit your different need on woodworking, machinery and DIY.
- 【More Safe to Use Table Saw】GOINGMAKE table saw guide can eliminate blade wobble, easy to adjust the alignment between the blade and your table saw so it can improve your accuracy and protecting your blades and workpiece from damage. Make you safer to use table saw.
Hire a pro or take the saw to a tool technician when the fence will not stay locked, the rails are bent, the blade has visible wobble, the arbor has runout, the trunnion adjustment is beyond your comfort level, or the saw has been dropped. A basic tune-up commonly falls around $100 to $300, with more added for parts, travel, fence replacement, or serious repair work.
For a homeowner building one fence gate or trimming a few deck boards, the better answer may be avoiding the table saw entirely. A circular saw with a straightedge guide, a track saw, or having a lumberyard or shop make repeatable rips can be safer than forcing long, wet, unstable boards through a small portable saw.
For contractors, the standard is higher. If a saw travels between projects, verify the fence after transport. Bumps, folding stands, rail movement, and rough handling can change the setup between jobs. A two-minute check before ripping deck boards is cheaper than ruined material and much cheaper than an injury.
Free tools Windows power users keep installed
One-click scans. No signup required.
Field Setup Checklist for Cleaner, Safer Rips
Before ripping outdoor-structure stock, use this sequence:
- Unplug the saw before measuring or adjusting.
- Confirm the blade is clean, sharp, flat, and suitable for the material.
- Align the blade parallel to the miter slot.
- Align the fence parallel to the miter slot and blade.
- Lock the fence at several widths and recheck.
- Install and align the riving knife or splitter.
- Set featherboards before the blade where appropriate.
- Use push sticks, push blocks, or thin-rip jigs for narrow work.
- Support long boards on infeed and outfeed so the stock stays level.
- Test cut straight, dry scrap before ripping expensive decking or trim.
Once the saw is tuned, feed the stock steadily. Do not stop halfway through a rip unless you have to. Do not pull the board backward through a spinning blade. If the cut starts to bind, shut the saw off while maintaining control of the stock, wait for the blade to stop, and then diagnose the cause.
Bottom Line
The proper rip-fence alignment is parallel to the blade and miter slot, after the blade itself has been aligned to the miter slot. A tiny, measured rear toe-out can be acceptable for advanced users, but toe-in is unsafe and should be corrected immediately.
For outdoor construction work, alignment is only part of a safe cut. Long boards need support. Wet or twisted lumber needs judgment. The riving knife belongs on the saw. The blade needs to be sharp and matched to the material. When all of those pieces are right, the saw cuts cleaner, the measurements hold, and the work moves with less force and less risk.
Quick wins for a faster PC:
Repair Windows errors before they cause bigger problemsFix Now →Scan for outdated or missing drivers - takes under a minuteDriver Scan →Clear out junk files and repair common Windows errorsFree Scan →Frequently Asked Questions
Should a rip fence be perfectly parallel to the blade?
Yes, dead parallel is the best default. First align the blade to the miter slot, then align the fence parallel to that same reference. Some experienced users allow a tiny rear toe-out, but parallel is the safest practical target for most jobsite and homeowner saws.
Is a little toe-out safer than a parallel rip fence?
A very small toe-out can reduce rubbing at the rear of the blade, but it must be tiny and intentional, often around .003 to .005 inch or roughly 1/64 inch at most. Too much toe-out causes tapered cuts. It does not replace a riving knife, guard, push sticks, or proper stock support.
Why is toe-in on a table saw fence dangerous?
Toe-in makes the rear of the fence closer to the blade than the front. That can pinch the board into the rising rear teeth and increase kickback risk. If the board gets tighter as it exits the cut, stop and check the fence, blade alignment, riving knife, and stock condition.
How do I check rip-fence alignment without a dial indicator?
Use a combination square or careful measuring tool against the miter slot. Mark one blade tooth, measure it at the front, rotate the same tooth to the rear, and measure again. After the blade is parallel to the miter slot, lock the fence and compare the front and rear fence measurements to the miter slot.
Can a misaligned rip fence cause kickback?
Yes. A fence that toes in toward the rear can push the workpiece into the back teeth of the blade. Kickback can also come from wet or warped lumber, a closing kerf, a missing or misaligned riving knife, poor outfeed support, dull blades, and unsafe feed technique.
Why does my table saw burn wood after I align the fence?
Burning can come from a dirty or dull blade, the wrong blade for the material, blade misalignment, slow feed rate, wet stock, or internal stress in the board. Test with straight, dry scrap. If scrap cuts cleanly but pressure-treated lumber burns or binds, the material is likely part of the problem.
Quick Recap
Product prices and availability are accurate as of the date/time indicated and are subject to change. Any price and availability information displayed on Amazon at the time of purchase will apply.

