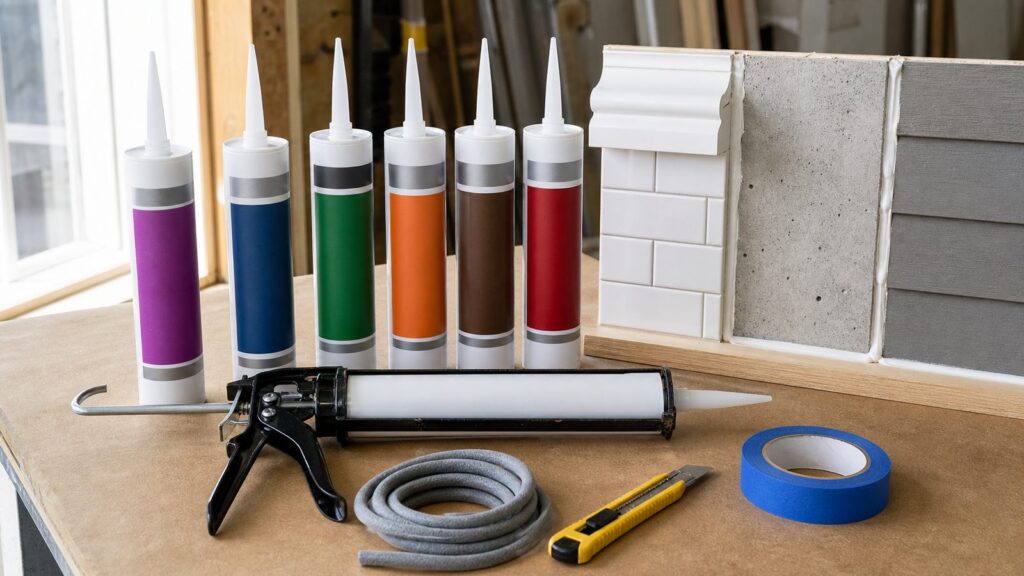
The short answer: use paintable acrylic latex or siliconized acrylic for interior trim, 100% silicone for tubs and showers, polyurethane or hybrid sealant for exterior joints that move, butyl or roof sealant for flashing and gutters, and listed firestop sealant only where a rated wall or floor assembly requires it.
That one sentence solves about 80% of caulk questions. The other 20% is where homeowners get into trouble: using painter’s caulk in a shower, using silicone on trim that needs paint, filling a 1-inch exterior joint without backer rod, or sealing a window leak that is actually a flashing problem. On our job sites, we do not start by asking, “What tube is cheapest?” We start with the joint: where it is, what it touches, how much it moves, whether it gets wet, whether it must be painted, and whether it is part of a rated assembly.
As an Amazon Associate I earn from qualifying purchases.
A standard 10.1-ounce tube of caulk may cost anywhere from about $3 to $15 in 2026, but the real cost is failure. A $5 tube in the wrong location can lead to peeling paint, mildew, rot, drywall damage, stained trim, or repeated callbacks. This guide explains which caulk to use by application, what the labels actually mean, how much material and labor usually cost, and when a homeowner can handle the work versus when it belongs with a contractor.
Quick wins for a faster PC:
Scan for outdated or missing drivers - takes under a minuteDriver Scan →Clear out junk files and repair common Windows errorsFree Scan →Fix the driver behind crashes, sound loss and screen glitchesFind Drivers →Start With the Joint, Not the Tube
Every caulk or sealant choice should answer six questions before you cut the nozzle.
#1 Best Overall

- Introducing the Bates caulking gun, your versatile companion designed to seamlessly dispense a variety of materials – from acrylic and adhesives to asphalt, butyl, and cement – with utmost precision.
- With its superior 10:1 thrust ratio, this caulking gun ensures precise bead control and consistent flow, making every application smoother than a jazz ballad.
- Crafted to perfection, this tool promises both durability and efficiency, standing up to the demands of professionals while also being user-friendly for the DIY enthusiasts.
- Its ergonomic design ensures a comfortable grip, allowing users to tackle extensive caulking jobs without a hint of hand fatigue.
- Whether you're sealing gaps, binding materials, or waterproofing surfaces, the Bates Caulking Gun is your go-to tool, promising precision with every squeeze.
Is it indoors or outdoors? Interior trim gaps usually need a neat, paintable bead. Exterior joints need UV resistance, weather resistance, adhesion to difficult materials, and enough movement capacity to survive seasonal expansion and contraction.
Will it stay wet? A backsplash joint that sees occasional wipe-downs is not the same as a tub surround that gets soaked daily. Constant water exposure points toward 100% kitchen and bath silicone, not painter’s caulk.
Does it need paint? Ordinary 100% silicone does not accept paint well. If the bead must disappear under wall, trim, or siding paint, choose acrylic latex, siliconized acrylic, polyurethane, or a paintable hybrid sealant rated for the application.
Do these 3 things before closing this tab:
1Clear out junk files and repair common Windows errors2Fix the driver behind crashes, sound loss and screen glitches3Repair Windows errors before they cause bigger problemsWill the joint move? A hairline crack along crown molding is low movement. A siding-to-window joint, concrete control joint, or masonry transition can move substantially. For moving joints, look for performance sealants and movement ratings, not just words like “flexible” on the front label.
What materials are being sealed? Wood, PVC, fiber cement, brick, stucco, aluminum, vinyl, glass, porcelain tile, natural stone, and concrete do not all bond the same way. Some silicones can stain stone. Some sealants do not bond well to dusty masonry. Some roof products are made for metal laps and flashing, not finish trim.
Is it fire-rated, structural, or drainage-related? Red caulk is not automatically firestop. Window caulk does not replace flashing. Sealant is not a substitute for proper building paper, pan flashing, weep paths, or correctly lapped exterior wall assemblies.
Quick Selection Table: Which Caulk Should You Use?
Use this as the job-site cheat sheet. Product labels vary by manufacturer, so verify compatibility and cure time before use.
What’s actually slowing this PC down?
Pick the symptom - the matching free tool is one click away.
| Application | Best caulk or sealant | Paintable? | Typical 2026 DIY tube cost | Do not use |
|---|---|---|---|---|
| Baseboards, casing, crown, interior painted trim | Acrylic latex or siliconized acrylic | Yes | $3-$10 per 10 oz tube | 100% silicone if the bead must be painted |
| Tub, shower, sink, glass, tile wet joints | 100% kitchen/bath silicone | Usually no | $8-$15 per 10 oz tube | Acrylic painter’s caulk |
| Interior window and door trim gaps | Paintable acrylic or siliconized acrylic | Yes | $3-$10 per tube | Exterior roof sealant or messy polyurethane unless needed |
| Exterior windows, doors, siding transitions | Hybrid STPE/MS-polymer, polyurethane, or premium exterior sealant | Often yes | $8-$15+ per tube | Cheap interior latex caulk |
| Concrete, masonry, expansion or control joints | Polyurethane or ASTM C920-rated hybrid sealant with backer rod | Often yes | $8-$15+ per tube | Thin painter’s caulk or rigid filler |
| Gutters, flashing, chimney metal, roof laps | Butyl rubber or specialty roof sealant | Sometimes | $7-$15+ per tube | Interior acrylic or bathroom silicone unless listed for the surface |
| Rated wall, floor, or ceiling penetrations | Listed firestop system matching the exact assembly | Depends | Varies widely | Generic red caulk without a listed system |
Acrylic Latex Caulk: Best for Painted Interior Trim
Acrylic latex, often called painter’s caulk, is the right choice for most painted interior trim. Use it at baseboards, casing, crown molding, shoe molding, built-ins, wainscoting, drywall-to-trim gaps, and small nail-hole touchups where the bead will be painted.
Its advantages are practical. It tools easily, cleans up with water, has low odor, and is forgiving for a homeowner using a caulk gun for the first time. Basic acrylic latex commonly costs about $3-$6 per 10.1-ounce tube in 2026. Higher-quality acrylic and siliconized acrylic products often run $4-$10 per tube. Sherwin-Williams 950A siliconized acrylic latex was listed at $4.09, and 1050 Quick Dry siliconized acrylic latex at $4.69. Big-box pricing for common painter’s caulks such as DAP Alex Plus has been around the $4 range in recent listings.
The weakness is durability under movement and water. Acrylic latex shrinks more than premium sealants and should not be used where it will stay wet. If you use it in a shower corner, around a tub, or on an exposed exterior expansion joint, expect cracking, softening, mildew, or bond failure.
Where We Use It
On interior finish work, we use acrylic latex for gaps roughly 1/16 inch to 1/4 inch wide. The goal is not to bridge a bad carpentry joint with a giant bead. The goal is a clean, controlled line that hides normal finish gaps after paint.
The Tool Desk
Outbyte Driver Updater FREEFix the driver behind crashes, sound loss and screen glitchesFind Drivers →Outbyte PC Repair FREEClear out junk files and repair common Windows errorsFree Scan →For painted trim, a smaller nozzle opening is usually better. Cut the tip at about 45 degrees and start with an opening slightly smaller than the joint. You can always cut more off. A 1/8-inch opening handles most trim work better than a 1/4-inch opening. Tool the bead while it is still open, usually within a few minutes depending on temperature, humidity, and product. Fast-dry caulks can skin quickly in warm, dry, windy conditions.
When to Upgrade to Siliconized Acrylic
Siliconized acrylic is a middle-ground product. It remains paintable like acrylic latex but generally offers better flexibility and water resistance. It is a good choice for interior window and door trim, bathrooms outside the wet zone, laundry rooms, and protected exterior trim where the manufacturer allows it.
Do not confuse siliconized acrylic with 100% silicone. The word “siliconized” means silicone has been added to an acrylic formula. It does not make the product a substitute for true silicone in a shower or for high-performance exterior sealant in a wide moving joint.
100% Silicone: Best for Showers, Tubs, Sinks, Glass, and Tile
For wet areas, use 100% silicone labeled for kitchen and bath use. This includes tub-to-tile joints, shower corners, sink rims, vanity backsplashes that see regular water, glass shower enclosures, and changes of plane in tile where movement and water exposure are expected.
Recommended Free Tools
In 2026, 100% silicone commonly costs about $8-$15 per 10-ounce tube at major retailers. Some listings run lower during promotions, and specialty pro-grade silicones can start around $8 and climb from there. The price difference matters less than cure time, adhesion, mold and mildew resistance claims, and compatibility with the surface.
Silicone’s biggest advantage is water resistance. Its biggest disadvantage is paintability. If you put ordinary silicone along painted baseboard or casing, the painter will not thank you. Paint tends to bead, crawl, or peel off it. Use silicone where the finished bead itself is the final surface.
Acetoxy Cure vs Neutral Cure
Many common silicones release a vinegar-like smell while curing. Those are often acetoxy-cure silicones. They work well on many nonporous surfaces such as glass and glazed tile, but they are not always the safest choice for metal, stone, mirrors, or specialty materials.
Neutral-cure silicone is usually a better choice around metal, natural stone, and sensitive substrates, but the label controls. If the surface is marble, granite, metal, acrylic, fiberglass, or a specialty shower system, verify compatibility before installing the bead.
Rank #2

- PRECISION CAULKING WITH DRIP-FREE TECHNOLOGY: The Octogun 930-GTD Caulking Gun by Newborn offers advanced drip-free technology, providing smooth, mess-free caulking every time. With a 10:1 thrust ratio, this caulking gun delivers precise control over caulk flow. Ideal for sealing joints, cracks, and gaps, this caulk gun ensures clean, accurate applications in every use.
- EXTRA TOOLS INCLUDED FOR VERSATILITY: The Octogun 930-GTD comes with a range of built-in tools to streamline your caulking projects. Use the attached scraper tool to remove old material and for easy surface preparation, the 4-sided finishing square to make your caulk bead look professional, the spout cutter for efficient cartridge opening, and the seal puncture tool to get your caulking started right away.
- HEX ROD FOR EFFORTLESS CAULKING: The Octogun caulking gun features a hex rod for greater durability and smoother caulk dispensing. This design minimizes the effort needed for caulking, allowing users to apply sealants, adhesives, and caulk efficiently and with greater ease. The hex rod also ensures that the gun operates quietly, making it a preferred tool for both indoor and outdoor caulking tasks.
- COMPATIBLE WITH STANDARD 1/10 GALLON CARTRIDGES: Designed to work with any 1/10 gallon caulk cartridge, this caulk gun is ideal for use with thin materials such as latex and silicones. The 930-GTD offers versatility and ease of use for all your caulking needs. This item provides professional-grade results. Perfect for use in construction, renovation, and home improvement projects.
Bathroom Caulking That Actually Lasts
Most failed shower caulk is not caused by buying a bad tube. It fails because the joint was not prepared. On our jobs, we remove all loose and failed material, clean residue from both sides of the joint, kill and remove mildew staining as appropriate, rinse if cleaners require it, and let the joint dry fully. Caulking over damp soap film is a short-term repair.
For a bathtub, many installers fill the tub with water before caulking so the joint is loaded near its in-use position. Follow the product and tub manufacturer guidance, but the principle is sound: seal the joint at a realistic movement position. After application, respect the cure time. Some products are water-ready in 30 minutes, while others require 12, 24, or more hours before water exposure. Full cure can take longer than surface skinning.
Exterior Windows, Doors, and Siding Need Better Sealant
Exterior caulk is where the word “caulk” becomes too casual. Around windows, doors, siding transitions, fiber-cement trim, brickmold, stucco, and masonry, you usually want a high-performance exterior sealant. In 2026, that often means polyurethane, STPE, MS-polymer, or another hybrid sealant depending on the substrate and manufacturer details.
These products are usually more expensive than painter’s caulk, commonly about $8-$15 or more per 10-ounce cartridge, but they are built for UV exposure, weather, adhesion, and movement. Many are paintable. Many bond to a wider range of materials than basic acrylic. Some have lower odor and easier tooling than older solvent-heavy products.
Exterior joints move. Vinyl expands and contracts. Fiber cement and wood trim change with moisture. Aluminum and steel move with temperature. Stucco and masonry crack when forced to behave like rigid materials. A cheap interior caulk may look acceptable for one season and then split, pull loose, or chalk away.
Caulk Does Not Fix Bad Flashing
This is one of the most important distinctions in exterior work. Caulk is a secondary line of defense, not the drainage system. A window should be flashed so water is directed out and away even if a sealant bead eventually ages. If water is entering above a window, behind siding, or through a wall assembly, simply smearing sealant over the outside can trap moisture and delay the real repair.
Current exterior wall code provisions in the International Building Code and International Residential Code address weather-resistant exterior wall assemblies, flashing, and water-resistive barriers. Homeowners do not need to memorize code sections to choose a tube of sealant, but they should understand the principle: exterior walls are systems. Sealant helps close joints. It does not replace lapped flashing, weep paths, or proper installation.
Concrete, Masonry, and Moving Joints: Pay Attention to ASTM C920
For concrete, masonry, control joints, driveway-to-wall joints, patio joints, foundation penetrations, and commercial-style exterior joints, look beyond “waterproof” marketing. ASTM C920 is the common performance specification for elastomeric joint sealants. It classifies sealants by type, grade, class, and use.
The part most homeowners should understand is movement class. A Class 25 sealant is designed to handle plus or minus 25% joint movement. A Class 50 sealant handles plus or minus 50%. In plain language, if a 1/2-inch joint expands and contracts seasonally, the sealant has to stretch and compress without tearing or debonding. The larger and more active the joint, the more movement capacity matters.
Polyurethane sealants are common here because they bond strongly, remain flexible, and are often paintable after cure. Hybrid STPE/MS-polymer sealants are also strong choices for many exterior and masonry applications. Expect material pricing commonly around $8-$15 per cartridge for typical construction sealants, with specialty products costing more.
Backer Rod Is Not Optional on Wider Joints
Backer rod is compressible foam installed into a joint before sealant. It does three things: controls depth, creates the right bead shape, and prevents three-sided adhesion. That last point matters. Sealant should generally bond to the two sides of the joint, not the back. If it sticks to three sides, it cannot stretch properly and may tear.
For many joints, the sealant depth should be about half the joint width, with common practical limits such as roughly 1/4 inch deep for smaller joints and about 3/8 to 1/2 inch deep for larger joints depending on the product. Always follow the sealant manufacturer’s joint design chart. If a joint is 3/4 inch wide and 1 inch deep, filling the entire void with sealant wastes material and creates a poor bead. Install backer rod first.
Free tools Windows power users keep installed
One-click scans. No signup required.
Choose backer rod slightly larger than the joint so it compresses and stays in place. For a 1/2-inch joint, a 5/8-inch backer rod is often appropriate. Do not puncture closed-cell backer rod while installing it; trapped gas can cause bubbling in some sealants.
Roofs, Gutters, Flashing, and Metal Work
Roof and flashing sealants are specialized because they face sun, water, metal movement, dirty surfaces, and difficult geometry. Butyl rubber sealant is useful around gutters, flashing laps, chimney details, roof penetrations, and metal work. It can be stringy, slow-curing, and less attractive than finish caulk, but it stays useful in places where adhesion and weather resistance matter more than appearance.
Do not use interior acrylic caulk on a roof. Do not assume bathroom silicone is correct for flashing. Roof conditions require sealants labeled for roofing, flashing, gutter, asphalt, metal, or the exact surface involved. Some products are compatible with asphalt shingles; others are not. Some are paintable; some stay tacky. Some can be applied damp; many perform better on clean, dry surfaces.
For roof leaks, sealant is often a temporary repair unless the failed flashing, boot, shingle, membrane, or metal detail is corrected. A cracked plumbing vent boot, for example, is usually better replaced than buried under layers of sealant.
PC Slower Than It Used to Be?
A free scan shows the junk files, broken settings and background clutter dragging Windows down - then fixes them in one click.Free scan · Windows 10 & 11Outdated Drivers Are Slowing You Down
One free scan finds every outdated or missing driver and matches the right update for your exact hardware.Free scan · exact hardware matchFirestop Caulk Is a System, Not a Color
Firestop sealant is used where pipes, cables, ducts, conduits, or other penetrations pass through fire-rated walls, floors, or ceilings. The goal is to maintain the hourly rating of the assembly, such as 1 hour or 2 hours, when the assembly has been penetrated.
The common homeowner mistake is buying red caulk and assuming the job is code-compliant. That is not how firestopping works. A proper firestop installation uses a listed system that matches the exact wall or floor assembly, penetrating item, annular space, backing material, sealant depth, and rating. A plastic pipe through a rated floor is not the same as steel conduit through a rated gypsum wall.
Rank #3
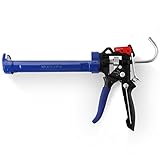
- Switch at Will of High & Low Flow Rates: WORKPRO caulking gun allows for switching between high and low flow rates. Pull the trigger handle downwards, the high setting thrust ratio 18:1 for use with adhesive materials. Push the trigger handle upwards, the low setting of thrust ratio 9:1 for use with acrylic materials
- Drip Controllable: The hand caulk gun can switch from drip to less-drip for dispensing desired applications. Press down on the front of the red button, this process stops the caulk from flowing and allows for clean, smooth transitions and less mess to clean up. Press down towards the rear of the red button, this mode keeps constant pressure on the tube for providing smoother action and quicker working
- Allows for Effortless Maneuvering in Tight Areas: The sealant cartridge gun with a rotating barrel can effortlessly reach hard-to-reach places. A rotating shaft is designed to allow easy maneuvering in tight areas. WORKPRO's half-barrel frame caulking gun is ideal for standard-size 10oz cartridges
- Smooth Round Rod for Less Force Required: Smooth plungers allow more control and more thrust to push the caulk. The smooth round rod with spring-loaded thumb release offers a quieter and less effortful project than a ratchet rod
- Comfortable Grip: The trigger with a cushion grip improves grip comfort and prevents your fingers from hurting when you are caulking. The handle and trigger of the cartridge gun are made of ergonomic plastic, which is comfortable for long time using
If you are working in a multifamily building, garage separation wall, mechanical room, commercial space, rated corridor, or any area identified on plans as fire-rated, do not improvise. Use the approved firestop system or hire someone who knows how to document it.
Caulk for Air Sealing and Energy Efficiency
Caulk can improve comfort and reduce drafts when used in the right gaps. ENERGY STAR notes that sealing air leaks and adding insulation can save up to 10% on annual energy bills. Caulk is appropriate for small cracks and seams. Expanding foam is generally used for larger hidden gaps around penetrations, framing openings, and rough openings where allowed.
Common air-sealing targets include gaps around window and door trim, sill plates, baseboards on exterior walls, attic penetrations, plumbing and electrical holes, and small cracks where conditioned air leaks into unconditioned spaces. For visible painted areas, use paintable acrylic or siliconized acrylic. For hidden larger gaps, use the correct low-expansion foam or fire-rated product where required.
Be careful around heat-producing assemblies. Gaps around chimneys, flues, fireplaces, and B-vent require special high-temperature materials and clearances. Standard acrylic, silicone, or foam may be unsafe near high heat. When combustion appliances are involved, air sealing can also affect draft and makeup air. That is a pro-level judgment call.
How Much Caulk Do You Need?
A 10.1-ounce cartridge covers more or less depending on bead size. A small 1/8-inch bead may run roughly 90 to 100 linear feet under ideal conditions. A 1/4-inch bead may cover about 24 to 30 linear feet. A 3/8-inch bead may cover only about 10 to 13 linear feet. Waste, tooling, uneven joints, and learning curve reduce those numbers.
For trim, count the linear footage and add 10% to 20% waste. For exterior or masonry joints, measure the actual joint width and depth, then use the sealant manufacturer’s calculator or coverage chart. Tremco and other sealant manufacturers provide calculators for estimating cartridges based on joint dimensions.
As a rough example, a room with 60 linear feet of baseboard and three cased openings may require 2 to 4 tubes depending on gaps and bead size. A shower surround may only need 1 tube if prep is clean and the bead is controlled. A 40-foot exterior masonry joint at 1/2 inch wide can consume several cartridges once proper depth and tooling are considered.
2026 Cost Guide: DIY Tubes and Professional Installation
Material cost is only one part of the job. Removal, cleaning, masking, access, lift equipment, cure time, and joint repair can matter more than the tube price.
| Work type | Typical 2026 cost | What affects price |
|---|---|---|
| Basic acrylic latex tube | $3-$6 per 10.1 oz tube | Brand, paint time, flexibility, shrink resistance |
| Siliconized acrylic tube | $4-$10 per 10 oz tube | Water resistance, quick-dry claims, paintability |
| 100% silicone tube | $8-$15 per 10 oz tube | Kitchen/bath rating, cure chemistry, mildew resistance |
| Polyurethane or hybrid exterior sealant | $8-$15+ per cartridge | Movement rating, substrate compatibility, UV resistance |
| Professional interior trim caulking | Often $2-$6 per linear foot | Prep, painting scope, furniture protection, finish standard |
| Professional exterior joint resealing | Often $4-$12+ per linear foot | Removal, backer rod, access height, substrate condition |
| Full home perimeter caulking | Often several hundred to several thousand dollars | Home size, stories, window count, siding type, failed sealant removal |
Published estimating sources for home perimeter caulking vary because the work varies. A simple first-floor recaulk is not comparable to removing failed sealant around second-story windows on stucco with lift access. In our experience, the honest estimate comes after walking the house, identifying failed joints, checking whether flashing or substrate repair is needed, and separating cosmetic caulking from waterproofing work.
Independent reader supportYour contribution helps us test, update, and keep practical guides available for everyone.How to Apply Caulk So It Holds
Good caulk work is mostly preparation and control. The bead you see at the end is only the final few minutes.
1. Remove Failed Material
If old caulk is cracked, loose, mildewed, or pulling away, remove it. New sealant over failed sealant usually fails with it. Use a scraper, utility knife, oscillating tool, or specialty removal tool appropriate to the surface. Avoid gouging tubs, vinyl windows, soft wood, or finished stone.
2. Clean and Dry the Joint
Dust, soap film, old paint flakes, oil, mildew, and chalky siding residue prevent adhesion. Clean the joint based on the surface and sealant instructions. Many acrylics only need a clean, dry surface. Some silicones call for solvent cleaning on nonporous materials. Masonry may need brushing, vacuuming, and primer depending on the product.
3. Use Backer Rod When Needed
For wider or deeper joints, install backer rod before sealant. This saves material and creates the right geometry. Without it, even expensive sealant can split because the bead is too thick, bonded on three sides, or shaped like a plug instead of an elastic bridge.
4. Cut a Small Nozzle and Tool Promptly
Cut the nozzle at about 45 degrees. Start slightly smaller than the joint. Puncture the inner seal fully so the flow is smooth. Keep steady pressure on the gun and move at a consistent pace. It is better to lay a controlled bead than to apply twice as much and wipe most of it away.
Recommended Free Tools
Tool the bead within the open time listed by the manufacturer. For high-visibility joints, mask both sides and pull the tape before the sealant skins over. Do not wait until the bead is half-cured and then tear the edges.
5. Respect Cure Time
Dry to the touch is not the same as cured. Acrylic trim caulk may be paintable in 30 minutes to a few hours depending on the product. Silicone may need 12 to 24 hours before water exposure, sometimes longer. Polyurethane and hybrid sealants can skin in hours but take days to fully cure in thick beads or cool weather.
Lead Paint, Safety, and Permit Notes
If you are removing old caulk from a pre-1978 home and disturbing painted surfaces, lead-safe work rules may apply. The EPA Renovation, Repair and Painting Rule applies to many paid renovation jobs in pre-1978 housing and child-occupied facilities. Homeowners should still use lead-safe practices: contain dust, avoid dry sanding, use proper cleanup, and keep children and pregnant occupants away from the work area.
Wear gloves when working with solvent-based sealants, polyurethane, butyl, and some silicones. Ventilate bathrooms and enclosed spaces. Read the safety data and label instructions, especially for cleanup solvents and cure byproducts.
Do these 3 things before closing this tab:
1Fix the driver behind crashes, sound loss and screen glitches2Clear out junk files and repair common Windows errors3Scan for outdated or missing drivers - takes under a minuteRank #4

- Ultimate no drip control: Caulking gun features a 360° rotatable barrel and one-touch drip-free switch, ensuring zero mess with medium/high viscosity sealants. Built-in spout cutter and puncture pin enable seamless material flow control – no accidental drips even when inverted
- Caulk gun kit: This professional caulking gun kit includes 3 silicone caulking tools + 3-in-1 caulk remover. Multi-angle scrapers (5/8/10/16mm) fit bathroom sinks, kitchen joints, and tile gaps. Abs/stainless steel tools deliver professional finishes without surface marks
- Ergonomic heavy-duty operation: 15:1 thrust ratio, caulking gun tool reduces hand strain by 70%. Rubber-coated trigger offer rust-proof durability. The caulk gun’s thrust lever locks firmly for smooth backward/forward control – perfect for thick adhesives
- Multi-scene versatility: Caulk gun handle silicone, acrylic, asphalt, butyl, and cement. Caulking gun technology adapts to windowsills, toilet seals, brick joints, and sink seams. Includes grout scraper blades for gap cleaning and agglutination repair
- Pro-grade durability: Caulk gun kit making it a all-in-one solution for your caulking needs. Caulking gun no drip design + reusable tools ensure long-term value. Backed by trusted quality commitment – ideal for contractors and diyers
Permits are usually not required for simple cosmetic caulking. They may become relevant when caulking is part of window replacement, exterior wall repair, fire-rated assembly work, roofing, structural repair, or energy retrofit work. In those cases, the sealant is one part of a larger permitted assembly.
When to DIY and When to Hire a Pro
DIY is reasonable for interior trim gaps, small backsplash joints, simple sink caulking, minor draft sealing, and clean replacement of a short tub bead if you can remove the old material fully and keep the area dry long enough to cure. Budget $10-$40 for a small interior project if you already own a caulk gun, scraper, utility knife, tape, and rags. Add another $10-$30 for tools if you do not.
Hire a pro when the joint is part of a water management system, the failure has already caused staining or rot, the work is above safe ladder height, the substrate is stucco, brick, concrete, or commercial glazing, the joint is wider than about 1/4 inch and needs backer rod, or the work touches a rated fire assembly. Also hire out shower caulking if there is recurring mold, soft wallboard, loose tile, or movement at the tub or pan. Those are symptoms, not just caulk problems.
For exterior work, a professional should identify whether the failed bead is the cause of water entry or just the most visible symptom. If the window lacks proper flashing, a new bead may look neat and still leak behind the wall.
The Tool Desk
Outbyte Driver Updater FREEScan for outdated or missing drivers - takes under a minuteDriver Scan →Outbyte PC Repair FREERepair Windows errors before they cause bigger problemsFix Now →Common Caulk Mistakes We See
The most common mistake is choosing by room instead of exposure. “Bathroom caulk” does not always mean shower-grade silicone. “Exterior caulk” does not always mean suitable for a moving masonry joint. Read the back label.
Another mistake is making the bead too large. Oversized beads look sloppy, cure poorly, collect dirt, and may fail because the shape is wrong. If the gap is too big, fix the gap, install backer rod, or use the correct filler before sealing.
Homeowners also keep old tubes too long. Store cartridges nozzle-up and sealed, but do not trust expired or partially cured material for critical work. If the product comes out lumpy, separated, stringy in the wrong way, or refuses to cure, throw that tube out and start with fresh material.
Finally, do not mix products casually. Silicone residue can prevent new caulk from bonding. Some sealants are incompatible with asphalt, plastics, stone, or damp masonry. When in doubt, use the manufacturer’s compatibility chart or test a small area before committing to a visible joint.
The Bottom Line
There is no single best caulk. There is a right sealant for the joint in front of you.
For painted interior trim, use acrylic latex or siliconized acrylic. For showers, tubs, sinks, glass, and tile wet zones, use 100% silicone. For exterior windows, doors, siding, masonry, and concrete joints that move, use a high-performance polyurethane or hybrid sealant with the right movement rating and backer rod where needed. For roofs and flashing, use the specialty product made for that surface. For fire-rated assemblies, match the listed firestop system.
That approach costs a few dollars more up front and saves the expensive part: doing the same repair twice.
Frequently Asked Questions
What caulk should I use for baseboards?
Use paintable acrylic latex or siliconized acrylic caulk. It tools cleanly, cleans with water, and can usually be painted after the label’s dry time. Avoid 100% silicone on painted trim.
What’s actually slowing this PC down?
Pick the symptom - the matching free tool is one click away.
What is the best caulk for a shower or bathtub?
Use 100% kitchen and bath silicone. Remove all failed old caulk, clean the joint, let it dry fully, apply a controlled bead, and wait the full cure time before water exposure.
Can I use silicone outside around windows?
Sometimes, but a paintable polyurethane, STPE, MS-polymer, or premium exterior sealant is often better for exterior window and door joints. Also verify the flashing is correct; caulk alone should not be the primary water barrier.
What does ASTM C920 mean on sealant?
ASTM C920 is a performance specification for elastomeric joint sealants. For homeowners, the key number is movement class: Class 25 handles plus or minus 25% movement, while Class 50 handles plus or minus 50%.
When do I need backer rod?
Use backer rod in wider or deeper joints where the sealant depth must be controlled. It helps create the correct bead shape, reduces wasted material, and prevents three-sided adhesion that can cause splitting.
How much does professional caulking cost in 2026?
Simple interior trim caulking often runs about $2-$6 per linear foot. Exterior joint resealing commonly runs about $4-$12 or more per linear foot depending on access, removal, backer rod, substrate condition, and whether water damage is present.
Quick Recap
Product prices and availability are accurate as of the date/time indicated and are subject to change. Any price and availability information displayed on Amazon at the time of purchase will apply.

