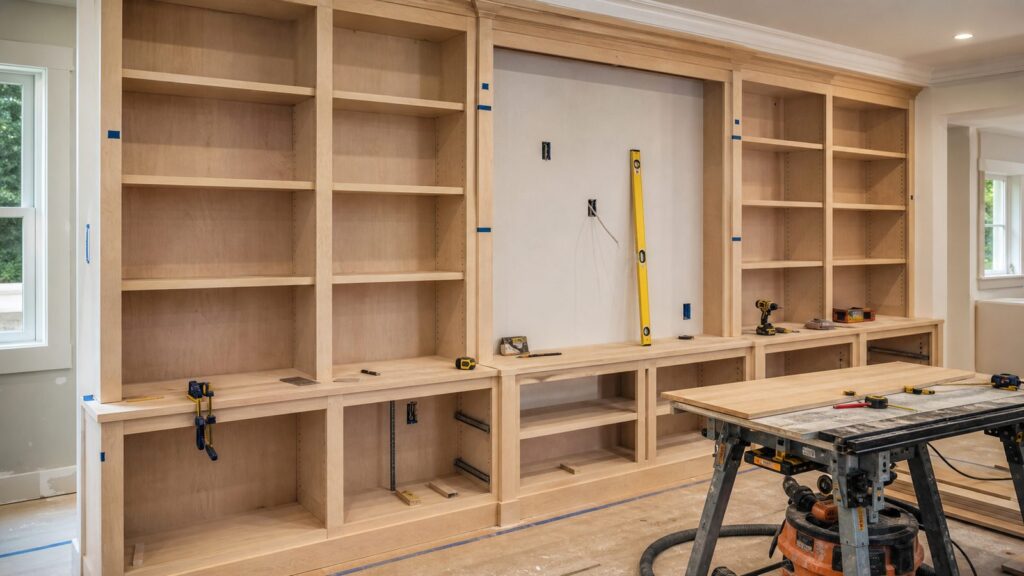
A good built-in bookcase and cabinet plan should do more than show a pretty wall of shelves. It should help you measure the room, choose materials that will not sag, budget realistically, handle outlets correctly, and decide whether the work belongs in your shop, your garage, or a professional cabinet shop.
Here is the practical version: build the project as a modular system. Use separate base cabinets, left and right bookcase towers, adjustable or fixed shelves, scribe strips, crown filler, and trim that hides the small sins every real house has. On our job sites, we never assume the wall is straight, the floor is level, or the ceiling is the same height from left to right. We build the cabinet work slightly undersized, fasten it hard to framing, and use fillers and scribes to make it look intentional.
As an Amazon Associate I earn from qualifying purchases.
For a typical 8- to 12-foot wall with cabinet bases and open shelving above, a capable DIYer might spend roughly $1,000 to $3,000 in materials using stock cabinets and plywood. A carpenter-built paint-grade unit often lands closer to $2,500 to $7,500, and a premium shop-built wall with hardwood, inset doors, drawers, lighting, and a sprayed finish can exceed $8,000 to $12,000. The plan is free; the quality comes from the measuring, material choices, anchoring, electrical planning, and finish work.
Start With a Modular Built-In Plan
The most useful free built-in bookcase and cabinet plans use modules instead of one giant cabinet. The classic layout is simple: base cabinets at the bottom, bookcase towers above, and either a center window seat, fireplace opening, desk opening, TV space, or uninterrupted shelving between them. That modular approach is why plans based on two bookcases, cabinet bases, and an optional window seat are so adaptable. You can omit a section, lengthen a shelf bay, wrap a fireplace, or build only one side of the wall.
#1 Best Overall

- 1/4 Inch Shelf Pin Jig: Designed for drilling accurate 1/4 in shelf pin holes for adjustable shelving in cabinets and furniture
- Consistent Hole Spacing: Precision guide ensures evenly spaced shelf pin holes for professional cabinet layouts
- Edge-Aligned Design: Registers securely against cabinet edges to maintain straight, repeatable drilling results
- Portable and Easy to Use: Compact jig supports fast setup and efficient drilling for DIY and professional woodworking
- Premium Kreg Tools: We offer products that help woodworkers close the gap between idea and outcome
For most homes, the cleanest layout uses these parts:
- Base cabinets: 24 inches deep is standard, usually 30 to 36 inches high before countertop or top deck.
- Bookcase towers: 10 to 14 inches deep for books and display items, or 15 to 16 inches deep if you need binders, baskets, or deeper decor.
- Vertical partitions: placed every 30 to 36 inches for book-heavy shelves.
- Top rail or crown filler: removable or scribed to handle uneven ceilings.
- Side scribe strips: 1 to 2 inches wide so the unit can be fit tightly to wavy drywall.
- Back cleats: 3/4-inch plywood or solid stock fastened to studs for anchoring.
A built-in that finishes at 96 inches tall in an 8-foot room should not be built exactly 96 inches tall. Leave installation room. We commonly build the main cabinet boxes 1/2 to 1 inch short of the lowest ceiling point, then cover the gap with crown, a flat frieze board, or a scribed filler. The same rule applies to width. If the wall measures 143 1/2 inches wide, do not build a 143 1/2-inch cabinet and hope it slides in. Build the modules smaller and plan 1/2 to 2 inches of total filler depending on the age and condition of the room.
Measure the Room Before You Cut Anything
The biggest mistake homeowners make is starting from the plan instead of the room. A free plan gives you proportions and joinery. Your room gives you the actual dimensions. Before buying plywood or stock cabinets, make a measurement worksheet and fill it out completely.
What’s actually slowing this PC down?
Pick the symptom - the matching free tool is one click away.
Built-In Measurement Worksheet
- Wall width: measure at the floor, at 36 inches high, and near the ceiling.
- Ceiling height: measure left, center, and right. Record the lowest number.
- Floor level: check with a 4- or 6-foot level, laser, or water level.
- Stud locations: mark every stud that can receive cabinet screws or cleats.
- Outlets and switches: record height, box location, and circuit use.
- Vents and returns: note supply registers, returns, thermostat wires, and access panels.
- Trim dimensions: baseboard height and thickness, window casing width, crown projection, plinth blocks, and door casing nearby.
- Obstructions: fireplace surround, mantel clearance, window stool, radiator, cleanout, shutoff, attic hatch, or service panel.
- Desired shelf loads: light display, mixed use, heavy books, records, binders, or equipment.
Do not skip stud layout. Tall bookcases need anti-tip fastening, and base cabinets should be anchored through solid cleats into studs. Brad nails and trim screws are not structural fastening. For a wall unit loaded with books, we use cabinet screws into framing, typically through a back rail or cleat. If the drywall is over masonry, plaster, metal studs, or furring strips, the fastening method changes.
Recommended Dimensions for Bookcases and Cabinet Bases
A comfortable built-in usually starts with standard cabinet proportions and then adapts to the room. Base cabinets are commonly 24 inches deep because that matches kitchen and storage cabinet standards. Upper bookcase shelves do not need to be that deep. In fact, a 24-inch-deep open shelf above a base cabinet often looks heavy and wastes space unless it is designed for media equipment or large objects.
| Component | Practical Dimension | Field Notes |
|---|---|---|
| Base cabinet depth | 21 to 24 inches | Use 24 inches for stock cabinets, drawers, files, and deep storage. |
| Base cabinet height | 30 to 36 inches | Window seats are often lower; storage bases are commonly cabinet height. |
| Bookcase shelf depth | 10 to 14 inches | Most books fit well at 10 to 12 inches; decor and baskets may need 14 inches. |
| Shelf span for books | 30 to 36 inches | Use vertical partitions or fixed shelves for heavy loads. |
| Shelf thickness | 3/4 inch minimum | Add poplar or hardwood nosing for stiffness and a finished edge. |
| Toe kick | 3 to 4 inches high, 3 inches deep | Useful if the base functions like cabinetry; optional for a furniture-style base. |
| Scribe strips | 1 to 2 inches wide | Gives room to fit uneven walls without rebuilding the cabinet. |
For open shelving that will carry books, assume meaningful weight. A common design range is about 20 to 40 pounds per linear foot, with library-style planning often around 35 pounds per foot. That means a 36-inch shelf could easily carry 60 to 120 pounds once it is full. The shelf material, span, front edging, back support, and fastening all matter.
For paint-grade work, 3/4-inch cabinet-grade plywood with poplar face frames is a reliable choice. MDF can produce a smooth painted finish, but long unsupported MDF or melamine shelves are a poor choice for heavy books unless reinforced. For stain-grade work, keep the veneer species and grain direction consistent, and use matching hardwood edging instead of random paint-grade nosing.
Material List for a Paint-Grade Built-In
The exact material list depends on wall length, but the following is a realistic starting point for an 8- to 10-foot wall with base cabinets and open bookcase towers. Prices vary by market, but 2026 retail signals put 23/32-inch cabinet-grade plywood around $45 per 4×8 sheet and 3/4-inch birch plywood around $75 per 4×8 sheet at national home centers. Better plywood, specialty hardwood plywood, and prefinished panels cost more.
Rank #2

- 1/4 Inch Shelf Pin Drill Bit: Designed for drilling precise 1/4 in shelf-pin holes to a depth of 3/8 in using the Kreg Shelf Pin Jig
- Designed for Kreg Shelf Pin Jigs: Precision-sized drill bit engineered to work seamlessly with Kreg shelf pin drilling systems
- Clean, Accurate Shelf Pin Holes: Produces consistent hole size and depth for reliable shelf support and alignment
- Cabinet and Furniture Ready: Ideal for adjustable shelving in cabinets, bookcases, and furniture construction
- Premium Kreg Tools: We offer products that help woodworkers close the gap between idea and outcome
- Stock base cabinets or shop-built plywood bases
- 3/4-inch plywood for carcasses, shelves, fixed partitions, and top panels
- 1/4-inch plywood backs if using full backs instead of open backs
- Poplar for face frames, front shelf nosing, scribes, and trim
- Cabinet screws, trim screws, pocket screws, or confirmat-style fasteners as appropriate
- Adjustable shelf pins and drilling jig if shelves are adjustable
- Wood glue, construction adhesive where appropriate, shims, and blocking
- Base molding, crown molding, shoe molding, and panel molding if used
- Primer, cabinet enamel, caulk, filler, sandpaper, and finish supplies
- LED tape, drivers, switches, and electrician-installed wiring if lighting is included
A stock-cabinet approach reduces cabinet-box labor. You can set manufactured base cabinets, build bookcase towers above them, and trim the assembly so it reads as one custom wall. This is often the best DIY path when the homeowner wants painted built-ins and does not need custom drawers or inset doors.
A full plywood build gives you better control over dimensions, shelf spans, stile widths, and odd room conditions. It also demands more accurate cutting, squaring, clamping, sanding, and finishing. If you do not have a track saw, table saw, miter saw, drill-driver, countersink bits, clamps, level, stud finder, and a good way to handle sheet goods, the tool cost can erase some of the DIY savings.
2026 Cost Guide: DIY vs Carpenter vs Custom Shop
Built-in bookcases are usually priced by project or linear foot. Current U.S. ranges cluster around $1,400 to $4,900 for many homeowner projects, with typical custom built-ins commonly reported around $2,000 to $7,500. Installed linear-foot pricing often falls around $300 to $850 per linear foot, while custom cabinetry with drawers, doors, specialty hardware, and finish-grade construction can run about $500 to $1,200 per linear foot installed.
The Tool Desk
Outbyte Driver Updater FREEScan for outdated or missing drivers - takes under a minuteDriver Scan →Outbyte PC Repair FREERepair Windows errors before they cause bigger problemsFix Now →| Approach | Typical 2026 Cost | Best For | Watch For |
|---|---|---|---|
| DIY stock-cabinet built-in | $1,000 to $3,000 in materials for a medium wall | Painted family room, office, playroom, or bedroom built-ins | Tool costs, uneven walls, trim fit, finish quality, electrical work |
| DIY plywood build | $1,500 to $4,000+ in materials depending on size and finish | Custom dimensions, stronger shelves, nonstandard room layouts | Sheet-good cutting accuracy, shelf sag, door alignment, long labor hours |
| Carpenter-built paint-grade | $300 to $850 per linear foot, often $2,500 to $7,500 total | Built-in look, site-fit trim, paint-grade cabinetry, practical storage | Clarify painting, doors, drawers, electrical, and shelf load design |
| Custom shop-built stain-grade | $500 to $1,200 per linear foot, often $8,000 to $12,000+ for premium walls | Hardwood, inset doors, drawers, sprayed finish, glass, lighting, high-end rooms | Longer lead times, finish approvals, hardware selection, field scribing |
A single wall of floor-to-ceiling shelving with cabinet bases commonly lands around $2,500 to $6,000 when the design is straightforward. Add drawers, inset doors, glass fronts, thick crown, integrated LED lighting, fireplace integration, stain-grade veneer, or a premium sprayed finish, and the same wall can move past $8,000 to $12,000.
When comparing bids, make sure every contractor is pricing the same scope. A low number may exclude electrical relocation, painting, doors, drawers, hardware, crown molding, or final caulking. A higher number may include shop spraying, better plywood, concealed hinges, soft-close drawers, and scribing that actually fits the room.
How to Build the Bookcase and Cabinet System
This is the broad job sequence we would use for a paint-grade built-in. Details change by house, but the order matters.
1. Establish the Layout
Snap or laser a level line for the base height. Mark the centerline of the wall, stud locations, cabinet module widths, outlet locations, and any fixed openings. If the unit wraps a window or fireplace, work from the fixed object outward. A 1/4-inch mistake near a fireplace or window casing becomes obvious once trim starts.
Quick wins for a faster PC:
Scan for outdated or missing drivers - takes under a minuteDriver Scan →Clear out junk files and repair common Windows errorsFree Scan →2. Set the Base Cabinets
Remove existing baseboard only where the built-in will sit. Shim the base cabinets level from the highest floor point, then fasten them together and anchor them to studs through back rails or added cleats. If using stock cabinets, add side panels, filler strips, and a continuous top deck so the bases read as built-in furniture instead of loose kitchen cabinets.
Rank #3
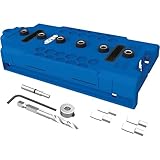
- 5 mm Shelf Pin Jig: Designed for drilling precise 5 mm shelf pin holes commonly used in European-style cabinets
- Consistent Hole Spacing: Precision guide ensures evenly spaced shelf pin holes for professional cabinet layouts
- Edge-Aligned Design: Registers securely against cabinet edges to maintain straight, repeatable drilling results
- Portable and Easy to Use: Compact jig supports fast setup and efficient drilling for DIY and professional woodworking
- Premium Kreg Tools: We offer products that help woodworkers close the gap between idea and outcome
3. Build the Upper Bookcase Boxes
Cut 3/4-inch plywood sides, tops, bottoms, and fixed shelves. Keep bookcase towers square during assembly. Use dados, screws with plugs, pocket screws, or cabinet joinery that matches your tools and finish plan. For a painted unit, face frames can hide plywood edges and small fasteners. For stain-grade work, exposed joinery and edge treatment need more planning.
4. Control Shelf Sag
For heavy books, keep shelf spans to 30 to 36 inches unless the shelf is engineered for more. A 3/4-inch plywood shelf with a 1 1/2-inch poplar or hardwood front nosing is much stiffer than a raw plywood edge. A back cleat, fixed shelf, or vertical partition adds more support. Avoid long, unsupported MDF or melamine shelves for books; they can creep over time even if they look fine on installation day.
5. Anchor the Tall Units
Set the bookcase towers on the base, plumb them, clamp adjacent units together, and fasten them through structural rails into studs. Tall cabinets need anti-tip fastening. Do not rely on crown molding, caulk, or brad nails to restrain a loaded bookcase.
Free tools Windows power users keep installed
One-click scans. No signup required.
6. Add Face Frames, Fillers, and Scribes
Face frames turn plywood boxes into finished cabinetry. Common paint-grade face frames use 1×2 poplar for stiles and rails, with wider members where doors, partitions, or visual breaks require them. Scribe strips at the outside edges are cut to follow uneven walls. This is one of the differences between a built-in and a cabinet that merely touches a wall.
7. Trim and Finish
Install base molding, crown, shoe, and any panel molding after the unit is anchored. Pre-prime or pre-finish tight interior parts before final assembly when access will be difficult. For paint-grade built-ins, use a quality primer and cabinet enamel. Expect sanding between coats, caulk at paintable joints, and enough cure time before loading shelves. Many cabinet enamels feel dry quickly but take days or weeks to reach full hardness.
Electrical, Fireblocking, and Permit Notes
Built-ins often touch electrical and code issues even when they look like simple carpentry. A bookcase can cover an outlet, change access to a junction box, interfere with receptacle spacing, conceal low-voltage transformers, or alter fireblocking behind a false wall. Plan this before demolition.
Do not bury an electrical receptacle, junction box, splice, cable TV/data box, or LED driver behind finished cabinetry where it cannot be accessed. If an outlet lands behind the built-in, the usual options are to keep it accessible inside the cabinet with a proper box extension, move it to the face or side of the cabinet, use it to feed code-compliant lighting, or have an electrician relocate it. Electrical work should follow local code and may require a permit.
Windows Errors? Fix Them Before They Spread
Repair common Windows errors and clear accumulated junk for a smoother, more stable PC - no reinstall needed.Free scan · no reinstallOutdated Drivers Are Slowing You Down
One free scan finds every outdated or missing driver and matches the right update for your exact hardware.Free scan · exact hardware matchFireblocking also matters. The International Residential Code includes fireblocking requirements intended to limit concealed draft openings. If your built-in creates a false wall, chase, soffit, or concealed cavity, especially around fireplaces or multi-story framing conditions, ask the local building department or a qualified contractor how it should be blocked. Around fireplaces, also verify mantel, trim, and combustible clearance requirements for the exact fireplace type, insert, or appliance. A gas insert, masonry fireplace, and electric fireplace can have very different rules.
Rank #4
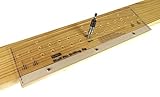
- Obtain quick,accurate and perfectly spaced shelf pin holes on custom cabinetry
- Holes spaced 1 ¼” apart
- Drill holes either 1 1/2" or 2 1/2" from edge
- Includes 1/4” self-centering bit
- Index jig with shelf pin to drill continuous holes on any length part
Permit triggers vary by city and county. Simple freestanding or surface-mounted cabinetry may not need a permit. Electrical relocation, new lighting circuits, structural changes, fireplace modifications, or work in a condo or multi-family building often can. When in doubt, ask before the cabinet is built; changing electrical after the face frames are painted is expensive and frustrating.
Independent reader supportYour contribution helps us test, update, and keep practical guides available for everyone.When to DIY and When to Hire a Pro
A built-in bookcase is a good DIY project when the wall is straightforward, the finish is paint-grade, the base cabinets can be stock or simple plywood boxes, and you are comfortable with accurate measuring, cutting, leveling, scribing, and finishing. It is also more realistic if you can spread the work over several weekends. For many homeowners, an 8- to 10-foot wall can take 40 to 80 hours when you include design, shopping, cutting, assembly, installation, sanding, caulking, priming, painting, and cleanup.
Hire a carpenter or cabinetmaker when the project includes stain-grade hardwood, inset doors, drawers, glass doors, complicated crown, fireplace integration, sloped floors, old plaster walls, out-of-level ceilings, large spans, integrated lighting, or electrical relocation. Also hire out the work if the built-in needs to match existing historic trim or high-end cabinetry. That kind of fit and finish is not just about patience; it takes the right tooling and field experience.
When interviewing a pro, ask direct questions:
- Are the shelves designed for book loads, and what span are you using?
- Will outlets remain accessible, be relocated, or be mounted in the cabinet?
- Is electrical work included or excluded?
- Will the built-in affect fireblocking, fireplace clearances, vents, or service access?
- Are doors, drawers, hardware, crown, base molding, and painting included?
- Is the finish shop-sprayed, site-sprayed, brushed, or rolled?
- What plywood, hardwood, MDF, or veneer materials are included?
- What workmanship standard or quality level is the shop building to?
For quality expectations, the Architectural Woodwork Institute standards are a useful benchmark. ANSI/AWI 0641 covers architectural wood casework topics such as materials, fit, tolerances, doors, drawers, shelves, and hardware. A residential project does not always need a formal AWI specification, but referencing a recognized standard helps everyone talk about quality in concrete terms.
Common Mistakes That Make Built-Ins Look Cheap
The first mistake is building too tight. Walls are rarely square. Floors slope. Ceilings move. Professional built-ins use fillers, scribes, base molding, and crown to absorb those conditions. If you build the cabinet to the exact wall opening, you may not be able to install it, and even if you do, the uneven gaps will be obvious.
The second mistake is weak shelves. Paint and caulk cannot hide sag. If the unit will hold books, records, binders, or equipment, design the shelf system for the load from the beginning. Use 3/4-inch plywood, poplar, or pine with reinforced front edges, keep spans reasonable, and add fixed partitions where needed.
The third mistake is treating electrical as an afterthought. Covering an outlet with a cabinet back or hiding a junction box behind shelves is not acceptable. Map the wall, decide what happens to each box, and bring in an electrician before the built-in is installed.
Do these 3 things before closing this tab:
1Fix the driver behind crashes, sound loss and screen glitches2Repair Windows errors before they cause bigger problems3Scan for outdated or missing drivers - takes under a minuteThe fourth mistake is underestimating finish work. A built-in is mostly flat surfaces and long shadow lines. Poor sanding, rough caulk, nail holes, brush marks, and uneven sheen show immediately. For paint-grade work, prime raw wood, sand between coats, use a cabinet-grade enamel, and allow proper cure time before loading shelves or closing doors against fresh paint.
Best Value

- 1/4 Inch Shelf Pins: Designed for cabinets and furniture using standard 1/4 in shelf pin holes for adjustable shelving
- Zinc Plated Steel: Durable metal construction provides corrosion resistance and long-term holding strength
- High Holding Strength: Pin design supports shelves securely up to 25 lbs while maintaining proper alignment
- Quick, Easy Installation: Drop-in shelf pins allow fast shelf height changes without tools
- Premium Kreg Tools: We offer products that help woodworkers close the gap between idea and outcome
The fifth mistake is forgetting access. Do not block HVAC returns, floor registers, plumbing cleanouts, shutoffs, fireplace service panels, attic hatches, or low-voltage equipment. If access is required, design a removable panel or grille before installation.
Final Plan Checklist
Before you buy materials, your built-in bookcase and cabinet plan should answer these questions:
- What is the exact wall width at floor, middle, and ceiling height?
- What is the lowest ceiling height?
- Where are the studs, outlets, switches, vents, and service access points?
- Are the base cabinets stock, custom plywood, or shop-built?
- What shelf spans will carry books, and how are they reinforced?
- How will the unit be anchored to framing?
- Where are the scribes, fillers, crown, and base molding?
- Will any electrical work require a licensed electrician or permit?
- Is the finish paint-grade or stain-grade?
- What is included in the budget: materials, labor, hardware, lighting, painting, and cleanup?
A free plan is a solid starting point, especially when it uses modular bookcases, cabinet bases, and adaptable center sections. The difference between a weekend-looking project and a professional built-in is not mystery. It is accurate measuring, strong shelves, accessible electrical, proper anchoring, clean scribing, and a finish system that can stand up to daily use.
Recommended Free Tools
Frequently Asked Questions
How much does it cost to build built-in bookcases with cabinets in 2026?
Many U.S. built-in bookcase projects fall around $1,400 to $4,900, with typical custom built-ins often around $2,000 to $7,500. A single wall with cabinet bases commonly costs $2,500 to $6,000, while premium hardwood, drawers, lighting, and sprayed finishes can exceed $8,000 to $12,000.
Is it cheaper to build built-ins or use stock cabinets?
Using stock base cabinets is usually cheaper and faster for paint-grade built-ins. A medium wall may run roughly $1,000 to $3,000 in DIY materials before tool costs and labor. Fully custom plywood or shop-built cabinets cost more but fit odd rooms better and allow stronger shelf layouts, custom doors, drawers, and premium finishes.
Can I cover an electrical outlet with a built-in bookcase?
Do not bury an outlet, junction box, splice, transformer, or data box behind finished cabinetry where it cannot be accessed. Common solutions include extending the box into the cabinet, relocating the outlet to the face frame or side panel, or having an electrician reroute wiring before installation.
What material is best for built-in bookshelves that will not sag?
For book loads, 3/4-inch plywood with a poplar or hardwood front nosing is a reliable paint-grade choice. Keep heavy book shelves around 30 to 36 inches wide unless they are engineered with additional support. Avoid long unsupported MDF or melamine spans for heavy books.
Do I need a permit for built-in bookcases?
Simple cabinetry may not require a permit, but electrical relocation, new lighting circuits, fireplace modifications, structural changes, or work in condos and multi-family buildings often can. Check with your local building department before closing up walls or moving wiring.
How do you anchor built-in bookcases to the wall?
Use structural back rails or cleats fastened into wall studs with cabinet screws. Tall bookcases should include anti-tip fastening. Brad nails, caulk, trim screws, and crown molding are not enough to restrain a loaded bookcase.
Quick Recap
Product prices and availability are accurate as of the date/time indicated and are subject to change. Any price and availability information displayed on Amazon at the time of purchase will apply.

