Sometimes you can replace the polarizing film without replacing the entire LCD, but it is not a universal or manufacturer-supported repair. First identify which layer is damaged. A resin printer may have a removable screen protector, the LCD’s bonded front polarizer, and the vat’s FEP, PFA, or ACF release film. They can look similar, but they perform completely different jobs.
If only a protector is damaged, replace the protector. If the actual polarizer is damaged but the LCD still produces a uniform exposure image, a skilled DIY replacement may work. If the panel is cracked, contaminated beneath the film, uneven, or unable to mask UV light, replacing the complete model-specific LCD is usually the safer and more repeatable repair.
As an Amazon Associate I earn from qualifying purchases.
Do not confuse the three films
Most resin-printer film problems begin with a vat leak, but the damaged vat film is not the same component as the polarizer above the LCD.
Quick wins for a faster PC:
Fix the driver behind crashes, sound loss and screen glitchesFind Drivers →Clear out junk files and repair common Windows errorsFree Scan →Scan for outdated or missing drivers - takes under a minuteDriver Scan →- Vat release film: FEP, nFEP, PFA, ACF, or a related material stretched across the resin vat. It contains resin and separates the vat from the display. Anycubic describes FEP as the transparent barrier between the resin and LCD; see its FEP replacement guide.
- Screen protector: An optional removable spill barrier placed above the LCD. Some printers include one; others rely on an aftermarket protector.
- LCD polarizer: A dark optical film bonded to the LCD. It controls the polarization needed for the display to mask UV light. It is not a disposable vat consumable.
From top to bottom, the usual stack is: vat and release film, optional protector, front polarizer, LCD glass and liquid-crystal layer, rear polarizer, and UV light source. A smooth dark sheet that peels away may be the polarizer rather than cured resin. Scraping it can permanently damage the display.
#1 Best Overall

- The 10-inch 12K Mono LCD screen is used for ELEGOO Saturn 3/Saturn 3 Ultra resin 3D printer.
- With an amazing resolution of 11520x5120 and XY axis resolution of 19x24um, our Mono LCD screen ensures that your 3D printed models are highly precise with stunning details and exceptional sharpness.
- Mono LCD screen comes with a 9H hardness tempered glass that protects the screen from scratches and damages caused by resin dripping or penetration, to prolong the LCD screen lifespan.
- Mono LCD screen has a service life of about 2000 hours, which is 4X longer than the traditional RGB LCD screens, providing a longer lifespan and greater value for your cost.
- Mono LCD screen features more stable performance and higher printing efficiency, providing reliability and consistency in every print. Less maintenance reduces the need for frequent repairs and replacements.
Identify the failed layer before removing anything
| Observed symptom | Likely cause | Best next step |
|---|---|---|
| Resin cured on a removable clear layer; the exposure image remains normal | Damaged screen protector | Remove and replace the protector |
| Scratches are confined to a top film and the screen test is uniform | Protector damage | Replace the protector, not the polarizer |
| A dark film is cloudy, torn, chemically damaged, or peeling | Polarizer damage | Consider a polarizer-only repair or complete LCD |
| No test image or no UV light | LCD, ribbon cable, motherboard, or UV-light fault | Diagnose the electronics before changing film |
| Bright areas appear where the LCD should block UV | Wrong polarizer orientation, damaged polarizer, or failed LCD | Stop printing and verify the optical stack |
| Bright corners, bands, blotches, or uneven exposure | Bubbles, wrinkles, contamination, optical damage, or failed LCD | Rework the film or replace the display |
| Resin is visible beneath the film or around LCD edges | Leak reached the display assembly | Full LCD replacement is often safer |
| The display works but print exposure has changed | Added film has different transmission or thickness | Inspect masking and recalibrate exposure if necessary |
A cured-resin spill often indicates that the vat’s FEP film has failed. Repair that leak before using the printer again. Replacing the LCD polarizer will not repair a leaking vat.
Test the LCD before removing the film
A panel that lights up is not necessarily healthy. It may have dead zones, failed masking, a bad cable, or optical contamination.
- Remove the build plate and resin vat.
- Clean and dry the screen area without spreading resin toward the edges.
- Reconnect power only when the printer is safely reassembled enough for testing.
- Use the printer’s built-in exposure, UV, or screen-test function. The exact menu label varies by model and firmware.
- Check whether the UV source turns on and whether the expected pattern appears uniformly.
- Look for dead regions, flicker, bright leakage, bands, or areas that remain illuminated when they should be dark.
- Photograph the result before disassembly.
If the screen test is already abnormal, a new polarizer may not solve the problem. Check the ribbon cable, connectors, motherboard, UV source, and complete LCD assembly according to the printer’s service documentation. A brief paper exposure test may also help, but follow the printer’s normal exposure-test controls and avoid looking directly at UV light.
Choose the repair path
Replace only the screen protector
This is the preferred repair when the LCD test is normal and damage is limited to a removable protector. It is less invasive than peeling a factory-bonded optical layer and is usually the best preventive upgrade for a working display.
Choose a model-specific protector that covers the active screen and appropriate bezel area without interfering with vat seating or adding problematic thickness. Mach5ive lists protectors for many ELEGOO, Anycubic, Phrozen, Creality, EPAX, Peopoly, Voxelab, and other printers. Its product information states that some protectors transmit more than 93% of light and may require re-leveling or increased exposure; those are vendor claims, not universal requirements. Phrozen also sells an official LCD screen protector.
Replace the polarizer only
This is possible only when the LCD glass, electronics, and masking function are otherwise sound. It is a precision optical repair, not a routine consumable change. The main risks are damaging the LCD while removing adhesive, installing the film at the wrong angle, trapping dust or bubbles, and changing UV transmission.
Rank #2

- 【Official Original】Only compatible with Saturn 4 Ultra 16K resin 3D printer, provides assembly and replacement videos, easy to get started
- 【10" 16K Ultra-High Resolution】 The screen resolution is as high as 15120 × 6230, and the XY resolution is 19 × 14 μm. The unprecedented ultra-high resolution brings an unparalleled visual experience.
- 【2000H Life】This Saturn 4 Ultra 16K LCD Screen has a service life of up to 2000 hours, and the quality is still guaranteed under long-term use and ultraviolet radiation
- 【Troubleshooting】 The one-button self-check function of Saturn 4 Ultra 16K resin 3D printer can detect whether the LCD screen is faulty, so as to facilitate and handle problems and ensure the success rate of printing
Manufacturers generally sell complete LCD assemblies rather than bare polarizers. Anycubic’s LCD parts collection and ELEGOO’s LCD-printer parts collection list complete screens separately from FEP, PFA, ACF, and other consumables.
Replace the complete LCD
Choose the complete display if the glass is cracked, the screen test is uneven, resin has entered beneath the film or around the panel edges, connectors are damaged, or the display cannot mask UV reliably. A complete replacement restores a known optical stack and is normally more repeatable than sourcing and aligning a bare film.
Prusa’s official display-replacement documentation illustrates the kind of model-specific process involved: disconnecting cables, fitting the assembly, checking operation, and calibrating the platform. Procedures for Mars, Saturn, Photon, Phrozen, Prusa, and other printers are not interchangeable.
Materials and preparation
For a polarizer-only repair, obtain:
- A model-compatible linear polarizing film, not ordinary clear plastic, a sunglasses lens, a photographic filter, or vat FEP.
- The correct width, length, thickness, adhesive construction, surface durability, and UV behavior.
- Nitrile gloves and eye protection.
- A plastic pick or plastic razor.
- Lint-free wipes and a clean, dust-controlled work surface.
- A soft, clean squeegee or applicator.
- Suitable perimeter tape or gasket material only where compatible with the printer’s original design.
- A model-specific protector for the finished repair, if clearance allows.
Specialist suppliers such as Polarization.com sell adhesive-backed linear polarizing material. Generic LCD polarizer specifications, such as those in this example technical sheet, do not establish compatibility with every resin printer. Confirm linear polarization, axis, adhesive compatibility, thickness, and UV transmission before buying.
Safety and damage warning: Unplug the printer before disassembly. Do not use a metal scraper on an exposed LCD or polarizer. Do not flood the panel with isopropyl alcohol or other solvent; liquid can wick into the LCD edges, tapes, and electronics, and coatings differ by model. Use only a controlled, nonmetal tool to remove cured material from a confirmed sacrificial protector.
Before starting, photograph the existing film, perimeter tape, connectors, and edge orientation. Confirm the exact printer model and screen dimensions. Read the printer’s LCD replacement instructions and check the warranty terms for your region. DIY removal of a factory-bonded polarizer may affect manufacturer support.
Rank #3

- 【7'' 10K High Resolution】Photon Mono 4 boasts an impressive 105% increase in print precision compared to Mono 2. With a resolution of 9024x5120, each pixel measures a mere 17x17μm on the X and Y axes. This enhanced capability allows for creating models with exceptional detail and dynamic richness.
- 【Powerful Light Source】The time-tested Anycubic LighTurbo matrix light source technology delivers stable, balanced, and uniform lighting to reduce layer lines and rasterization, creating models with ultra-smooth surface and maximum print details.
- 【Sufficient Print Size】With a generous maximum build volume of 6.04'' x 3.42'' x 6.49''/153.4mm x 87mm x 165mm, you have ample print space to easily tackle your daily tasks and demanding projects.
- 【Laser-engraved Print Platform 2.0】With a new design, the laser engraving platform of the photon mono 4 improves adhesion to mitigate lifting and warping of the model during 3d printing, while keeping the removal process simple and smooth.
- 【User-friendly Function】The 4-point leveling method is ideal for beginners, after the first leveling and tightening the 4 screws, no need to repeat leveling. Photon mono 4 can resume printing when power is restored, effectively reducing material and time wastage.
Record the original polarizer orientation
The polarizer has an axis. Rotating it changes how much light passes through the printer’s optical stack. The replacement may look visually correct while allowing excessive UV leakage or producing weak curing.
- Mark one edge of the existing film and the corresponding edge of the printer frame.
- Take a close photograph of the mark and the whole panel.
- Transfer the reference to the replacement film before removing its protective liner.
- Do not assume a printed arrow or liner direction indicates the correct installation axis unless the film supplier documents it.
If the original orientation cannot be recovered, use temporary placement and an exposure test to find the best position. Rotate the film in small increments, looking for the strongest contrast and darkest masked regions, then mark that position. This is an informed, model-specific repair technique—not a universal manufacturer specification. Community reports describe this approach for some resin printers, but they are anecdotal; examples include this Saturn discussion and this related report.
Remove the damaged polarizer cautiously
- Disconnect power and remove the vat, build plate, and existing protector.
- Inspect the perimeter tape or gasket and identify where the film ends.
- If adhesive is stubborn, warm it only gently and avoid heating the LCD excessively.
- Lift a corner with a plastic pick. If the layer does not separate cleanly, stop: it may be bonded directly to the display or the surface may be the LCD itself.
- Peel slowly at a low angle. Do not snap the film back across the glass or flex the panel.
- Use the least aggressive residue-removal method compatible with the printer. Keep liquids away from edges, ribbon cables, and electronics.
- Inspect the exposed glass for cracks, chips, delamination, scratches, and resin intrusion.
Stop the repair if you expose damaged LCD glass or find resin beneath the panel. At that point, a complete LCD replacement is usually the more reliable choice.
Free tools Windows power users keep installed
One-click scans. No signup required.
Prepare the surface
The glass must be flat, dry, free of cured resin, free of adhesive ridges, and as dust-free as possible. Use bright angled lighting to reveal lint and residue. Do not repeatedly touch the surface after final cleaning.
Deep scratches and adhesive ridges scatter light. A film that looks smooth from above can still create bright patches, bands, or incomplete masking during an exposure test.
Install and align the replacement
Adhesive-backed film
- Leave the protective liners in place while checking dimensions and orientation.
- Peel back only a small section of liner at one edge.
- Align the marked axis and edges with the original reference.
- Lay the film progressively from one edge while using a clean, soft squeegee.
- Push air toward an open edge. Never stretch the film.
- Avoid touching the adhesive and do not trap dust beneath the active area.
- Preserve the original perimeter seal where practical without covering the active display.
Non-adhesive sheet
A loose sheet can be useful for temporary orientation testing, but it is not normally a durable finished repair. Holding it flat and sealing it without wrinkles, optical gaps, or resin paths is difficult. Use a suitable adhesive construction or replace the complete display for the finished repair.
Rank #4
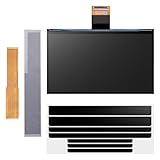
- 【Official Original】 Compatible with Saturn 4/ Saturn 4 Ultra resin 3D printers, provides assembly and replacement videos, easy to deal with
- 【High Resolution】 The resolution is up to 11520x5120, and the XY resolution is 19x24μm, which means that whether it is feathers or skin textures, or other complex textures, they can be well restored without missing details, making your model lifelike
- 【9H Tempered Film】 The screen surface comes with a 9H hardness tempered film, which is not easy to scratch, prolongs the service life of the screen, and does not need to be replaced frequently
- 【2000H life】This Saturn 4 LCD, Saturn 4 Ultra LCD has a service life of up to 2000 hours, and the quality is still guaranteed under long-term use and ultraviolet radiation
- 【Troubleshooting】 The one-button self-check function of Saturn 4 and Saturn 4 Ultra can detect whether the LCD screen is faulty, so as to facilitate and handle problems and ensure the success rate of printing
Control bubbles, dust, and optical defects
- Clean immediately before application and work in a dust-controlled area.
- Apply from one edge rather than dropping the entire sheet onto the glass.
- Use a clean, soft squeegee and avoid fingerprints.
- Push small bubbles toward an open edge only if doing so will not crease the film.
- Replace or rework the film if a large bubble, crease, or particle remains over the active area.
A cosmetic-looking installation is not necessarily a functional one. Correct axis and uniform UV masking matter more than the absence of a few marks outside the active display.
What’s actually slowing this PC down?
Pick the symptom - the matching free tool is one click away.
Reinstall the protector and repair the vat
Once the polarizer passes a screen test, install a separate protector or spill barrier where the printer design permits it. It should cover the active display, overlap or seal the bezel appropriately, and not interfere with vat seating or moving components.
Check the thickness carefully. An added protector can change the distance between the vat, LCD, and build plate. It can also alter light transmission. Re-level or re-zero the build plate if the repair changes the stack height. Anycubic and ELEGOO sell model-specific vat films; use the exact FEP, PFA, or ACF material and dimensions required by the printer. ELEGOO’s Mars, Saturn, and Jupiter instructions demonstrate why screw counts, foam dimensions, frame orientation, and tensioning are model-specific.
Do not print until the original leak has been fixed. A new polarizer cannot compensate for a pinhole or poorly seated vat film.
Final verification and calibration
- Reinstall the repaired or replacement display and all ribbon cables.
- Fit the vat and confirm that it sits flat.
- Run the exposure or screen test again.
- Check for uniform masking, dark unexposed regions, and the absence of bright leakage.
- Re-level or re-zero if screen or protector thickness changed.
- Print a small calibration model rather than committing to a large job.
- Inspect the first layers, exposure consistency, dimensional accuracy, and any new bright or weak areas.
- Adjust exposure only when testing demonstrates a real transmission change.
Prusa explicitly instructs users to recalibrate after FEP replacement in its FEP guidance. That does not prove every printer requires recalibration after a polarizer repair, but it supports treating any change to the vat/display stack as a calibration event.
Do these 3 things before closing this tab:
1Scan for outdated or missing drivers - takes under a minute2Repair Windows errors before they cause bigger problems3Fix the driver behind crashes, sound loss and screen glitchesTroubleshooting after installation
| Problem | What to check |
|---|---|
| The whole layer cures | Stop printing. Check polarizer orientation, film damage, LCD masking, UV control, and ribbon connections. |
| Curing is weak or incomplete | Check film transmission, orientation, excessive thickness, exposure settings, and UV output. |
| Bright patches or bands remain | Look for bubbles, wrinkles, dust, adhesive ridges, resin beneath the film, or damaged LCD glass. |
| The test pattern flickers or has dead regions | Investigate the LCD, cable, motherboard, and UV source; a polarizer is unlikely to correct an electronic fault. |
| Print height or first layers changed | Check vat seating and re-level or re-zero after adding a protector. |
| The vat still leaks | Replace the correct FEP, PFA, or ACF film and inspect the vat frame before using resin. |
Polarizer-only repair versus complete LCD replacement
| Repair | Advantages | Risks and limitations |
|---|---|---|
| Polarizer-only | Lower parts cost and may preserve a functioning LCD. | High risk of dust, bubbles, wrinkles, adhesive damage, wrong axis, changed UV transmission, and lost warranty support. |
| Complete LCD | Restores a known factory optical stack and is usually more repeatable. | Higher cost, model-specific availability, cable handling, and possible calibration. |
| Protector only | Least invasive when the polarizer and LCD are healthy; adds spill protection. | Must match screen dimensions, clearance, thickness, and optical transmission. |
Compare the price of the correct replacement LCD with the value of your time and the cost of a failed polarizer repair. Current manufacturer listings show that prices vary substantially by model and region: Anycubic’s parts collection includes LCD listings and other accessories, while ELEGOO’s collection includes LCDs, FEP, PFA, ACF, and resin-tank parts. Treat displayed prices as changeable, model-specific signals rather than universal costs.
For a construction workshop or fabrication environment where downtime and repeatability matter, a complete LCD is often the sensible choice once there is any doubt about hidden resin contamination or masking performance. Bare polarizer film is best reserved for an experienced technician who can verify the optical axis, adhesive, thickness, and UV behavior.
Quick Recap
Prevent the next failure
- Replace damaged vat film promptly and inspect for pinholes after failed prints.
- Install a model-compatible screen protector while the LCD is still healthy.
- Never drag a metal scraper across an exposed display.
- Remove cured resin carefully from a confirmed sacrificial protector rather than assuming every top layer is disposable.
- Inspect the underside of the vat and the LCD area before reinstalling the vat.
- Keep resin away from LCD edges, ribbon cables, and electronics.
- Follow the exact service procedure for the printer model; Mars, Saturn, Photon, Phrozen, Prusa, and other designs use different parts and clearances.
Product prices and availability are accurate as of the date/time indicated and are subject to change. Any price and availability information displayed on Amazon at the time of purchase will apply.




