What’s actually slowing this PC down?
Pick the symptom - the matching free tool is one click away.
If a drum sander leaves a dark streak on its abrasive or burns the wood, stop and check the abrasive wrap, grit, cut depth and feed rate. Burning is usually a heat-management problem with several possible causes—not proof that a machine part has failed. Clean or replace the abrasive as needed, correct any overlap, then make cautious adjustments using the manual for your specific sander.
Start with the streak and the abrasive
First identify where the mark appears: on the sandpaper, the workpiece, or both. Follow the sander’s shutdown and maintenance procedure before inspecting the drum. Look for a loaded or worn strip and check that the abrasive wrap does not overlap. A damaged or improperly wrapped abrasive can create localized heat; a slow feed or a cut that asks too much of a fine grit can also contribute to burning.
Adjust feed rate and cut depth
If the workpiece is burning, try a shallower cut or a faster conveyor feed, changing one setting at a time so you can judge the result. JET’s JWDS-2244 manual advises: “Also try a faster feed rate or less depth of cut if the stock you are working begins to show burn marks.” The manual explains that a slower feed gives the drum more revolutions per inch of stock, while a faster feed gives it fewer. Treat this as guidance for that machine, not a universal setting for every drum sander or material.
JET specifically recommends a shallower cut and faster feed when sanding cherry, hard maple and other hardwoods. Its manual also suggests slightly angling the stock as it enters. Test cautiously with your stock and setup; the useful feed rate depends on the wood, grit, cut depth and machine. Monitor both the finish and the machine’s behavior, and follow the exact owner’s manual rather than relying on a single setting.
The Tool Desk
Outbyte PC Repair FREERepair Windows errors before they cause bigger problemsFix Now →Outbyte Driver Updater FREEScan for outdated or missing drivers - takes under a minuteDriver Scan →#1 Best Overall

- Precut for JET and Performax 10-20 drum sanders
- Fine abrasive, 150 grit, aluminum oxide
- Abrasive strips are 3-in. wide, cloth backed, resin bond, open coat
- Multipack includes six wraps
- Antistatic backing for easier dust pickup
Match grit to the amount of material removal
A fine abrasive is for light finishing, not forcing a heavy cut. If it is removing material too slowly, it can burnish the surface and add heat instead of cutting efficiently. Move to a coarser grit for heavier stock removal, then use a finer grit for finishing. Make changes within the limits and sequence specified by your sander’s manual.
Clean, replace or rewrap the abrasive
- Loaded abrasive: Clean it often with a gum-rubber abrasive cleaner or cleaning stick. Loaded dust can reduce cutting effectiveness and increase heat.
- Worn abrasive: Replace the strip rather than continuing to sand with paper that no longer cuts effectively.
- Overlapping wrap: Rewrap the strip so its edges meet without overlapping. Check the machine manual for the correct installation procedure and strip dimensions.
Use dust collection and follow safety procedures
Connect suitable dust collection to help reduce abrasive loading and control fine sanding dust. OSHA notes that sanding equipment produces considerable fine wood dust and should be ventilated carefully. Sanding equipment can also present hazards from in-running rolls, abrasive contact and flying chips. Keep guards in place and follow the machine’s shutdown, maintenance, personal-protective-equipment and dust-control requirements.
Rank #2
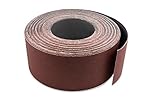
- Save big by cutting your own drum sanding strips with our continous rolls. Just use an old strip as a template and cut to length!
- Our 3" wide drum sander roll fits: Jet Performax 10-20 (13 wraps/roll), 22-44 (6 wraps/roll), 25-2 (6 wraps/roll), 16-32 (9 wraps/roll), Woodtek 25-2 (6 wraps/roll), Ryobi WDS1600 (9 wraps/roll) and any drum sander that requires 3" wide strips.
- Premium aluminum oxide open grain resists heat and buildup.
- Tough cloth backed X wgt material provides a long lasting cut.
- We are the manufacturer! Factory Direct and precision cut in USA by Red Label Abrasives. Guaranteed or Money Back.
A practical troubleshooting order
- Stop the sander and inspect the workpiece and abrasive under the machine’s safe shutdown procedure.
- Check for loaded or worn paper and an overlapping wrap; clean, replace or rewrap as appropriate.
- Confirm that the grit suits the amount of material you need to remove.
- If the wood still burns, test a shallower cut or faster feed, changing one at a time.
- For hardwoods such as cherry or hard maple, consider the shallower-cut and faster-feed approach described in the JET manual, and monitor the finish.
- Check dust collection and consult the manual for your exact model before making further adjustments.
There is no universal feed rate or cut-depth setting established for all drum sanders. Wood species, grit, abrasive condition, cut and machine all matter.
Quick Recap
Rank #4

- Overall Dimensions 3" wide x 91-5/8" long
- Fits on all Supermax 16-32 Drum Sanders
- 80 grit, Aluminum Oxide
Rank #3
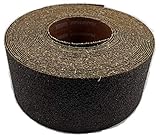
- For use with drum sanders to save money by cutting your own strips.
- Premium X-weight aluminum Oxides cuts fast and hold up to the most demanding sanding applications
- For 22" Drums like the Jet 22-44 can make 4 strips minimizing waste
- Use the strip on the machine as a template to cut the new strip
- Can be used for any application where cut to size is needed
Sources
- WOOD Magazine: Preventing Burn Marks on a Drum Sander
- JET Tools: JWDS-2244-M Operating Manual
- JET JWDS-1020 manual transcription
- OSHA: eTool—Woodworking, Sanders
Product prices and availability are accurate as of the date/time indicated and are subject to change. Any price and availability information displayed on Amazon at the time of purchase will apply.




