PC Slower Than It Used to Be?
A free scan shows the junk files, broken settings and background clutter dragging Windows down - then fixes them in one click.Free scan · Windows 10 & 11Outdated Drivers Are Slowing You Down
One free scan finds every outdated or missing driver and matches the right update for your exact hardware.Free scan · exact hardware matchCritical low-slope roofing details are the transitions where a membrane meets a drain, parapet, wall, or roof edge. They succeed only when membrane, attachment, deck, insulation, flashing, metalwork, and drainage are designed as one compatible assembly. A detail copied without checking the adopted code, project documents, membrane manufacturer’s instructions, and drain manufacturer’s requirements can leak even when the membrane itself is correctly installed.
Why low-slope roof details matter
Low-slope roofs shed water through designed drainage paths rather than relying primarily on rapid surface runoff. Every interruption in that path—such as a drain bowl, parapet, curb, wall, expansion joint, or perimeter edge—creates a transition that must remain watertight while accommodating movement, fasteners, insulation thickness, and the selected membrane.
As an Amazon Associate I earn from qualifying purchases.
NRCA’s Roofing Manual: Membrane Roof Systems—2023 treats the roof as a complete system. Its coverage includes decks, air and vapor retarders, rigid-board insulation, membranes, fasteners, surfacing, accessories, system configurations, and reroofing. NRCA reports that the manual contains 210 construction details for built-up roofing (BUR), polymer-modified bitumen, liquid-applied, EPDM, and thermoplastic membrane systems. That figure is a count of published details, not a performance statistic or a guarantee that one detail fits every project.
The practical rule is simple: select the membrane system first, then coordinate its substrate, insulation, attachment, flashing, drainage, and edge treatment. Exact dimensions cannot be chosen from the phrase “low-slope roof” alone. Jurisdiction, adopted code, wind exposure, climate, roof geometry, membrane assembly, manufacturer requirements, and site conditions all affect the final detail.
#1 Best Overall
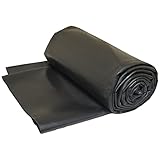
- 45-Mil Liner: The Most Popular Material for New And Re-Roof, Low Slope, Roofing Applications
- Outstanding Durability And Low Life Cycle Cost Means Excellent Value
- Easily Contours to Unusual Roof Shapes. Perfect for Do-It-Yourself Homeowners or Roofing Contractors
- Flexible Material Allows Design Versitility and Easy Installation
- NOTE: If using for a deck or a roof, make sure you order a liner size slightly larger than your dimensional needs. We don't want to sell you more than you need, but getting an EXACT size will not be sufficient to cover your deck or roof correctly.
Low-slope roof drains and sump details
Build a continuous transition into the drain
At an interior drain, the membrane should approach a properly formed sump, turn into the drain assembly, and be secured between the drain flange and clamping ring or other approved clamping arrangement. The drain bowl, flange, membrane flashing, fasteners, and insulation must be compatible with one another. A membrane that merely stops near the drain, or that is clamped without the system’s required flashing layer, leaves a predictable leak path.
The finished detail must also preserve the intended flow into the bowl. Insulation crickets, tapered boards, saddles, and the structural deck should be coordinated so water does not pond around the drain or become trapped behind the flange. The drain manufacturer’s assembly and the membrane manufacturer’s flashing method govern the actual materials and sequence.
Avoid wrinkling at sharply sloped or recessed sumps
NRCA cautions that round or deeply recessed sumps with sharp slopes can contribute to membrane wrinkling where the membrane transitions into the drain. Wrinkles can interfere with clamping, create stress concentrations, and prevent a uniform seal. This warning is not a universal prohibition on a particular sump shape or slope; it means the geometry must be reviewed with the selected membrane and drain assembly before construction.
For some deck and membrane conditions, a metal receiver pan can increase the bearing area beneath the outer drain flange. Whether that is appropriate depends on the system design, structural support, corrosion compatibility, and the drain manufacturer’s instructions. Do not substitute a generic pan for a tested or published assembly.
Coordinate primary and overflow drains in one sump
When primary and overflow drains share a sump, their locations must leave enough room to install each drain’s flashing correctly. Crowding the bowls can force folds, narrow flashing strips, inaccessible fasteners, or an incomplete clamping seal. Show both drains, their clearances, the sump geometry, and the membrane termination on the construction detail before the deck is formed.
Rank #2

- Durable Construction: The EPDM waterproofing membrane is extremely durable and has a life expectancy of over 50 years in outdoor applications
- Robust Design: EPDM waterproof membrane is very robust thanks to its fiber reinforcement and overall thickness of 52 mil
- Weather-resistant Performance: EPDM waterproof membrane has an EPDM top layer that is suitable many applications and exposure to the weather conditions which makes it remain flexible and dont break even for decades
- Peel and Stick Installation: EPDM waterproof membrane is quick and easy to install, without the need for special knowledge or tools
- Clean Appearance: The EPDM waterproof membrane has a clean looking top layer in black which doesnt reflect the sun like aluminum does
Drain coordination checklist
- Confirm the drain type, bowl material, flange dimensions, clamping ring, and approved accessories.
- Show how the membrane enters the sump and is secured at the flange.
- Check that insulation, tapered boards, and the structural deck provide the intended drainage plane.
- Review sump shape and slope for membrane wrinkling risk.
- Maintain installation space when primary and overflow drains occupy one sump.
- Verify compatibility of primers, adhesives, sealants, metal pans, and membrane flashing materials.
- Coordinate the completed drain with overflow provisions required by the adopted code and project design.
Parapet base flashing, coping, and counterflashing
Keep the membrane flashing continuous at the parapet
A parapet detail must connect the field membrane to base flashing that rises at the wall and is terminated in a way the system permits. The wall substrate, insulation, membrane, flashing layer, termination bar or fasteners, sealant, and coping must be drawn as one assembly. The coping cap protects the top of the wall, but it is not a substitute for membrane base flashing.
NRCA technical material includes BUR parapet coping and base-flashing details. Later manual updates identify parapet saddle flashing and additional counterflashing options. These are categories of solutions rather than universal instructions. A thermoplastic, EPDM, polymer-modified bitumen, liquid-applied, or BUR system may require different primers, attachment methods, seam treatments, cover strips, and termination arrangements.
What’s actually slowing this PC down?
Pick the symptom - the matching free tool is one click away.
Use coping to manage water, movement, and metal joints
Coping should shed water away from the wall and roof assembly, accommodate thermal movement, and be detailed at corners, laps, joints, inside and outside returns, and transitions to adjacent wall materials. Metal cleats, clips, splice plates, fasteners, and sealants must be selected for the coping system and exposure. Do not assume that a visually similar cap has the same wind-resistance or movement capacity.
Coordinate counterflashing and wall interfaces
Counterflashing protects the top edge of base flashing and directs water over the exposed wall-side transition. It may be integrated into masonry joints, reglets, formed receivers, or other approved terminations, depending on the wall construction and system. The detail should show how counterflashing remains serviceable when the roof membrane is repaired and how it interfaces with windows, cladding, expansion joints, and penetrations.
NRCA’s Architectural Metal Flashing and Condensation and Air Leakage Control—2026 manual volume contains 61 construction details and background on moisture and air leakage in buildings. Its scope connects roof-edge metalwork with the wider envelope, including condensation control for low-slope roof systems. The published count describes the manual’s contents; it does not measure leak frequency, service life, or performance.
Rank #3
- 60-Mil Liner: The Most Popular Material for New And Re-Roof, Low Slope, Roofing Applications
- Outstanding Durability And Low Life Cycle Cost Means Excellent Value
- Easily Contours to Unusual Roof Shapes. Perfect for Do-It-Yourself Homeowners or Roofing Contractors
- Flexible Material Allows Design Versitility and Easy Installation
- NOTE: If using for a deck or a roof, make sure you order a liner size slightly larger than your dimensional needs. We don't want to sell you more than you need, but getting an EXACT size will not be sufficient to cover your deck or roof correctly.
“The new manual includes 61 construction details and provides background information regarding moisture and air leakage issues in buildings, such as ventilation for steep-slope roof assemblies and condensation control for low-slope roof systems.” — National Roofing Contractors Association, announcement dated January 29, 2026.
Special offer. See more information about Outbyte and uninstall instructions. Please review EULA and Privacy policy.
Roof-edge metal flashing and perimeter transitions
At the roof edge, the membrane must terminate into a perimeter condition that resists wind, sheds water, and remains compatible with edge metal. Depending on the assembly, that may involve a metal edge securement, fascia, gravel stop, coping, cleat, cover plate, or manufacturer-specific termination. The drawing should identify the membrane attachment, edge-metal attachment, substrate, fascia or wall support, and sealant locations rather than showing only a generic metal angle.
Perimeter details deserve a structural review where wind uplift is significant. Fastener spacing, pull-out capacity, substrate thickness, corner zones, and transitions between edge-metal pieces are project-specific. A metal cap that looks substantial can still fail if its cleat or fasteners are not supported by the deck or wall construction.
At inside and outside corners, avoid abrupt membrane folds and unsupported metal joints. Provide formed corners, reinforcing layers, splice plates, and sealants required by the selected system. Coordinate edge metal with gutters, scuppers, overflow paths, parapet returns, rooftop equipment screens, and cladding so one trade does not block another trade’s flashing.
How membrane type changes the detail
There is no universal “best” low-slope membrane detail. The appropriate choice depends on the roof’s deck, insulation, attachment strategy, climate, fire and wind requirements, maintenance plan, drainage geometry, and the manufacturer’s published assembly.
Free tools Windows power users keep installed
One-click scans. No signup required.
Rank #4
- Durable Construction: The EPDM waterproofing membrane is extremely durable and has a life expectancy of over 50 years in outdoor applications
- Robust Design: EPDM waterproof membrane is very robust thanks to its fiber reinforcement and overall thickness of 52 mil
- Weather-resistant Performance: EPDM waterproof membrane has an EPDM top layer that is suitable many applications and exposure to the weather conditions which makes it remain flexible and dont break even for decades
- Peel and Stick Installation: EPDM waterproof membrane is quick and easy to install, without the need for special knowledge or tools
- Clean Appearance: The EPDM waterproof membrane has a clean looking top layer in black which doesnt reflect the sun like aluminum does
| Membrane family | Detail decisions that must be coordinated | What cannot be assumed |
|---|---|---|
| Built-up roofing (BUR) | Base flashing layers, ply transitions, surfacing, felts, bitumen compatibility, and termination at drains and parapets. | A BUR coping or drain detail automatically applies to another membrane family. |
| Polymer-modified bitumen | Sheet laps, flashing sheets, adhesive or heat-weld method, insulation interface, and edge termination. | All modified-bitumen products accept the same torch, adhesive, primer, or self-adhered method. |
| Liquid-applied | Substrate preparation, reinforcement, coating thickness, cure conditions, transitions to metal and drains, and detailing at movement joints. | A liquid coating can bridge contamination, standing water, or an unsuitable substrate without preparation. |
| EPDM | Bonded or mechanically attached sheets, cured or uncured flashing, seam preparation, corner boots, and compatible drain flashing. | Generic adhesives, tapes, or sealants are interchangeable with the specified system. |
| Thermoplastic membranes | Hot-air-welded seams, flashing sheets, prefabricated corners, attachment plates, drain clamping, and edge securement. | Welding temperature, speed, and accessories are universal across products or weather conditions. |
NRCA’s 2023 manual covers these membrane families because each has distinct construction details. Use the detail set for the actual product and assembly, not a drawing selected only because its roof shape looks similar.
Coordination checks before construction
1. Establish the governing requirements
- Identify the project jurisdiction and adopted building, plumbing, fire, energy, and stormwater provisions that affect the roof.
- Collect the contract drawings, specifications, wind and fire requirements, structural deck information, and reroofing constraints.
- Obtain the current membrane, insulation, drain, edge-metal, coping, and sealant instructions for the exact products proposed.
2. Draw the complete assembly
- Show the deck, vapor or air retarder where required, insulation layers, cover board, membrane, surfacing, and attachment.
- Detail every transition: drain, overflow, parapet, wall, curb, penetration, expansion joint, scupper, and perimeter edge.
- Identify each flashing layer, termination, fastener, plate, cleat, splice, sealant, and protection layer.
3. Check constructability
- Can installers reach the drain clamping ring and install the flashing without forcing wrinkles?
- Is there enough room between adjacent drains for the specified flashing?
- Can the parapet base flashing be installed continuously before coping is closed?
- Are substrates dry, clean, smooth, and strong enough for the specified attachment?
- Do metal joints, corners, and penetrations allow movement without tearing the membrane?
- Can future maintenance replace a drain clamping component, sealant joint, or coping splice without dismantling unrelated work?
4. Review field changes
Require a documented review whenever a drain moves, insulation thickness changes, a curb is added, a parapet height changes, or a specified product becomes unavailable. A small change can alter flashing height, fastener embedment, sump geometry, edge support, or compatibility. Substitutions should be accepted only after the responsible designer and manufacturers confirm the revised assembly.
Independent reader supportYour contribution helps us test, update, and keep practical guides available for everyone.Common failure modes and corrections
Membrane ends short of the drain flange
Symptom: exposed substrate or an improvised seal around the bowl. Correction: stop work, expose enough of the assembly to install the approved drain flashing and clamping arrangement, and replace contaminated or damaged materials rather than covering them.
Wrinkles are forced into a steep sump
Symptom: folds radiate toward the bowl or prevent even clamping. Correction: review the sump geometry and membrane forming method with the system manufacturer; do not flatten the wrinkle with random fasteners or excess sealant.
The Tool Desk
Outbyte Driver Updater FREEFix the driver behind crashes, sound loss and screen glitchesFind Drivers →Outbyte PC Repair FREERepair Windows errors before they cause bigger problemsFix Now →Primary and overflow drains are too close
Symptom: flashing strips overlap, fasteners are inaccessible, or the clamping rings interfere. Correction: revise the layout or sump before membrane installation so each drain retains the required flashing space.
Best Value
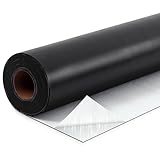
- Vulcanized Epdm Rubber: made from vulcanized EPDM rubber, This 50 mil thick roofing membrane delivers exceptional tensile strength is built to handle tearing while keeping its structure intact; Engineered to withstand UV exposure, extreme temperature fluctuations, harsh weather conditions without cracking, shrinking, or degrading over time
- Butyl Rubber Adhesive Backing: bonded with an aggressive butyl rubber adhesive layer, this membrane creates a permanent waterproof seal the moment it contacts the surface; the butyl backing conforms tightly to irregular surfaces, eliminating gaps and preventing water infiltration at every edge and seam
- Waterproof & Ice/water Barrier Protection: creates a fully sealed, watertight barrier that prevents water infiltration, ice dam leaks, and moisture damage. conforms seamlessly to irregular surfaces, corners, and penetrations to eliminate vulnerable leak points on flat and low-slope roofs
- Versatile Fit For Multiple Applications: each roll covers 39" x 10ft (3.1m x 1m) and is ideal for rv roofs, garden sheds, garages, patios, gutters, skylights, and hvac duct sealing. the flexible rubber membrane adheres to wood, metal, concrete, and most roofing substrates with a permanent bond
- Reinforced Construction with Finish: the EPDM sheet keeps its surface integrity under standing water weather exposure; The white release liner ensures clean, precise peel stick application every time; A reliable waterproofing solution suitable for both residential commercial roofing projects
Coping is treated as the only parapet waterproofing
Symptom: a metal cap is installed while base flashing is missing, discontinuous, or unprotected. Correction: install the specified membrane base flashing and counterflashing, then complete coping with its own movement and wind-securement details.
A generic sealant or accessory is substituted
Symptom: incompatible primer, tape, adhesive, metal, or sealant is used because it appears similar. Correction: verify chemical and physical compatibility in the current product instructions and obtain written acceptance before installation.
What the available guidance can—and cannot—specify
NRCA’s manuals provide organized reference details, terminology, and system-specific approaches. They do not replace the adopted code, the project’s structural and envelope design, or the current instructions for the products actually purchased. Exact flashing heights, slopes, drain dimensions, fastening intervals, clearances, and compatibility requirements remain project decisions.
Recommended Free Tools
The available references also do not establish a universal ranking of BUR, polymer-modified bitumen, liquid-applied, EPDM, or thermoplastic systems. No relevant performance statistic for leak frequency, service life, or comparative reliability is established here. Select among systems by matching the required assembly to the building, climate, loading, drainage, maintenance plan, and qualified installer—not by treating a publication’s detail count as a performance score.
Reference manuals for designers and installers
- NRCA Roofing Manual: Membrane Roof Systems—2023: low-slope applications, system components and configurations, reroofing, and 210 construction details covering the membrane families listed above.
- NRCA Architectural Metal Flashing and Condensation and Air Leakage Control—2026: 61 construction details plus background on architectural flashing, moisture, air leakage, and condensation control relevant to roof-edge and envelope coordination.
Use the editions current for the project and confirm any later revisions directly with NRCA, the authority having jurisdiction, and each system manufacturer.
Quick Recap
Product prices and availability are accurate as of the date/time indicated and are subject to change. Any price and availability information displayed on Amazon at the time of purchase will apply.

