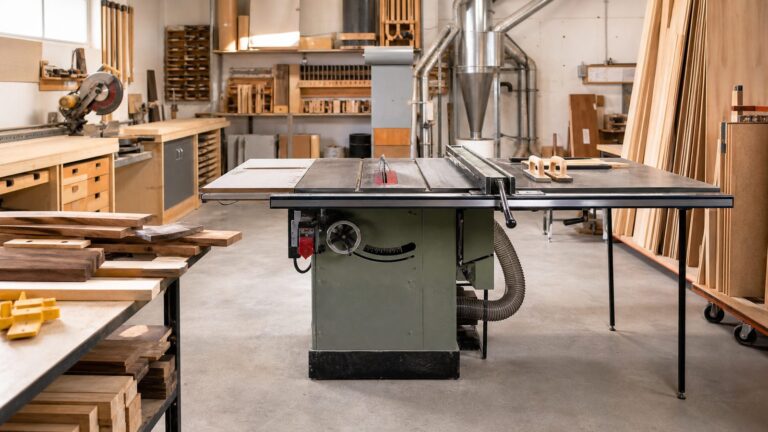
Kerf bending is the process of cutting repeated slots into one face of wood so the remaining web and narrow ribs can flex around a form. It is often simpler than steam bending or bent lamination, but it is not a strength-neutral shortcut: the cuts weaken the part, and the finished curve usually needs a backer, veneer, spline, or supporting substructure.
What kerf bending is
Kerf bending creates a curve by cutting a series of closely spaced slots, or kerfs, into one face of solid wood or plywood. The cuts remove most of the material through the thickness while leaving an uncut face as a thin, flexible web. The material between the kerfs becomes a row of narrow ribs that can flex around a prepared form.
As an Amazon Associate I earn from qualifying purchases.
The kerfed face is normally placed on the inside or hidden side of the curve. After the part is bent, it should generally be bonded to a backer, substructure, veneer, spline, or another supporting component. Removing material makes the part flexible, but also makes it weaker than an uncut board or panel. This is why kerf bending is best understood as a forming method, not a complete structural solution. WOOD Magazine’s kerf-bending overview describes the same basic relationship between the cuts, ribs, remaining web, and supporting construction.
Quick wins for a faster PC:
Clear out junk files and repair common Windows errorsFree Scan →Scan for outdated or missing drivers - takes under a minuteDriver Scan →Kerf bending compared with other ways to make a curve
| Method | How the curve is made | Main advantage | Main trade-off |
|---|---|---|---|
| Kerf bending | Repeated relief cuts let thicker stock flex around a form. | Requires relatively little specialized equipment and can use solid stock or plywood. | The cuts reduce strength, and the kerfed face may need to be hidden or covered. |
| Steam bending | Heat and moisture temporarily plasticize suitable solid wood. | Can produce a structurally continuous bent part when the species, grain, and process are suitable. | Requires steam equipment, careful timing, suitable stock, and a bending form. |
| Bent lamination | Thin strips are glued around a form and retain the curve after the adhesive cures. | Can produce a strong, clean-looking curved assembly. | Requires accurately prepared laminations, adhesive, many clamps or a pressing system, and a form. |
Choose kerf bending when the inside or rear face can be concealed, when a backer will carry the loads, or when making thin laminations or steam equipment is impractical. Choose another method when the curved part must remain highly resistant to bending, impact, or tension on its own.
#1 Best Overall

- 1. The complete set includes 4pcs 6" bar clamps,2pcs 12" bar clamps and 2pcs 6" spring clamps, which can meet different needs.
- 2. 6" clamps are suitable for spreaders up to 11-9/64" and 12" clamps are suitable for spreaders up to 17-21/64", which can provide customers with more choices.
- 3. Strong nylon body and high-quality hardened steel bar have good impact resistance and can fully withstand the high frequency of use at the construction site.
- 4. Quick-change button design allows the F-Clamp to also function as a spreader. Just push the red button,remove the jaws,then reverse it and put it back in place to get the spreader you want.
- 5. With up to 150 lbs of squeeze capacity and metal ratchet construction,our pole clamps are perfect for woodworking and home repairs. Lightweight yet strong and durable,it can be used for a long time. Pad features a flexible material and a non-slip texture that enhances the overall clamping force. The quick release design makes your functions easier.
Plan the bend before cutting
Do not begin by guessing a kerf interval and cutting the final workpiece. First define:
- the finished radius and sweep angle;
- the length of the curved section;
- the stock thickness and material, including the ply construction if it is plywood;
- which face will remain visible;
- the saw and blade you will use;
- the planned kerf width, spacing, and depth; and
- the backer, veneer, spline, cabinet structure, or other assembly that will support the curve.
The form should be prepared before the final stock is cut. For a curved apron, cabinet side, arch, or panel, the form may be temporary, but the final supporting construction must be considered from the beginning. A kerfed board that is expected to remain freestanding is likely to be a poor application unless the design provides sufficient additional reinforcement.
Kerf spacing and radius
Spacing is the primary control over how smoothly and tightly the part bends. Wider spacing leaves broader, flatter sections between cuts. Closer spacing creates a smoother approximation of the curve and generally allows a tighter bend, but it also leaves narrower ribs that are easier to break.
The Tool Desk
Outbyte PC Repair FREEClear out junk files and repair common Windows errorsFree Scan →Outbyte Driver Updater FREEScan for outdated or missing drivers - takes under a minuteDriver Scan →The layout depends on more than the target radius. Blade width, stock thickness, cut depth, remaining web thickness, material species, grain direction, plywood veneer structure, and the required sweep all affect the result. The Fine Woodworking discussion of calculated kerfs identifies these variables as inputs for estimating a layout. Treat any calculator result as a starting point, not a guaranteed recipe.
A useful way to understand the limit is the closed-kerf limit. As the part bends, the kerfs on the inside of the curve close. Once they have closed, the part cannot bend substantially farther without crushing or breaking the ribs and remaining web. If the kerfs are too far apart, the uncut areas between them become visible flats when the curve is formed. Closer spacing can reduce those flats, but it cannot remove the need for a strong web and accurate cutting.
Kerf depth and the remaining web
Cut from the face that will be hidden or placed on the concave side, and stop short of the face that must remain intact. The uncut material is the hinge-like web that holds the part together. Cutting through it turns the workpiece into separate strips or broken sections rather than one controllably flexible component.
Rank #2

- Practical Gifts for Men: WETOLS corner clamps come in a gift-ready box, making them a practical gift for men, dads, husbands, and grandpas. This set of 4 wood clamps is ideal for aligning, nailing, welding, screwing, cabinet making, box assembly, picture frames, and woodworking DIY projects
- Quick and Accurate 90-Degree Alignment: Quickly align and hold boards and frames at a 90-degree angle. These corner clamps fit boards from 3/16" to 3/4" thick and are suitable for both 90-degree corners and T-joints
- Durable Polyamide Material: WETOLS corner clamps for woodworking are made of polyamide material for durability and reliable use in various woodworking projects
- Strong Flexible Spring: Strong spring tension helps keep boards securely in place while screwing or gluing them together, making assembly easier and more convenient
- Single-Handed Operation: The WETOLS right angle clamp features a lightweight design and can be easily operated with one hand. A practical addition to any woodworking tool collection for DIY and woodworking projects
There is no safe universal web measurement for every species, thickness, blade, or plywood panel. In one plywood example, WOOD Magazine illustrates leaving approximately 1/16 inch of material, but the appropriate depth depends on the stock and its ply structure. Its kerf-bending video is best read as an example of the process, not as permission to use that dimension blindly.
Use a test piece made from the same material and cut with the same blade, spacing, and depth. The web must be thin enough to flex but continuous enough to resist splitting. If the test piece fractures, the remaining web may be too thin, the ribs may be too narrow, the radius may be too tight, or the material may be unsuitable. If it will not reach the target curve, the cuts may not be deep enough or the spacing may be too wide.
Step-by-step kerf-bending process
1. Build the form and prepare the support
Make the bending form to the required curve and ensure that it is rigid enough to resist clamping pressure. Include room for clamps, cauls, and the final backer or mating piece. If the form has a sharp transition at either end, add bevels or shaped blocks so clamps do not slide off as pressure is applied.
Prepare the backer or substructure before cutting the final part. A solid mating piece, veneer, spline, or cabinet assembly can help distribute loads and preserve the curve after forming. The supporting element should be designed as part of the finished component, not treated as an emergency repair after the kerfed piece has been weakened.
2. Make one or more test pieces
Use scrap from the same species or sheet construction and match the final operation as closely as possible:
Windows Errors? Fix Them Before They Spread
Repair common Windows errors and clear accumulated junk for a smoother, more stable PC - no reinstall needed.Free scan · no reinstallCrashes, No Sound, or Screen Glitches?
Random freezes, missing sound and display glitches usually trace back to one bad driver. Find and replace yours safely.Free scan · under a minute- same thickness and grain or ply orientation;
- same blade and saw setup;
- same kerf width and spacing;
- same target depth and remaining web; and
- same approximate bend radius.
Form the test piece around the actual or a representative section of the form. Inspect both the bend and the visible face. Look for broken ribs, split veneer, pronounced flats, and a web that is so thin it tears during handling. Make more than one test when the stock is expensive, the radius is tight, or the finished part would be difficult to replace.
Rank #3

- High Quality : CRAFOM 90 Degree Corner Clamping Squares is made of high-quality aluminum alloy material, Anodized red surface, resistant to corrosion, wood working tools durable and long service life
- Multiple uses : For woodworking, right-angle clamps are used to create and fix wooden corners perfectly. Aluminum corner clamps help in framing, making cabinets, and installing furniture, especially making sure to install them at a 90-degree angle
- Two Different Sizes: Corner Clamps Including 3-inch and 5.5-inch sizes, each size contains 4 pieces, Excellent for wood working of various sizes and different needs
- Easy to Store and Use : With Crafom 90 Degree Positioning Squares Installing a wooden frame at a 90 degree angle has become easy, All parts are stored and organized inside a plastic storage case. It is enough to place the Corner Clamping Squares next to the two pieces to be combined, then insert the Right Angle Screws into one of the corner clamp holes, then secure it with an M8 plastic nut
- Great choice as a Gift : 90 degree carpentry clamps will be the best gift for woodworkers or any Handyman, because they have two sizes (3" 5.5") which makes working on small or large frames easy. In addition to their high quality, they come in a colorful paper box package, which gives them beauty and elegance compared to others
3. Establish a repeatable indexing method
Every kerf should be parallel and consistently spaced. On a table saw, an auxiliary miter-gauge fence with an indexing pin can create a step-and-repeat layout: make the first cut, place that cut over the pin, and make the next cut. The exact jig must be built for the saw and workpiece; it should not interfere with the blade, guard, riving knife, or other safety equipment.
For a long or wide part, a track saw or circular saw may make handling easier because the work can remain stationary and fully supported. Woodworker’s Journal’s track-saw approach emphasizes supporting unusually large workpieces rather than trying to balance them through a small saw setup.
Mark the start and end of the bend and keep the uncut margins outside the curved region. Witness marks on the workpiece and form will later make the dry fit and glue-up repeatable.
What’s actually slowing this PC down?
Pick the symptom - the matching free tool is one click away.
4. Cut the kerfs without breaking through
Set the depth using a test cut, then make the repeated relief cuts from the hidden or concave face. Keep the workpiece stable and supported for the entire cut. Do not rely on the final web to hold a poorly supported piece flat against the saw or guide.
The blade’s kerf is part of the layout. A thin-kerf table-saw blade may be useful for making closely spaced relief cuts, but thin kerf is not automatically compatible with every saw. Before selecting a replacement blade, verify its diameter, arbor, kerf and plate thickness, tooth configuration, maximum rated dimensions, and compatibility with the saw’s riving knife. The manufacturer documentation for blades such as DEWALT’s DW9055 shows why these dimensions are product-specific rather than interchangeable.
Never cut through the web simply to make the bend easier. If the test shows that the radius cannot be reached, revise the spacing, depth, material, or design and test again.
5. Dry-bend and dry-fit the assembly
Before applying adhesive, flex the kerfed part around the form. Align the witness marks and check that the ends land where intended. Confirm that:
Do these 3 things before closing this tab:
1Clear out junk files and repair common Windows errors2Fix the driver behind crashes, sound loss and screen glitches3Repair Windows errors before they cause bigger problemsRank #4
![Housolution Right Angle Clamp, [4PACK] 90° Aluminum Alloy, Silver Gray](https://m.media-amazon.com/images/I/51fhtK3TMXL._SL160_.jpg)
- 【Premium Quality Clamps for Woodworking】: Woodworking gifts for men. Sturdy 90 degree wood corner clamps, made of premium aluminum alloy die-casting material with heat treated rust proof coating, ensure abrasion-resistant, heavy-duty, and long-lasting use.
- 【70mm Clamping Range】: Maximum clamping range is approx. 2.75in/70mm; jaw width: 3.74in/95mm; jaw depth: 1.4in/35mm. It can accommodate metal tubes, steel rods, wood, thick glass, acrylic pieces, and more. It is wood working tools and equipment commonly used in daily life as cabinet clamps, etc. Corner clamps for woodworking are a great tool to make woodworking projects easier.
- 【Adjustable Swing Jaw Design】: The single-handle jaw of the Corner Clamps for Woodworking can be rotated in two-way, which allows two different thicknesses of rods or blocks to be joined at an angle of 90 degree. The design will fix your work pieces precisely. Note: Pay attention to the size before purchasing, this product is suitable for large woodworking projects. During use, it is necessary to adjust the previous direction and position of the wood to prevent it from being clamped tightly.
- 【Ergonomic TPR Coated Handle】: Clamps for woodworking have rubber handles. Rubberized single handle offers a comfortable grip and prevents slip. Solid and anti-skid, helps to set up instantly and secure quickly.
- 【Versatile Use】: Housolution clamps for woodworking jig is perfect for aligning, nailing, drilling, woodworking, welding, screwing, making cabinets, assembling furniture, furniture repair connection, building wooden boxes, picture frames, birdhouse, mailbox, DIY woodworking, and dresser drawers, etc.Gifts for Men, wood worker gifts, woodworking gifts, tool gifts.
- the part reaches the form without excessive force;
- the visible face does not develop unacceptable facets or split veneer;
- the backer contacts the part as intended;
- clamps can reach every section of the curve;
- cauls distribute pressure without crushing the ribs; and
- the form, part, adhesive, and clamps can be assembled within the adhesive’s working time.
A dry run is particularly important for an unusual glue-up. WOOD Magazine recommends this approach because it exposes alignment and clamping problems before adhesive makes them difficult to correct.
6. Glue or fasten the part to its support
Apply adhesive to the mating surfaces according to the adhesive manufacturer’s instructions, then bring the kerfed part and backer together on the form. Clamp progressively from one area to the next so the curve seats gradually and a large gap is not trapped at the opposite end. Cauls can spread pressure and help prevent clamp marks or localized crushing.
A woodworking PVA glue may be appropriate for a compatible wood-to-wood joint, but the correct adhesive depends on the materials, joint fit, moisture exposure, temperature, and project requirements. Rockler’s bending-wood guidance describes holding a manually formed part to a curve with glue when it is supported by a solid mating piece.
Leave the assembly clamped for the period required by the adhesive and conditions. A 24-hour clamp period is used in one WOOD Magazine example, but it is not a universal cure time. Follow the adhesive label or technical data, including its requirements for temperature, humidity, open time, and full cure.
Common problems and corrections
| Problem | Likely causes | What to change |
|---|---|---|
| The part breaks while bending | Kerfs are too deep, ribs are too narrow, the radius is too tight, or the material is prone to splitting. | Leave a thicker web, increase spacing cautiously, use a larger radius, change the material, or add supporting construction. Retest before cutting the final part. |
| The part will not reach the form | Kerfs are too shallow or too far apart; the closed-kerf limit has been reached. | Adjust depth or spacing based on a test piece. Do not force the final part past the point where ribs or web begin to fracture. |
| The visible curve has flats | Spacing is too wide, or the part has been bent to the closed-kerf limit. | Use closer spacing on a new test, or fair the surface very lightly after it is supported. Avoid sanding through the web. |
| The face looks wavy or irregular | Kerf spacing or depth varies, the form is inaccurate, or clamp pressure is uneven. | Improve indexing, depth control, form accuracy, and caul coverage. Inconsistent flexibility can also indicate variable plywood construction. |
| The veneer splits | The web is too thin, the bend is too tight, or the veneer construction does not tolerate the selected geometry. | Use a less aggressive bend, adjust the depth, test the same sheet construction, or place the damaged face where it will be concealed. |
| Clamps slip during glue-up | The form or cauls lack a positive bearing surface. | Add beveled blocks, shaped cauls, or mechanical stops and repeat the dry fit before applying adhesive. |
Tools and materials checklist
- Rigid bending form matching the required radius.
- Suitable saw with a stable guide or fence.
- Compatible blade selected for the saw and the planned kerf width.
- Indexing fence, stop, or other repeatable spacing method.
- Stable work support, especially for long or wide stock.
- Clamps and shaped cauls for the curve.
- Backer, veneer, spline, or finished substructure.
- Wood adhesive appropriate for the joint and service conditions.
- Scrap stock for calibration tests.
- Measuring, marking, and alignment tools.
Model-specific zero-clearance inserts can support material close to the blade, but they must match the exact saw model and be installed in a way that preserves the saw’s intended safety hardware. They are not universal accessories. For example, Bosch’s TS1006 insert documentation is specific to the listed saw system.
Safety requirements
Repeated cuts do not make this a low-risk operation. Follow the saw and blade manufacturers’ instructions, use guards and safety hardware as designed, maintain firm support for the workpiece, and disconnect power before changing a blade or making setup adjustments.
Best Value

- Heavy-Duty Construction: Made from nickel-plated carbon steel with a heat-treated body, this locking sheet metal clamp provides exceptional durability, wear resistance, and high toughness, making it perfect for various tasks such as metalworking, woodworking, and welding.
- Even Pressure Distribution: Featuring wide, flat jaws, these duckbill welding pliers provide even pressure distribution. The large, flat jaw design (jaw width: 100 mm / 3.93 in) ensures a firm grip on thin sheet metal, steel, or wood without marring the surface, making it a reliable grip plier for welding, bending, and grinding tasks.
- Adjustable Locking Jaw Design: The rear adjustment screw allows you to change the jaw opening to fit materials of different thicknesses (adjustable range: 0.1–2 in) and precisely regulate the clamping pressure. Once set and locked, the duckbill pliers will securely hold the workpiece without requiring continuous manual force.
- Ergonomic Design for Easy Operation: Engineered with an ergonomic handle, this welding plier helps to minimize hand fatigue. The built-in spring mechanism facilitates effortless one-handed operation, making the sheet metal clamp exceptionally easy to release and operate.
- Versatile Applications: Ideal for metalworking, welding, and woodworking, these versatile sheet metal clamps are perfect for bending, shaping, crimping, and securing materials. Whether you're working on automotive repairs, construction projects, or DIY tasks, this duck bill pliers tool is perfect for precise operation.
- Check blade diameter, arbor, kerf, plate thickness, and riving-knife compatibility before installation.
- Keep the workpiece supported and controlled; do not balance a long panel on a small table.
- Use a proper fence, guide, or track rather than making repeated freehand cuts.
- Keep hands away from the blade path and plan how the work will be supported before the cut begins.
- Stop and correct binding, shifting, or unstable support instead of forcing the cut.
- Do not defeat or remove a riving knife or other required safety component merely to fit a blade or jig.
Incorrect blade dimensions can interfere with a riving knife and contribute to binding or kickback. Review the relevant manufacturer blade-compatibility guidance. Also, do not mount a handheld circular saw to a table as a substitute for a properly designed table saw; Bosch safety material specifically warns against that practice.
When kerf bending is the wrong choice
Use another method when the component must carry significant structural loads without a backer, when both faces must be clean and fully exposed, or when the curve is too tight for the material to tolerate without a very thin web. Kerfing can also be a poor choice when the visible face cannot accept slight facets and there is not enough remaining material for safe fairing.
Recommended Free Tools
A supported kerf-bent panel can be an efficient solution for cabinet work, curved aprons, decorative arches, wrapped panels, and similar construction. Its success depends less on a single “correct” spacing number than on matching the geometry to the material, testing the layout, cutting consistently, and designing the support into the finished assembly.
Frequently Asked Questions
What is kerf bending?
Kerf bending uses a series of closely spaced slots cut into one face of solid wood or plywood. The uncut face remains as a thin web, while the ribs between the slots flex around a form. The kerfed part usually needs a backer, veneer, spline, or other support because the cuts reduce its strength.
How deep and how far apart should kerf cuts be?
There is no universal spacing or depth that works for every project. Radius, sweep angle, stock thickness, blade width, material, kerf spacing, and remaining web thickness all matter. Use layout calculations as a starting point, then test matching scrap before cutting the final part.
Does a kerf-bent piece need a backer?
Usually, yes. Kerf cuts remove material and leave a thin web, so a kerf-bent part is generally weaker than uncut stock. Bonding it to a backer, substructure, veneer, spline, or other supporting assembly helps preserve the curve and distribute loads.
Free tools Windows power users keep installed
One-click scans. No signup required.
Can I use a thin-kerf blade for kerf bending?
A thin-kerf blade can be useful because blade width affects the kerf geometry, but compatibility must be checked for the specific saw. Verify diameter, arbor, kerf and plate thickness, tooth configuration, maximum dimensions, and riving-knife requirements before installation.
The Bottom Line
Kerf bending is a practical way to form a curve from solid stock or plywood, but the cuts trade strength for flexibility. Build the form first, calculate spacing only as a starting point, calibrate depth and spacing on matching scrap, cut from the hidden face without breaking through, and bond the finished curve to a backer or other supporting structure.
Quick Recap
Product prices and availability are accurate as of the date/time indicated and are subject to change. Any price and availability information displayed on Amazon at the time of purchase will apply.