Quick wins for a faster PC:
Fix the driver behind crashes, sound loss and screen glitchesFind Drivers →Clear out junk files and repair common Windows errorsFree Scan →Scan for outdated or missing drivers - takes under a minuteDriver Scan →Store lumber flat, level, elevated and ventilated. Set the pile on dry, aligned sleepers or stickers, keep it away from soil and slab moisture, shield the top from rain and sun, and leave the sides and ends open to moving air. A ventilated garage or shed is the safest choice for kiln-dried and appearance-grade boards; a roofed, open-sided stack is suitable for green or partly seasoned stock.
The correct moisture level depends on the species, thickness, climate and final use. Measure boards when they arrive and again before installation rather than relying on a cover or a single universal percentage.
As an Amazon Associate I earn from qualifying purchases.
Why lumber warps or grows mold in storage
Boards change dimension as their moisture content moves toward equilibrium with the surrounding temperature and relative humidity. If one face dries faster than the other, the board cups, bows, twists or checks. Uneven support allows the same distortions even when the wood is otherwise dry.
Recommended Free Tools
Mold needs moisture, limited drying and time. Rain entering a pile, condensation under an airtight tarp, damp soil, or a wet concrete slab can keep surfaces above the moisture level at which mold becomes likely. A pile that is protected from liquid water but cannot release humid air can still deteriorate.
#1 Best Overall

- HUMIDITY SENSOR: Our handy meter tool can quickly determine what level of remediation is needed to keep your family safe from black mold. High levels of dampness that go untreated are the leading cause of harmful fungus growth in the home.
- WATER LEAK DETECTOR: Finding the moisture content in your wood or drywall is the first step in early prevention. Continuously check and test suspicious water stains around the house so you can determine whether the area is wet or has already dried. Low, medium and high moisture tones and on-screen icons, Reading HOLD button
- MOISTURE READER: The mold test features large 0.3" high digits in a backlit LCD for quick and easy detecting. Our mildew scanner includes extra 8mm stainless steel pins, a protective cap that doubles as a calibration checker, and a “9V” battery.
- MOLD TESTER: For an accurate test read, stick the stainless steel pins into the surface of what you're measuring. The gauge has a broad range of 5 - 50% for wood and 1.5 - 33% for building materials such as concrete and drywall.
- GENERAL TOOLS: We're a recognized leader in designing and developing specialized precision tools dedicated to delivering exceptional customer service. We encourage artisans and DIYers to work smarter, measure better, and repair more productively.
Storage therefore has four jobs: keep liquid water out, provide a level load path, allow air to pass through the pile, and keep the wood near the humidity it will experience in service.
Choose the storage location by lumber type and end use
Match the storage environment to the product you will make and to the way the wood was dried. Interior trim, flooring, cabinet parts and machined hardwood are least tolerant of repeated outdoor moisture cycles. Exterior finish lumber can tolerate a protected, unheated shed, while green or partly seasoned boards need open stickered storage so they can continue drying without trapping water.
| Storage option | Protection from liquid water | Airflow | Support and levelness | Humidity match |
|---|---|---|---|---|
| Garage or controlled room | Highest protection when the building stays dry | Provide circulation around the pile; do not push boards tightly against damp walls | Use a level rack, sleepers or pallets; keep every support line aligned | Best for kiln-dried interior, furniture, flooring and cabinet stock |
| Closed shed | Protects from rain and direct sun if the roof and walls remain weather-tight | Ventilate the shed; avoid sealing wet boards inside | Raise the pile above the floor and keep the base level | Suitable for protected exterior finish, siding and millwork |
| Roofed outdoor stack | Top cover blocks precipitation and sun; open sides cannot stop wind-driven rain completely | Excellent when ends and sides remain open | Requires robust, aligned sleepers and stickers | Appropriate for green or partly dried lumber, not the first choice for interior finish stock |
The USDA Forest Products Laboratory’s Wood Handbook describes open piling on stickers under a tight roof for green or partially seasoned lumber. It also cautions that long storage of solid-piled lumber is not recommended because rain is difficult to keep out completely.
Use a garage or controlled room for interior work
Bring kiln-dried boards intended for interior installation into a closed, dry space where the temperature and relative humidity resemble the finished room. This limits the repeated wetting and drying that causes movement. Keep the pile away from plumbing leaks, exterior doors that admit rain, and uninsulated walls that can condense moisture.
Rank #2

- FIND HIDDEN WALL MOISTURE EARLY — Check suspicious drywall and building surfaces after a leak, water stain, or other moisture concern. Detect abnormal moisture before a small issue develops into more extensive damage and costly repairs
- CHECK BEFORE YOU REPAIR — Don't rely on a wall looking or feeling dry. Use the moisture meter to check questionable areas before painting, repairing, or covering the surface, helping you make decisions based on actual moisture readings.
- CHECK FIREWOOD BEFORE YOU BURN — Test firewood before placing it in your fireplace or wood stove. Knowing the moisture level of your firewood helps you choose wood that is ready for burning and avoid relying on appearance alone.
- PIN-TYPE TESTING FOR DIRECT MEASUREMENTS — The contact pins penetrate the material to measure moisture inside wood and building materials. This makes it useful for checking areas where surface conditions may not tell the whole story.
- ONE TOOL FOR TWO IMPORTANT HOME CHECKS — Keep it ready for two practical jobs: checking walls for hidden moisture and checking firewood before burning. A simple way to make informed decisions before a moisture problem becomes expensive or wood goes into the fireplace.
Use a shed for protected exterior stock
A closed, unheated shed works for exterior finish, siding and millwork when the stock is raised above the floor and the building excludes precipitation. Leave enough clearance for air to circulate around the pile. A shed that is technically enclosed but damp is not an improvement over a well-roofed open stack.
Use an open, roofed stack for green or partly seasoned boards
Green and partly seasoned lumber needs a controlled drying path. Stack it on stickers under a roof or top cover, with open ends and sides. Do not wrap the pile tightly in plastic; condensation can wet the boards even when no rain reaches them.
Build a stack that carries the load evenly
Most storage failures begin at the base. A flat stack cannot compensate for a sinking support, a short sleeper, or stickers that do not line up from course to course. Build the support system before moving the boards.
- Select a dry site. Choose the driest part of the garage, shed or yard. Avoid depressions where rain collects and areas beneath dripping eaves or downspouts.
- Raise the pile. Use sleepers, pallets or a rack so no board touches soil. Elevate the pile even on concrete because a slab can transfer moisture into wood. For kiln-dried exterior finish and millwork, the Wood Handbook specifies at least 150 mm (6 in.) above a paved floor or 300 mm (12 in.) above an unpaved floor.
- Level the supports. Shim or reset sleepers until they form a stable, level plane. A level base prevents a constant bending load from being built into every course.
- Make support lines continuous. Put a sleeper or rack beam under each sticker line. Keep those lines in the same position from the bottom course to the top so the load travels straight down.
- Sort the boards. Group stock by species, thickness and approximate length. Keep unusually heavy or wide boards where the support pattern can carry them without crushing the stickers.
- Lay the first course flat. Place boards with their broad faces supported. Do not allow one end to project far beyond the supports; unsupported overhang encourages sagging.
- Add stickers between courses. Lay dry, straight strips at right angles to the boards. Every sticker should sit directly over a sleeper or the sticker below it.
- Check each layer. Before adding the next course, look along both edges for rocking boards, gaps or a sticker that has shifted. Correct problems while the pile is still low.
- Finish with a rigid top cover. A roof or top board should shed water without pressing a concentrated load into the lumber. Secure it against wind while keeping the pile’s sides and ends open.
Use dry, straight stickers
Stickers create the air channels that let moisture leave the pile evenly. They must be straight enough to keep courses parallel and dry enough not to stain or re-wet the boards. USDA guidance recommends kiln-dried sticker material to reduce sticker stain and thickness changes. Never use green, moldy or visibly wet strips between valuable stock.
Rank #3
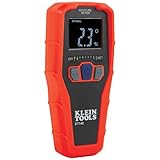
- WATER LEAK DETECTOR detects relative moisture content from leaks and flooding
- PINLESS MOISTURE METER measures relative moisture content in building materials
- NONDESRUCTIVE DETECTION up to 3/4-Inch deep using Electromagnetic field (EMF) technology
- USE ON DRYWALL, MASONRY, HARDWOOD, AND SOFTWOOD; calibrated for these materials only
- REVERSE-CONTRAST DISPLAY for easy viewing of reading and nine LED bars to indicate moisture range
Set sticker spacing for the stock
Spacing is a practical starting point, not a universal law. The USDA cites about 3 to 4 feet for softwoods and about 2 feet for many 4/4 hardwoods. Species, thickness and crushing resistance can require closer spacing. Put end stickers close to the board ends to support them before they can sag.
| Stock and condition | Practical sticker spacing from USDA guidance | Placement detail |
|---|---|---|
| Softwoods | About 3–4 ft | Keep end stickers close to each end; reduce spacing for flexible or heavy boards |
| Many 4/4 hardwoods | About 2 ft | Use closer spacing when the species, width or crushing resistance demands it |
| Any unusually thick, wide or heavy stock | Not fixed by the guidance | Increase the number of support lines so the boards remain flat without crushing stickers |
Measure spacing along the board length, not diagonally. If a board bridges a gap and visibly bends when you press it, add a support line rather than hoping the upper courses will flatten it.
Cover the pile without trapping condensation
Protect the top from precipitation and direct sun, but treat the cover as a roof rather than a sealed bag. A rigid roof, corrugated panel or well-supported top sheet sheds water while allowing air to enter from the sides. An outdoor tarp can work when it covers the top and is secured above the boards, but its edges should not be taped or tied airtight around the pile.
- Keep the tarp or roof above the top course so air can move under it.
- Let both ends and the long sides remain open to cross-ventilation.
- Pitch the cover enough that rain drains away instead of pooling.
- Secure the cover against wind without allowing straps or weights to crush board edges.
- Inspect after storms for wind-driven rain, pooled water and damp stickers.
The Wood Handbook’s wording is direct: “If green or partially seasoned, the lumber should be open piled on stickers and protected from sunshine and precipitation by a tight roof.” A fully wrapped tarp defeats the open-pile principle by trapping humid air and condensation.
Rank #4

- 🌲【Accurate and fast measurements reveal hidden water leaks】: It has 2 high-precision pins that can penetrate the surface to be tested and quickly measure moisture content to estimate potential moisture increase throughout the home. COCZOW moisture meter is the ideal tool for measuring moisture.
- 🌲【Professional Wood Moisture Meter】: 6 calibrated scales. Our moisture meter is a great tool for manufacturers, floorers, inspectors and wood suppliers to quickly and easily measure moisture content (% Mc). You can quickly determine if the moisture content is low (5-12%), medium (12-17%) or high (17-60%). Checking moisture content prevents wood from cracking and warping.
- 🌲【Widely Used】: PM6811A moisture meter is ideal for carpentry, building construction, agricultural restoration and floor laying. Measure moisture content of wood products such as hardwood floors, cabinets, furniture, lumber, lath, beams, plywood, panels, composite boards, window frames, forestry wood, coils, building materials, etc.
- 🌲【User-friendly】: With LCD backlight, the backlight color is divided into three types of green, yellow and red, or display the moisture content of different measurement types. Hold function, maximum/minimum moisture measurement function and 5-minute automatic shutdown function (no power supply required).
- 🌲【Why choose COCZOW Wood Moisture Meter】: LED display function, large measuring range (wood: 2.0%-75.0%. Building materials: 1.5-30%), durable stainless steel needle, heat insulation, light weight and easy to carry. Get professional and accurate results with Peakmeter Wood Moisture Tester.
Concrete floors, soil and elevation
Soil is an obvious moisture source, but concrete is not automatically dry from a board’s point of view. Slabs can transmit moisture into lumber resting directly on them. The DOE/Pacific Northwest National Laboratory Building America Solution Center advises, “Avoid storing materials on the ground,” and also says to protect materials from the weather.
On a slab, place sleepers, pallets or a rack beneath the pile. Keep the bottom boards off the floor by the same level standard used for the rest of the stack. If the slab has a history of dampness, leaks or condensation, solve that problem before storing valuable wood; a sheet laid directly on the concrete does not create a reliable drying space.
Outdoors, use the larger clearance specified for unpaved surfaces: at least 300 mm (12 in.) for kiln-dried exterior finish and millwork. Raising the stack also keeps splashback and surface runoff from reaching the bottom course.
Do these 3 things before closing this tab:
1Repair Windows errors before they cause bigger problems2Scan for outdated or missing drivers - takes under a minute3Clear out junk files and repair common Windows errorsUse moisture content as a decision, not a guess
Measure lumber when it arrives and again before installation. A moisture meter gives you a way to identify a wet board, compare the pile’s drying progress and decide whether the material is ready for an enclosed space. Follow the meter’s instructions for the species and thickness; readings are estimates, not a substitute for understanding the service environment.
Best Value

- Easy to Read with Large LCD Screen: This wood moisture meter is easy to get an accurate reading from the surface of materials and displays accurate moisture readings on the 2.25" big screen. Use this handheld meter to check the moisture content in firewood or drywall, it can stand up on the table, the moisture content is displayed with a bar graph and percentage (_%RH) on the screen. Date Hold and Max/Min function is used to freezes readings, useful for writing down data
- Tricolor Backlight Display, Easy to Use: TopTes Moisture Meter TS-630 features an HD tri-color backlight to easily know if the wood/wall humidity is Dry, Moist, or Wet. Green backlight for Low moisture, orange backlight for middle moisture, and red moisture for high moisture. After selecting the mode, and putting pins into the firewood, easy and quick to get a visible alert from the clear screen
- Seven Calibration Scales, Two Material Mode: It is designed with built-in characteristic parameters of 7 calibration scales for wood and building material, ranging from 0.0% to 57%. This humidity meter is perfect for woodworking, water damage restoration, building construction, and home renovation. Easily Check and test suspicious water leaks around the wall/floor so you can quickly determine what level of remediation is needed
- Pin Type & Battery Operated: TopTes TS-630 moisture meter is a pin-type moisture meter and operates on batteries. With a high precision multi-material sensor, DON’T need calibration. It’ll support an accurate reading after inserting the stainless steel pins into the surface of the wood or building materials. It will auto shut off after 10 minutes of non-use to help save energy. A low-battery indicator will appear on the screen when the battery is running out
- What's in the Box: One TS-630 Moisture Meter, three AAA Batteries, one User Manual, one Carry Pouch, one Pair of Test Pins, one Mini Wrench
| Figure | What it applies to | How to use it |
|---|---|---|
| 6–12% moisture content | USDA Forest Products Laboratory, 2025: kiln-dried finish grades of softwoods and hardwoods | A useful description of kiln-dried finish stock, not a universal installation target for every climate or product |
| 12–15% moisture content | USDA Forest Products Laboratory, 2025: minimum range for thoroughly air-dry lumber in the United States; average values can be somewhat higher | Describes air-dried material; do not assume it is conditioned for an interior room |
| 18% maximum | EPA 2018, as cited by the DOE/Pacific Northwest National Laboratory Building America Solution Center, before enclosure | A context-specific upper limit for enclosing building materials, not a household rule for every board |
| 19% maximum | Southern Pine Inspection Bureau’s cited grading rule for dimension lumber 2 inches or less; year not stated on the accessed page | Applies to that Southern Pine grading context, not to all species or uses |
Oklahoma State Extension explains that equilibrium moisture content changes with surrounding relative humidity and temperature. That is why no single “safe” percentage can be assigned to every home, species, thickness and end use. A floor in a dry heated room, a cabinet in a humid coastal house and exterior siding have different service conditions.
Measure at three useful moments
- On arrival: Take readings from representative boards and note any visibly wet, stained or moldy pieces separately.
- During storage: Recheck boards after a weather change or after moving them from an outdoor stack into a building. Look for a trend rather than one isolated number.
- Before installation or enclosure: Confirm that the boards are appropriate for the final room and that no board is still visibly wet. Do not enclose wet material on the assumption that a cover will dry it later.
Condition lumber for its final use
Storage and acclimation are related but not identical. A board can be dry by one measurement and still be mismatched to the humidity of the room where it will be installed. For interior work, keep the pile in the closed space where it will serve, with supports that maintain flatness and with enough air around the stack for readings to stabilize.
Do not move a cold, damp outdoor pile directly into a finished room and seal it behind trim or flooring. First inspect it, measure it and allow the environment to bring the stock toward the room’s equilibrium. The required endpoint depends on the room’s temperature and relative humidity, so follow the flooring, cabinet, millwork or coating manufacturer’s specified range when one is provided.
Windows Errors? Fix Them Before They Spread
Repair common Windows errors and clear accumulated junk for a smoother, more stable PC - no reinstall needed.Free scan · no reinstallOutdated Drivers Are Slowing You Down
One free scan finds every outdated or missing driver and matches the right update for your exact hardware.Free scan · exact hardware matchExterior lumber has a different target because it will continue to experience outdoor humidity swings. A closed, unheated shed protects it from direct weather while avoiding the extreme conditioning mismatch of a heated interior.
Prevent mold before it starts
- Start with clean stock. Separate boards with existing mold, mud or trapped water instead of burying them in the pile.
- Keep every contact surface dry. Wet sleepers and stickers can transfer moisture and stain into otherwise sound lumber.
- Maintain airflow. Sticker channels must remain open; do not fill the sides with stored materials or wrap the pile tightly.
- Inspect the bottom and ends. These areas receive splashback and have the greatest risk of contact with damp supports.
- Control the building. Repair leaks, improve ventilation and prevent condensation before storing finish stock in a garage or shed.
- Act on wet weather quickly. After a storm, remove standing water from the cover, reset displaced tarps and check whether wind-driven rain reached the pile.
Visible mold or persistent wetness is a condition to investigate, not a reason to enclose the boards. Identify the moisture source, isolate affected material and determine whether the wood has regained a suitable moisture level before it is used.
Troubleshoot common storage failures
| Symptom | Likely storage problem | Correction |
|---|---|---|
| Boards bow between supports | Sticker or sleeper lines are too far apart, not aligned, or the base is not level | Rebuild on a level base, align every support vertically and add support lines appropriate to the stock |
| Ends curl or sag | End stickers are too far from the board ends | Place end stickers close to the ends and support the overhang |
| One face cups or twists | Uneven drying from sun, rain, a blocked side or an airtight cover | Restore open airflow, shade the top, keep the pile level and remove the moisture source |
| Dark patches or musty odor | Condensation, wet stickers, slab moisture or poor ventilation | Separate affected boards, dry the storage area and correct the source before restacking |
| Bottom course is damp | Direct contact with soil or concrete, splashback or insufficient elevation | Raise the stack on dry sleepers; use at least 6 in. above paved floors or 12 in. above unpaved floors for the cited exterior-finish guidance |
| Boards are dry outside but wet inside the pile | Air cannot reach the inner courses, or the pile was wrapped tightly | Restack with dry stickers, open the sides and ends, and use a roof-like top cover |
A repeatable home-storage checklist
- Identify the lumber’s species, thickness, drying condition and final use.
- Choose a dry garage, suitable shed or roofed outdoor location that matches that use.
- Prepare level sleepers, pallets or rack beams; never rely on soil or bare concrete.
- Set support lines under the planned sticker lines and keep them aligned vertically.
- Use straight, dry stickers; start with about 3–4 ft spacing for softwoods or about 2 ft for many 4/4 hardwoods, then tighten spacing when the stock requires it.
- Keep end stickers close to board ends and correct unsupported overhangs.
- Cover the top against rain and sun while leaving sides and ends open.
- Measure moisture on arrival, during storage and before installation or enclosure.
- Separate visibly wet, moldy or damaged boards and correct the moisture source before use.
- Recheck the pile after heavy rain, snow, a move between buildings or a major humidity change.
Bottom line
The reliable method is simple but must be executed consistently: elevate lumber, keep the base level, align every support, sticker the courses with dry straight material, cover only the top, and preserve airflow through the pile. Select a controlled indoor space for kiln-dried interior stock, a dry shed for protected exterior material, and an open roofed stack for green or partly seasoned boards. Use moisture readings and the final service environment—not a tarp or one universal percentage—to decide when lumber is ready.
Quick Recap
Product prices and availability are accurate as of the date/time indicated and are subject to change. Any price and availability information displayed on Amazon at the time of purchase will apply.

