What’s actually slowing this PC down?
Pick the symptom - the matching free tool is one click away.
The perfect plumbing vent diagram is not a generic bathroom sketch. It is a code-specific, fixture-specific, buildable DWV plan that shows how every trap is protected, where drainage flows, how vents rise and connect, how pipes are sized, and where the system terminates outdoors.
Before drawing a line, identify the authority having jurisdiction (AHJ), the locally adopted plumbing-code edition, and any amendments. A diagram copied from an internet example may use the wrong code, show an unapproved venting method, omit required elevations, or be impossible to build around joists, walls, roof framing, and existing piping.
As an Amazon Associate I earn from qualifying purchases.
Use the workflow below to prepare a strong preliminary plan for a remodel. Treat it as a permit-planning and coordination tool—not as permission to conceal altered DWV piping without code review, testing, and inspection.
Recommended Free Tools
What a perfect plumbing vent diagram must accomplish
A plumbing vent system maintains an air path through the drainage system and helps protect fixture-trap seals from excessive pressure differences. The vent is therefore part of the drainage design, not a pipe added beside a fixture after the drain route has already been chosen.
#1 Best Overall

- VERSATILE APPLICATION: Perfect for plumbing projects, furniture assembly, shelving units, and industrial-style decor with standard 1-inch female threaded connections
- DURABLE CONSTRUCTION: Made from high-quality cast iron material that provides exceptional strength and longevity for both wet and dry applications
- PACKAGE CONTENTS: Set includes 4 black pipe coupling fittings, each designed with precision-cut 1-inch female threads on both ends
- EASY INSTALLATION: Standard NPT threads ensure compatible connections with 1/2-inch male threaded pipes and fittings for quick assembly
- DIMENSIONS: Each coupling measures 1/2 inch in diameter with female threads, ideal for creating secure connections in your piping system
For remodeling, the most useful drawing is usually an isometric or schematic DWV diagram supported by a floor plan. A floor plan shows where fixtures sit in the room; an isometric drawing explains how traps, drains, branches, stacks, and vents connect in three dimensions.
A permit-ready planning diagram should distinguish existing piping from new work and communicate enough information for a reviewer, plumber, and inspector to understand the proposed system. Include the following:
- Every affected fixture: water closet, lavatory, tub, shower, kitchen sink, laundry standpipe, floor drain, condensate connection, and any special waste fixture.
- Every trap: show the trap serving each trapped fixture and identify the fixture-drain connection.
- Drain routing: draw fixture drains, horizontal branches, stacks, and the building drain with arrows showing the direction of flow.
- Venting method: label each individual, common, wet, circuit, island, branch, stack, stack-vent, waste-stack, single-stack, AAV, or engineered arrangement being proposed.
- Pipe data: show nominal diameters, slopes where applicable, developed lengths, and drainage fixture units (DFUs) where aggregate loading affects sizing.
- Elevations: mark floor levels, pipe inverts where useful, the flood-level rim of the highest fixture or trap served, and the point where each dry vent rises above that reference.
- Access: identify cleanouts, removable panels, and other required access points.
- Termination: show the vent stack or stack vent and its route through the roof or to another termination permitted by the adopted code.
- Air-admittance valves: if proposed, show the valve, size, elevation, access, ventilation, and the fixtures or branch it serves.
- Project status: use separate line types or labels for existing to remain, existing to remove, and new work.
The 2024 International Residential Code includes an informative appendix illustrating several venting methods and notes that plumbing venting is often best understood through isometric diagrams. Those illustrations are useful for planning, but they are examples—not a replacement for the enforceable provisions of the code adopted in your jurisdiction.
Free tools Windows power users keep installed
One-click scans. No signup required.
Start with the correct code and AHJ
The first decision is not whether to use a wet vent or an air-admittance valve. It is which code governs the building.
Residential work: usually begin with the IRC
For a detached one- or two-family dwelling or a qualifying townhouse, begin by checking the plumbing provisions of the locally adopted 2024 International Residential Code or the edition your jurisdiction has adopted. Chapter 31 addresses vent-system selection, vent connections, grades, fixture vents, wet venting, circuit venting, island fixture venting, sizing, and air-admittance valves.
The IRC is a model code. It is not automatically enforceable everywhere, and the local jurisdiction may still be using another edition or may have amended the model language.
Commercial and multifamily work: check the IPC or local plumbing code
Commercial buildings, many multifamily buildings, and structures outside the IRC residential scope commonly fall under the locally adopted plumbing code, often based on the 2024 International Plumbing Code. IPC Chapter 9 addresses vent materials, terminals, outdoor extensions, connections, sizing, individual and common vents, wet vents, waste-stack vents, circuit vents, island fixture venting, single-stack systems, air-admittance valves, engineered systems, and computerized vent design.
Do not transfer a sizing rule, wet-vent detail, or AAV assumption from an IRC project to an IPC project. The codes use different structures and tables, and local amendments can change the result.
Verify the adopted edition and amendments
Contact the city or county building department before finalizing the diagram. Confirm:
- the adopted plumbing-code edition;
- whether the project is reviewed under the IRC, IPC, or another local code;
- local amendments affecting vent terminals, sidewall terminations, snow clearance, materials, AAVs, or cleanouts;
- permit and plan-submittal requirements;
- whether a historic district, flood-hazard area, or special overlay creates additional requirements;
- whether the project crosses a municipal or county boundary; and
- whether multifamily ownership, shared stacks, or common building systems require additional review.
Existing plumbing also matters. Lawful existing work may sometimes remain if it was legal when installed and does not create a hazard, but an addition, alteration, renovation, or repair can trigger requirements under the adopted plumbing and existing-building provisions. Your drawing should make the boundary between existing and new work unmistakable.
For a residential code reference, the 2024 International Residential Code is useful because Chapter 31 and its informative venting appendix provide a common starting point. If the project falls under the IPC, keep the 2024 International Plumbing Code available instead. In either case, verify that the edition matches the one enforced by the AHJ.
Quick wins for a faster PC:
Scan for outdated or missing drivers - takes under a minuteDriver Scan →Clear out junk files and repair common Windows errorsFree Scan →Use this six-step diagram workflow
1. Inventory fixtures and physical constraints
Walk the project before drawing. Record every fixture affected by the remodel, even if the fixture itself is not moving. Then document the physical constraints that will determine whether the proposed route can actually be installed.
| Record | Questions to answer |
|---|---|
| Fixtures | Which fixtures are new, relocated, removed, or existing to remain? |
| Traps and drains | Where is each trap, and where does each fixture drain connect? |
| Levels | Which fixtures are on each floor? What is the relevant flood-level rim? |
| Existing DWV | Where are the building drain, branch drains, vent stack, cleanouts, and accessible chases? |
| Structure | Which way do joists, beams, studs, plates, and roof rafters run? Are drilling or notching limits relevant? |
| Building enclosure | Where are exterior walls, air barriers, insulation, fire-rated assemblies, and roof penetrations? |
| Access | Can valves, cleanouts, traps, and concealed connections be inspected or replaced? |
Take photographs and measurements before opening walls. A remodel diagram based only on room dimensions can fail when an existing stack is offset, a beam blocks the branch, or the proposed vent cannot reach the roof without several concealed horizontal turns.
Rank #2
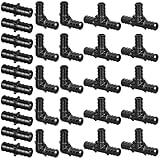
- 【Worthy Pack】- Poly PPSU barb crimp PEX fittings include 10pcs 1/2" PEX elbow fittings, 10pcs 1/2" PEX straight fittings and 10pcs 1/2" PEX tee fittings, which can be used in potable water system or radiant heating system. PEX fitting set is more worthy than brass fittings.
- 【Enhanced Performance】- Poly PPSU barb crimp PEX fittings are made of high-quality PPSU poly material, which is no lead and is more environmentally friendly than brass. It also has better corrosion resistance and performance than brass fittings in RO, chlorinated and low pH water application.
- 【Easy Installation】- PEX fittings are easy to install, you just need to slide the PEX clamp rings over the PEX pipe, insert the fittings, and secure them in place with a clamp tool. The protruding stop on the fitting makes it easy to verify proper installation.
- 【PEX Compatibility】- Plastic PEX fittings can be easily installed without flame, flux, or solder, require no bonding agents, glues, or solvents, they are suitable for stainless steel clamp & copper crimp ring systems and they are NOT suitable for expander fitting system and uponor/wirsbo expander system.
- 【Wide Application】- Poly PPSU barb crimp PEX fittings are suitable for various applications, including domestic water systems, radiant heating systems, retrofit construction, and hot or cold water distribution.
2. Draw drainage first
Lay out fixture drains and horizontal branches before selecting the vent route. Draw the direction of drainage flow with arrows. Mark connection points, changes in direction, pipe slopes, cleanouts, and the location of the existing building drain or stack.
This order exposes problems early. For example, relocating a laundry standpipe may appear simple on the floor plan but may require a long branch, a new cleanout, structural drilling, a different vent route, and a longer developed length than the original installation.
Once the drains are clear, add the vent path that supplies the required air route while protecting trap seals. Avoid drawing one vertical line labeled vent for an entire room. The diagram must show which trap or branch that vent actually serves and where the connection occurs.
3. Select the simplest permitted venting method
Choose the least complicated method that fits the fixture arrangement, adopted code, structure, and access conditions. A cleaner-looking diagram is not automatically a better or more compliant design.
| Method | Where it may fit | What the diagram must prove |
|---|---|---|
| Individual vent | A single fixture with a practical wall, chase, or ceiling route. | The vent connection, rise, size, developed length, termination, and relationship to the trap. |
| Common vent | Two traps arranged in a configuration permitted by the adopted code. | That the two fixtures connect in the allowed arrangement and that the common vent is correctly located and sized. |
| Horizontal wet vent | Often useful for grouped residential bathroom fixtures on one floor. | The permitted fixture combinations, branch direction, connection order, sizing, and any limitations in the adopted code. |
| Circuit vent | A specialized branch arrangement serving multiple fixtures where the code permits it. | The fixture count, branch arrangement, vent connection, sizing, and required relief or other details. |
| Island fixture vent | A kitchen or other island fixture where a conventional wall vent is unavailable. | The loop or island arrangement, elevation, cleanout and access provisions, and the code-specific connection details. |
| Waste-stack vent or single-stack system | Specialized layouts, generally requiring careful code review. | That the entire system meets the applicable system-specific provisions rather than merely resembling an example. |
| Air-admittance valve | A code-permitted individual, branch, circuit, or certain stack applications. | Listing, location, ventilation, access, sizing, manufacturer instructions, and the required outdoor venting elsewhere in the building. |
Individual venting is often the easiest arrangement to explain and inspect, but it is not always the most practical. Wet venting can reduce piping in a bathroom group, while an island vent may solve a kitchen layout problem. Each alternative has conditions that must be checked against the adopted code.
4. Mark the dry-vent rise and flood-level references
Flood-level-rim elevations are among the most frequently misunderstood parts of a vent drawing. A vent cannot simply run horizontally from a trap through a wall cavity wherever the installer finds space.
Do these 3 things before closing this tab:
1Clear out junk files and repair common Windows errors2Scan for outdated or missing drivers - takes under a minute3Repair Windows errors before they cause bigger problemsUnder the 2024 IRC, a dry vent connecting to a horizontal drain must connect above the drain centerline. A dry vent must also rise to at least 6 inches above the flood-level rim of the highest trap or trapped fixture served before it offsets horizontally. The 2024 IPC contains comparable requirements, subject to its own text and local amendments.
Show this in the diagram with a clear elevation callout. Label the flood-level rim, draw a vertical rise, and identify the point above which the vent is allowed to offset. If several fixtures are served, identify the highest relevant fixture or trap rather than assuming the nearest fixture controls.
5. Calculate size only after route and load are known
Do not select vent diameters by copying the largest pipe visible in a sample drawing. Vent sizing depends on the governing code, drainage fixture-unit load, drain and stack sizes, developed length, and the specific venting method.
For the 2024 IRC, individual, branch, circuit, stack, and stack-vent diameters generally may not be less than one-half the required drain diameter, and vents may not be smaller than 1 1/4 inches. The IRC also generally requires a vent longer than 40 feet to be increased by one nominal pipe size for the entire developed length. These are planning rules to verify against the adopted text, not permission to ignore the code tables or local amendments.
IPC sizing uses its own tables based on factors such as developed length, stack or drain diameter, and drainage fixture-unit load. Record the calculation basis on the plan:
Rank #3

- Critical Sizing Note - Please Read Before Buying: This 3/4" PVC tee has an actual inner diameter of 1.050 inches (26.67 mm). It is specifically designed to fit standard 3/4" PVC SCH40 pipes, which have an outer diameter (OD) of 1.050" (26.67 mm). Please measure your pipe's OD to ensure it matches 1.050" before ordering. If your pipe's outer diameter measures only 0.75", this fitting will be too large
- Durable PVC Construction: Made from high-quality PVC, these fittings are lightweight yet sturdy, offering reliable resistance to corrosion, moisture, and everyday impact. Suitable for long-term use in both indoor and outdoor environments
- Easy & Secure Installation: Features smooth socket connections to help guide the pipe in smoothly and maintain proper alignment. Designed for use with PVC primer and solvent cement (not included) to create a strong, permanent bond
- Versatile Application Use: Suitable for a wide range of projects including plumbing repairs, irrigation and sprinkler systems, pool plumbing, and DIY PVC builds such as shelving units, garden structures, and greenhouse frames
- Practical Choice for SCH40 Systems: Meets common plumbing and DIY requirements and is intended for cold water applications within standard Schedule 40 temperature limits. Ideal for repairs, extensions, or new installations where dependable PVC fittings are needed
- fixture type and DFU value used;
- total DFU load on each branch or stack;
- drain and vent diameters;
- developed length, including the actual route rather than just the room width;
- number and type of fittings where relevant;
- pipe material and listed fittings; and
- the code table or section used for the sizing decision.
If you cannot explain why a vent is the size shown, the diagram is not finished. Keep the sizing notes with the permit set so a field change does not silently invalidate the design.
6. Show outdoor termination, testing, and inspection
At least one vent serving each building drain must extend outdoors under the IRC and IPC frameworks. Show the route to the roof or another termination permitted by the adopted code. Then check the applicable requirements for:
- roof-extension height;
- sidewall termination, if allowed;
- doors and openable windows;
- mechanical air intakes;
- roof edges and other openings;
- snow accumulation and local weather conditions;
- roof assembly and flashing compatibility; and
- local amendments that change termination dimensions.
A vent that ends in an attic, wall cavity, soffit, or crawlspace is not a substitute for an approved outdoor termination. Sewer gas, moisture, and condensation can create health, odor, and building-damage problems in addition to causing an inspection failure.
The Tool Desk
Outbyte Driver Updater FREEFix the driver behind crashes, sound loss and screen glitchesFind Drivers →Outbyte PC Repair FREEClear out junk files and repair common Windows errorsFree Scan →Plan the inspection sequence before closing the walls. Rough-in the DWV piping, provide supports and required slope, complete the code-required test, schedule the inspection, and only then conceal the work. Under the 2024 IRC, air-admittance valves are installed after the required DWV testing. Confirm the exact testing procedure with the adopted code and AHJ.
Conceptual remodel examples
The following examples illustrate how to think about a diagram. They are not construction drawings and do not establish code compliance without project-specific measurements and local review.
Example 1: Single-bathroom remodel
Suppose a bathroom includes a water closet, lavatory, tub, and shower. Start by locating all four traps and drawing their fixture drains toward the existing branch or stack. Then decide whether individual vents, a common vent, or a permitted residential wet-vent arrangement best fits the room and structure.
On the isometric diagram, label each fixture, trap, drain direction, branch diameter, and vent connection. Show the dry vent rising above the relevant flood-level rim before it offsets into a wall or ceiling. If the existing vent stack remains, draw the proposed connection and identify whether the stack is existing to remain or being altered.
A common mistake is to label the bathroom as wet-vented without showing which fixtures are included, the direction of flow, or the required branch arrangement. The reviewer needs to see the actual connections, not just the name of the method.
Example 2: Two-bath remodel on separate floors
Two bathrooms on different floors should not automatically be treated as one large wet-vented group. Draw each bathroom’s drains and vents in relation to the vertical stack, floor elevations, and branch connections. Determine whether each floor uses its own venting arrangement or whether a permitted stack or branch method serves both.
Mark the highest flood-level rim served by each dry vent, the stack or stack-vent sizes, the total DFU load, and the developed length. Pay particular attention to shared walls and ceiling cavities: a route that works for the lower bathroom may not provide the required rise or access for the upper bathroom.
Example 3: Kitchen sink in an island
A kitchen island may not have a nearby wall through which a conventional vent can rise. An island fixture vent is a specialized arrangement, not simply a drain loop drawn under the cabinet.
Rank #4

- Sufficient Quantity: you will receive 12 pieces 1/2 pvc fittings of 3-way PVC fittings, 8 pieces of 3-way corner elbow fittings, 4 pieces of 90 degree angle PVC fittings, 6 pieces of 45 degree elbow PVC fittings, 4 pieces of 4-way PVC fittings, 8 pieces of 4-way corner elbow fittings, ample quantity for your use
- Strong Material: these furniture connectors are made of quality PVC fittings, sturdy and strong to use for a long time, also can withstand impacts or drop from a substantial height, won't suffer any cracks or breakage
- Wide Application: these PVC elbow fittings have tapered edges and smooth surface, nice for DIY furniture display items, also suitable for building shelves, pool products, chairs, desks, storage frames, garden support structures etc.
- Useful Tools: these PVC fittings are resistant to low temperature, ultraviolet rays and impact resistance; The inside surface of the pipe wall is smooth, and the installation is convenient without scratching your hands
- Note Attention: the tent connection is not measured by the outside diameter, these 1/2" PVC connectors fit for 0.84" OD PVC pipe, please make sure that you order the correct size PVC fittings; And these aren't designed for irrigation purposes, and should not be applied for such condition
Show the trap, fixture drain, island vent route, connection points, direction of flow, and the cleanout required for the below-flood-level portion of the arrangement. The cleanout must remain accessible. Coordinate the route with cabinet construction, finished flooring, joists, and the building drain.
If an AAV is being considered instead, do not assume that it is automatically allowed. Confirm the local code, listing, placement, ventilation, access, and required outdoor venting before putting it on the permit drawing.
Example 4: Laundry relocation
A laundry relocation adds more than a new drain location. Show the standpipe and trap, the branch connection, vent route, pipe slope, cleanout, wall or floor penetrations, and the relationship to the existing stack or building drain.
Measure the actual developed length and check the route against joists, beams, fireblocking, and finished-wall access. A long horizontal route may affect sizing and may require a different vent location than the one suggested by the new laundry-room floor plan.
Crashes, No Sound, or Screen Glitches?
Random freezes, missing sound and display glitches usually trace back to one bad driver. Find and replace yours safely.Free scan · under a minuteWindows Errors? Fix Them Before They Spread
Repair common Windows errors and clear accumulated junk for a smoother, more stable PC - no reinstall needed.Free scan · no reinstallHow to draw and label the diagram
Use a consistent legend. Your drawing does not need to look like an engineering schematic, but every line and abbreviation should have one clear meaning.
| Graphic or label | Recommended use |
|---|---|
| Solid heavy line | New DWV piping. |
| Dashed or lighter line | Existing piping to remain; define the convention in the legend. |
| Crossed or clouded line | Existing piping to remove or work being revised; explain the notation. |
| Arrow | Direction of drainage flow. |
| Trap symbol or label | Identify every fixture trap. |
| V or vent label | Identify the vent and specify its method, such as individual, wet, circuit, island, or AAV. |
| CL or elevation note | Show centerline, invert, floor, or flood-level-rim information where it controls the design. |
| CO | Cleanout location; show access direction or panel where needed. |
| DFU note | Document the drainage fixture-unit load used for sizing. |
| Material note | Identify PVC, ABS, cast iron, or another listed material and any transition. |
Include a small section detail wherever a reviewer could misunderstand the connection. Useful details include the vent-to-horizontal-drain connection, the rise above the flood-level rim, an island fixture vent cleanout, an AAV access enclosure, a roof penetration, and a transition between different DWV materials.
Air-admittance valves: a conditional option
An air-admittance valve opens when negative pressure develops in the drainage system, allowing air to enter and helping prevent trap siphonage. It does not provide a universal replacement for every vent, and it does not eliminate the need for an outdoor vent serving the building drainage system where the code requires one.
The IRC permits AAVs for certain individual, branch, circuit, and stack-vent applications subject to conditions. The IPC has its own Section 918 requirements and limitations. Before specifying one, verify all of the following:
Recommended Free Tools
- the AHJ permits the proposed AAV use;
- the valve is properly listed for the application;
- the size matches the served drainage load;
- the elevation and placement comply with the adopted code;
- the valve receives the required ventilation;
- the valve remains accessible for inspection and replacement;
- the manufacturer’s installation instructions are followed;
- the rest of the DWV system is tested as required; and
- the building still has the required outdoor vent or vent stack.
Show the AAV on the diagram with its size, elevation, access panel or cabinet location, ventilation path, and the fixtures it serves. Never bury it permanently behind drywall, tile, or fixed cabinetry. A listed air-admittance valve may be a useful solution where the jurisdiction permits it, but it should be selected after code review—not as a shortcut around a difficult vent route.
Materials and remodeling coordination
The code, approved plans, and manufacturer instructions govern the material and installation method. Identify whether the proposed system uses PVC, ABS, cast iron, or another listed material. Then coordinate:
- solvent-welded and mechanical joints;
- transitions between existing and new materials;
- pipe supports and hangers;
- firestopping at penetrations;
- structural drilling and notching limits;
- insulation and condensation control where relevant;
- roof flashing and weatherproofing;
- air-sealing around subfloor, wall, plate, and roof penetrations; and
- access to cleanouts, traps, valves, and concealed connections.
For an approved rough-in, a project materials list may include DWV vent pipe and fittings, supports, transition components, firestopping materials, access panels, and roof-flashing components. Do not buy a universal diameter or material based on a sample diagram: the correct selection depends on the adopted code, existing system, developed length, drainage load, manufacturer requirements, and the approved plan.
Plumbing vent piping is not appliance venting. Sanitary drainage vents and combustion-appliance vents serve different purposes and follow different safety requirements. Do not combine them or represent fuel-gas or appliance venting on a plumbing vent diagram as though it were part of the DWV system.
Roof and sidewall termination checklist
When the remodel adds or relocates an open vent, draw the termination all the way through the building enclosure. Check these items before submitting the plan:
Best Value

- INSTALLATION EFFORTLESS: Each package comes with 4 x 5-Way SCH40 PVC Pipe Fittings. Just trim 1/2" PVC pipe to your preferred length and place it into the slots to construct cubes or different shapes using this PVC connector. Every opening on this PVC joint features a deep-set socket on five distinct angles, each 90 degrees apart.
- PRACTICALITY IN DESIGN: The unique structure and geometry of our PVC Pipe Fittings ensure firm fluid dynamics, providing an efficient flow and connection in your piping system. The SCH40 grade guarantees both performance and compatibility, allowing you to achieve a seamless fit within your plumbing requirements, all while staying within your financial reach.
- EXCELLENCE WORKMANSHIP: Made of premium polyvinyl chloride (PVC) material, our 1/2 inch 5-Way fittings are built to resist corrosion and withstand 600PSI working pressures(Max.). With a focus on precision manufacturing, these fittings promise a tight connection, ensuring longevity and reduced maintenance costs. The smooth interior surface ensures reduced friction and efficient flow.
- MULTIPLE APPLICATIONS: Whether you're crafting a complex irrigation system, home DIY projects, pet playpen, garden supports structures, or setting up an industrial plumbing framework, our 1/2 inch 5-Way PVC Pipe Fittings cater to diverse needs. Harmonizing with both contemporary and traditional setups, these fittings offer an aesthetic yet functional addition to any system.
- COMFORTABLE PURCHASE: If you have any questions about our products, please contact us by email in Amazon, in order to provide our customers with a comfortable purchasing experience, we will reply you within 24 hours.
- Is the termination location permitted by the adopted code?
- Is the pipe extension high enough for the local roof condition and code?
- Is it clear of doors, openable windows, and mechanical air intakes by the required distance?
- Could snow accumulation block or bury the terminal?
- Does the roof assembly require a particular boot or flashing detail?
- Will the penetration interfere with rafters, trusses, insulation, or an air barrier?
- Can the installer weather-seal the penetration without creating a leak path?
- Are local amendments more restrictive than the model-code language?
A compatible plumbing vent roof flashing component may be needed when a new vent penetrates the roof, but the correct flashing depends on pipe size, roof material, roof pitch, and the assembly’s weatherproofing requirements. Treat the flashing as part of the enclosure detail, not as an afterthought added after the vent is installed.
Common diagram mistakes that cause problems
- One vent per room: The drawing labels a room but does not show which trap each vent protects or where the vent connects.
- Unverified wet venting: A bathroom wet-vent example is reused for a kitchen, laundry, or mixed-use branch without checking the permitted fixture combination.
- Low vent connection: A dry vent connects below the drain centerline or below the required connection elevation.
- Horizontal offset too early: The vent runs sideways before rising above the highest applicable flood-level rim.
- Missing sizing information: The plan omits developed length, DFU load, diameter, slope, or elevation data.
- Automatic AAV assumption: An AAV is shown without confirming local permission, listing, access, ventilation, or the required outdoor vent.
- Attic termination: A vent ends in an attic or wall cavity instead of outdoors or at another code-permitted termination.
- Island cleanout omission: An island fixture vent below the fixture flood-level rim lacks the required accessible cleanout.
- Roof and weather ignored: The route conflicts with rafters, snow accumulation, roof materials, windows, doors, or air intakes.
- Existing and new work mixed together: The reviewer cannot tell what is being removed, retained, or altered.
- Concealment before inspection: Walls or ceilings are closed before the required DWV test and rough inspection.
- Appliance vent confusion: Combustion or fuel-gas venting is incorrectly merged into the sanitary plumbing diagram.
A one-page planning worksheet
Complete this worksheet before preparing the final isometric drawing:
| Planning item | Project information |
|---|---|
| AHJ and permit office | ____________________________________________ |
| Building category | Detached dwelling / townhouse / multifamily / commercial / other |
| Adopted code and edition | ____________________________________________ |
| Local amendments confirmed? | Yes / No — date and contact: ___________________ |
| Fixtures affected | ____________________________________________ |
| Existing vent stack and building drain | Location, size, material, and status: _____________ |
| New work | ____________________________________________ |
| Existing to remain | ____________________________________________ |
| Existing to remove | ____________________________________________ |
| Proposed vent method for each fixture or branch | ____________________________________________ |
| Highest flood-level rim served | Elevation: ____________________________________ |
| Dry-vent rise before horizontal offset | Elevation and location: _________________________ |
| DFU load and sizing basis | ____________________________________________ |
| Developed lengths | Branch: __________ Stack: __________ Vent: ______ |
| Cleanouts and access panels | ____________________________________________ |
| Outdoor termination | Roof or sidewall; clearances and flashing: _________ |
| Materials and transitions | ____________________________________________ |
| Testing and inspection checkpoint | Date or permit note: ___________________________ |
When to involve a professional
A homeowner or project manager can often prepare the fixture inventory, photograph existing conditions, and create a preliminary diagram. A code review or licensed design professional becomes especially important when the work involves:
- concealed DWV alterations;
- relocated bathrooms, kitchens, or laundry fixtures;
- main stacks or building drains;
- multiple floors or shared drainage systems;
- multifamily or commercial occupancy;
- structural members that must be drilled, notched, or bypassed;
- new roof penetrations or difficult sidewall terminations;
- island, circuit, single-stack, waste-stack, or engineered venting;
- AAVs in a jurisdiction with uncertain requirements; or
- historic, flood-hazard, or otherwise specially regulated properties.
For these situations, involve a licensed plumber for remodel early enough to verify the route, code basis, materials, testing sequence, and permit requirements. Professional review does not replace the AHJ: the building department remains the authority on the adopted code and inspection process.
What to submit or keep with the plan
A strong remodel package may include:
- floor plans showing existing and proposed fixture locations;
- the isometric or schematic DWV diagram;
- a legend explaining line types and symbols;
- fixture, trap, and vent labels;
- drainage-flow arrows;
- pipe diameters, slopes, materials, and developed lengths;
- DFU calculations or sizing notes;
- flood-level-rim and vent-rise elevations;
- cleanout and access locations;
- AAV listing and installation information, if applicable;
- roof or sidewall termination details;
- existing-to-remain, existing-to-remove, and new-work notes;
- structural and firestopping coordination notes; and
- testing and inspection notes.
Keep photographs of existing conditions, product installation instructions, and code-section references with the project file. If a field condition forces a change, revise the diagram instead of relying on memory or an undocumented substitution.
Frequently Asked Questions
Can a plumbing vent terminate in the attic?
Generally, no. A vent serving the drainage system must extend outdoors or terminate through another location specifically permitted by the adopted code. An attic or wall cavity is not an acceptable substitute for an approved outdoor termination.
Can an air-admittance valve replace the roof vent?
Not automatically. AAV use is conditional under both the IRC and IPC, and the building still generally requires the required outdoor vent or vent stack. Confirm local permission, listing, placement, access, ventilation, sizing, manufacturer instructions, and testing requirements before specifying one.
Should the drainage or vent piping be drawn first?
Draw the drainage route first. Once fixture drains, branches, flow direction, slopes, and connection points are known, select the simplest permitted venting method that protects the traps and can be built within the structure.
What is developed length in a plumbing vent diagram?
Developed length is the actual length of the pipe route used for sizing, rather than a straight-line measurement across the room. Include the route through walls, ceilings, chases, and around structural obstructions as required by the applicable code.
Is a generic bathroom wet-vent diagram enough for a remodel permit?
No. Wet-vent rules depend on the adopted code, fixture combination, branch arrangement, direction of flow, sizing, and other limitations. A generic example can help explain the concept but cannot establish compliance for a particular remodel.
The Bottom Line
The best plumbing vent diagram is a verified plan of the actual building: correct AHJ and code edition, every fixture and trap, drainage flow, venting method, sizes, developed lengths, elevations, cleanouts, outdoor termination, materials, and inspection checkpoints. Use the drawing to coordinate the remodel, then have the local authority and an appropriately qualified plumbing professional confirm the design before concealed DWV work is installed.
Quick Recap
Product prices and availability are accurate as of the date/time indicated and are subject to change. Any price and availability information displayed on Amazon at the time of purchase will apply.




