Some links on this page are affiliate links: if you buy through them we may earn a commission, at no extra cost to you.
Cut the mortise first, then fit the tenon to it. That sequence is the key to making a strong, clean through mortise-and-tenon joint: the mortise establishes the opening, while the tenon can be adjusted gradually until it passes through with firm hand pressure. The exposed end can then be left flush, beveled, or reinforced with visible pins.
A through mortise-and-tenon joint can make a frame both highly durable and visually distinctive: the tenon passes completely through the mortised member, so its end remains visible on the far face. The reliable way to build one is simple but important: cut the mortise first, then fit the tenon to it. Mortise width is difficult to adjust accurately once cut; a tenon can be fine-tuned with a saw, router, plane, or chisel.
As an Amazon Associate I earn from qualifying purchases.
Quick wins for a faster PC:
Fix the driver behind crashes, sound loss and screen glitchesFind Drivers →Repair Windows errors before they cause bigger problemsFix Now →How a through mortise-and-tenon joint works
One board carries the mortise, an opening cut through its thickness. The mating board carries the projecting tenon. A through tenon extends all the way through the mortised board and is visible on the opposite side; a blind tenon stops inside the mortise and remains hidden.
The tenon’s broad sides are its cheeks. They meet the mortise walls and provide the primary long-grain glue surfaces. The shoulders are the portions of the tenon that bear against the face of the mortised member. Well-fitted shoulders help close the joint and resist racking, while the cheeks transfer load through the joint.
Popular on Amazon

- Premium Blades: Drop forged CR-V steel with heat-treated edges ensures sharp precision and long-lasting durability, can be used to make finish or paring cuts on wood surfaces, as well as cut mortises
- Beveled Edge for Versatility: 25° Bevel edge for woodworking multi-purpose use, ideal for soft wood, hard wood, and laminated wood products
- Ergonomic PVC Handle: HURRICANE wood chisel set with Lightweight yet durable regular size impact PVC Handle, feels natural in your hand for everyday fixes, yet tough enough for mallet strikes—great for door locks or DIY use
- Safety & Portability: This four sizes (1/4"; 1/2"; 3/4"; and 1") chisel set with blade guards protects edges during storage
- Widely Function: this HURRICANE wood chisel set empowers beginners to tackle DIY projects while meeting the demands of hobbyists & Home use
That geometry explains both the joint’s reputation and its limits. A mortise-and-tenon is not automatically strong simply because it has that name. Performance depends on the wood species and grain direction, the remaining material around the mortise, the tenon’s width and thickness, the accuracy of the fit, clean glue surfaces, and the loads the frame will experience.
Size the joint without weakening the mortised member
For two members of equal thickness, a useful starting point is to make the mortise width and tenon thickness approximately one-third of the stock thickness.
| Stock thickness | Starting mortise width | Starting tenon thickness |
|---|---|---|
| 3/4 inch | About 1/4 inch | About 1/4 inch |
| 1 inch | About 5/16 to 3/8 inch | About 5/16 to 3/8 inch |
These are layout guidelines, not universal structural specifications. If the two members differ in thickness, the tenon may be sized up to roughly one-third of the thicker member, but only if the mortised piece retains adequate wood on both sides and around the opening. A wider tenon creates more long-grain glue area in some configurations, yet making it too wide can leave thin, fragile walls beside the mortise.
Check the remaining material before cutting. Consider the expected load, the direction of the grain, the possibility of splitting, and whether the joint is part of a heavily stressed frame. Published woodworking tests have found mortise-and-tenon samples stronger than dowel, biscuit, and screw joints in the tested configurations, but those results should not be treated as an engineering rating for every species, size, or loading condition. In some tested joints, tenon width mattered more than additional tenon length.
Tools and preparation
Choose the workflow that matches your equipment:
- Hand-tool route: marking gauge, square, mortise chisel, mallet, drill for waste removal, backsaw, bench plane, shoulder or rabbet plane, vise or clamps, and a sharp general-purpose chisel.
- Drill-press and table-saw route: drill press, brad-point or auger-style bit, chisels, a square-cutting guide, table saw, dado blade or tenoning setup, and test stock.
- Router route: plunge router, mortising guide or jig, suitable bit, and a router table or other controlled tenon-cutting setup.
A mortise chisel is particularly useful for the hand-cutting route. Its thick blade and robust handle are designed for mallet blows and for levering waste from a deep mortise. A premium chisel is not required, but the tool should be stout, sharp, and held securely by the workpiece rather than by your free hand.
Step 1: Lay out the mortise accurately
Choose and mark the reference faces and reference ends on both parts. Use a marking gauge to establish the mortise’s parallel edges, then use a square to mark its ends. Mark the mortise on both opposing faces of the mortised member. Verify that the layout is positioned the same distance from the reference end on each face; otherwise, the opening can shift or become misaligned as the cuts meet.
Free tools Windows power users keep installed
One-click scans. No signup required.
Also popular on Amazon
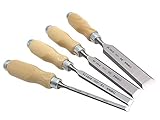
- Blades are made from highly alloyed Cr-Mn steel, hardened up to Rc 59.
- Meets DIN 5139 requirements.
- Handles are ergonomic with oval cross-section.
- Blade sizes: 6 mm (1/4"), 12 mm (1/2"), 20 mm (13/16") and 26 mm (1 1/32").
- Made in the Czech Republic.
Clearly mark the waste area. Extend the layout lines across the end grain if useful, and keep the reference face identified throughout the job. This is especially important when cutting tenon cheeks on a table saw or router: changing the reference face between cuts can move the tenon off-center.
Step 2: Remove most of the mortise waste
Drilling-assisted method
- Secure the workpiece in a vise or clamp it firmly to the drill-press table.
- Install a bit slightly smaller than the final mortise width. A brad-point or auger-style bit helps locate the cut and remove waste cleanly.
- Drill a row of overlapping holes along the mortise, staying inside the layout lines. Do not drill directly on the final edges.
- Leave a controlled amount of material for chiseling. The holes remove bulk waste; they do not establish the finished mortise.
For a hand-drilling variation, make a starter hole inside the layout, then use a stout chisel to chop and lever out the waste. A brad-point drill bit set can be useful for this drilling-assisted method, but select the bit diameter from the actual mortise layout rather than assuming one bit size fits every joint.
Hand-chopping method
With the work firmly secured, place the mortise chisel inside the waste area and strike it with a mallet. Begin near an end but not on the layout line. Chop down, lever out a small portion of waste, then move progressively along the mortise. Do not try to remove the entire depth in one heavy blow; deep, aggressive cuts can split the work or bruise the mortise walls.
Whether you drill or chop first, leave enough material that the final edges can be established deliberately with a chisel.
Recommended Free Tools
Step 3: Square and clean the through mortise
Square the mortise ends first with a narrow chisel. Then clean the walls from both faces. Work from one side until the chisel approaches the center, turn the piece over, and continue from the other side. This prevents the chisel from breaking out a large chip as it exits the opposite face.
Keep checking the mortise width, length, depth, and position against the layout. The walls should be reasonably flat and parallel, but do not enlarge the opening merely to make an imperfect tenon fit. If a wide chisel tends to tip, a simple glued-up chisel guide can hold it at 90 degrees to the workpiece and help prevent cuts outside the layout lines.
A swan-neck chisel is useful for reaching the bottoms of some blind mortises. It is unnecessary here: a through mortise is open from both sides, so ordinary access is better and the waste can be cleaned through the opening.
Also popular on Amazon

- EZARC premium set of wood chisel includes a variety of sizes, 1/4”(6mm), 3/8”(10mm), 1/2”(12mm), 5/8”(16mm), 13/16”(20mm), and 1”( 25mm), to cater to all your woodworking needs. Whether you're a seasoned woodworker or just starting out, this set is sure to impress.
- All chisels were made from fine-grained, nicely tempered chrome-vanadium steel with a hardness of HRC60 for long-lasting sharpness and ensuring a smooth finish.
- Beech wooden is a hard and dense wood species, making it highly resistant to wear and tear. This means that your chisel handle will last for years to come, even with frequent use. Finally, beech wood is a renewable resource, making it a more environmentally friendly option compared to synthetic materials.
- The carpentry chisel is precisely beveled ground at 25 degrees with an extremely sharp edge which can be used immediately after opening the package, easily cut mortises, shave rough surfaces, chop out corners and scrape off the glue with effortless.
- Professional chisel carefully packed in a wooden box, easy to store and transport. Ideal gift for beginners, hobbyists and professional wood artists.
Step 4: Cut and fit the tenon
Cut the tenon slightly oversized. Remove equal amounts from both cheeks until the tenon slides through the mortise with firm hand pressure. The tenon should not require pounding into place, and it should not rattle loosely in the opening.
On a table saw, make a test cut in scrap first and use that test piece to confirm the cheek thickness. A dado blade or tenoning setup can remove the waste efficiently, but make incremental adjustments rather than trying to reach the final dimension in one setting. A router, tenoning jig, backsaw, shoulder plane, or hand plane can accomplish the same basic task with an appropriate setup.
Use scrap made from the same stock thickness whenever possible. Keep the same reference face against the fence or guide for corresponding cuts. Test the actual joint frequently: it is easier to remove another shaving than to repair an undersized tenon.
Concentrate on the cheeks and mortise walls. They should be flat, smooth, and parallel, because these long-grain surfaces are the important glue interface. The end grain at the tip of the tenon contributes far less than a properly fitted cheek-to-wall joint. A snug fit is desirable; a crushing fit can split the mortised member or force the shoulders away from the face during assembly.
Step 5: Shape the exposed through tenon
Insert the fitted tenon and mark its final projection from the mortised face.
The Tool Desk
Outbyte Driver Updater FREEFix the driver behind crashes, sound loss and screen glitchesFind Drivers →Outbyte PC Repair FREERepair Windows errors before they cause bigger problemsFix Now →- For a tenon that will be sanded flush, leave approximately 1/32 inch extra length before final sanding.
- For a decorative beveled tenon, leave about 1/4 inch of projection before forming the bevel, provided that appearance and the surrounding design call for it.
Bevel the exposed faces and edges as planned. When using a plane, work from the edge toward the center to reduce the chance of tear-out. Stop planing or sanding at the layout mark so the reveal remains even and intentional. A contrasting tenon can become a design feature, while a flush tenon can be made visually quiet by matching the surrounding wood.
Also popular on Amazon
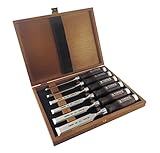
- 6 piece set comes on a wooden presentation box
- Blades are made from fine-grained, nicely tempered chrome-manganese steel and hardened to Rc 59
- Contains the following sizes: 6, 10, 12, 16, 20 and 26 mm
- Bevel ground at a 25 degree bevel.
- Handles are made from stained European Beech
Step 6: Glue and clamp without a mess
Apply adhesive to the mating long-grain surfaces and assemble the joint while the glue is workable. Glue coverage and squeeze-out management vary with the joint and adhesive, so follow the selected manufacturer’s application and cleanup instructions. Applying glue primarily to the center of the tenon cheek can help limit excess adhesive reaching the visible exposed end, but it should not substitute for adequate coverage of the actual mating surfaces.
Titebond Original Wood Glue is specified by its manufacturer for interior woodworking, with water cleanup and a fast set. It is a reasonable product category to consider for interior furniture and casework when its instructions suit the assembly. For projects exposed to more moisture or intended for exterior use, choose an adhesive rated for that environment; Titebond III is the more water-resistant option identified in the source material. Neither choice makes poor geometry or a loose fit acceptable.
Clamp until the adhesive has set according to the product directions. Use enough pressure to close the shoulders and hold the parts in alignment, but do not apply so much force that a properly sized tenon crushes fibers or drives the joint out of square. Protect visible faces with cauls where needed, and wipe or pare away squeeze-out without flooding the end grain of the exposed tenon.
Step 7: Add visible pins or dowels
Visible wooden pins can reinforce the joint and add a deliberate contrasting detail. One straightforward method is:
- Lay out a 1/4-inch hole near each end of the mortise.
- Drill through the mortised member and through the tenon after the joint is fitted, or use an accurately marked assembly sequence.
- Bevel the ends of 1/4-inch hardwood dowels so they start more easily.
- Apply suitable glue if the design calls for glued pins, drive the dowels through, then cut them flush after the adhesive cures.
- Plane or sand the pins flush with the surrounding face.
Centered dowels and drawbore pins are not the same technique. In a drawbored joint, the hole in the tenon is offset slightly from the holes in the mortised member. Driving the pin through the offset pulls the tenon shoulder tightly against the face and adds mechanical resistance. The offset must be controlled: too much can split the tenon or mortised member, particularly in brittle or thin stock.
Independent reader supportYour contribution helps us test, update, and keep practical guides available for everyone.When a different mortise-and-tenon method makes more sense
A router and jig can improve repeatability for multiple identical parts, but powered tools do not eliminate test cuts, layout checks, or final fitting. Secure the work, control dust, and use the cutter manufacturer’s recommended setup.
A loose-tenon machine such as the Festool DOMINO DF 500 cuts rectangular mortises for manufactured beech tenons. It is a legitimate fast and repeatable solution for furniture, doors, and casework, particularly when many joints must be made. It is not the same visual result as the through-tenon described here: the manufactured floating tenon is normally hidden inside the parts, whereas a through tenon is deliberately visible.
What’s actually slowing this PC down?
Pick the symptom - the matching free tool is one click away.
Also popular on Amazon

- 【 Professional Wood Chisel Set 】- Includes 6-50mm(1/4"-2") 8 sizes of wood chisels, 6mm, 10mm, 13mm, 19mm, 25mm, 32mm, 38mm, 50mm(¼", 3/8", ½", ¾", 1", 1-¼", 1-½", 2"), 1 honing guide and 1 alumina sharpening stone (120/200 grit), to meet various woodworking projects.
- 【Precision Pregrinding Chisel Heads】 - All woodworking chisel heads undergo precise 25 degree bevel pre grinding to ensure accuracy and sharpness, making it easy to cut mortises, scrape rough surfaces, cut corners, and scrape off glue.
- 【High Quality CR-V Blade】 - Our chisels for woodworking is made from chrome vanadium steel, hardened to Rockwell C60 for a long lasting sharp edge and durability. These wood chisels are durable and sharp enough for tough wood, fine carving and a variety of woodworking projects.
- 【Comfortable Wood Handle】 - The solid wood handle of our wood carving chisels are comfortable and beautiful to hold, sturdy and durable, and the end of the chisel handle is hooped with a metal ring, which is hammer-resistant and not easy to be deformed and broken, but it is still recommended to use a mallet or plastic hammer instead of an iron hammer.
- 【Sturdy Wooden Box】 - These 8 wood chisels are neatly organized in a wooden case that features double panels, padded hinges, and a protective EPE liner that ensures the woodworking chisels are safely stored and transported, Convenient for beginners and experts.
For readers who want a broader physical reference after learning this joint, Joints: A Woodworker’s Guide is a relevant joinery book covering mortise-and-tenon construction, tools, adhesives, and related joints. It is supplementary, not necessary for completing the workflow above.
Safety checklist
- Secure the workpiece before chopping, drilling, routing, or sawing.
- Wear eye protection, especially when drilling overlapping holes or driving a mallet.
- Keep hands clear of the exit side when drilling a through mortise; a bit can emerge unexpectedly and violently.
- Keep hands clear of moving router bits, saw blades, and dado cutters.
- Use push devices, guards, guides, and dust collection as appropriate to the tool.
- Follow the specific manufacturer’s safety instructions. In particular, a mortising-bit manual warns users to keep hands away from the back of the workpiece when the bit may cut through.
- Make powered-tool test cuts in scrap before cutting the project parts.
Final inspection before assembly
- The mortise is centered and its walls are clean, parallel, and free of major breakout.
- The mortised member retains enough wood around the opening for the intended load.
- The tenon enters straight and reaches its planned projection.
- The cheeks make firm contact without requiring excessive force.
- The shoulders close against the face without visible gaps.
- The exposed end is intentionally flush, beveled, or proud by the planned amount.
- Any dowel or drawbore layout is positioned far enough from the edges to avoid splitting.
The result is a joint whose strength comes from sound proportions, long-grain contact, shoulder support, accurate fitting, and appropriate assembly—not from a strength slogan. Cut the mortise carefully, make the tenon fit that actual opening, and treat the visible end as both a structural detail and a design choice.
Frequently Asked Questions
What is the difference between a through and blind mortise-and-tenon joint?
A through mortise-and-tenon joint has a tenon that passes completely through the mortised member and remains visible on the far side. A blind mortise-and-tenon joint stops inside the mortised member, so the tenon is hidden.
How thick should a tenon be?
For equal-thickness stock, begin with a mortise width and tenon thickness of approximately one-third of the stock thickness. For example, 3/4-inch stock suggests a starting size of about 1/4 inch. Check the remaining wood and expected loads before finalizing the dimensions.
Do these 3 things before closing this tab:
1Clear out junk files and repair common Windows errors2Fix the driver behind crashes, sound loss and screen glitches3Repair Windows errors before they cause bigger problemsWhy should the mortise be cut before the tenon?
Yes. Cutting the mortise first gives you a fixed opening to measure and test. Tenons are easier to make thinner in small increments than mortises are to narrow accurately after cutting.
How tight should a through tenon fit?
The tenon should slide through with firm hand pressure. It should not rattle loosely, but it should not require pounding or crushing force either. Excessive force can split the mortised member or push the shoulders away from the face.
What is a drawbored mortise-and-tenon joint?
Drawboring offsets the hole through the tenon slightly from the holes in the mortised member. Driving the wooden pin through that offset pulls the tenon shoulder tight against the mortised face. It is different from installing centered dowels through the joint.
The Bottom Line
A strong through mortise-and-tenon joint starts with proportion and accuracy: leave adequate wood around the mortise, cut the mortise first, and fit an oversized tenon until it passes with firm hand pressure. Clean long-grain cheeks, well-seated shoulders, suitable glue, and optional pins or drawboring then reinforce the joint without pretending that one recipe suits every wood, size, or load.
Quick Recap
Product prices and availability are accurate as of the date/time indicated and are subject to change. Any price and availability information displayed on Amazon at the time of purchase will apply.

