Free tools Windows power users keep installed
One-click scans. No signup required.
Use a wired video doorbell if you have compatible low-voltage wiring and want dependable, maintenance-free power. Choose a battery model when no wiring exists, you rent, or you want the simplest installation. Before mounting anything, check the transformer, indoor chime, Wi-Fi signal, mounting surface, and the exact requirements for your doorbell model.
“Wireless” usually describes the network connection and battery power—not always a completely wire-free installation. Some battery doorbells can also connect to existing low-voltage wiring.
As an Amazon Associate I earn from qualifying purchases.
Make the wired-or-battery decision first
| Choose wired when… | Choose battery-powered when… |
|---|---|
| Compatible doorbell wiring is already available. | No doorbell wiring exists. |
| You want to avoid routine charging. | You rent or want a reversible installation. |
| The entrance has frequent motion and visitors. | You need more freedom to choose the mounting location. |
| Your transformer and chime meet the manufacturer’s requirements. | You are comfortable managing charging and battery life. |
A wired doorbell is not automatically plug-and-play. The transformer may have the wrong voltage or insufficient capacity, and the existing chime may be incompatible. Battery models are easier to install, but they require charging and may reduce recording or motion activity to conserve power.
Do not assume that every wired doorbell records continuously or that every battery model lacks advanced features. Capabilities vary by model and subscription plan. For example, Google says its current Nest Doorbell (battery) cannot provide continuous 24/7 video history: check the manufacturer’s specifications.
#1 Best Overall

- AI-Powered Smart Detection: Advanced AI technology accurately identifies people while filtering out vehicles and animals, so you only get the alerts that matter most
- Secure Cloud Storage: Protect your recordings with AES-128 encrypted cloud storage
- Pre-Capture Recording: Cloud subscribers benefit from pre-capture functionality, ensuring the camera starts recording right at the moment motion begins - never miss a thing
- Reliable 2.4GHz Wi-Fi Connection: Optimized for 2.4GHz networks to deliver stable, uninterrupted performance. (Not compatible with 5GHz Wi-Fi.)
- Exceptional Night Vision: Equipped with four powerful infrared LEDs and an advanced image sensor, providing sharp, detailed footage even in total darkness
Check your home before buying
If an old doorbell is installed
Remove or inspect the existing button and look for two low-voltage wires. Also locate the indoor chime and transformer. Common transformer locations include inside or near the chime, near the electrical panel, in a basement, or in a crawl space. Google’s transformer and compatibility guide explains how to identify the relevant components.
Record:
- The transformer’s AC voltage and VA rating.
- Whether the indoor chime is mechanical, digital, battery-only, or wireless.
- The exact model and generation of the doorbell you plan to install.
- The Wi-Fi signal strength at the front door.
- The mounting surface: wood, siding, brick, stucco, stone, or concrete.
Transformer requirements are model-specific. For example, the current Google Nest Doorbell (wired, 3rd gen) requires a 16–24 VAC, 10–40 VA transformer in North America. Google’s compatibility table lists different requirements for different Nest models, so do not treat that range as a universal smart-doorbell standard.
If there is no doorbell
Your options are a battery-powered doorbell, a supported indoor plug-in power adapter, new low-voltage wiring installed by an electrician, or professional installation. A battery-only indoor chime is not automatically compatible with a wired smart doorbell; Google specifically says battery-powered wireless chimes do not work with its wired Nest Doorbells.
Tools and materials
- Phillips screwdriver and, if supplied, the manufacturer’s security screwdriver.
- Drill and the correct bit for the mounting surface.
- Wall anchors suitable for the surface.
- Bubble level or phone-level tool.
- Pencil.
- Tape or a small clamp to stop existing wires falling into the wall.
- Voltage tester or multimeter, if you are qualified to check low-voltage wiring.
- Masonry bit for brick, concrete, stone, or some stucco surfaces.
- Manufacturer-approved chime connector, jumper, power kit, wedge, or corner mount where required.
Google’s battery installation instructions list a Phillips screwdriver, a 1/4-inch (6 mm) drill bit for anchors, an optional 3/32-inch (2.38 mm) bit for hard materials, and a bubble level: see the installation guide.
Use the supplied or approved fasteners. Ring warns that incorrect screws on some wired models can damage the device and create a fire or injury hazard: review the model-specific mounting instructions.
Set up and test the doorbell indoors
Do this before permanently mounting the device:
- Download the manufacturer’s app and sign in or create an account.
- Charge a battery model fully.
- Add the doorbell by scanning its QR code or entering its device code.
- Connect it to your home Wi-Fi network.
- Install firmware updates if prompted.
- Confirm that live video works.
This catches problems while the device is still on a table. You may discover that the Wi-Fi signal is too weak, the battery is not charged, the device is registered to another account, or a required accessory is missing. Google recommends using its app as the primary setup guide because it connects the doorbell to Wi-Fi and enables video features: see its setup guidance.
How to install a wired video doorbell
1. Confirm power and chime compatibility
Before disconnecting the old button, verify:
- AC voltage and VA rating.
- Transformer type and frequency requirements.
- Whether the existing chime is supported.
- Whether the product needs a chime connector, jumper, or power kit.
- Whether an indoor power adapter disables the existing chime.
For example, Google’s wired Nest Doorbells require an included chime connector when used with a compatible wired chime. The current wired Nest specifications also say that wired chimes are not supported when the doorbell is powered by the optional Indoor Power Adapter.
Rank #2
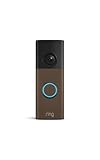
- Capture it all with Retinal 2K video — From wide views to tighter focus, it’s easy to see your home or business in crisp clarity with Retinal 2K.
- Zoom in up to 6x — Catch details at a distance, inspect faces, and more with up to 6x Enhanced Zoom.
- Connect to who’s there — See, hear, and speak in real time with Live View and Two-Way Talk.
- Get real-time alerts — Receive real-time notifications on your phone when motion is detected.
- Easily recharge — Simply insert the included removal tool to detach your doorbell from the wall, then recharge the built-in battery via USB-C. (Cable not included.)
2. Turn off the correct circuit
- Switch off the breaker or fuse supplying the doorbell transformer and chime.
- Press the old doorbell to confirm it no longer rings.
- If you cannot identify the circuit, stop and call an electrician rather than guessing.
The wires at a doorbell button are normally low voltage, but the transformer’s input side is connected to household mains. Never work on exposed mains wiring.
3. Photograph and label the wires
Take a clear photograph before disconnecting anything. Label wires connected to front, rear, transformer, or other chime terminals. Wire colors are not a reliable substitute for terminal labels. Secure the wires with tape so they cannot disappear into the wall.
4. Install the required chime component
Follow the exact wiring diagram for your model. Do not assume that a Ring procedure applies to a Google, Arlo, Eufy, Wyze, or other doorbell.
For Ring Video Doorbell Wired installations with an existing internal chime, Ring’s diagram calls for connecting the doorbell wires and installing a jumper between the chime’s TRANS and FRONT terminals. For a Ring Video Doorbell Wired connected directly to a transformer without an internal chime, Ring says both original wires connect to the doorbell and the app’s chime type should be set to None. See the Ring wiring diagrams.
Crashes, No Sound, or Screen Glitches?
Random freezes, missing sound and display glitches usually trace back to one bad driver. Find and replace yours safely.Free scan · under a minuteWindows Errors? Fix Them Before They Spread
Repair common Windows errors and clear accumulated junk for a smoother, more stable PC - no reinstall needed.Free scan · no reinstall5. Connect the low-voltage wires
- Follow the product’s terminal diagram.
- Tighten terminal screws securely without stripping them.
- Keep bare copper from touching another terminal.
- Use only supplied or manufacturer-approved connectors.
- Never connect a doorbell directly to household mains.
Some models accept either wire on either terminal; others have specific connections. Follow the exact manual for the model and generation in your hands.
6. Mount and angle the doorbell
Feed excess wire back into the wall without sharply bending or crushing it. Level the mounting plate, use anchors suited to the surface, and add a wedge or corner mount if the doorway is recessed or angled. The correct angle can determine whether the camera captures a visitor’s face, a wall, or only the top of a person’s head.
Frame the approach and package area without unnecessarily recording neighboring windows or private property. Google’s battery model includes a wedge offering up to 20 degrees of horizontal adjustment; a wider angle may require an additional accessory.
Rank #3
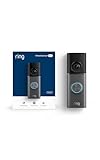
- Capture it all with Retinal 4K video — See your home or business in the ultimate clarity with Retinal 4K.
- Zoom in up to 10x — Catch details at a distance with up to 10x Enhanced Zoom.
- See, hear and speak to visitors on camera — With Live View & Two-Way Talk with Audio+, you’ll be able to interact with who’s there in real time, right from your phone.
- Tailored detection for more exact alerts — 3D Motion Detection pinpoints motion on your property so you’ll receive more precise alerts and fewer interruptions.
- True color, even in low light — With Low-Light Sight, just a little ambient light gives you true color video. In total darkness, your camera switches to crisp black-and-white to keep details sharp.
7. Restore power and test
Restore the breaker and check, in order:
- The doorbell powers on.
- The app displays live video.
- A button press creates a phone notification.
- Two-way audio works in both directions.
- The compatible indoor chime rings.
- Smart-speaker announcements work, if configured.
- Night vision and low-light video are usable.
- Motion detection covers the intended approach.
How to install a battery-powered video doorbell
1. Charge and pair it indoors
Fully charge the battery, add the device in the manufacturer’s app, connect it to Wi-Fi, update its firmware, and confirm live video before mounting it.
2. Choose the mounting position
Check Wi-Fi strength at the actual door, not just inside the house. Choose a position that captures faces and packages, is protected from excessive rain and direct sun, and allows the battery to be removed or replaced easily. Extreme temperatures can affect battery performance and video quality.
3. Mount the plate
- Hold the plate in position and confirm it is level.
- Mark the holes.
- Drill with the correct bit for the material.
- Install suitable anchors.
- Fasten the plate.
- Attach the doorbell and install its security screw or lock.
Do not use ordinary drywall anchors in masonry or heavy cladding unless they are rated for that surface.
4. Test real-world activity
Walk toward the door from several directions and distances. Check face visibility, package coverage, notification delay, two-way audio, and Wi-Fi reliability. After several days, check battery drain. A busy sidewalk, passing cars, swaying branches, weak Wi-Fi, cold weather, frequent live views, and high sensitivity can all shorten runtime.
When the indoor chime does not work
Possible causes include an unsupported chime, a missing connector or jumper, an incorrect digital-chime setting, wires touching the mechanical chime’s moving parts, or a power adapter that does not support the existing chime.
The Tool Desk
Outbyte Driver Updater FREEFix the driver behind crashes, sound loss and screen glitchesFind Drivers →Outbyte PC Repair FREEClear out junk files and repair common Windows errorsFree Scan →Check the product’s compatibility list and wiring diagram. For mechanical chimes, ensure wires are not touching the moving mechanism or one another. If the old chime is unsupported, use the manufacturer’s wireless chime, phone notifications, a compatible smart speaker, or another approved indoor alert method.
Independent reader supportYour contribution helps us test, update, and keep practical guides available for everyone.Troubleshooting checklist
The doorbell does not power on
- Confirm the breaker is on.
- Check that the transformer voltage and VA rating meet the model’s requirements.
- Inspect low-voltage terminals with power switched off.
- Confirm that a required chime connector, jumper, or power kit is installed.
- Charge the battery if it is a battery model.
If the transformer is unlabeled, inaccessible, outside the required range, or connected to questionable mains wiring, stop guessing. Google advises treating an unlabeled or incompatible transformer as unsuitable.
Rank #4

- Capture it all with Retinal 2K video — From wide views to tighter focus, it’s easy to see your home or business in crisp clarity with Retinal 2K.
- Zoom in up to 6x — Catch details at a distance, inspect faces, and more with up to 6x Enhanced Zoom.
- Connect to who’s there — See, hear, and speak in real time with Live View and Two-Way Talk.
- Get real-time alerts — Receive real-time notifications on your phone when motion is detected.
- Easily recharge — Simply insert the included removal tool to detach your doorbell from the wall, then recharge the built-in battery via USB-C. (Cable not included.)
The doorbell repeatedly reboots or goes offline
Check for insufficient transformer capacity, voltage drop in old or long wiring, weak Wi-Fi, excessive motion activity, low battery, extreme temperatures, or router interference. Restart the router and doorbell, improve Wi-Fi coverage, reduce activity zones, and verify the transformer specifications. Google recommends moving the router and doorbell closer, reducing interference, and restarting the router: see its troubleshooting steps.
The picture is distorted or poorly framed
Clean the lens, check for condensation, reduce direct sunlight or bright sky behind visitors, and adjust the height or angle with a wedge. Extreme heat and cold can also affect video quality.
The battery drains too quickly
Reduce motion sensitivity, limit activity zones to the approach or porch, disable unnecessary alerts, improve Wi-Fi coverage, and use a spare battery or solar accessory where supported. Do not rely on a fixed number of months between charges; activity, temperature, Wi-Fi, settings, and battery age make runtime highly variable.
When to hire an electrician or installer
Professional help is the right choice when you need to replace or relocate a transformer, run new cable through finished walls, connect household mains, work inside a breaker panel, deal with an inaccessible or unlabeled transformer, or comply with permits and local building codes.
Low-voltage doorbell wiring is different from the transformer’s mains side. Ring’s hardwiring guidance also recommends considering local laws and building codes and using only a transformer within the model’s specified range: read the safety guidance.
Privacy, security, and maintenance
- Point the camera at the approach to your door rather than unnecessary neighboring windows.
- Use privacy zones or masking if the device provides them.
- Tell household members about audio recording and check the rules in your state or locality; U.S. requirements vary.
- Follow landlord, condominium, homeowners-association, and building policies.
- Use a strong account password and multifactor authentication where available.
- Keep the app and doorbell firmware updated.
- Clean the lens periodically and inspect mounts and wiring.
- Charge or replace batteries before they reach a critical level.
Scenario-based buying advice
- Existing compatible wiring: Choose wired after confirming the transformer and chime.
- No wiring: Choose battery power, a supported plug-in adapter, or professional wiring.
- Renting: Favor a battery model and reversible mounting, subject to landlord rules.
- No battery maintenance: Choose a wired model or pay for professional wiring.
- Weak Wi-Fi: Improve network coverage before buying; a better doorbell will not fix a poor signal.
- Indoor alerts required: Verify support for your mechanical chime, digital chime, wireless chime, smart speaker, or phone notifications.
- Replacing an older doorbell: Identify the exact new model. Do not assume an old mounting plate, power kit, chime connector, or accessory will transfer.
For current product requirements, consult the manufacturer’s model-specific documentation, such as Google’s wired Nest specifications or Ring’s wired doorbell product information. Prices, accessories, subscriptions, and availability can change.
What’s actually slowing this PC down?
Pick the symptom - the matching free tool is one click away.
Quick Recap
Product prices and availability are accurate as of the date/time indicated and are subject to change. Any price and availability information displayed on Amazon at the time of purchase will apply.