For a standard basket-strainer drain, seal the flange as its manufacturer specifies, secure the drain body with the supplied washers and locknut, connect the tailpiece to a properly trapped and vented drain, then run water and check every joint for leaks. The exact washer order and sealant depend on the drain and sink; use the product instructions, not a one-size-fits-all diagram.
Before you start: identify the drain and check the fit
A removable-basket strainer and a garbage-disposer flange are different assemblies. Confirm which arrangement your sink is made for and that the drain matches its opening. Lay out the strainer basket, drain body, washers, locknut or housing, tailpiece and coupling hardware, then compare them with the kit diagram. Elkay’s drain installation instructions show the components in one typical assembly; parts and their order vary by product.
Also look at the piping under the sink. The tailpiece must connect to a trapped and vented drain, and the existing wall connection and locally adopted plumbing code affect what arrangement is acceptable. If the pipes do not line up without improvised bends, or the layout appears unusual, pause and get local plumbing guidance before altering it.
Tools and preparation
- The drain assembly and its installation sheet
- The sealant specified as compatible with the drain and sink
- A wrench suited to the locknut and the available cabinet access; LIXIL specifies a basin wrench for its basket-strainer locknut
- A container and cloth for residual water, plus a dry tissue for checking joints after installation
Remove the old drain material from the sink opening and leave the flange seating surface clean and dry. The reviewed manufacturer instructions do not establish a universal cleaning product, so avoid assuming a particular solvent or cleaner is safe for every sink finish.
The Tool Desk
Outbyte PC Repair FREEClear out junk files and repair common Windows errorsFree Scan →Outbyte Driver Updater FREEScan for outdated or missing drivers - takes under a minuteDriver Scan →#1 Best Overall

- Standard size 3-1/2 inches opening: Fits most American family/commercial kitchen sinks. Fits sinks with 3.23 - 4.45 inches opening. Height of this kitchen sink drain is 3.85‘’. Please measure to ensure compatibility with existing plumbing before buying
- Well made 304 stainless steel construction, except plastic nut (Metal nut will corrode, bonding the nut to the strainer) and brushed nickel finish. Good material protect against corrosion & rust, ensuring quality and longevity
- The removable separate deep basket prevents debris from clogging drain pipe ( NOTE: It can not be connected to the garbage disposal)
- Easy to install: No need plumbers. Installed easily without any tools. You can contact KONE if you need help for installation
- 2 years Guarantee(from order date), if there have any problem with our products, please contact us directly, we'll responsible for all products from KONE
Install a standard basket-strainer drain
- Apply the specified flange seal. Follow the drain and sink instructions for both sealant type and placement. LIXIL’s basket-strainer instructions call for plumber’s putty under the flange; Elkay’s drain instructions allow putty or sealant at the flange area. These are product-specific directions, not interchangeable universal rules. See LIXIL’s basket-strainer instructions and Elkay’s drain instructions.
- Insert the drain body. Place it through the sink opening as shown in the kit diagram. Keep the flange seated evenly.
- Fit the parts underneath. Install the specified gasket, washers, housing or retainer, and locknut in the order shown for that assembly. Hold the drain body firmly so it does not turn while tightening; rotation can disturb the flange seal. Tighten according to the manufacturer’s directions rather than applying an assumed universal torque.
- Remove excess sealant where directed. Follow the product instructions for cleanup at the flange; do not disturb the seal while doing so.
- Attach the tailpiece. Use the supplied or specified flanged washer and coupling nut to connect the tailpiece to the drain body.
- Connect the trap and downstream drain. Join the tailpiece to the existing trap and drain only in a configuration that is properly trapped and vented. Do not create an S-trap or improvise a route to compensate for misaligned piping. The International Code Council’s 2024 International Plumbing Code, Chapter 9, addresses venting and prohibits S-traps; local adoption and amendments determine the rules that apply at a particular home.
Disposer and dishwasher connections
If the sink has a garbage disposer
A disposer uses its own sink flange and model-specific drain connections, so a standard basket-strainer installation sequence does not apply. Use the disposer’s instructions for mounting and connecting it. The exact disposer model and sink configuration determine the parts and steps.
If a dishwasher drains into the sink plumbing
The 2024 International Plumbing Code’s residential provision allows a dishwasher waste connection at a wye on the kitchen sink tailpiece, at a food-waste disposer’s dishwasher connection, or through an air break to a standpipe. It also requires the waste line to rise and be securely fastened beneath the sink rim or countertop. This is model-code language, not proof that every jurisdiction has adopted the same rule; check local requirements and the appliance manual. See 2024 IPC, Section 409.4.
Rank #2

- DESIGNED FOR STAINLESS STEEL SINKS: The sink drain strainer plug is engineered to fit perfectly into standard stainless steel sinks
- PEACE-OF-MIND: The kitchen sink strainer is designed for hassle-free installation
- COORDINATING STYLE: Coordinate with today's popular kitchen appliances and accessories with stainless steel
- AUTHENTIC MOEN PART: The kitchen sink stopper includes convenient lock nut
- MOEN QUALITY: The sink strainer basket is made with durable and dependable construction
Route and secure the hose as the dishwasher manufacturer directs, avoiding sharp bends and kinks. Whirlpool describes a high loop as a way to help prevent siphoning or backflow and advises checking connections for leaks after a short cycle; follow the manual for the actual appliance rather than treating that guidance as a universal code requirement. An air gap may be required in some locations. Moen’s air-gap guidance discusses code-dependent uses, but local rules determine whether one is required for a particular installation.
Independent reader supportYour contribution helps us test, update, and keep practical guides available for everyone.Test the drain for leaks
- Run water into the sink and inspect the underside of the flange, the tailpiece coupling and each trap connection.
- Fill the sink, then let it drain while watching the same joints. A dry tissue around each connection can help reveal a small drip.
- If a joint leaks, follow the fitting or drain instructions to reseat or tighten it. Do not try to cure a flange leak by tightening an unrelated downstream connection.
- Repeat the water test and inspect again. If a dishwasher is connected, check its hose connections during the test recommended in the appliance manual.
Elkay’s installation sheet directs installers to run water and check for leaks. Its instructions also state, “Follow all local plumbing and building codes.” See Elkay, Installation Instructions: Drains (2019).
Do these 3 things before closing this tab:
1Fix the driver behind crashes, sound loss and screen glitches2Repair Windows errors before they cause bigger problems3Scan for outdated or missing drivers - takes under a minuteQuick Recap
Best Value

- PREMIUM 304 STAINLESS STEEL – Crafted from high-quality 304 stainless steel, this drain strainer is rustproof, corrosion-resistant, and built to last, ensuring leak-free performance for years to come.
- UNIVERSAL FIT FOR KITCHEN SINK– Designed to fit standard American kitchen sinks with a 3-1/2 inch drain hole, this versatile drain strainer is a perfect match for your existing setup.
- UPGRADED DRAIN HOLES – Features a durable stainless steel T-knob for a tighter seal and enhanced durability, along with strategically placed anti-clogging drain holes for fast, hassle-free water drainage.
- DUAL-FUNCTION BASKET – Combines a strainer and water stopper in one, making it easy to trap debris while allowing you to control water flow. Simply lift the basket to remove trapped food particles for quick and easy cleaning.
- TOOL-FREE INSTALLATION – No special tools required! Effortlessly install this drain strainer in minutes. If you have any questions or need assistance, our friendly customer support team is here to help.
Rank #4

- 3-1/2 INCH KITCHEN SINK DRAIN: fit for most American standard kitchen sinks with Universal 3-1/2 inch drain hole
- 304 STAINLESS STEEL: Stainless steel body and strainer basket, Metal center knob. Durable and dependable, rustproof no leaks
- USE EASILY: Works as a kitchen drain strainer and a kitchen sink stopper, depend on which way you want. Easy to stop the flow of water and open back up. Easy to clean. Just remove the basket to empty
- EASY TO INSTALL: Package included installation instruction, You do not need professional skills to become a plumber
- CUSTOMER SERVICE: If you have any question about KONE sink drain assembly, any issue, please contact us anytime
Rank #3
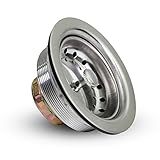
- Size: 3.5.Highly Durable: This Highcraft Sink Drain As sembly is Made of Heavy Duty Stainless steel which is Built To Last!
- Strainer/Stopper Included: Works as strainer and a plug, depEnding which feature you prefer
- Fits Standard Drains: (3-1/2 - 4 Inch -4-1/2 inch flange ), Detachable Parts
- Anti Clogger: Traps food debris to Prevent clogs in your sink and has lots of Holes in the basket for Draining Water easily.
- Strainer/Stopper: Super easy to clean! just Remove the basket to empty. and it's Dishwasher Safe
Common mistakes to avoid
- Buying a basket strainer when the sink is set up for a disposer, or choosing a drain that does not fit the sink opening.
- Assuming every kit uses the same washer stack or accepts the same sealant.
- Allowing the drain body to rotate while tightening the locknut, which may disturb the flange seal.
- Forcing misaligned pipes together or creating an improper trap arrangement instead of checking the existing venting and local requirements.
- Kinking or failing to secure a dishwasher hose, or skipping model-specific disposer preparation for the dishwasher inlet.
- Skipping the leak check after assembly.
Product prices and availability are accurate as of the date/time indicated and are subject to change. Any price and availability information displayed on Amazon at the time of purchase will apply.




