Replacing a built-in dishwasher is usually a manageable DIY project when the new appliance fits the existing opening and usable hot-water, drain, and electrical connections are already in place. The basic process is to measure the opening, shut off power and water, remove the old unit, connect the water supply, route the drain correctly, connect power according to the model instructions, level and secure the dishwasher, and run a complete leak test.
This guide is written for U.S. homeowners and focuses primarily on a same-location replacement. Installing a dishwasher where none existed before is a larger plumbing, electrical, cabinet, and sometimes countertop project. The installation manual for the exact model and the electrical and plumbing rules adopted by your local jurisdiction take precedence over any general guide.
As an Amazon Associate I earn from qualifying purchases.
Do not begin by buying generic parts. First locate the exact model’s separate installation manual. Opening dimensions, drain-hose limits, water-pressure requirements, mounting brackets, electrical connection method, GFCI arrangement, and test-cycle controls vary by dishwasher.
Free tools Windows power users keep installed
One-click scans. No signup required.
Before you start: decide whether this is a DIY installation
A dishwasher replacement is a reasonable project for a capable homeowner if the opening, utilities, and mounting conditions are already suitable. It is not simply an appliance swap when the kitchen needs new plumbing, electrical wiring, or cabinet work.
#1 Best Overall

- DISHWASHER INSTALLATION KIT: Includes a stainless steel braided supply line measuring 6 ft. in length with 3/8 in. compression x 3/8 in. compression connections, designed for compatibility with most standard dishwashers
- WHAT IS INCLUDED: Kit contains (1) 6 ft. braided water supply line, (1) 3/4 in. female hose 90 degree elbow, (1) 3/8 in. male iron pipe (MIP) 90 degree elbow, (1) 3-prong straight power cord, (3) wire nuts, (1) Teflon tape, (1) hose clamp, and (1) Romex connector
- DURABLE BUILD: Water line features a PVC core, braided nylon reinforcement, clear vinyl outer shell, and stainless steel exterior to help reduce kinking and crimping
- EASY TO INSTALL: Drop-in kit includes all components required for new or replacement installations—no soldering, glue, or crimping needed
- RELIABLE PERFORMANCE: Suitable for potable water use with a maximum working pressure of 125 PSI and temperature range of 40 to 160 degrees F; UPC approved and CSA certified
A replacement may be suitable for DIY when:
- The new dishwasher will occupy the same location as the old one.
- The opening is correctly sized, reasonably square, and deep enough for the exact model.
- A working hot-water shutoff valve is accessible under the sink.
- The sink drain, garbage disposal, or air-gap arrangement provides an approved dishwasher connection.
- The existing electrical supply is grounded, undamaged, accessible, and compatible with the appliance instructions.
- You can safely move a heavy appliance with a second person.
- You can verify that the circuit is de-energized before touching electrical connections.
Use a professional when:
- No dishwasher opening exists and cabinets, countertop, flooring, or structural supports must be modified.
- A new circuit, breaker, receptacle, junction box, or hardwired connection is needed.
- The existing wiring is ungrounded, damaged, aluminum, knob-and-tube, or otherwise uncertain.
- There is no accessible shutoff valve, or supply plumbing must be soldered, rerouted, or opened inside a wall.
- The drain must travel an unusual distance, connect to a floor drain, or be substantially reconfigured.
- The dishwasher cannot be secured because of a stone countertop, unusual cabinet construction, an uneven floor, or an insufficient enclosure.
- You cannot confidently verify that the breaker is off.
Bosch’s electrical and plumbing safety instructions likewise direct electrical work to qualified electricians and caution that hot-water work should be performed only after the supply is shut off. Copper or other water-supply methods not shown in the model instructions should be handled by a licensed plumber.
Safety rule: Water and electricity may be close together under the sink. Turn off the dishwasher breaker, verify that the appliance is de-energized with an appropriate voltage tester, and close the dishwasher water shutoff before disconnecting anything. If the breaker trips during testing or operation, leave it off and call an electrician rather than repeatedly resetting it.
Measure the opening and utilities before buying
Do not assume that the old dishwasher’s dimensions or the phrase standard dishwasher describe the new appliance accurately. Measure the opening and compare those measurements with the installation manual for the exact model.
Quick wins for a faster PC:
Clear out junk files and repair common Windows errorsFree Scan →Scan for outdated or missing drivers - takes under a minuteDriver Scan →| What to measure | How to check it | Why it matters |
|---|---|---|
| Width | Measure at the top, middle, and floor. | Cabinet openings can narrow or bow, especially near flooring and trim. |
| Height | Measure from the finished floor to the underside of the countertop at the left, center, and right. | New tile, underlayment, or uneven floors can reduce clearance. |
| Depth | Measure from the back wall to the front of the cabinets, including any obstruction. | Hoses, wiring, insulation, and the door panel need room without being crushed. |
| Door clearance | Open the door fully and check adjacent cabinets, islands, corners, handles, and flooring. | A dishwasher can fit the opening but still be unable to open correctly. |
| Utility route | Measure the distance to the sink cabinet and inspect existing holes. | Water, drain, and power connections have model-specific routing and length limits. |
| Mounting area | Identify whether the countertop is drillable wood or laminate, or non-drillable stone or another hard surface. | The model may require top mounting, side mounting, or a manufacturer-approved alternative. |
Twenty-four-inch built-in dishwashers are common, but they are not universal. Compact built-in models are often about 18 inches wide; ADA-height, drawer, panel-ready, portable, and countertop models have different dimensions. Lowe’s dishwasher buying guide describes approximate 23.5-to-24-inch built-in and 17.5-to-18-inch compact categories, while Home Depot’s guide identifies 24-inch and 18-inch built-in models along with portable dishwashers.
Use manufacturer dimensions as examples, not as universal requirements. For example, one Bosch installation document specifies a minimum enclosure of 34 inches high and 24 inches wide, while a separate Bosch compact-model document specifies a substantially smaller opening. Your model may differ.
Inspect the existing utilities
- Water: Find the dishwasher’s hot-water shutoff under the sink. Operate it briefly and confirm that it shuts off completely without leaking around the stem or compression connection.
- Drain: Identify whether the hose connects to a garbage-disposal inlet, a branch tailpiece, or an air gap. If a disposal will be used, confirm that its dishwasher inlet is open.
- Electrical: Locate the receptacle or junction box. Check the appliance data plate and manual for voltage, amperage, grounding, cord, and hardwire requirements.
- Routing holes: Confirm that holes through the sink cabinet are large enough and have no sharp edges that could damage a hose or cable. Use the specified grommet or edge protection where required.
- Service access: Leave enough slack for a future technician to pull the dishwasher forward without cutting the water, drain, or electrical connections.
- Floor: Make sure the floor is stable and does not rise high enough to trap the dishwasher behind newly installed flooring.
Tools and parts
Typical tools
- Tape measure and flashlight
- Level
- Screwdrivers and a drill/driver
- Adjustable wrench, pliers, and the nut drivers or socket set specified by the manual
- Wire stripper, if the model is hardwired and you are qualified to perform that work
- Hole saw or spade bits if new utility holes are permitted and needed
- Suitable voltage tester
- Safety glasses and work gloves
- Shallow pan, bucket, towels, cardboard, and a drop cloth
Typical installation parts
- Model-approved dishwasher water-supply line, commonly braided stainless steel or another approved material
- The correct 90-degree inlet fitting, if required or supplied
- Dishwasher drain hose and clamps
- Approved power-cord kit for a cord-and-plug installation
- Strain-relief fitting and junction-box components for a hardwired installation
- Manufacturer-approved mounting brackets and screws
- Air-gap assembly if required by local code or the model
- Branch tailpiece if the sink has no disposal dishwasher inlet
- Moisture-barrier tape or panel for wood, laminate, or particleboard countertops when specified
- Replacement shutoff valve if the existing valve is corroded, inaccessible, or lacks an appropriate dishwasher outlet
Do not assume that the dishwasher includes the water line, power cord, air gap, or all mounting hardware. Retailer installation programs commonly require a new connector hose and may not reuse old cords or hoses; manufacturers also specify model-specific kits. Check the exact product documentation and installation requirements before purchasing parts. See the Lowe’s dishwasher installation requirements and the product documentation for your model.
Required utilities: water, drain, and electricity
Hot-water supply
Dishwashers normally connect to the hot-water supply, not the cold-water line. Many manufacturers target approximately 120°F at the appliance, but the permitted temperature and water-pressure range varies by model.
Windows Errors? Fix Them Before They Spread
Repair common Windows errors and clear accumulated junk for a smoother, more stable PC - no reinstall needed.Free scan · no reinstallCrashes, No Sound, or Screen Glitches?
Random freezes, missing sound and display glitches usually trace back to one bad driver. Find and replace yours safely.Free scan · under a minuteFor example, one Maytag installation family specifies 120°F water and 20–120 psi. Bosch documents show other examples: approximately 120°F with a 15–145 psi range in one model and approximately 120°F, a 140°F maximum, and a 7.25–145 psi range in another. These differences are precisely why a single universal pressure or temperature claim is unsafe. Check the exact manual; the Maytag requirements and Bosch installation specifications illustrate the variation.
Flush the supply line into a pan before connecting it to clear debris. Do not kink the line, and use the gasket, ferrule, or fitting specified by the manufacturer.
Drain connection
The drain hose usually connects to one of these arrangements:
Rank #2

- DISHWASHER INSTALLATION KIT: Includes a stainless steel braided supply line measuring 6 ft. in length with 3/8 in. compression x 3/8 in. compression connections, designed for compatibility with most standard dishwashers
- WHAT IS INCLUDED: Kit contains (1) 6 ft. braided water supply line, (1) 3/4 in. female hose 90 degree elbow, (1) 3/8 in. male iron pipe (MIP) 90 degree elbow, (1) 3-prong angled power cord, (3) wire nuts, (1) Teflon tape, (1) hose clamp, and (1) Romex connector
- DURABLE BUILD: Water line features a PVC core, braided nylon reinforcement, clear vinyl outer shell, and stainless steel exterior to help reduce kinking and crimping
- EASY TO INSTALL: Drop-in kit includes all components required for new or replacement installations—no soldering, glue, or crimping needed
- RELIABLE PERFORMANCE: Suitable for potable water use with a maximum working pressure of 125 PSI and temperature range of 40 to 160 degrees F; UPC approved and CSA certified
- The dishwasher inlet on a garbage disposal.
- A branch tailpiece installed on the sink drain when there is no disposal.
- An air gap, where required by local plumbing rules or the model.
- Another approved arrangement specifically described in the installation manual.
If the garbage disposal is new or has never been connected to a dishwasher, remove the dishwasher-port knockout plug before attaching the hose. A forgotten plug is a common reason a new dishwasher will not drain; Bosch specifically identifies this check in its installation instructions.
The Tool Desk
Outbyte PC Repair FREEClear out junk files and repair common Windows errorsFree Scan →Outbyte Driver Updater FREEScan for outdated or missing drivers - takes under a minuteDriver Scan →The drain hose also needs the model-required high loop or air gap. A high loop raises the hose high inside the sink cabinet before it descends to the drain connection. An air gap is a countertop-mounted device that physically separates the dishwasher drain from the sink drain. Some jurisdictions require an air gap; others permit a properly installed high loop. Confirm the local requirement before choosing one.
Do not universalize either the minimum height or maximum hose length. One Bosch document requires the hose to reach at least 33 inches above the floor and permits a high loop or air gap. Bosch documents list 92 inches in one pre-installation checklist and 150 inches, including hose leading to the air gap, in another. Whirlpool documents cite other limits, including 10 or 12 feet depending on model. Follow the exact manual rather than extending the hose to a generic distance.
Electrical supply
Many U.S. dishwashers use 120 volts and 60 hertz on a grounded 15- or 20-amp supply, but the appliance data plate and installation manual control. Some manufacturers specify a dedicated circuit; others provide different requirements by model. One Bosch model, for example, specifies a dedicated 15-amp circuit and minimum No. 14 copper conductors rated for 75°C or higher. That is an example, not a universal wiring specification.
There are two common connection methods:
- Cord and plug: An approved power cord connects the dishwasher to a properly grounded receptacle located as permitted by the model and local code. Do not use an extension cord or an improvised adapter.
- Direct wire: The cable enters the dishwasher junction box through the required strain relief, and the conductors and grounding connection are made exactly as shown in the model manual. Install the junction-box cover before operation.
Do not use a generic wiring diagram. Wire colors, terminal arrangements, junction-box locations, cord-kit requirements, strain reliefs, and whether cord-and-plug installation is permitted vary among models.
GFCI requirements depend on the locally adopted electrical code. The 2026 edition of NFPA 70 includes dishwashers among appliances requiring GFCI protection, as summarized by Eaton’s 2026 NEC chart and discussed by IAEI. Your state or municipality may have adopted an earlier edition or amended the rule. Ask the local building department or a licensed electrician which NEC edition and GFCI arrangement applies where you live. Permit and inspection requirements also vary.
How to install a dishwasher: step-by-step
1. Read the exact installation manual
Find the model number and download the manufacturer’s installation instructions before buying fittings or disconnecting the old appliance. Manufacturers often publish a separate installation document rather than placing all installation information in the owner’s use-and-care manual. The manufacturer’s specification library, such as Bosch’s model-document lookup, is a useful example.
Mark these requirements in the manual:
- Minimum and maximum opening dimensions
- Utility-entry locations and hole sizes
- Water fitting, gasket, and supply-line requirements
- Drain routing, high-loop or air-gap requirements, and maximum hose length
- Electrical connection method, circuit rating, grounding, and cord-kit requirements
- Mounting method and approved hardware
- Moisture barrier or countertop protection
- Custom-panel or door-panel dimensions, if applicable
- Test-cycle controls and completion procedure
2. Inspect the opening before disconnecting anything
Confirm that the new unit fits the measured opening and that the existing utilities can reach it without unsafe extensions. Check the shutoff valve, drain connection, disposal port, receptacle or junction box, floor height, and mounting surfaces.
Plan the route before moving the appliance. Hoses and cables should not cross the motor, leveling legs, sharp frame edges, or moving parts. Do not leave a large coil directly behind the dishwasher. Bosch warns that coils can fold, kink, or break as the dishwasher is pushed into place.
Do these 3 things before closing this tab:
1Scan for outdated or missing drivers - takes under a minute2Repair Windows errors before they cause bigger problems3Fix the driver behind crashes, sound loss and screen glitches3. Shut off water and power
- Turn off the dishwasher’s circuit breaker.
- Verify that the appliance is de-energized with an appropriate tester before handling wiring.
- Close the dishwasher hot-water shutoff under the sink.
- Open the sink’s hot-water faucet briefly to relieve pressure.
- Place towels and a shallow pan under the water and drain connections.
Turning off a control switch is not enough for a hardwired dishwasher. The breaker must be off and the circuit must be verified dead.
Rank #3

- DISHWASHER CONNECTOR KIT: Includes a 5 ft. stainless steel braided supply line with 3/8 in. compression x 3/8 in. compression ends for standard dishwasher installations
- WHAT IS INCLUDED: Kit contains (1) 5 ft. braided water supply line, (1) 3/8 in. male iron pipe (MIP) 90 degree elbow, and (1) 3/4 in. female hose thread (FHT) 90 degree elbow
- DURABLE: Hose construction includes a PVC core, nylon braid reinforcement, clear vinyl shell, and stainless steel exterior
- EASY TO INSTALL: Elbows and nickel-plated brass nuts support easy connections in tight spaces without soldering, glue, or crimping
- RELIABLE PERFORMANCE: Rated for potable water use; maximum working pressure 200 PSI and temperature range 15 to 158 degrees F; UPC approved and CSA certified
4. Remove the old dishwasher
- Remove the toe-kick or lower access panel.
- Disconnect the electrical connection using the existing cord or hardwire method.
- Disconnect the water line and catch residual water in the pan.
- Disconnect the drain hose.
- Remove the mounting screws or brackets.
- Lower the leveling feet if necessary.
- Protect the floor with cardboard or a drop cloth.
- Pull the dishwasher forward carefully, checking for hidden screws, clips, hoses, or wiring.
Water remains in supply and drain lines even after the shutoff is closed. A pan, towels, and floor protection are not optional cleanup accessories; they prevent a small disconnection spill from damaging cabinets or flooring. Home Depot and Whirlpool both recommend preparing for residual water.
5. Prepare the new dishwasher
- Inspect the dishwasher for shipping damage before installation. Keep the packaging until the test is complete.
- Remove all interior packing materials.
- Leave the factory insulation blanket in place unless the manual says otherwise.
- Install the specified 90-degree water-inlet fitting in the correct orientation.
- Attach the drain hose and its clamp.
- Prepare the approved power cord or junction-box connection.
- Install the supplied or specified moisture barrier under a wood, laminate, or particleboard countertop.
Do not operate the dishwasher while it is unsecured. Opening the door on an unsecured unit can cause it to tip forward.
6. Route the utilities
Before sliding the dishwasher completely into the opening:
What’s actually slowing this PC down?
Pick the symptom - the matching free tool is one click away.
- Route the water line toward the sink cabinet.
- Route the drain hose toward the disposal, branch tailpiece, or air gap.
- Route the power cord or cable toward the receptacle or junction box.
- Protect holes through metal cabinets with the specified grommet or edge protector.
- Smooth wood holes so they cannot abrade the hose or cable.
- Keep the water line, drain hose, and electrical cable away from sharp edges and moving parts.
- Leave only the amount of slack the manual allows; do not pack excess coils behind the motor.
7. Connect the hot-water supply
- Confirm that the dishwasher shutoff remains closed.
- Flush the supply line into a pan to clear debris.
- Connect the approved supply line to the dishwasher inlet fitting.
- Use the supplied rubber washer, gasket, or ferrule where specified.
- Connect the other end to the dishwasher shutoff valve.
- Open the shutoff slowly.
- Inspect both ends immediately for leaks.
Be careful with thread sealant. A gasketed hose or compression connection seals with its washer or ferrule. Whirlpool’s general guide says not to apply Teflon tape or thread sealer to the dishwasher water-valve threads in the cited installation method. A separate tapered NPT pipe-thread elbow may require the sealant specified by another model’s manual. Do not treat all threaded connections alike:
- Gasketed hose or compression connection: use the supplied washer or ferrule; do not add tape unless the manual explicitly requires it.
- Tapered pipe threads: use the sealant specified by the model instructions.
Cross-threading, overtightening, using the wrong fitting, or placing tape where a gasket should seal can all create leaks.
8. Connect the drain correctly
- Attach the drain hose to the disposal inlet, branch tailpiece, or air-gap outlet.
- Secure it with the specified clamp.
- If connecting to a disposal, remove the dishwasher-port knockout plug first if it is still present.
- Create and secure the required high loop unless the factory drain routing already provides the required arrangement.
- Keep the hose free of kinks, crushing, and sharp bends.
- Do not connect below the sink trap or use an arrangement that permits sink water to flow back into the dishwasher.
- Confirm that the total hose length is within the exact model’s limit.
If the dishwasher drains through an air gap, connect the dishwasher hose to the correct air-gap inlet and the air-gap outlet to the disposal or drain tailpiece. A clogged air gap can cause water to appear around the sink; clean it only after shutting off power and following the component instructions.
9. Connect power
For a cord-and-plug installation, use only the approved cord kit and a properly grounded receptacle. For a hardwired installation, route the cable through the required strain relief, make the connections in the dishwasher junction box exactly as shown in the model manual, and connect the equipment grounding conductor as instructed.
Before operating, confirm that:
- No extension cord is being used.
- The circuit rating matches the appliance instructions.
- The grounding connection is present and secure.
- No conductor is exposed outside a terminal or approved wire connector.
- The strain relief grips the cord or cable correctly.
- The junction-box cover is installed.
- The GFCI arrangement and any permit or inspection requirements have been confirmed locally.
Stop and call a licensed electrician if the circuit is not grounded, the breaker or wiring is uncertain, the cable is damaged, the connection does not match the manual, or the breaker trips.
10. Slide the dishwasher into the opening
- Feed the water line, drain hose, and power connection into the sink cabinet as the dishwasher moves inward.
- Push slowly and check behind the unit frequently.
- Do not pinch, sharply bend, stretch, or drag the utilities across the frame.
- Center the dishwasher in the opening without forcing it against the countertop.
- Align the front with the surrounding cabinet fronts.
If the dishwasher stops before it is fully seated, pull it back out and find the obstruction. Do not solve the problem by crushing the drain hose or forcing the appliance against the back wall.
11. Level and secure the dishwasher
Use a level to check the dishwasher side-to-side and front-to-back. Adjust the feet or rear leveler according to the manual. Proper leveling affects door alignment, the door seal, drainage, and the ability to mount the dishwasher securely.
Rank #4
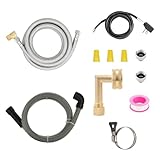
- 【UNIVERSAL FIT】All adapters included.Provides everything you need in installing almost any brands of dishwashers to household water supply.
- 【COTENT】1PC 6 ft stainless steel dishwasher supply line with 3/8" Comp x 3/8" Comp connections,1pc 3/8 in MIP elbow connector adapter,1pc 3/8" Comp x 3/4 in FHT elbow,3pcs yellow plastic wire nuts,2pcs 1/2" adapters and 1pc universal 3-wire power cord and 1 teflon tape.1 PC 6ft drain hose and 1 PC of clamp.
- 【DURABLE】Dishwasher Hose is Made of premium grade 304 stainless steel.It prevents corrosion, kinking, and crimping.Use good PVC core, brass nuts and brass inserts.Drain hose is made of good quality plastic.
- 【SAFE】North America Quality Insurance.AB-1953, NSF-61 certification and UPC/CUPC approved.
- 【EASY TO USE】Include everything you need and easy to install.
Check that the door opens without striking the countertop, adjacent cabinets, flooring, or hardware. Then install the supplied mounting brackets and screws:
- Top mounting: commonly used with wood or another drillable countertop when the model permits it.
- Side mounting: commonly used with stone or another hard countertop that should not be drilled.
- Alternative mounting: use only a method and hardware approved by the manufacturer for the specific cabinet construction.
For example, Bosch specifies top mounting for wood or drillable countertops and side mounting for stone or other hard countertops in one installation document. The countertop alone should not be treated as the appliance’s only support; use the manufacturer’s approved attachment method.
12. Run the manufacturer’s test cycle
The test procedure is model-specific. Do not substitute a normal wash cycle if the installation manual provides a dedicated test. One Bosch installation document uses a 15-minute test cycle to verify operation and leaks; Whirlpool directs installers to follow the test instructions for the product.
During the first test, inspect:
- The water-inlet fitting and shutoff connection
- The drain-hose, disposal, branch-tailpiece, or air-gap connection
- The floor beneath the dishwasher
- The door seal and lower corners
- The fill, spray, drain, and door-latch behavior
- The junction-box area visually, without touching energized wiring
- The countertop underside and cabinet sides for moisture
After the test, turn off power and water before making adjustments, removing access panels, or correcting a connection. Recheck the dishwasher for leaks after it has cooled and the surrounding cabinet surfaces are dry. Install the toe-kick and lower access panel only after the test passes.
Independent reader supportYour contribution helps us test, update, and keep practical guides available for everyone.Drain installation: high loop, air gap, and disposal connections
Drain problems are among the most common failures after installation. The hose must be routed so wastewater leaves the dishwasher and sink water cannot freely flow back into it.
When connecting to a garbage disposal
- Confirm the disposal has a dishwasher inlet.
- Remove the inlet knockout plug if the disposal has not previously been connected to a dishwasher.
- Attach the drain hose with the correct clamp.
- Route the hose in the required high loop or through an air gap.
- Check the model’s maximum hose length.
When there is no disposal
A plumber can install an approved dishwasher branch tailpiece on the sink drain. The hose still needs the model-required high loop or air-gap arrangement, and the connection must be made above the trap in the approved location. Do not improvise a connection to the drain below the trap.
High loop versus air gap
| Arrangement | How it works | Important qualification |
|---|---|---|
| High loop | The drain hose is secured high inside the sink cabinet before descending to the drain connection. | Often accepted, but the required height and routing are model- and jurisdiction-specific. |
| Air gap | A countertop device physically separates the dishwasher drain from the sink drain. | May be required by local plumbing rules or the dishwasher instructions; a clogged air gap can cause sink-side discharge. |
Wood countertops and moisture protection
Steam can condense against the underside of a wood, laminate, or particleboard countertop. Whirlpool, Maytag, and KitchenAid documentation describe moisture-barrier tape or an approved barrier for these surfaces. Stone surfaces generally do not require the same barrier unless the model instructions say otherwise.
Install the supplied or approved barrier before sliding the dishwasher into place. If condensation appears on the counter after installation, check the dishwasher’s alignment, door seal, vent path, and moisture barrier. Do not assume that a small amount of steam-related moisture is harmless; repeated exposure can damage wood-based countertop materials. See Whirlpool’s condensation guidance.
Common installation failures and what to check
| Symptom | First checks | When to stop |
|---|---|---|
| Dishwasher will not power on | Check the breaker, adjacent receptacle if cord-connected, applicable GFCI device, junction-box connection if hardwired, and whether the door is fully latched. | Stop if the breaker or GFCI trips again, wiring is hot or damaged, or the connection does not match the manual. |
| Dishwasher does not fill | Confirm the hot-water shutoff is open, the supply hose is not kinked, the connection is on the hot side, the inlet filter is not obstructed, and the door is latched. | Use the manufacturer’s service procedure if the inlet valve, float, or wiring may be faulty. |
| Dishwasher does not drain | Check the drain hose for kinks, the high loop or air gap, the disposal knockout plug, the disposal or branch tailpiece, and the filter and pump area after disconnecting power. | Stop if water backs up, leaks, or repeatedly remains in the tub. |
| Water leaks | Shut off water. Check for a missing gasket, cross-threaded or overtightened fitting, incorrectly oriented 90-degree fitting, kinked hose, or damaged connection. | If water is near wiring, turn off the breaker too. Do not test again until the source is corrected. |
| Door hits the countertop | Recheck opening height, level, centering, feet adjustment, flooring height, and door or custom-panel dimensions. | Do not force the door or operate the dishwasher if the seal is compromised. |
| Dishwasher tips forward | Check the mounting brackets and use the approved top, side, or alternative mounting method. | Do not use the dishwasher. Never rely on friction, the water line, or the drain hose to hold it in place. |
| Condensation damages the counter | Check the moisture barrier, alignment, door seal, vent path, and the model’s drying instructions. | Correct the cause before continuing to operate the appliance. |
Additional no-fill checks
Possible causes of a no-fill condition include a closed supply, kinked inlet hose, inlet-valve problem, float problem, or door-switch issue. Bosch’s dishwasher troubleshooting guidance lists these types of checks.
Recommended Free Tools
Additional no-drain checks
Blocked filters, a blocked pump, a kinked hose, a clogged air gap, and an unremoved disposal plug can all prevent draining. Disconnect power before inspecting the filter or pump area, and follow the model’s service instructions. Bosch provides additional no-drain guidance and error-code information.
Best Value

- UNIVERSAL FIT - TT FLEX universal dishwasher installation kit provides everything you need in installing almost any brands of dishwashers to household water supply.All adapters included.
- COMPLETE INSTALLATION KIT - Our dishwasher install kit universal includes 1pc 6 ft stainless steel dishwasher supply line with 3/8" Comp x 3/8" Comp connections,1pc 3/8 in MIP elbow connector adapter,1pc 3/8" Comp x 3/4 in FHT elbow,3pcs yellow plastic wire nuts,2pcs 1/2" adapters and 1pc universal 3-wire power cord.
- DURABLE - This dishwasher hose is made of premium grade 304 stainless steel.It prevents corrosion, kinking, and crimping.Use best PVC core, brass nuts and brass inserts.
- LEAD FREE - North America Quality Insurance.AB-1953, NSF-61 certification and UPC/CUPC approved.
- 10-YEAR WARRANTY - Please purchase with confidence,if you have any issue with our dishwasher hose kit 6ft, simply email us.
When a first-time installation becomes a remodeling project
Adding a dishwasher to a kitchen that never had one is substantially different from replacing an existing unit. The project may require:
- Removing or modifying a cabinet to create the opening
- Checking whether the countertop and cabinet structure can support the appliance and mounting brackets
- Installing a dishwasher-rated hot-water shutoff valve
- Adding a branch tailpiece or disposal drain inlet
- Running a new electrical circuit or installing a compliant receptacle or junction box
- Drilling utility holes with proper edge protection
- Repairing flooring or cabinet faces after the modification
- Obtaining permits or arranging inspections if required locally
That is a cabinet, plumbing, and electrical coordination project—not a routine appliance replacement. This Old House’s retrofit example describes a project-specific 5–6 hour estimate, but that time should not be generalized. Wall access, cabinet construction, flooring, utility distances, and local requirements can change the scope substantially.
Alternatives when a built-in installation is impractical
- Portable dishwasher: Connects to the sink faucet and avoids a permanent cabinet opening, but uses floor space and must be stored or positioned near the sink.
- Countertop dishwasher: Has lower capacity but can avoid cabinet modification and extensive plumbing work.
- Professional retrofit: Best when there is no opening, no suitable drain branch, no accessible shutoff, or no compliant electrical supply.
Portable, 24-inch built-in, and 18-inch built-in models are common categories; Home Depot’s buying guide discusses these alternatives.
What’s actually slowing this PC down?
Pick the symptom - the matching free tool is one click away.
Stop-work checklist
Stop the installation and call the appropriate professional if any of the following occurs:
- You find an active leak at the shutoff, supply valve, drain, or dishwasher inlet.
- The existing shutoff valve will not close completely or is corroded.
- The wiring is ungrounded, damaged, aluminum, knob-and-tube, or otherwise unidentified.
- The breaker trips or the receptacle, cable, or junction box shows heat or damage.
- A new circuit, breaker, GFCI device, or receptacle is required.
- Plumbing must be soldered, moved inside a wall, or connected in a way not shown by the manual.
- The opening must be cut or rebuilt, or the countertop may be weakened by the required modification.
- The drain route exceeds the manufacturer’s length or height limits.
- The dishwasher cannot be secured with approved brackets or hardware.
- The unit is unstable, the door causes it to tip, or the floor cannot support it.
- You cannot verify that the electrical circuit is de-energized.
Manufacturer and code references
Use these sources to verify model-specific requirements and local electrical rules:
- Whirlpool: How to install a dishwasher
- Bosch installation instructions: dimensions, water, drain, mounting, and testing
- Bosch installation instructions: water, drain routing, and test cycle
- Bosch electrical and plumbing safety instructions
- Maytag installation requirements
- Eaton: 2026 NEC dwelling-unit GFCI updates
- IAEI: 2026 NEC dishwasher GFCI discussion
- NFPA 70, National Electrical Code, 2026 edition listing
Frequently Asked Questions
Can I install a dishwasher without a garbage disposal?
Yes. The drain hose can usually connect to an approved dishwasher branch tailpiece on the sink drain, or to an air-gap arrangement, if permitted by the model instructions and local plumbing rules. The connection must be above the trap and must include the required high loop or air gap.
Does every dishwasher need an air gap?
No. Some jurisdictions or models require an air gap, while others permit a properly installed high loop. Check both the local plumbing requirements and the exact dishwasher installation manual before choosing a high loop alone.
Recommended Free Tools
Can I reuse the old dishwasher water line or power cord?
Do not assume that reuse is acceptable. Many installation programs require a new connector hose and will not reuse old cords or hoses. Use the new parts and cord kit specified or approved for the exact model.
Should I use Teflon tape on the dishwasher water connection?
It depends on the connection. Gasketed hose and compression connections generally seal with a washer or ferrule and should not receive tape unless the manual says otherwise. A separate tapered pipe-thread fitting may require the sealant specified by its instructions.
The Bottom Line
A dishwasher replacement is usually a reasonable DIY project only when the opening, hot-water shutoff, drain connection, electrical supply, and mounting surfaces are already suitable. Measure in several places, use the exact model installation manual, keep the drain hose high and within its length limit, make no assumptions about wiring or thread sealant, and secure the appliance before opening the door. Run the manufacturer’s test cycle and inspect every connection for leaks. If plumbing, electrical, cabinet, countertop, or mounting conditions are uncertain, stop before cutting or connecting anything and hire the appropriate professional.
Quick Recap
Product prices and availability are accurate as of the date/time indicated and are subject to change. Any price and availability information displayed on Amazon at the time of purchase will apply.
Do these 3 things before closing this tab:
1Repair Windows errors before they cause bigger problems2Fix the driver behind crashes, sound loss and screen glitches3Clear out junk files and repair common Windows errors