Recommended Free Tools
Yes, you can sprout an avocado pit into a living plant. The most beginner-friendly method is to suspend a clean pit over water with its broad end down, wait for roots and a shoot, and then transplant it into well-drained potting mix. The process is easy as a propagation experiment or houseplant project—but it is not a reliable shortcut to homegrown avocados. A seed-grown tree may take many years to fruit, produce fruit unlike the original avocado, or never produce useful fruit at all.
Use the six steps below to orient the pit correctly, avoid rot, transfer it with minimal root damage, and decide whether your finished plant should remain indoors, move outdoors, or eventually become rootstock for a grafted fruit tree.
As an Amazon Associate I earn from qualifying purchases.
What you need
- One freshly removed, intact avocado pit
- Water and a clear glass or jar
- Three or four toothpicks
- A 6- to 8-inch pot with drainage holes
- Commercial, well-drained potting mix
- A bright window or supplemental grow light
- Optional: dilute houseplant fertilizer for active spring and summer growth
Choose a pit that has not been cut, cracked, dried out, or damaged while removing the avocado flesh. One pit is enough to start, but germination is not guaranteed; starting two or three fresh pits improves the odds that at least one will succeed.
Free tools Windows power users keep installed
One-click scans. No signup required.
The most important orientation rule
Pointed end up ↑
Broad, flatter end down ↓
Fat end down; pointed end up. The broad bottom produces the roots. The pointed top produces the stem and leaves.
#1 Best Overall

- EASIER SEED STARTING: Our Burpee SuperSeed tray with 36 flexible pop-out cells is designed to simplify indoor seed starting for all your favorite vegetables, flowers and herbs. Just add seed starting mix, seeds, water and light to get growing! Rows are labeled alphanumerically for seedling identification with included Plant-o-Gram diagram. Tray dimensions: 11.5" x 10-3/8" x 2-1/4"
- SMARTER WATERING SYSTEM: Molded corner slots in each cell improve drainage and soil aeration to set your seeds up for germination success. Deep channels in the watering tray draw excess away from the cells, while the raised perimeter edge keeps water contained in the tray - no spills! Seed tray side handles make it easy to lift and pour off excess water or check seedlings daily.
- SIMPLER TRANSPLANTING: Soft food-grade silicone cells cradle seedlings and gently flex to pop out when it’s time to transplant into your outdoor garden! This system is specially designed to reduce stress on your seedlings, so you don't damage their roots. After transplanting, trays are easy to clean and reuse or simply store for next growing season. Top shelf dishwasher safe.
- SEED STARTER TIP: Many favorite vegetables, including peppers and tomatoes, must be started indoors before warmer weather arrives. Start pepper seeds 8-10 weeks before your area’s average last frost date, and tomato seeds 6-8 weeks before last frost. Check your Burpee seed packets for instructions on when and how to plant any of your herb, flower and vegetable seeds.
- 100% GUARANTEED: Burpee is committed to the success of all gardeners. We treat each order with care to ensure healthy seeds, plants, soil mixes and gardening supplies are packaged and sent in excellent condition. If you are unsatisfied with your purchase, we aim to make it right!
If the two ends look similar, hold the pit vertically and look for the slightly flatter, wider base. That end belongs at the bottom. Iowa State University Extension gives the same orientation and recommends placing only the lower portion in water.
How to grow an avocado tree from a pit in 6 steps
1. Remove, rinse, and orient the pit
Remove the pit from a fresh avocado and rinse away all remaining fruit. Fruit residue can make the water dirty and encourage mold. Rub it gently with your fingers, but do not cut, puncture, crack, or aggressively peel it.
The brown outer seed coat does not need to be removed. It may loosen, split, or fall away naturally as the seed germinates. Trying to peel it with a knife can damage the embryo inside. The practical advice from Iowa State University Extension is to wash the pit and avoid damaging it.
Quick wins for a faster PC:
Fix the driver behind crashes, sound loss and screen glitchesFind Drivers →Repair Windows errors before they cause bigger problemsFix Now →Set the pit aside briefly so you can identify its shape, then position it with the broad, flatter end down and the pointed end up.
What you should see: A clean, firm pit with the wider base at the bottom and the narrower point at the top.
2. Suspend the pit over water
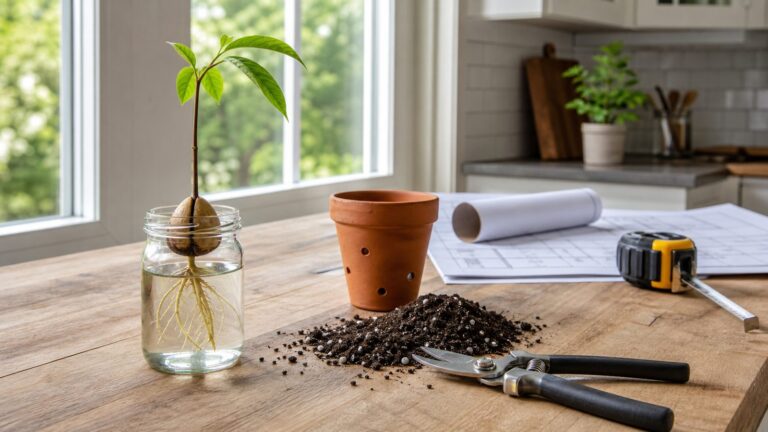
Push three or four toothpicks into the sides of the pit around its middle. The toothpicks should support the seed without being driven deeply into it. Rest them on the rim of a glass or jar.
Add enough water to submerge approximately the bottom quarter to one-third of the pit. The broad end should touch the water, while the pointed top remains above it. Guides vary slightly on the exact fraction—some specify the bottom quarter and others the bottom third—but the principle is consistent: keep the lower end wet and the upper end out of the water.
Do not submerge the entire pit. Keeping the top dry reduces the chance that the whole seed will remain continuously waterlogged while the root and shoot are developing.
What you should see: The seed resting securely above the glass, with its broad base in water and most of the pit exposed to air.
3. Keep it warm, bright, and clean while it germinates
Place the glass in a warm indoor location with bright light. Bright indirect light is a sensible choice during germination, particularly if direct sun through a window would heat the glass and water. UC Cooperative Extension gives approximately 70–80°F (21–27°C) as a favorable temperature range for avocado seed started in a moist medium.
Check the water regularly. Top it up when evaporation lowers the level below the base of the pit, and refresh it at least once a week. Replace it sooner if it becomes cloudy, foul-smelling, or visibly contaminated. Stagnant water is an avoidable source of trouble.
What’s actually slowing this PC down?
Pick the symptom - the matching free tool is one click away.
Roots usually appear before the shoot. The pit may split as the root emerges; that is normal. Expect progress in several weeks under favorable conditions, not on a guaranteed schedule. UC material describes a very fast 12- to 15-day result in favorable circumstances, but that should be treated as optimistic rather than a promise for every supermarket avocado pit. If there is no meaningful change after about two months, discard that pit and start again with a fresh one, as recommended by Iowa State University Extension.
What you should see: A crack, followed first by a pale root from the broad end and later by a shoot from the pointed end.
4. Move the rooted seed into a pot
Do not rush the transfer as soon as the pit cracks. Wait until the root system is well developed—ideally with a main root at least 2 to 3 inches long—and preferably until a shoot or developing stem is visible. This gives the seedling a better chance of handling the move from water to soil.
Rank #2

- Upgraded with Adjustable Ventilation - Gardzen seed starter tray has been newly upgraded with two air vents added to the top, allowing you to easily adjust the ventilation for optimal seed growth. Say goodbye to stagnant air and hello to thriving plants!
- High Quality and Durable - These seedling starter trays are made from premium plastic material, ensuring long-lasting use for all your seed starting needs. Comes with thoughtfully attached stickers, you can achieve a tighter fit of dome and base for maximum efficiency.
- 40-Cell Capacity - Each seed starter kit in our set comes with a generous 40-cell capacity, providing ample space for all your seeds to sprout and thrive. Whether you're a beginner or experienced gardener, this plant starter kit is perfect for starting your own garden paradise.
- Easy to Manage Kits - The 40-cell insert tray provides a simple, straightforward way to start seeds and grow plants from cuttings. The drain hole at the bottom of the seed tray prevents over watering. The clear dome allows you to clearly see the growth status.
- Versatile and User-friendly - This seed germination kit is not only suitable for starting seeds but also perfect for propagating cuttings and nurturing young plants.
Prepare a 6- to 8-inch pot with a drainage hole and fill it with a commercial, well-drained potting mix. Avoid a container with no drainage, even if it is attractive or convenient. Avocado roots are especially vulnerable to saturated conditions, and poorly drained soil increases the risk of root disease, including Phytophthora root rot. The UF/IFAS avocado guide discusses the connection between flooding, poor drainage, and avocado root problems.
Remove the toothpicks carefully. Handle the root rather than pulling on the stem or splitting the pit. Make a hole in the mix, place the root downward, and cover the roots with soil. Leave the top of the pit level with or slightly above the soil surface; do not bury the entire seed deeply.
Water the mix until a little excess drains from the bottom, then empty any water collected in the saucer. The new soil should be moist, not sodden.
What you should see: The pit sitting partly above the soil, with the root covered and the emerging stem upright.
5. Provide light, moisture, and room to branch
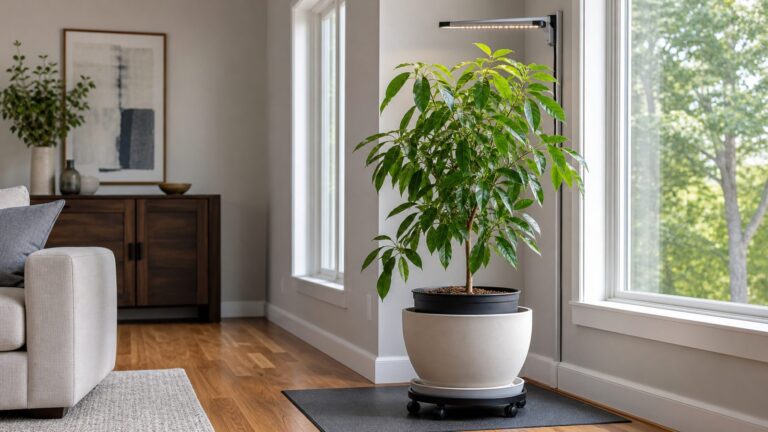
Place the potted seedling in the brightest suitable indoor location you have, preferably near a bright east-, south-, or west-facing window. A windowsill that looks bright to you may still provide too little light, particularly in winter or behind shading. Insufficient light commonly produces a long, thin stem with widely spaced leaves. If the plant stretches, move it closer to a bright window or use supplemental lighting. The University of Minnesota Extension guide to indoor lighting explains why weak light causes elongated growth and when artificial lighting can help.
Do these 3 things before closing this tab:
1Clear out junk files and repair common Windows errors2Fix the driver behind crashes, sound loss and screen glitches3Repair Windows errors before they cause bigger problemsCheck the potting mix before watering rather than following a fixed calendar. While the newly potted plant establishes, keep the mix evenly moist, but allow excess water to escape and never leave the pot standing in water. If the mix is still wet, wait. If it has begun to dry, water thoroughly and let the pot drain.
Do not fertilize immediately after transplanting if the plant is stressed. Once it is healthy and actively growing, a dilute houseplant fertilizer can be used during spring and summer. Iowa State recommends a dilute solution once or twice monthly, but the appropriate frequency depends on the product label, the light level, the season, and whether the potting mix already contains slow-release nutrients. Heavy feeding can damage a stressed seedling.
Pruning is optional. It is useful for shaping a tall, bare seedling, not for making it germinate. Once the plant is vigorous and actively growing, pinch out the growing point to encourage lateral branching. Iowa State suggests pinching at approximately 12–15 inches, while a UC home-orchard handout describes pinching the top leaves at approximately 5–6 inches. These are different training thresholds rather than a reason to cut a weak seedling in half. A practical approach is to wait until the plant is healthy, then pinch when it is becoming tall and sparse. The purpose is a bushier shape—not a guaranteed increase in root growth.
What you should see: New leaves that remain firm and green, with a stem that becomes sturdier rather than increasingly long and floppy.
Windows Errors? Fix Them Before They Spread
Repair common Windows errors and clear accumulated junk for a smoother, more stable PC - no reinstall needed.Free scan · no reinstallOutdated Drivers Are Slowing You Down
One free scan finds every outdated or missing driver and matches the right update for your exact hardware.Free scan · exact hardware match6. Choose its long-term home
At this point, decide what you actually want from the plant:
- Houseplant: Keep it indoors in strong light and prune selectively to control height. Container growing can limit the plant’s size, but it does not permanently turn an avocado seedling into a genetic dwarf.
- Seasonal outdoor plant: Move it outside during warm weather, acclimating it gradually and bringing it back indoors before damaging cold.
- Landscape tree: Plant outdoors only where the avocado type, drainage, wind exposure, and local climate are suitable. Outdoor avocado trees can become large, and an unknown seedling has unknown cold tolerance and fruit characteristics.
- Fruit project: Grow the seedling as potential rootstock and learn to bud or graft it, or buy a grafted named cultivar instead.
For grafting, UC Cooperative Extension indicates that a seedling is suitable for budding or grafting once it is approximately 24–30 inches tall. A grafted nursery tree is the more predictable option if your primary goal is edible fruit.
Water method versus planting the pit directly in soil
The toothpick-and-glass method is popular because it lets beginners see the root develop and makes the correct orientation obvious. It is not the only valid method. UC Cooperative Extension recognizes both water and soil approaches.
| Consideration | Water method | Direct-to-soil method |
|---|---|---|
| What you can observe | Roots and the developing shoot are easy to see. | Progress is hidden beneath the mix. |
| Transplanting | Required once the roots are established. | A later water-to-soil transfer is avoided. |
| Main risk | Stagnant water or leaving the pit too wet for too long. | Overwatering a small enclosed pot. |
| Best suited to | First experiments, classrooms, and growers who want to watch germination. | Growers who prefer to keep the developing root system in one medium. |
Some guides describe soil as faster or easier to transplant, but that is a practical preference rather than a universal, proven advantage. Choose water if visibility will help you maintain the plant; choose soil if avoiding a later transfer matters more.
The Tool Desk
Outbyte PC Repair FREERepair Windows errors before they cause bigger problemsFix Now →Outbyte Driver Updater FREEFix the driver behind crashes, sound loss and screen glitchesFind Drivers →How to plant an avocado pit directly in soil
- Fill a small pot with moist, well-drained commercial potting mix.
- Set the broad end down and the pointed end up.
- Leave approximately the top third of the pit exposed rather than burying the entire seed.
- If you use a loose clear cover to retain moisture, provide ventilation and remove it when the shoot emerges. Do not allow excessive condensation to keep the mix constantly wet.
- Keep the mix moist but never saturated.
- Place the pot somewhere warm with bright indirect light.
Instructions differ on planting depth: general seed-starting advice may suggest burying a seed two to three times its length, while avocado-specific home instructions commonly leave the upper portion exposed. For a small indoor container, leaving the upper portion exposed is the more cautious choice because it reduces the chance that the crown and upper seed will remain continuously wet. This approach is also described in practical guidance from Bob Vila and the Associated Press.
Rank #3

- 【Keep an eye on your plant】: The only design in the market- High quality clear plastic trays of this seed grow kit make it easier to observe your plants without interrupting the process.
- 【Total control】: Adjustable vents of this seed trays allow you to regulate the temperature and humidity of your seedling environment, so you have total control over the germination process.
- 【Perfect for the heat mat】: With its excellent resistance to high and low temperature, these seedling trays are strong enough to be used on a heat mat and no-worry melting.
- 【Perfect size for large seed】: 1.5 inch square for each cell makes these seed trays are suitable for large seeds, such as potatoes,tomates,perpers, eggplants and so on. 6 trays equivalent to a 1020 flat.
- 【Package include】5 x Seed Tray, 5 x Watertight Base Tray, 5 x Humidity Dome, 10 x Plant Labels (A must have for seedling).
Ongoing avocado plant care
Light
Give an indoor avocado the brightest light available. If the stem is thin, the spaces between leaves are long, or the plant leans strongly toward the window, treat that as a light problem first. Move it closer to a bright window or add a supplemental grow light. Rotate the pot occasionally so one-sided window light does not produce a severely lopsided plant.
Water and drainage
Moisture management is more important than a watering schedule. Soil, pot size, temperature, light, and humidity all affect how quickly the mix dries. Check the mix before watering, water thoroughly when it has begun to dry, and empty the saucer afterward.
Do not confuse yellow leaves with a definite diagnosis. Yellowing can result from wet roots, inadequate light, fertilizer stress, or other problems. Check whether the mix remains wet for long periods, whether water exits freely, and whether the roots smell sour or look dark and mushy. Continuously saturated conditions are especially dangerous for avocado roots.
Fertilizer
A newly transplanted or visibly stressed seedling does not need heavy feeding. After it resumes active growth, use a dilute, balanced houseplant fertilizer according to the label. Once or twice monthly in spring and summer is a reasonable starting point for a healthy plant if the product instructions support it, but reduce or stop feeding in low light or during slow winter growth. Overfertilizing can cause brown leaf tips and salt buildup in the potting mix.
Repotting
Move the plant to a larger container when the current pot is becoming crowded with roots, the plant is repeatedly drying out very quickly, or the top growth has become unstable. Keep the next pot only modestly larger and maintain excellent drainage. A very large pot holds excess moisture around a small root system and can increase rot risk.
Moving it outdoors
An indoor-grown avocado should not go directly from a window to intense outdoor sun. Begin in bright shade or a sheltered location, then increase sun exposure over several days. Protect the plant from strong wind, sudden heat, and abrupt changes in light. Brown or bleached patches after the move are often signs of sun or environmental shock rather than a need for more fertilizer.
Cold tolerance depends on avocado race or cultivar, tree age, duration of the cold, wind, and microclimate. UF/IFAS lists approximate freeze-damage ranges for young trees of about 24–30°F, depending on avocado type, and mature-tree thresholds ranging roughly from 18–30°F. These are regional reference values, not a guarantee that an unknown seedling will survive those temperatures. Young plants are more vulnerable, so move a container plant indoors before frost or a hard freeze is expected. The UC Statewide IPM frost guidance provides additional context on frost injury and protection.
Important reality check: will a pit-grown avocado produce fruit?
Commercial avocado trees are normally produced by budding or grafting a known variety onto a selected rootstock. That combination gives the grower a named cultivar and a more predictable fruit type. Under suitable conditions, grafted avocado trees commonly begin producing in about three to four years, but that timeline should not be applied to an ungrafted seedling.
If the original avocado was a Hass, planting its pit will not reliably produce a Hass tree. To grow Hass fruit, buy a grafted Hass tree or graft a Hass scion onto suitable rootstock. Your pit-grown plant may still be valuable as a rootstock project once it reaches roughly 24–30 inches tall.
Does it need a second avocado tree?
Not categorically. Avocado flowers are classified as Type A or Type B according to the timing of their female and male functions. Some varieties can set fruit adequately on their own, while others benefit from a compatible second variety nearby. With an unknown seedling, the flower type and eventual performance cannot be predicted confidently. If you are planting known cultivars and have no avocado trees nearby, UF/IFAS recommends considering two varieties to improve the opportunity for pollination.
Troubleshooting an avocado pit and seedling
| Problem | What it may mean | What to do |
|---|---|---|
| No roots after several weeks | The pit may be damaged, too old or dry, incorrectly oriented, too cool, or beginning to rot. | Confirm that the broad end is down, keep the base in water, refresh cloudy water, and move the glass to a warmer location. Start another fresh pit alongside it. If there is still no progress after about two months, discard the failed pit. |
| The pit has cracked but only a root has appeared | This is usually normal; roots commonly emerge before the shoot. | Keep the root from drying out and maintain the water level. If the root is several inches long but the shoot remains stalled, pot it into moist, well-drained mix. |
| Soft, black, foul-smelling, or persistently moldy pit | Likely decay rather than harmless loosening of the outer coat. | Replace contaminated water and rinse surface residue from a healthy pit. A persistently mushy or decaying pit is generally not worth rescuing; discard it and start with another. Do not keep a rotting pit in the same water as a healthy one. |
| Yellow leaves | Possible wet roots, poor drainage, insufficient light, or fertilizer stress. Yellowing alone does not prove root rot. | Check the mix, drainage hole, saucer, light level, and fertilizer history. If roots are dark, mushy, or sour-smelling, move quickly to address saturated conditions. |
| Long, thin, floppy growth | Usually insufficient light. | Move the plant nearer a bright window or provide supplemental lighting. Once it is healthy and actively growing, pinch the tip to encourage branching. |
| Drooping after transplanting | Water-to-soil transfer can cause temporary root stress. | Keep the mix evenly moist, not waterlogged; provide bright but gentle light while it settles; and avoid fertilizer until new growth resumes. |
| Brown leaf tips | Possible dry soil, salt buildup, low light combined with watering stress, excessive fertilizer, or damaged roots. | Check moisture and drainage before changing anything else. Water thoroughly but allow drainage, empty the saucer, and pause fertilizer if it may have been overapplied. |
| Leaf scorch after moving outdoors | Sudden full sun, heat, or wind can damage indoor-grown foliage. | Return the plant to bright shade or a sheltered spot and acclimate it gradually over several days. |
| Frost damage | Young avocado plants are particularly sensitive to freezing conditions. | Protect container plants before frost, remove damaged foliage only after the extent of injury is clear, and do not treat regional temperature thresholds as a guarantee for an unknown seedling. |
Frequently asked questions
Can I grow an avocado pit without toothpicks?
Yes. Plant it directly in moist, well-drained potting mix with the broad end down, the pointed end up, and roughly the top third exposed. The soil method avoids a later transplant but makes it harder to see whether roots are developing.
Should I peel the brown skin from the pit?
No. Wash away avocado flesh, but do not aggressively peel, cut, or crack the seed. The brown coat can loosen naturally, and forcing it off can damage the embryo.
How often should I change the water?
Refresh it at least weekly, and sooner if it becomes cloudy, foul-smelling, or contaminated. Keep the water level high enough to touch the broad base but not high enough to submerge the pointed top.
How long can the pit stay in water?
Move it to soil once the roots are well developed—ideally at least 2–3 inches long—and a shoot or developing stem is visible. There is no advantage in leaving a rooted seedling in water indefinitely; the later transfer can disturb the roots and the plant still needs a well-drained growing medium.
Rank #4
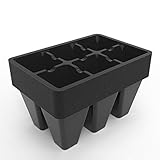
- High Quality and Durable - Our Gardzen Seed Start Trays are made from premium plastic material, ensuring long-lasting use for all your seed starting needs. These trays are designed to withstand daily wear and tear, making them perfect for avid gardeners.
- Healthy Growth - With the dimensions of 5.4*3.7 inches of the seedling tray, each cell measures 1.5 inches square by 2.2 inches deep, providing ample space for the healthy development of your plants' root systems. This allows your seedlings to grow strong and vibrant, giving you a head start in your gardening journey.
- Intimate Design - Drain holes at the bottom of the seed tray prevent over watering and promote suitable soil moisture for seed germination and seedling growth. There are guide channels at the top to ensure water reaches every cell.
- Reusable and Eco-friendly - Simply clean the seedling starter trays after each use, and they will be ready for your next batch of seeds. By opting for these seed starting trays, you are not only saving money but also reduce waste and contribute to a greener environment.
- Versatile and Practical - Our seed trays are suitable for various types of plants, making them a versatile choice for any gardener. Whether you're starting flowers, vegetables, or herbs, these trays provide the ideal growing environment.
How large will an avocado plant become indoors?
It can become tall and difficult to manage if light is weak or pruning is neglected. A container and selective tip-pruning can help control its presentation, but container growing does not permanently dwarf the plant. Outdoor avocado trees can become much larger.
Can I make a seedling produce the same avocado variety?
Not reliably. A seedling from a Hass avocado, for example, is not guaranteed to be Hass. Buy a grafted named tree for predictable fruit, or use a healthy seedling as rootstock for budding or grafting when it reaches approximately 24–30 inches.
Should I cut the stem in half?
No routine stem-halving is required. If a healthy seedling is becoming tall and bare, pinch the growing tip to encourage lateral branches. Training guidance varies from approximately 5–6 inches to 12–15 inches, so use the plant’s vigor and shape—not a rigid calendar—as the deciding factors.
Is one tree enough for fruit?
Sometimes. Pollination depends partly on flower type, cultivar, weather, and nearby trees. Some avocados fruit adequately alone, while compatible Type A and Type B varieties can improve fruit set. An unknown pit-grown seedling has unpredictable flowering behavior.
Bottom line
Growing an avocado from a pit is an inexpensive, rewarding way to produce a houseplant: clean the pit, keep the fat end down, submerge only the lower quarter to one-third, wait patiently, and pot it once the roots reach about 2–3 inches. The keys after germination are bright light, careful watering, and excellent drainage.
If your goal is a dependable harvest rather than a leafy experiment, start with a grafted named avocado tree. A pit-grown seedling can still become an attractive plant—or a future rootstock—but its fruit, timing, and productivity cannot be promised.
Sources and further reading
- Iowa State University Extension: How do you sprout an avocado seed?
- Iowa State University Extension: Growing vegetables from kitchen scraps
- UC Cooperative Extension, Ventura County: Growing an avocado from seed
- UC Cooperative Extension, Ventura County: Avocado seed and fruiting expectations
- UF/IFAS: Avocado growing, climate, drainage, pollination, and grafting
- University of Minnesota Extension: Lighting indoor plants
- UC Statewide IPM: Frost injury and control in avocado
Frequently Asked Questions
Can an avocado pit really grow into a tree?
Yes. The pit is a viable seed and can produce a seedling, although not every pit will sprout and a seedling is not guaranteed to become a productive fruit tree.
How long does an avocado pit take to sprout?
Roots and shoots often begin developing after several weeks in warm, suitable conditions, but timing varies. If there is no meaningful progress after about two months, start over with a fresh pit.
Free tools Windows power users keep installed
One-click scans. No signup required.
Can I grow an avocado pit directly in soil?
Yes. Plant the broad end down, leave roughly the top third exposed, and keep the well-drained mix moist but never saturated. This avoids transplanting but hides the developing roots.
Can I grow Hass avocados from a Hass pit?
Not reliably. Seedlings are genetically variable and may produce fruit unlike the parent, take many years to bear, or remain unproductive. A grafted Hass tree is the dependable choice.
Can an avocado plant live outdoors?
It can in a suitable warm climate, but success depends on avocado type, age, frost, wind, drainage, and microclimate. Acclimate an indoor plant gradually and protect a young tree from freezing temperatures.
Do I need two avocado trees?
No, not always. Some varieties can fruit alone, while compatible Type A and Type B varieties may improve fruit set. The flower type of an unknown seedling is unpredictable.
When should an avocado seedling be grafted?
UC Cooperative Extension identifies approximately 24–30 inches tall as a suitable seedling size for budding or grafting. If reliable fruit is the goal, buying a grafted tree is usually simpler.
The Bottom Line
Sprouting is easy; reliable fruiting is not. Keep the broad end down, submerge only the lower portion, transplant after the roots reach about 2–3 inches, and prioritize bright light and drainage. For known-quality avocados, choose a grafted tree or graft a suitable seedling rather than relying on the pit to reproduce its parent.
Quick Recap
Product prices and availability are accurate as of the date/time indicated and are subject to change. Any price and availability information displayed on Amazon at the time of purchase will apply.