Door and window trim can sit at different heights without indicating a structural defect. First determine whether only the casing heads differ, or whether a jamb, frame, wall, sash, or patio-door unit is out of level. If the openings are sound, you can redesign the casing layout; if the unit or reveal is faulty, correct the installation before making cosmetic trim changes.
Why door and window trim end up at different heights
“Trim” is the visible casing around an opening. The opening itself is defined by the jamb, frame, sash, or door unit. Those are related, but they are not the same thing. A door can be installed correctly while its casing head is higher than a nearby window because the two openings have different heights, the casing was laid out independently, or the wall forced one piece to sit differently.
As an Amazon Associate I earn from qualifying purchases.
The important distinction is whether the mismatch is visual or functional. A difference limited to the top edges of the casing is usually a finish-layout decision. An uneven reveal, a head that is not level, a jamb that is out of plumb, or a patio-door frame that is not square can indicate an installation problem. Do not cut new trim until you know which condition you have.
Diagnose the mismatch before removing trim
- Check each head with a level. Place a spirit level on the door casing head, then on the window casing head. Check the actual frame or jamb where accessible, not just the outer trim. A trim line can look sloped even when the unit is level, and a level-looking casing can hide an out-of-level frame.
- Inspect the reveal. The reveal is the consistent amount of jamb or frame visible beside the casing. Look along both sides and across the head. A reveal that widens, disappears, or changes abruptly may point to casing placement, a twisted jamb, or an opening that is not square.
- Check the wall plane. Hold a straightedge or casing piece against the wall near each opening. If the wall bows or breaks plane, the casing may rock or leave a gap even when the opening is sound.
- Measure the height difference and spacing. Record the distance between the openings, casing widths, profiles, and the amount by which the head lines differ. These details determine whether a shared head casing will look intentional or crowded.
- Decide whether the unit itself needs attention. If a window or patio door is out of level, plumb, or square, use the unit maker’s installation and adjustment instructions instead of forcing the trim to hide the problem. Andersen’s installation guidance explains these checks and notes that resetting a unit can involve removing insulation and shims; see its checking guide.
Photograph or mark the existing conditions before dismantling anything. That record helps you distinguish a casing decision from a change that could affect the opening’s operation, weather seal, or warranty.
#1 Best Overall

- 【High Quality】: Crafted from premium material, our window trim molding seals are built to withstand the elements., with exceptional elasticity and resistance to compression, deformation, and aging, they ensure long-lasting performance and a snug fit.
- 【Replacement Part Numbers】: The outer door window belt weatherstrip kit replaces# 68210-04020 68160-04020 68230-04010 68180-04010 Designed according to the original mold, it can perfectly fit the original car window to ensure the sealing and waterproofing.
- 【Compatibility】: The window trim is compatible with the 2000-2004 Toyota Tacoma double cab, rigorously tested for a seamless fit.
- 【Effective Weatherproofing】: Say goodbye to leaks and drafts with our effective waterproof and windproof design, our window trim the gap between the windshield and the car body, keeping your vehicle dry and reducing noise for a more comfortable ride.
- 【Easy Installation & Warranty】: Installation is a breeze – no professional tools required, each kit includes 4 pieces of door window weatherstrip for the driver, passenger, rear left, and rear right. Plus, enjoy peace of mind with our 24-month warranty. If you have any questions or concerns, contact us directly through Amazon messages, and we'll respond promptly within 24 hours.
Choose a trim layout that fits the wall
There is no universal rule that every nearby door and window must have identical casing-head elevations. Compare the spacing, wall plane, casing profile, height difference, source of the mismatch, and whether you want the openings to read as one group or as separate elements.
| Condition | Possible treatment | Main benefit | Important limitation |
|---|---|---|---|
| Only the casing heads differ and both openings are sound | Re-layout the individual casings to a common visual line | Creates a deliberate, orderly top edge | May require wider casing, altered legs, or a different reveal |
| Openings are close together with little wall between them | Use one continuous head casing across the group | Makes adjacent openings read as one composition | Needs enough room for the profile and a convincing termination at each side |
| One opening sits too close for a shared head to look balanced | Let one trim run meet and terminate cleanly at the adjacent opening | Preserves separation while avoiding an awkward narrow strip | Requires careful planning of miters, returns, and the shared leg |
| Casing rocks or leaves a gap against an uneven wall | Shim behind the casing; scribe for a pronounced irregularity | Fits the trim to the wall instead of forcing it | Does not make differently sized openings the same height |
| Frame, sash, or patio-door unit is out of level or has an uneven reveal | Follow the unit-specific installation or adjustment procedure | Addresses the underlying opening | Cosmetic re-trimming alone can conceal a continuing functional problem |
Option 1: Align the individual head casings
This approach works when the door and window can remain separate openings but their top edges would look better on one line. The target line is a finish decision; it does not require rebuilding a correctly installed opening.
Plan the line before cutting
Choose the elevation that gives both openings adequate casing legs and a balanced relationship to the ceiling, baseboard, nearby corners, and hardware. Account for the actual casing width and profile. A line that works with flat stock may look too heavy with a stepped or back-banded profile.
What’s actually slowing this PC down?
Pick the symptom - the matching free tool is one click away.
Rank #2
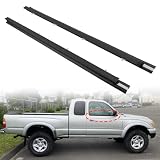
- 【COMPATIBILITY】: The window trim is compatible with the 1995-2004 Toyota Tacoma driver and passenger side, rigorously tested for a seamless fit
- 【REPLACEMENT PART NUMBERS】: The window weatherstrip replaces# 68160-04020 68210-04020. Designed according to the original mold, it can perfectly fit the original car window to ensure the sealing and waterproofing
- 【12-MONTH WARRANTY】If for any reason at all, you are not fully satisfied with the weatherstrip window moulding trim seal belt kit , simply contact us through Amazon message to apply the service of carefree REPLACEMENT or REFUND
- 【EASY TO INSTALL】automotive weather stripping is of fine workmanship, flexible and elastic, it has excellent adhesion, can fit and seal the car without professional tools, just keep the surface clean, and direct installation can be
- 【HIGH QUALITY】: Crafted from premium material, our window trim molding seals are built to withstand the elements. With exceptional elasticity and resistance to compression, deformation, and aging, they ensure long-lasting performance and a snug fit
Mark a consistent reveal
Mark the intended reveal on the jamb or frame before placing casing. RONA’s trim-installation instructions recommend establishing the reveal and using test pieces to check the fit. Marking first prevents each piece from drifting as you work around the opening.
Make test pieces and dry-fit
Cut short samples for the head and one leg, then hold them in place at both openings. Check the top line, reveal, miters, casing intersections, and relationship to the wall. The casing guide from Home Depot’s product-document repository also emphasizes measuring, cutting, leveling, and dry-fitting before final installation: Casing Installation.
Fit the wall, then fasten
Where the wall is slightly out of plane, use shims behind the casing so it is supported and stays in the planned position. For a more pronounced irregularity, scribe the back of the casing to the wall rather than leaving a large unsupported gap. This Old House describes both methods in its guide to installing trim around a door. Recheck the level and reveal as each piece is held in place, then fasten according to the trim and wall construction.
Rank #3
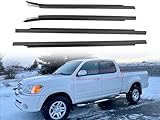
- 【COMPATIBILITY】: The window trim is Compatible with the Toyota Tundra 2000-2006. Our effective waterproof and windproof design window trim the gap between the windshield and the car body, keeping your vehicle dry and reducing noise for a more comfortable ride
- 【REPLACEMENT PART NUMBERS】: The window weatherstrip replaces# 75710-0C010 75720-0C010 75730-0C022 75740-0C022 designed according to the original mold, it can perfectly fit the original car window to ensure the sealing and waterproofing.
- 【EASY INSTALLATION】This outside window trim molding set is manufactured to the OE specification to provide factory appearance and direct-fit. Each kit includes 4 pieces of door window weatherstrips for the driver, passenger, rear left, and rear right
- 【12-MONTH WARRANTY】If the weatherstrip window moulding trim seal belt kit fails, stops working or any other problems, you can rely on our service of carefree REPLACEMENT or REFUND
- 【COMPATIBILITY】: The window trim is Compatible with the Toyota Tundra 2000-2006. Our effective waterproof and windproof design window trim the gap between the windshield and the car body, keeping your vehicle dry and reducing noise for a more comfortable ride.
Option 2: Install a continuous head casing
When a door and window are close together, a single head casing can visually tie them into one group. The head runs across both openings, with the vertical casing legs arranged at the outside edges and, where appropriate, at the shared intersection.
Mock up the entire arrangement with loose casing before cutting finished pieces. Verify that the wall between openings is wide enough for the profile, that the head does not overpower the room, and that the shared leg does not make either opening look pinched. Fine Homebuilding’s discussion of setting prehung doors covers the carpentry problem of coordinating adjacent head casing and occasional jamb adjustment: Setting Prehung Doors.
A continuous head is a visual treatment, not a correction for an opening that is out of square. Keep the reveals at each opening consistent and preserve clearance for door swing, window operation, locks, and screens.
Rank #4

- 【Direct Replacement】: With the passage of time, the window felt will gradually be worn and then broken. At this time, harmful water and debris will enter the door. It is recommended that you replace it in time. This window felt meets or exceeds the oem standard, and has been tested in the factory, perfectly matching the original car, and can be installed directly
- 【High quality】: The use of enhanced high-quality materials, wear resistance, impact resistance and long service life. The built-in metal interlayer greatly enhances the strength of the window felt. When the window moves up and down, they will sweep the window cleaner. Replace the new window felt to prevent the occurrence of water accumulation, avoid the noise of car windows knocking, and provide you with long-term stable and excellent performance
- 【Fits For】: 1987-1996 Ford F150 | 1997 Ford F150 Old Body Style | 1987-1997 Ford F250 F350 | 1987-1996 Ford Bronco
- 【OE#】: E7TZ1521452A E7TZ1521453A F2TZ1521456A F2TZ1521457A Note: There is a tough steel bar in the curved part. If there is some disobedience, it can be knocked down with a rubber hammer, which can be corrected, or wrapped in a towel with a wooden stick and knocked down.
- 【Buy With Confidence】: Once there is a problem with the product, contact us here to solve it perfectly for you, without worrying about quality problems
Option 3: Terminate one casing run at the other opening
Some layouts look better when one trim run stops at the neighboring opening instead of forcing both openings into a single head. This can work where the openings are close but a continuous board would create an awkward proportion, or where the casing profiles do not combine gracefully.
Decide which opening is visually dominant, then mock up the termination with both casing profiles. Check the end cut, return, shared leg, and any back-band or plinth detail. The examples in Concord Carpenter’s guidance on trim at uneven doors illustrate ways adjacent openings can be treated at different heights; the exact detail still depends on your spacing and profile.
Correct casing fit on an uneven wall
Use shims for a small or localized gap
A shim behind the casing supports the piece where the wall or framing is recessed. Add support at the locations needed to keep the face straight, then recheck the reveal and head level. Shimming changes how the casing bears on the wall; it does not change the height of the door or window opening.
Best Value

- Old door belt molding weatherstrip dries out and cracks under repeated heat cycling, causing water leaks, wind noise, and rattling along the window edge. Distortion and seal failure let dust and moisture into the cabin. A fresh replacement restores a tight, weatherproof seal and quiet, smooth window operation.
- 【Compatibility Vehicles】Fit For Honda Odyssey 2011-2017
- 【Replace Part Number】72410-TK8-A11,72450-TK8-A11,72910-TK8-A01,72950-TK8-A01
- 【Premium Material】Made of durable ABS plastic with chrome-finished trim for long-lasting performance. Engineered to OEM specifications for a precise clip-in fit on the Honda Odyssey 2011-2017 front and sliding door frames. Tested to withstand daily UV exposure and road moisture without fading or distortion.
- 【Feature】Easy direct-fit installation, no modification, no extra tools, each strip snaps directly into the factory door frame clip holes. Restores a clean factory appearance and a tight window seal that blocks wind noise and water intrusion. Ideal upgrade for faded or cracked door belt molding on your Honda Odyssey.
Use scribing for a pronounced wall irregularity
If the wall surface is significantly out of plane, scribe the back edge of the casing so it follows the wall while the face remains visually consistent. Scribing takes more fitting time but avoids a large wedge-shaped gap or an excessively thick bead of filler.
Do not use caulk to repair poor geometry
Caulk can seal a properly fitted joint. It is not a substitute for accurate cuts, adequate support, a level head, or a corrected installation. A joint that needs a heavy, visible bead to hide a substantial mismatch should be refitted rather than simply caulked.
If the window or door itself is out of level
Stop treating the issue as a trim problem when the unit has an uneven reveal, binds, fails to latch, or shows a head or sill that is not level. Recheck plumb, level, square, and the manufacturer’s required clearances. Follow the installation guide for that specific model; procedures vary by unit.
Recommended Free Tools
Resetting a unit can disturb insulation and shims, so plan for more than removing and replacing casing. If the opening is already finished, a qualified installer or finish carpenter can coordinate the correction with the surrounding wall. Do not force a casing line that puts pressure on a frame or interferes with operation.
A practical DIY sequence
- Gather only the tools that match the task: a level, measuring tools, casing, shims, and a miter saw or miter box. Buy or cut final trim only after a dry-fit confirms the layout.
- Record the existing geometry: note head elevations, jamb conditions, reveals, wall gaps, opening spacing, and casing profile.
- Classify the problem: cosmetic casing mismatch, wall irregularity, or out-of-level/out-of-square unit.
- Select the layout: aligned individual heads, continuous head casing, or a clean termination. Use the comparison factors rather than assuming one treatment is mandatory.
- Mark the reveal: transfer the same intended reveal around each opening that will share a visual treatment.
- Cut test pieces: make short head and leg samples, then check miters and intersections in place.
- Dry-fit the complete composition: stand back and inspect the top line, spacing, profile weight, and relationship to adjacent walls and baseboard.
- Fit the wall: shim where the casing lacks support; scribe where the wall is substantially irregular.
- Recheck before fastening: confirm level, reveal, opening clearance, and that doors and windows operate normally.
- Install and seal the finished joints: fasten the casing securely, then use caulk only for suitable finish joints after the geometry is correct.
Common mistakes and how to avoid them
- Matching the top edges without checking the openings: A level casing line can hide an out-of-level frame. Test the unit and reveal first.
- Assuming a shim equalizes two openings: Shims support casing against an uneven wall; they do not change the rough-opening heights.
- Skipping the mock-up: A continuous head or termination can look very different once the profile, wall spacing, and leg widths are visible together.
- Measuring from the floor alone: Floors and ceilings may not be level. Establish the trim line from the openings and verify it with a level.
- Using caulk for a large gap: Refit, shim, or scribe the casing instead of creating a conspicuous filler joint.
- Changing a jamb casually: Jamb adjustment can affect reveals, door operation, insulation, and weather sealing. Treat it as installation work, not a cosmetic shortcut.
When to hire a finish carpenter
Get a finish carpenter involved when the casing must be removed around several close openings, a jamb or frame needs adjustment, the wall requires extensive scribing, or the desired continuous detail includes complex returns and profiles. Professional help is especially sensible when the unit is not level or square, because the correct repair may involve insulation, shims, and the manufacturer’s installation sequence rather than new casing alone.
The practical rule
First make the openings sound; then make the trim intentional. If the door and window are level with consistent reveals, choose the casing arrangement that best suits their spacing and profiles, mock it up, and support the trim against the wall before fastening. If the frame, sash, patio door, or reveal is wrong, correct that condition with the applicable installation guidance before using trim to change the appearance.
Quick Recap
Product prices and availability are accurate as of the date/time indicated and are subject to change. Any price and availability information displayed on Amazon at the time of purchase will apply.
Quick wins for a faster PC:
Clear out junk files and repair common Windows errorsFree Scan →Fix the driver behind crashes, sound loss and screen glitchesFind Drivers →Repair Windows errors before they cause bigger problemsFix Now →
