Build a cinematic Halloween scene in layers: hide LED strips to create an indirect base wash, add smart bulbs or spotlights for directional color and shadows, then use slow transitions and motion-triggered accents. Keep a limited palette—such as cold moonlight, purple, and deep red—and repeat it across zones so the result feels intentional rather than multicolored and chaotic.
What makes Halloween lighting look cinematic?
Cinematic lighting gives the eye a clear sequence. The approach is readable, the focal point is brighter or more colorful, and the strongest change is saved for a reveal. Instead of placing a bright lamp in every corner, shape the scene with three layers:
As an Amazon Associate I earn from qualifying purchases.
- Ambient layer: concealed or indirect LED strips wash walls, ceilings, shelves, or architectural edges with a broad, low-glare color.
- Directional layer: smart bulbs and spotlights put controlled pools of color on a doorway, prop, plant, or person and create shadows.
- Event layer: motion sensors, fades, flashes, or color changes provide a deliberate reaction when someone enters or crosses a path.
The visual hierarchy matters more than the number of fixtures. A dim background with one well-placed red accent usually reads more dramatically than several equally bright colors. Conceal the emitters wherever possible, keep the palette consistent from zone to zone, and reserve movement for moments that deserve attention.
Map the scene before installing anything
Walk the route a visitor will take and mark the places where the story changes. A practical map has four focal points: the approach path, the entrance, windows or exterior features, and the room or prop that serves as the reveal. Philips Hue’s Halloween planning guidance uses this same zone-based approach, assigning fixtures and colors to each focal point before programming scenes.
#1 Best Overall
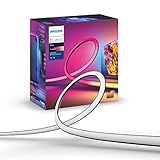
- WHAT’S IN THE BOX - Includes one White and Color Ambiance 65" TV smart led light strip with mounting brackets designed for use on 65 inch TVs; Perfect for immersive gaming and TV watching experiences
- REQUIRES A HUE BRIDGE AND SYNC BOX - In order to have your TV light strip and light play bars sync with movies, music or gaming, a Hue bridge and sync box are required (both sold separately)
- MILLION OF COLORS - The White and Color Ambiance range offers both warm-to-cool white and millions of colors straights out of the box.
- VOICE CONTROL - Convenient smart control; Set up voice control in the Hue app and use simple voice commands to control your lights with Alexa or Google Assistant
- SET UP - Attach TV light strip to the back of your TV with the included mounts, which let you bend it easily around corners.
Divide the property into lighting zones
| Zone | Purpose | Typical fixture | Programming idea |
|---|---|---|---|
| Approach path | Establish atmosphere and guide movement | Concealed strip, low-level bollard or small spotlight | Very slow fade or steady cold moonlight |
| Doorway | Frame the threshold and signal the first reveal | Color smart bulb, strip behind trim, or pair of spotlights | Purple or blue-green at rest; red change when triggered |
| Windows and foliage | Add depth behind or around the entrance | Strip behind a curtain or spotlight aimed through plants | Low-intensity purple accent with a gradual pulse |
| Reveal area | Deliver the strongest visual moment | Directional spotlights, backlight, or a bright practical lamp | Deep red shift, short flash, or flame-like orange flicker |
| Living room or movie area | Support the screen without competing with it | Backlight strip or gradient strip behind the display | Screen-synchronized color at low room brightness |
Use the doorway and path as an approach sequence, then place the most intense color or motion at the reveal. This prevents the entrance from being visually louder than the feature you want visitors to remember.
Check sightlines and power routes
Stand where guests will stand, not only where the fixture will be mounted. A strip that looks hidden from the side may be visible from the path. Identify outlets, cable runs, drainage, and places where a connector could be stepped on or exposed to water. Keep a written zone plan so a scene can be restored after cleaning, weather, or a furniture change.
Hide LED strips so the light, not the dots, is visible
Concealment is the central placement rule: hide the strip itself and let its beam define the space. Visible individual emitters create glare and make the installation look temporary. Indirect light also produces softer gradients that resemble film lighting.
Recommended Free Tools
Indoor concealment locations
- Behind crown molding, aimed upward to wash the ceiling.
- Along the rear edge of a shelf, aimed at the wall behind objects.
- Behind a television or media unit for a controlled backlight.
- Under a baseboard or furniture lip, aimed across the floor or lower wall.
- Inside a cabinet or behind a translucent prop where the material can diffuse the glow.
Leave enough room for the strip to radiate rather than pressing it into a corner where the first few inches become a bright hot spot. Test the scene at night with the main room lights off, then lower the strip level until the surrounding surfaces are visible without washing out the shadows.
Make a ghost or prop glow from within
Place a strip behind translucent gauze or a similar diffusing material, keeping the LEDs from touching fabric that could trap heat. The material should hide the points of light while allowing a broad glow through the prop. Use a slow brightness change instead of rapid flashing; the subtle rise and fall reads as an object that is alive rather than as a sign or display.
Use spotlights for hard shadows
Low-angle spotlights aimed at tombstones, skeletons, plants, or textured walls create long shadows and establish scale. Move the fixture a few inches at a time while watching the shadow edge. A lower angle lengthens the shadow; a higher angle reveals more of the object and reduces distortion. Aim away from visitors’ eyes and keep the beam off neighboring windows if it could disturb occupants.
Rank #2

- WHAT’S IN THE BOX - Includes one White and Color Ambiance 75" TV smart led light strip with mounting brackets designed for use on 75 inch TVs; Perfect for immersive gaming and TV watching experiences
- REQUIRES A HUE BRIDGE AND SYNC BOX - In order to have your TV light strip and light play bars sync with movies, music or gaming, a Hue bridge and sync box are required (both sold separately)
- MILLION OF COLORS - The White and Color Ambiance range offers both warm-to-cool white and millions of colors straights out of the box.
- VOICE CONTROL - Convenient smart control; Set up voice control in the Hue app and use simple voice commands to control your lights with Alexa or Google Assistant
- SET UP - Attach TV light strip to the back of your TV with the included mounts, which let you bend it easily around corners.
Build a ceiling cove without hot spots
A ceiling cove is an effective base layer because it lights a large surface without showing the source. Use an aluminum channel or profile to keep the strip straight, diffuse the output, and protect it from dust and heat. Philips Hue’s installation guidance recommends placing the strip 4–6 inches (10–15 cm) from the ceiling to spread light evenly and reduce hot spots. That figure is an installation recommendation, not a measured performance guarantee for every strip.
- Mark a continuous line around the cove or selected wall section, maintaining the recommended offset where the geometry allows it.
- Cut the channel to length and deburr the ends so they cannot damage the strip or cable.
- Secure the channel according to its mounting method, leaving access to the power connection and controller.
- Install the diffuser, then place the strip so its emitting surface faces the ceiling or wall rather than the room.
- Power the strip temporarily and inspect the wash from the normal viewing position before closing any trim.
- Reduce brightness and correct any visible bright sections by changing the angle, spacing, or diffuser rather than simply increasing room lighting.
Choose a restrained Halloween color progression
Color works best when it has a role. A limited palette lets the audience recognize a change in mood instead of seeing unrelated colors compete. A practical three-stage progression is cold white or blue-green for moonlight, purple for uneasy accents, and deep red for the climax.
Opening: cold moonlight
Use a cool white or blue-green wash on the path, ceiling, or exterior wall. Keep it relatively even and slow-moving so visitors can orient themselves. This establishes the scene before any scare occurs.
Build: purple accents
Place purple around foliage, windows, shelves, or the edges of a prop. Repeat the same hue in more than one zone so the set feels connected. A slow pulse or gentle fade is less distracting than a rapid color chase.
Climax: deep red
Reserve deep red for the doorway reveal, a central prop, or a triggered event. Transition gradually from the opening color when you want suspense; use a faster change only when the visitor has already reached the intended reveal point. Keep other zones dimmer during the red moment so the focal point remains clear.
When orange is appropriate
Orange can simulate fire when it is confined to a small cluster and paired with an irregular, low-speed flicker. Avoid applying the effect to every fixture, which makes the entire scene look like a blinking decoration. A motion trigger can activate the orange cluster after a person crosses the entrance.
Rank #3

- WHAT’S IN THE BOX - Includes one White and Color Ambiance 55" TV smart led light strip with mounting brackets designed for use on 55 inch TVs; Perfect for immersive gaming and TV watching experiences
- REQUIRES A HUE BRIDGE AND SYNC BOX - In order to have your TV light strip and light play bars sync with movies, music or gaming, a Hue bridge and sync box are required (both sold separately)
- MILLION OF COLORS - The White and Color Ambiance range offers both warm-to-cool white and millions of colors straights out of the box.
- VOICE CONTROL - Convenient smart control; Set up voice control in the Hue app and use simple voice commands to control your lights with Alexa or Google Assistant
- SET UP - Attach TV light strip to the back of your TV with the included mounts, which let you bend it easily around corners.
Program motion and transitions for suspense
Automation should control timing, not replace composition. Set a calm idle state first, then define what changes when a sensor detects movement. The official Halloween guidance describes motion sensors that can trigger a red entrance scene, flash groups of lights for a jump scare, or activate flickering orange lights that imitate flames.
Use a three-part trigger sequence
- Idle: Keep the path in cold moonlight or a very slow fade. The entrance and reveal remain subdued.
- Detection: When someone crosses the sensor, change the entrance to red or brighten a defined accent. If using a flash, keep it brief and limit it to the intended cluster.
- Recovery: Fade back to the idle scene after the event so the next visitor receives the same progression. Set a practical cooldown to prevent repeated triggers from stacking while people remain in the detection area.
Place the sensor where the approach is visible but where normal movement will not trigger it constantly. Protect outdoor sensors from direct water exposure as specified by the product marking. Test from both directions and at the height of children and adults who will use the path.
Prefer fades and pulses over constant flashing
Slow fades preserve visibility and are easier to watch for long periods. A short flash can be effective as a single event, but repeated strobing can be uncomfortable and can interfere with cameras. If guests with photosensitivity may attend, provide a non-flashing scene and make the change easy to disable.
Quick wins for a faster PC:
Repair Windows errors before they cause bigger problemsFix Now →Fix the driver behind crashes, sound loss and screen glitchesFind Drivers →Synchronize the room with a Halloween movie
For a movie setup, a Hue Sync box can connect to a television and coordinate compatible Play light bars or Gradient strip lights with screen content. Put the strip behind the display or along nearby architectural edges so the reflected color extends the picture without revealing the LEDs.
- Mount the backlight behind the screen or at the edge recommended for the fixture, keeping the emitting surface aimed at the wall.
- Connect the source devices and television through the Sync box according to the system’s current connection instructions.
- Start with the room lights dim and the backlight at a conservative level; the screen should remain the visual anchor.
- Watch a dark scene and a bright scene before guests arrive. Reduce the backlight if it lifts black levels or makes subtitles difficult to read.
- Keep path and safety lighting on a separate scene so someone can move around without interrupting synchronization.
Movie synchronization is most convincing when the rest of the room is quiet. Do not use a bright red doorway scene at the same time as a screen-reactive backlight unless the doorway is intentionally part of the composition.
Compare bulbs, strips, spotlights, and accessories
Choose the fixture by the visual job it must perform, then verify hub, platform, and environmental compatibility before buying. Product names, app features, regional availability, and prices can change, so confirm the current specifications for the exact model.
Rank #4
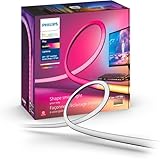
- WHAT'S IN THE BOX - Includes one White and Color Ambiance PC smart led light strip made for 24-27" PC monitors; Perfect for immersive gaming experiences
- REQUIRES A HUE BRIDGE - Unlock the power of Hue and enjoy automations control from anywhere in the world, and a secure, stable connection that won't drain your Wi-Fi. Use Matter to connect your smart home devices to your Hue smart lighting system.
- MILLIONS OF COLORS - Gradient-enabled lightstrips produce multiple colors of light at the same time resulting in a seamless gradient of rich, high-quality light.
- VOICE CONTROL - Convenient smart control; Set up voice control in the Hue app and use simple voice commands to control your lights with Alexa or Google Assistant
- SET UP - Attach the Play Gradient Light Strips to the back of your monitors with the included mounts which let you bend it easily around corners.
| Fixture or accessory | Best use | Strength | Limitation to check |
|---|---|---|---|
| Color smart bulb | Lamp, porch lantern, or practical fixture in a color zone | Simple replacement and directional control through an existing fitting | The lamp shade and fixture may expose or block the color; confirm platform and hub compatibility |
| Concealed LED strip | Wall wash, shelf edge, cove, or prop backlight | Broad indirect glow and continuous architectural coverage | Visible emitters can look harsh; verify diffusion, length, power, and heat management |
| Gradient or screen-sync strip | Television backlight and movie room | Can coordinate color with screen content when used with the required controller | Needs the compatible synchronization hardware and careful brightness balancing |
| Low-angle spotlight | Tombstones, plants, skeletons, and textured walls | Defined pool of color and long, dramatic shadows | Incorrect aiming can glare into eyes or illuminate neighboring property |
| Motion sensor | Entrance, path, and jump-scare trigger | Turns a static scene into a timed event | Placement, detection range, weather protection, and cooldown behavior matter |
| Aluminum channel with diffuser | Ceiling cove and exposed architectural edges | Straighter installation, softer output, and added protection from dust and heat | Channel dimensions must match the strip; allow access for service |
| Low-voltage power unit, cable, and weatherproof connectors | Outdoor low-voltage installations | Provides a system designed for the fixture’s electrical and environmental requirements | Every component must carry the correct rating and follow its marking and local code |
Outdoor safety: ratings and installation requirements
Never assume that an LED strip is safe outdoors because its controller is marketed as smart or because the light works indoors. Match the fixture, cable, connector, controller, and power unit to the actual location: dry, damp, or wet.
What’s actually slowing this PC down?
Pick the symptom - the matching free tool is one click away.
Understand the relevant standards
- UL 1598: Line-voltage outdoor luminaires are evaluated to this luminaire standard, including applicable wet-location requirements.
- UL 1838: Covers low-voltage landscape lighting systems for gardens, walkways, patios, and similar locations. Installation must follow the product marking and the National Electrical Code.
- UL 2108: Applies to certain low-voltage lighting systems and their construction and performance requirements.
UL’s LED guidance also notes that equipment exposed to weather needs additional construction, performance, and marking considerations under the applicable end-product standard. The certification mark alone does not tell you where every connection may be placed; follow the manufacturer’s instructions for the complete system.
Protect power and connections
- Use a power unit explicitly rated for the selected low-voltage system and the installation location.
- Keep power supplies and junctions protected exactly as the product instructions specify; do not leave indoor-rated adapters in rain or standing water.
- Use connectors and cable listed for the environment, and route them away from foot traffic, sharp edges, sprinklers, and drainage paths.
- Provide strain relief so a pulled cable cannot transfer force to a connector or circuit board.
- Use ground-fault protection and comply with local electrical requirements; hire a qualified electrician for line-voltage work or when the installation exceeds your competence.
- Unplug or isolate the system before changing connections, cutting a strip, or opening a weatherproof enclosure.
Installation workflow for a reliable scene
- Draw the route: Mark the approach, doorway, windows, reveal, power sources, sensor position, and cable paths.
- Assign the palette: Choose the idle, build, and climax colors before mounting fixtures. Record which zone uses each color.
- Install concealment first: Fit channels, shelves, trim, or prop diffusers before permanently attaching strips.
- Place directional fixtures: Aim spotlights from low angles and check shadows from the visitor’s viewpoint.
- Label cables and zones: Mark controllers and power units so a fault can be isolated without dismantling the entire display.
- Pair and test one zone at a time: Confirm the bulb, strip, sensor, and control platform before adding the next zone.
- Program the idle scene: Set conservative brightness and slow movement, then save it as the recovery state.
- Add the trigger: Configure the sensor event, flash or color change, and return-to-idle behavior.
- Test in darkness: Check glare, shadows, reflections in windows, camera exposure, and safe walking visibility.
- Weather-check the installation: Reinspect connectors, cable positions, and enclosures after the first rain or temperature change.
Troubleshoot common cinematic-lighting problems
The scene looks cheap or chaotic
Reduce the number of active colors and lower overall brightness. Repeat one accent color across related zones, hide exposed emitters, and move the brightest fixture to the reveal rather than leaving every fixture at the same level.
LED dots and bright bands are visible
Improve concealment before increasing power. Re-aim the strip at a wall or ceiling, add a diffuser or aluminum channel, increase the distance from the surface where the geometry permits, and inspect the result from the normal viewing position.
The cove has hot spots
Check spacing and angle. The 4–6 inch (10–15 cm) ceiling offset is a useful starting recommendation, but the channel, diffuser, wall color, and strip design affect the result. Adjust the physical placement and diffusion rather than compensating with more brightness.
Free tools Windows power users keep installed
One-click scans. No signup required.
Motion triggers happen repeatedly
Move the sensor away from the detection edge, reduce its sensitivity or range if the model allows it, and add a cooldown or recovery delay. Test with several people walking at normal speed so the trigger does not retrigger while the first event is still running.
Best Value
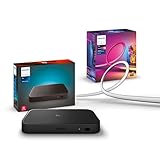
- WHAT'S IN THE BOX - Includes one Hue Play HDMI Sync Box 8K, perfect for an immersive media experience, and one Gradient 65" TV smart LED light strip with mounting brackets for use on 65-70 inch TVs.
- REQUIRES A HUE BRIDGE - Unlock the power of Hue and enjoy automations, control from anywhere in the world, and a secure, stable connection that won't drain your Wi-Fi. Matter compatible.
- HDMI 2.1 CERTIFIED FOR THE HIGHEST QUALITY CONTENT - With an ultra-fast refresh rate, you can sync your Hue lights to the highest quality video content with 8K at 60 Hz and 4K at 120 Hz.
- SYNC LIGHTS TO ANY HDMI DEVICE - You can only sync with HDMI devices, not with TV apps. Connect up to 4 devices, including the latest gaming consoles and home theater devices.
- MILLION OF COLORS - The Gradient 65" TV Light Strip offers both warm-to-cool whites and millions of colors straight out of the box.
The movie backlight overpowers the screen
Lower the backlight and dim unrelated room fixtures. Move the strip closer to the rear edge or improve diffusion so the wall receives a soft halo rather than a visible line of light.
Outdoor sections stop working after weather
Disconnect power before inspection. Look for water at connectors, damaged insulation, loose strain relief, or a power unit installed outside its marked environment. Replace components with correctly rated parts; do not seal an indoor-rated product with improvised tape and treat it as outdoor equipment.
Three scene recipes you can adapt
Front-door “moonrise to witching hour”
Run a concealed strip under the porch edge or behind entry trim in cold white or blue-green. Add purple to a nearby window or plant with a smart bulb. When the sensor detects a visitor, fade the doorway to deep red over several seconds, then return to moonlight. Keep the path brighter than the reveal’s floor so guests can walk safely while the door remains the visual focus.
Garden path with a shadow reveal
Use a low-level strip or other concealed wash to establish the path. Aim a low-angle spotlight across a tombstone or plant so its shadow stretches toward the approach. Leave the spotlight dim in the idle state; a motion event can raise it briefly or change its color while a separate orange cluster provides a restrained flame effect.
Living-room movie night
Install a compatible gradient or Play light backlight behind the television and keep the ceiling or shelf wash very low. Use a separate smart bulb near the entrance for safe movement, but do not let it compete with the screen. Before the film starts, verify that the screen remains the brightest object during both dark and bright scenes.
End-of-night checks and storage
Save a normal static scene as well as the animated Halloween scene. At the end of the evening, switch to the static scene, then power down equipment according to its instructions. For temporary outdoor installations, dry and inspect connectors before storage, coil cables without tight kinks, and label each zone. Store strips, channels, sensors, and power units together so the tested layout can be recreated without guessing next season.
Quick Recap
Product prices and availability are accurate as of the date/time indicated and are subject to change. Any price and availability information displayed on Amazon at the time of purchase will apply.

