Crashes, No Sound, or Screen Glitches?
Random freezes, missing sound and display glitches usually trace back to one bad driver. Find and replace yours safely.Free scan · under a minutePC Slower Than It Used to Be?
A free scan shows the junk files, broken settings and background clutter dragging Windows down - then fixes them in one click.Free scan · Windows 10 & 11Some links on this page are affiliate links: if you buy through them we may earn a commission, at no extra cost to you.
Composting is one of the simplest ways to turn kitchen scraps, leaves, and yard trimmings into a useful soil amendment. The beginner version does not require a complicated system. You need the right location, a bin that fits your property, enough dry brown material, moisture that feels like a wrung-out sponge, and enough airflow to keep the pile from going sour.
The basic recipe is straightforward: add 2 to 3 buckets of browns for every 1 bucket of greens, keep food scraps buried or covered with 4 to 8 inches of dry browns, turn or fluff the pile regularly, and wait until the material is dark, crumbly, earthy-smelling, and no longer heating. A well-managed backyard pile can produce usable compost in about 3 to 4 months. A small, dry, cold, or rarely turned pile may take 6 to 12 months or longer.
As an Amazon Associate I earn from qualifying purchases.
From a construction point of view, the biggest beginner mistakes are not biological. They are layout mistakes: a bin placed in a soggy corner, too close to siding or a deck, too far from the kitchen, open to rodents, or out of compliance with neighborhood rules. On our job sites, the same principle applies whether we are setting a drain, a fence post, or a compost station: good results start with location, access, drainage, and containment.
Step 1: Choose the Right Compost Location and Bin
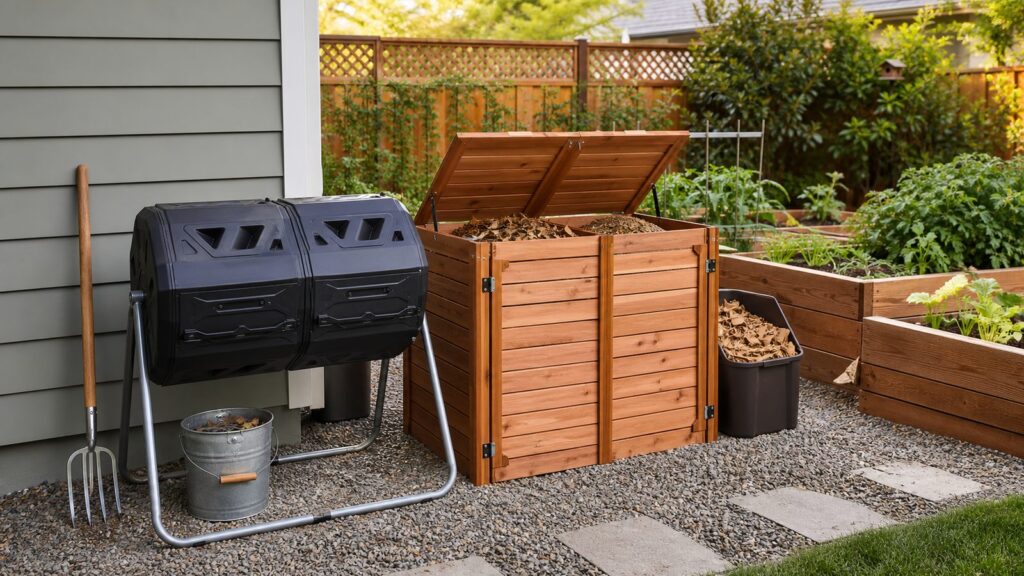
Before you collect a single banana peel, decide where the compost system will live. A compost station is a small working utility area. Treat it that way. It should be convenient enough that you will actually use it, but separated enough that odors, insects, and moisture do not become a problem.
Popular on Amazon

- Twin chambers: Two separate chambers allow one side to finish composting while leaving the other side available to add fresh wastes; Constant alternation of the two sides will create an uninterrupted stream of nutritious compost
- 360⁰ Tumbling Design: The rotating design prevents you from digging or mixing the pile by hand; And the deep fins on eight panels make it easier to turn the compost bin
- Excellent Aeration: Air vents can make the air fully circulate and will not cause an explosion due to excessive internal pressure; Deep fins can better break the clumps, which is conducive to the full fermentation of oxygen
- Sturdy & Durable Construction: Constructed of premium metal frame and high-quality pp plastic body, this tumbling composter is corrosion-resistant, weathering-resistant, sturdy, and durable for long-lasting service life
- Garden Gloves Included: The gloves that not only protect your hands from injury, but are also waterproof, making them easy to clean; With 4 durable ABS plastic claws for easy digging, planting and other gardening work
Best Location for a Beginner Compost Bin
Look for a level, well-drained spot with firm ground underfoot. The ideal location is close enough to the kitchen door that carrying scraps is not a chore, close enough to a hose for moisture control, and accessible by wheelbarrow when it is time to move finished compost. For most homes, that means a side yard, rear corner of the yard, or garden-adjacent utility area.
Keep the bin away from doors, operable windows, HVAC intakes, crawlspace vents, wood fences, deck framing, and siding. Compost should be damp, not wet, but beginners often overwater or overload food scraps. That moisture can stain surfaces, soften untreated wood, or create odor if the pile goes anaerobic. A clearance of several feet from structures is a practical minimum, and more is better when space allows.
The Tool Desk
Outbyte PC Repair FREERepair Windows errors before they cause bigger problemsFix Now →Outbyte Driver Updater FREEScan for outdated or missing drivers - takes under a minuteDriver Scan →Avoid low spots where stormwater collects. Standing water drives oxygen out of the pile and turns good ingredients into sludge. If the only available area is flat and poorly drained, improve it before you install the bin. A simple 3- to 4-inch compacted gravel base, a few concrete pavers, or a small raised pad can make the station cleaner and easier to maintain.
Check Local Rules Before You Build
Backyard composting is allowed in many places, but the details vary. Cities, counties, HOAs, and planned communities may regulate placement, enclosure type, pile size, setbacks, odor, rodents, and whether food scraps are allowed. Some rules are complaint-driven, which means you may not hear about them until a neighbor reports odor or pests.
For a typical single-family home, check three things before building: municipal solid waste or composting rules, HOA architectural guidelines, and any nuisance ordinances related to rodents or odors. If you are in a dense neighborhood or townhouse setting, a sealed tumbler or rodent-resistant stationary bin is usually easier to defend than an open pile.
Compost Bin Options and 2026 Cost Ranges
You can compost in an open pile, a wire cylinder, a plastic stationary bin, a wood bin, or a tumbler. The best choice depends on space, budget, appearance standards, pest pressure, and how much yard waste you generate.
| Compost setup | Typical 2026 cost | Best for | Watch-outs |
|---|---|---|---|
| Open pile or salvaged pallet bin | $0 to $30 | Large yards, low-cost starts, plenty of leaves | Harder to keep tidy, more exposed to pests, may not meet HOA rules |
| Wire mesh cylinder | $10 to $50 | Leaves, garden waste, simple backyard composting | Food scraps need careful burying and covering |
| Basic stationary plastic bin | $30 to $150 | Most beginners with small to medium yards | Can compact if not fluffed; some models need a rodent-resistant base |
| dual-chamber tumbler | $60 to $250 | Small lots, cleaner appearance, easier turning | Limited capacity; dries out or gets too wet quickly if overloaded |
| Premium insulated tumbler | $300 to $500+ | Cold climates, year-round users, tidy high-end setups | Higher cost per gallon of capacity |
| Built compost station with pad or screening | A few hundred dollars to $1,500+ | Permanent garden areas, HOA-sensitive yards, larger landscapes | Cost depends on grading, drainage, fencing, access, and materials |
If you want hot composting, aim for a pile at least about 3 feet by 3 feet by 3 feet. That size holds enough mass to heat. Smaller bins still work, but they usually compost slower and need more careful moisture control.
For small lots, a 34- to 65-gallon tumbler can be a clean first system. A 37-gallon dual-chamber tumbler commonly falls around $60 to $85 at big-box retailers, while larger or heavier-duty homeowner models often run $100 to $250. The dual-chamber design is useful because one side can receive fresh material while the other side rests and cures.
Also popular on Amazon
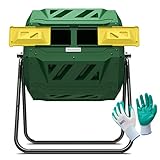
- ✅Speed Up Composing Process: More advanced models use rotating to bring oxygen to the center of the bin and paddles inside the chamber to help mix and aerate the composting materials when turned. These improvements or modifications are designed for one reason: to speed the composting process.
- ✅How do Compost Tumblers work? Simple. You load them with green and brown waste from your yard and kitchen. When full, you give them time to work, in other words, heat up. Turning a compost pile mixing the organic materials and the organisms it contains with heat-producing oxygen is the traditional method of keeping the process going full steam. By turning the tumbler, the organic materials are mixed and infused with fresh oxygen.
- ✅Easy to Access Finished Compost: Just Slide the door open and take the organic fertilizer out when the compost is ready. When a check reveals the compost is complete —and this can happen in a matter of weeks —the same access that allowed you to fill the tumbler lets you empty it. Now is the time to spread the results.
- ✅Dual-Bin Design: The dual bin design takes a different approach to the continuous-use composted concept, Two bins are set side-by-side into a single rotating chamber. Thickly insulated compartments conserve the heat generating by the decaying matter, and this greatly speeds the process. This design also allows you to add food waste to one chamber while the other is composting.
- ✅Totally Organic and Money-Saving: If you're looking for a fast, convenient way to compost your kitchen throw-outs, grass clippings, and organic yard waste, our outdoor kitchen compost bin is just right for you! The Compact Compost Tumbler quickly recycles it into nutrient-rich compost.
A countertop pail is not the composter. It is just a collection container for the kitchen. Plan on $20 to $50 for a lidded stainless or plastic pail with a charcoal filter. Electric countertop food recyclers are a separate category and often cost several hundred dollars. They dry and grind scraps into a reduced material, but they do not produce finished compost the same way an outdoor biological compost pile does.
Step 2: Load the Bin With the Right Browns and Greens
Compost needs carbon, nitrogen, water, and air. Beginners usually hear this as “browns and greens.” Browns are carbon-rich dry materials. Greens are nitrogen-rich fresh materials. The pile works best when browns dominate by volume.
Do these 3 things before closing this tab:
1Repair Windows errors before they cause bigger problems2Fix the driver behind crashes, sound loss and screen glitches3Clear out junk files and repair common Windows errorsUse this beginner recipe: add 1 bucket of greens, then add 2 to 3 buckets of browns. If you add food scraps, bury them in the center of the pile or cap them immediately with 4 to 8 inches of dry browns. That one habit prevents most odor, fly, and rodent complaints.
Good Browns for Compost
Good browns include dry leaves, shredded cardboard, torn paper egg cartons, small wood chips, straw, dry plant stems, pine needles in moderate amounts, and sawdust from clean untreated lumber. Shredded material breaks down faster than whole material. A whole cardboard box is a mat. Shredded cardboard is structure and carbon.
Keep a covered stash of dry leaves or shredded cardboard beside the compost station. This is one of the most practical beginner upgrades. Every time you empty the kitchen pail, cover those scraps right away. Without a brown-material stash, people tend to dump food scraps on top and promise to fix it later. That is how odors start.
Good Greens for Compost
Good greens include fruit and vegetable scraps, coffee grounds, tea leaves, fresh grass clippings, spent flowers, green garden trimmings, and plant-based kitchen waste. Grass clippings are useful, but only in thin layers mixed with browns. A thick wet mat of clippings can heat unevenly, compact, and smell.
Chop bulky items before adding them. Corn cobs, melon rinds, cabbage cores, thick stems, and whole spoiled produce break down much faster when cut into smaller pieces. You do not need to mince everything, but reducing pieces to 1 to 3 inches makes a noticeable difference.
What Not to Put in a Beginner Compost Bin
For a standard backyard pile, skip meat, fish, bones, dairy, grease, oily foods, pet waste, diseased plants, glossy coated paper, charcoal ash, and sawdust or chips from chemically treated wood. These materials can attract pests, create sanitation issues, introduce pathogens, or leave contaminants in the finished compost.
Some commercial and municipal composting systems can handle materials that a backyard pile should not. That does not mean your home bin can do the same. A beginner backyard pile is not managed like a permitted commercial operation, and it is not held to certified organic processing standards.
Also popular on Amazon
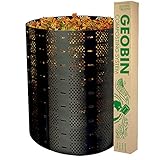
- Large capacity—expandable to 3.75 feet (237 gallon)
- Easy to assemble with closure keys. Easy to move. Easy to reassemble.
- The best value composting bin on the market.
- Excellent ventilation.
Step 3: Manage Moisture, Airflow, and Heat
Once the bin is loaded, your job is to keep conditions right for decomposition. Compost should be damp like a wrung-out sponge. If you squeeze a handful, it should feel moist, but water should not stream out. University extension guidance commonly places good compost moisture around 40% to 60%.
Too dry, and the pile stalls. Too wet, and air spaces collapse. When oxygen disappears, the pile turns anaerobic and starts to smell sour, rotten, or swampy.
How Often to Turn Compost
For faster compost, turn or fluff the pile every 1 to 2 weeks. In a tumbler, rotate it several times after each feeding and then a few times per week. In a stationary bin, use a garden fork, pitchfork, or compost aerator to lift and loosen compacted material. Basic aerators and pitchforks typically cost $20 to $60 if you do not already own one.
Turning does three things: it adds oxygen, mixes wet and dry pockets, and moves outer material toward the warmer center. If you never turn the pile, composting still happens, but it moves more slowly. That is cold composting, and it may take 6 to 12 months or longer.
Temperature Targets for Serious Gardeners
You do not need a thermometer to make compost, but it helps if you want a faster, hotter pile. Basic long-probe compost thermometers commonly cost $15 to $40. A well-built hot pile often works in the 131°F to 160°F range. Organic production guidance for windrow systems references 131°F to 170°F for 15 days with at least five turns as a pathogen-reduction benchmark. Homeowners are not trying to certify a backyard bin, but those numbers explain why volume, moisture, and turning matter.
Quick wins for a faster PC:
Repair Windows errors before they cause bigger problemsFix Now →Scan for outdated or missing drivers - takes under a minuteDriver Scan →If your pile never warms, it may be too small, too dry, too low in greens, or too loosely loaded to hold heat. If it smells like ammonia, it has too much nitrogen-rich green material and needs more browns. If it smells rotten, it is probably too wet or compacted and needs dry browns plus turning.
Simple Troubleshooting by Smell and Texture
| Problem | Likely cause | Fix |
|---|---|---|
| Ammonia smell | Too many greens, especially grass or food scraps | Add 2 to 3 buckets of dry browns and mix well |
| Rotten or sour smell | Too wet, compacted, low oxygen | Turn the pile, add shredded cardboard or dry leaves, improve drainage |
| Fruit flies | Food scraps exposed near the surface | Bury scraps in the center and cover with 4 to 8 inches of browns |
| Rodent activity | Open access, food scraps exposed, wrong materials added | Use a sealed bin, hardware cloth base, tight lid, and remove meat, dairy, grease, or bones |
| Pile not breaking down | Too dry, too cold, pieces too large, not enough greens | Moisten, chop bulky material, add greens, and turn every 1 to 2 weeks |
| Wet sludge at bottom | Poor drainage or overwatering | Move to higher ground, add coarse browns, and consider a gravel or paver pad |
Build airflow into the pile from the start. Put coarse browns, small twigs, or dry stems at the bottom before adding food scraps. Avoid thick layers of grass, wet leaves, or kitchen waste. Think of the pile like a wall assembly: trapped moisture without ventilation causes problems.
Step 4: Cure, Harvest, and Use Finished Compost
Finished compost is not just “old scraps.” It should be dark, crumbly, earthy-smelling, and no longer heating. You should not be able to identify most of the original food or yard waste. A few stubborn pieces of twig, eggshell, avocado pit, or corn cob are normal. Screen them out and toss them back into the active bin.
A practical beginner system has two zones. One side receives fresh material while the other side rests. In a two-bin setup, stop adding to the first bin once it is mostly full, then let it cure while you start filling the second. In a dual-chamber tumbler, use one chamber for active feeding and one for finishing. This avoids mixing new scraps into material that is almost ready.
Recommended Free Tools
How Long Compost Takes
A well-managed backyard compost pile can make usable compost in roughly 3 to 4 months. That assumes good size, good moisture, the right brown-to-green balance, and regular turning. A less-managed pile may take 6 to 12 months. In cold weather, decomposition slows. In a tiny dry tumbler, it can slow down even more unless you manage moisture carefully.
Also popular on Amazon

- ✅Speed Up Composing Process: More advanced models use rotating to bring oxygen to the center of the bin and paddles inside the chamber to help mix and aerate the composting materials when turned. These improvements or modifications are designed for one reason: to speed the composting process.
- ✅How do Compost Tumblers work? Simple. You load them with green and brown waste from your yard and kitchen. When full, you give them time to work, in other words, heat up. Turning a compost pile mixing the organic materials and the organisms it contains with heat-producing oxygen is the traditional method of keeping the process going full steam. By turning the tumbler, the organic materials are mixed and infused with fresh oxygen.
- ✅Easy to Access Finished Compost: Just Slide the door open and take the organic fertilizer out when the compost is ready. When a check reveals the compost is complete —and this can happen in a matter of weeks —the same access that allowed you to fill the tumbler lets you empty it. Now is the time to spread the results.
- ✅Dual-Bin Design: The dual bin design takes a different approach to the continuous-use composted concept, Two bins are set side-by-side into a single rotating chamber. Thickly insulated compartments conserve the heat generating by the decaying matter, and this greatly speeds the process. This design also allows you to add food waste to one chamber while the other is composting.
- ✅Totally Organic and Money-Saving: If you're looking for a fast, convenient way to compost your kitchen throw-outs, grass clippings, and organic yard waste, our outdoor kitchen compost bin is just right for you! The Compact Compost Tumbler quickly recycles it into nutrient-rich compost.
Do not rush the harvest. Unfinished compost can smell sour, attract pests, tie up nitrogen in the soil, and carry weed seeds or unstable organic acids. If in doubt, let it cure another few weeks.
How to Use Compost Without Overdoing It
Finished compost is a soil amendment, not a complete fertilizer and not a full replacement for potting soil. For garden beds, spread 1 to 2 inches over the surface and work it lightly into the top few inches of soil. For lawns, screen it and topdress lightly, often around 1/4 inch, so grass blades are not smothered. Around shrubs and perennials, use compost as part of the mulch layer, but keep it pulled back from trunks and stems.
Do not plant directly into pure compost for most applications. It can hold too much moisture, lack the mineral structure plants need, and vary in nutrient strength. Mixed into soil, it improves texture, moisture retention, microbial activity, and workability.
Beginner Composting Costs: What to Budget in 2026
You can start composting for almost nothing if you already have yard space, leaves, a hose, and a garden fork. You can also spend $500 or more on a polished, enclosed, premium system. Most homeowners land between those extremes.
A realistic starter budget is $50 to $200 for a basic bin, countertop pail, and turning tool. Add $15 to $40 if you want a compost thermometer. If you need a cleaner built station with a level pad, privacy screening, fencing, or drainage correction, the budget can move into the few-hundred-dollar range quickly. When bundled with landscape work, raised beds, grading, pavers, or a screened utility area, a small professional compost station can exceed $1,500.
The main cost drivers are capacity, material, lid quality, rodent resistance, UV resistance, insulation, access doors, dual-chamber design, shipping weight, and whether the site needs grading or drainage work. A cheap open pile can work beautifully on a rural lot. It may be the wrong answer for a tight suburban yard with HOA rules and nearby neighbors.
Independent reader supportYour contribution helps us test, update, and keep practical guides available for everyone.When to DIY vs. When to Hire a Pro
Composting itself is an easy DIY habit. Most homeowners can set up a basic bin in an afternoon. Hire help when the compost station becomes part of a larger site improvement or when the location has drainage, access, code, or appearance constraints.
What’s actually slowing this PC down?
Pick the symptom - the matching free tool is one click away.
Good DIY Compost Projects
DIY is the right call for a simple plastic bin, a wire cylinder, a small tumbler, a pallet bin, or an open leaf-and-yard-waste pile in a suitable backyard. If the ground is level, drains well, and the bin is not close to structures or property-line conflict, you do not need a contractor.
Also popular on Amazon

- Dual Chamber, High Capacity: Our compost bin features a dual chamber with a generous capacity of 43 gallons. Perfect for large families and avid gardeners, you can simultaneously compost in one chamber while adding new organic material to the other, reducing overall composting time.
- Convenient Access: The dual-chamber composter tumbler features a detachable sliding door with a large opening, making it effortless to add waste or remove compost. The compost bin features a secure seal that effectively keeps out mice, insects, and other pests, ensuring a safe and efficient composting process.
- Built to Last: Crafted from high-quality PP materials and supported by sturdy metal components, our compost bin outdoor boasts a robust load-bearing capacity of 110 lbs. They are BPA-free, UV-resistant, and weatherproof, enduring direct sunlight, typhoons, rain, snow, and more.
- Effortless Tumbling: Say goodbye to the hassle of manual stirring. Our tumbling composter's innovative 360° tumble design ensures thorough mixing, faster decomposition, and higher-quality compost output. Simply roll it every few days, and you'll have compost ready in just 4-6 weeks.
- Optimized Airflow: The garden compost tumbler features strategically placed vents that promote proper air circulation and prevent potential issues. Internal grooves effectively break up clumps, ensuring uniform mixing of materials and accelerating the decomposition of organic matter.
A homeowner can also build a simple 3-foot by 3-foot by 3-foot wood or wire bin using cedar, exterior-rated fasteners, and galvanized hardware cloth. For rodent resistance, use 1/4-inch or 1/2-inch hardware cloth at the base and sides, secure the lid, and avoid large gaps. Do not use chemically treated lumber scraps where leachate or sawdust may enter the compost.
When Professional Help Makes Sense
Bring in a pro when you need grading, drainage improvements, a paver or gravel pad, fencing, screening, raised beds, retaining edges, or a compost station that has to look intentional beside a finished landscape. Professional help is also useful if you have recurring rodent pressure, a steep side yard, poor access, or a yard that already has water collecting in the proposed location.
On construction and landscape projects, we look at the compost area the same way we look at any outdoor utility feature. Does water move away from it? Can the homeowner reach it with tools? Is it protected from animals? Will it stain or rot nearby materials? Does it create a neighbor problem? A few hours spent answering those questions can prevent years of nuisance issues.
Free tools Windows power users keep installed
One-click scans. No signup required.
Why Composting Is Worth the Effort
Composting reduces household waste, improves soil, and keeps a high-impact material out of landfills. Food waste is especially important because landfilled food waste contributes heavily to methane emissions from municipal solid waste landfills. At the home scale, the benefit is more immediate: fewer bags of wet trash, better garden soil, and a useful place for leaves and plant trimmings.
The key is to keep the system simple enough that it becomes routine. Put the bin where you will use it. Keep browns on hand. Cap food scraps every time. Turn or fluff before the pile compacts. Let finished compost cure before using it. That is the whole system.
Quick Start Checklist
- Pick a level, well-drained location away from doors, windows, vents, wood structures, and low wet areas.
- Check city, county, and HOA rules before installing a permanent bin or open pile.
- Choose a bin that fits your lot: open pile for large yards, stationary bin for most homes, tumbler for small or tidy spaces.
- Start with coarse browns at the bottom for airflow.
- Use 2 to 3 buckets of browns for every 1 bucket of greens.
- Bury food scraps in the center or cover them with 4 to 8 inches of dry browns.
- Keep moisture like a wrung-out sponge, roughly 40% to 60% moisture.
- Turn every 1 to 2 weeks for faster compost.
- Let compost cure until it is dark, crumbly, earthy-smelling, and no longer heating.
- Use finished compost as a soil amendment, not as pure potting soil.
Frequently Asked Questions
What is the easiest way to start composting at home?
The easiest way is to buy a lidded outdoor bin or tumbler, place it on level well-drained ground, and use a simple recipe: 1 bucket of greens plus 2 to 3 buckets of browns. Cover food scraps with 4 to 8 inches of dry leaves or shredded cardboard each time.
What should beginners put in a compost bin first?
Start with coarse browns such as dry leaves, small twigs, straw, or shredded cardboard. This creates airflow at the bottom. Then add greens like fruit and vegetable scraps, coffee grounds, and fresh plant trimmings, followed by more browns.
How long does backyard compost take?
A well-managed pile can make usable compost in about 3 to 4 months. A small, dry, cold, or rarely turned pile may take 6 to 12 months or longer. Compost is ready when it is dark, crumbly, earthy-smelling, and no longer heating.
Why does my compost smell bad?
Bad odor usually means too many greens, too much water, or not enough air. Add dry browns such as leaves or shredded cardboard, turn the pile to loosen it, and make sure the bin is not sitting in a poorly drained low spot.
Can I compost meat, dairy, grease, or pet waste?
Not in a standard beginner backyard pile. Meat, fish, bones, dairy, grease, oily foods, and pet waste can attract pests and create sanitation problems. Use municipal or specialized systems only if local guidance specifically allows those materials.
Is a compost tumbler better than a compost pile for beginners?
A tumbler is often better for small lots, tidy yards, and homeowners worried about rodents or HOA complaints. An open pile or stationary bin usually offers more capacity for less money, but it needs more attention to placement, covering scraps, and pest control.
Recommended Free Tools
Quick Recap
Product prices and availability are accurate as of the date/time indicated and are subject to change. Any price and availability information displayed on Amazon at the time of purchase will apply.

