Yes—you can build a useful bass amp at home, but the safest practical design is modular: build the preamp, controls, enclosure, and speaker cabinet, then use a proven Class-D power-amplifier module and a certified external DC power supply.
The signal chain is:
Bass input → input buffer/preamp → EQ → master volume → Class-D power module → matched bass speaker cabinetThis approach avoids the lethal high voltages of a tube output stage while still allowing you to customize the tone, cabinet, controls, and appearance.
As an Amazon Associate I earn from qualifying purchases.
Decide what you are building
“Bass amp” can mean several different projects:
- Practice amp: roughly 5–50 W into one 8 Ω speaker for home use.
- Bass head: the electronics in a separate enclosure that connects to an external cabinet.
- Combo amp: the amplifier and speaker in one cabinet. It is convenient but mechanically more demanding because vibration, cooling, magnetic fields, and service access must be managed.
- Tube amplifier: an advanced high-voltage project requiring transformer matching, biasing, grounding, lead dress, and safe discharge procedures.
For a first serious build, a 50–150 W amplifier into 8 Ω is a sensible practice or small-room target. A 100–300 W head into 4 Ω can provide more headroom, but the cabinet, speaker, power supply, and cooling must all support it. These are design targets, not guarantees of volume: speaker sensitivity, cone area, cabinet alignment, room acoustics, and clean headroom matter just as much.
#1 Best Overall

- Portable & Durable Design — Lightweight with a convenient carry handle, corner protectors, and quality leather covering, making it easy to take to lessons or band practice
- Powerful 20W Sound for Practice — The 20W 6.5Inch Speaker output delivers clear, rich tone ideal for bedroom practice, jam sessions, and beginner guitarists.
- Versatile Connectivity Options — Guitar input, Aux jack to play along with your favorite tracks, and a headphone jack for silent practice late at night without disturbing others.
- Full Control Over Your Tone — Adjust gain, bass, treble, and volume easily; the built-in drive/distortion lets you dial in clean or gritty sounds for any genre.
- Free accessories:3m noiseless cable,6.5mm-3.5mm headphone adapter, guitar picks, aux cable,earphone. All that Accessories Included as free.
Commercial bass amplifiers commonly combine a solid-state preamp with a Class-D power section; Ampeg describes Class-D power amplifiers in its bass range.
The safest beginner-friendly architecture
A practical modular build contains these sections:
- Input jack and buffer: presents a suitably high impedance to the bass and prevents the instrument’s pickups from being excessively loaded.
- Gain stage: provides controllable preamp gain and enough headroom for active basses.
- Tone section: provides passive or active bass, mid, and treble control.
- Optional high-pass filter: removes subsonic energy and can protect a ported cabinet below its tuning frequency.
- Master volume: controls the signal delivered to the power amplifier.
- Power amplifier: a documented Class-D module is usually the best first-build choice.
- Speaker cabinet: designed around the selected driver, not treated as an interchangeable box.
Class-D is efficient, light, and produces less heat than a linear Class-AB stage. Its disadvantages are switching noise, layout sensitivity, variable quality among inexpensive modules, and the need for a correctly rated power supply. A bare amplifier board is not a complete safe product.
Other power-stage choices
An LM3886 Class-AB design is useful for a lower-power educational build. It is conventional and well documented, but needs a substantial heat sink, suitable supply rails, output protection, and the manufacturer’s application circuit. It is less suitable when low weight and high output are priorities.
A tube preamp followed by a solid-state power amp can provide tube coloration without building a high-voltage tube output stage. It is still not a beginner-safe circuit if the preamp contains hazardous voltage.
Choose the speaker before the amplifier
The speaker and cabinet determine much of the finished amplifier’s sound and usable output. Select the driver first, then choose the amplifier and supply around it.
Check these specifications:
- Nominal impedance
- Continuous power rating
- Sensitivity
- Resonant frequency
- Usable frequency range
- Voice-coil diameter and maximum excursion
- Thiele–Small parameters
- Recommended sealed or vented enclosure
A guitar speaker is not automatically suitable for bass. Bass drivers must tolerate substantial low-frequency excursion and power. For example, Parts Express lists the Eminence Beta-12A-II as an 8 Ω driver for bass guitar and sound-reinforcement applications with a 250 W RMS rating. Eminence lists the KappaLITE 3012LF as an 8 Ω, 12-inch neodymium driver with 450 W power handling, 95.5 dB sensitivity, a 37 Hz resonance, and a stated usable range of 46 Hz–2 kHz. These are examples, not universal recommendations.
Sensitivity is particularly important. A more sensitive driver can produce more acoustic output from the same amplifier power, while a neodymium driver may reduce weight at a higher purchase price.
The Tool Desk
Outbyte PC Repair FREEClear out junk files and repair common Windows errorsFree Scan →Outbyte Driver Updater FREEFix the driver behind crashes, sound loss and screen glitchesFind Drivers →Understand amplifier power
Use these idealized relationships to estimate the electrical demands at the speaker:
P = V2 / R
V = √(P × R)
I = √(P / R)
Here, P is power in watts, V is RMS voltage, I is RMS current, and R is speaker impedance.
Rank #2

- POWERFUL MONOBLOCK PERFORMANCE: The Orion CBA2000.1D delivers up to 2000W Max power in a compact Class-D monoblock design. Stable at 1 ohm, it provides strong, efficient output ideal for driving subwoofers in daily and high-performance car audio systems.
- COMPLETE AMP & WIRING COMBO: Includes the COKIT4 4-gauge amplifier wiring kit with power and ground cables, fuse holder, RCA cables, speaker wire, and installation accessories for a clean and reliable setup.
- BUILT FOR SUBWOOFER SYSTEMS: Engineered specifically for bass-focused builds, this amplifier combo ensures consistent power delivery and dependable performance for sealed, ported, or custom subwoofer enclosures.
- COMPACT & EFFICIENT DESIGN: The Class-D platform reduces heat buildup while maintaining strong output, making it perfect for tight installations where space, efficiency, and reliability matter most.
- ALL-IN-ONE INSTALL SOLUTION: Save time and simplify your install with a matched amplifier and wiring bundle designed for easy integration into car audio systems without the need for additional components.
| Target | RMS voltage | RMS current |
|---|---|---|
| 50 W into 8 Ω | 20.0 V | 2.50 A |
| 100 W into 8 Ω | 28.3 V | 3.54 A |
| 100 W into 4 Ω | 20.0 V | 5.00 A |
| 200 W into 4 Ω | 28.3 V | 7.07 A |
These figures do not include efficiency losses, musical peaks, heat, or supply sag. Select the module and supply with appropriate margin, and do not treat a marketplace headline such as “600 W” as a continuous specification. Output power must be considered alongside supply voltage, current, impedance, distortion limit, cooling, test duration, and whether the module is stereo, bridged, or configured for parallel mono operation.
Texas Instruments specifies the TPA3255 with an 18–53.5 V power-stage supply range and output figures that depend on configuration and test conditions. A TPA3255-based board is only as capable as its particular PCB layout, output filter, cooling, protection circuitry, and power supply.
Doubling amplifier power does not double perceived loudness. Fender explains that doubling power produces approximately a 3 dB increase; speaker sensitivity and cone area can have a larger practical effect. Also distinguish continuous or RMS power from program, peak, and marketing maximum figures. Fender’s power-rating guide explains these terms.
Choose a speaker with a continuous rating at least equal to the amplifier’s expected output. A higher-rated driver may be sensible when the signal is heavily clipped, the bass has an active high-output preamp, or substantial low-frequency boost is used.
Match the speaker impedance
The amplifier must be rated for the connected load:
- Connect an 8 Ω cabinet only to an amplifier that supports 8 Ω.
- Connect a 4 Ω cabinet only if the module and supply support 4 Ω.
- Never assume a lower impedance is safe.
For equal cabinets connected in parallel:
8 Ω || 8 Ω = 4 Ω
4 Ω || 4 Ω = 2 Ω
Rtotal = 1 / (1/R1 + 1/R2 + ...)
Two 8 Ω cabinets therefore present a 4 Ω load. Ampeg’s knowledge base provides the same practical impedance guidance.
Free tools Windows power users keep installed
One-click scans. No signup required.
Do not generalize solid-state behavior to tube amplifiers. Tube output stages normally require the correct speaker load or transformer tap; operating one without its required load can cause damage. Some solid-state amplifiers may tolerate no load, but only if the manufacturer explicitly permits it.
Use a dedicated speaker cable of suitable gauge. Do not use a thin shielded instrument cable between the power amplifier and cabinet; Ampeg warns that it can cause power loss, oscillation, or damage.
Design the cabinet around the driver
A speaker cabinet is an acoustic system, not merely a wooden enclosure.
Rank #3
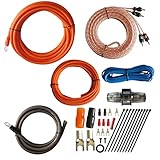
- 1.True Complete 4gauge CCA (Copper Clad Aluminum) 17ft Power Orange and 3ft Ground Wire Black with Soft Flexible Automotive Grade PVC Jacket;
- 2.17ft (5.18 meters) Tinned OFC Oxygen Free Copper 2-Channel Twisted Pair RCA Stereo Signal Cable interconnect cable.
- 3.Included Blue 18 Gauge 17ft remote turn on lead wire and 20ft 14GA Orange CCA Speaker Wire
- 4.Included One ROCKDIRECT 80AMP Mini ANL Fuse-holder and 80AMP fuse provides protection for high-powered system.
- 5.Included all the Installation accessories: One Black grommet. Two 4 Gauge Nickel Plated Spade terminals with orange/black boots. Three 18 Gauge Spade terminals with red boots and two Spade terminals with black boots. One Red 18 Gauge butt connector. Ten Black zip ties.
Sealed cabinet
A sealed box is comparatively simple, has no port to tune, and is forgiving of construction errors. Its usual trade-off is lower low-frequency efficiency, which may require more amplifier power or a larger driver.
Vented cabinet
A ported box can produce more output near its tuning frequency, but the internal volume and port dimensions must be correct. Below the tuning frequency, cone excursion can rise sharply. A high-pass filter and conservative low-frequency boost are important safeguards.
Cabinet workflow
- Select the driver and download its manufacturer data sheet.
- Choose sealed or vented alignment.
- Model the enclosure using the driver’s Thiele–Small parameters.
- Calculate the net internal volume after subtracting the driver, ports, bracing, and electronics compartment.
- Calculate port area and length if vented.
- Add bracing without obstructing airflow.
- Seal unwanted leaks and protect the driver mechanically.
- Confirm the panels and fasteners can withstand vibration and acoustic pressure.
Do not copy a generic 12-inch cabinet plan. The correct volume and port tuning vary by driver. Eminence’s KappaLITE cabinet guidance, for example, includes a specific bass-guitar vented design and recommends a 30 Hz high-pass filter for that design.
Build the preamp
Input stage
Use a high input impedance; around 1 MΩ is a common starting point for passive pickups, but the correct value depends on the pickup and circuit topology. Include an input pad or adequate headroom for active basses, which can produce a considerably hotter signal.
Gain and controls
Place input gain or pre-gain before the tone section and a master volume afterward. A clip indicator is useful. Tone options include a passive Fender-style stack, active three-band EQ, Baxandall bass/treble control, or a sweepable mid control. For bass, adjustable mids are often more useful than extreme bass and treble boosts because they help the instrument occupy space in a mix.
Do these 3 things before closing this tab:
1Repair Windows errors before they cause bigger problems2Fix the driver behind crashes, sound loss and screen glitches3Clear out junk files and repair common Windows errorsHigh-pass filter
A switchable high-pass filter can remove handling noise, reduce wasted amplifier power, and protect a ported cabinet below its tuning frequency. Avoid setting the cutoff so high that it removes the lowest fundamental: low E on a four-string bass is approximately 41 Hz, while low B on a five-string is approximately 31 Hz.
Useful additional outputs
Consider a balanced DI output with a pre/post-EQ switch, ground-lift option, headphone output, auxiliary input, effects loop, or tuner output. Clearly distinguish instrument-level, line-level, preamp, and speaker outputs; they are not interchangeable.
A practical 100–150 W build
For a first full-size project, build a head or compact combo around a documented Class-D module, an external certified DC supply, and one 8 Ω bass driver.
For 100 W into 8 Ω:
V RMS = √(100 × 8) ≈ 28.3 V
I RMS = √(100 / 8) ≈ 3.54 A
Select a module and supply with suitable current and voltage margin. Confirm the board’s minimum impedance, cooling requirements, output-filter requirements, protection features, and bridged-output wiring. Pair it with a cabinet specifically designed for the chosen driver, using a continuous speaker rating at least equal to the intended amplifier output.
Recommended Free Tools
Rank #4

- 【Complete 4 Gauge Amp 1200W Kit】All-in-one kit:17FT red 4-gauge power cable,1.6FT ground,17FT blue remote wire,17FT RCA signal cable,17FT speaker wire,RCA level controller and 60A gold-plated AGU fuse holder.
- 【CCA Construction】High-quality copper-clad aluminum cores meet 4-gauge diameter standards for stable high-current delivery.Stays cool,quiet and distortion-free even at a full 60A load.
- 【Gold-Plated AGU Fuse Holder】Prevents overload and short-circuit damage to your amp and head unit.Gold-plated contacts resist oxidation and outlast standard iron holders.Quick and easy fuse replacement.
- 【Fits Cars, SUVs & Trucks】A full 17 feet (5.2m) per cable — enough length to run from battery to trunk-mounted amp.Rubber-sheathed ends prevent friction damage.Neatly packaged,ready to install out of the box.
- 【Bass Control Knob】Plug and play,connects to any head unit or amplifier with RCA outputs.It can completely cut off the signal to mute the subwoofer.
Suggested parts categories
- Input jack, high-impedance input resistor, preamp PCB, and potentiometers
- Class-D amplifier module with complete documentation
- Certified external DC power supply
- Correctly rated DC connector, fuse, and reverse-polarity protection
- One 8 Ω bass driver and cabinet materials
- Speaker connector and dedicated speaker cable
- Heat sink or ventilation hardware as specified by the module
- Shielded input cable, mounting hardware, strain relief, feet, and service panels
- Multimeter and a properly rated dummy load for testing
Build and test in sections
1. Define requirements
Write down whether the amp is for practice, rehearsal, recording, or gigs; target power; minimum impedance; head or combo format; passive or active inputs; EQ; DI and headphone needs; maximum weight; and whether clean headroom or tube coloration matters.
2. Choose the driver and cabinet
Do this before finalizing amplifier power. A cabinet that cannot reproduce deep bass safely can be damaged by a correctly functioning amplifier.
3. Verify the power module
Check output power at the intended impedance, supply voltage, continuous current, cooling, output filtering, short-circuit and over-temperature protection, bridged or parallel operation, and whether operation without a speaker is permitted.
4. Prototype the preamp
Test the input, gain, EQ, filter, and master volume independently. Confirm clean operation at minimum and maximum gain, full control range, no oscillation, sufficient active-bass headroom, and correct grounding. Breadboards are unsuitable for some high-gain or high-frequency circuits; use a PCB or carefully laid-out perfboard when necessary.
Crashes, No Sound, or Screen Glitches?
Random freezes, missing sound and display glitches usually trace back to one bad driver. Find and replace yours safely.Free scan · under a minuteWindows Errors? Fix Them Before They Spread
Repair common Windows errors and clear accumulated junk for a smoother, more stable PC - no reinstall needed.Free scan · no reinstall5. Test the power stage separately
- Inspect for solder bridges, reversed capacitors, loose connectors, and incorrect wiring.
- Use a current-limited supply where practical.
- Verify the supply voltage before applying signal.
- Use a suitable, cooled dummy load if the module documentation permits or requires it.
- Apply a low-level sine wave.
- Check for DC offset, abnormal noise, and rising temperature.
- Increase the level gradually and monitor the supply and heat sink.
- Connect the actual cabinet only after the results are normal.
Do not use an ordinary small resistor as a high-power dummy load. The load must be rated for the expected power and adequately cooled.
6. Install the electronics
Keep high-impedance input wiring away from switching supplies and high-current speaker wiring. Separate the preamp, power module, and power components physically. Use shielding only when you understand its bonding and grounding. A bridged Class-D module may have both speaker terminals electrically active; never connect either terminal to chassis ground unless the module documentation explicitly allows it.
Provide ventilation, strain relief, secure mounting, accessible fuses, labeled connectors, test points where useful, and a removable panel for service. Do not leave a mains adapter or power brick loose inside a vibrating combo cabinet.
7. Perform a full functional test
- Power-on and power-off behavior
- Hum and buzz with and without an instrument connected
- Full EQ range and input overload behavior
- Heat-sink, supply, and speaker temperature
- Protection shutdown and recovery
- Speaker connector security and cabinet vibration
- DI output and headphone mute behavior
Electrical safety
Low-voltage solid-state builds
Low voltage can still deliver enough current to cause burns, fire, damaged components, or dangerous arcs. Fuse the incoming supply, use a correctly rated DC connector, prevent reverse polarity, insulate exposed terminals, secure heavy components, use suitable wire gauges, provide ventilation, and keep conductive debris out.
What’s actually slowing this PC down?
Pick the symptom - the matching free tool is one click away.
An external certified supply reduces the amount of exposed mains wiring inside the amplifier, but it does not eliminate the need for DC fusing, strain relief, safe connectors, grounding, and enclosure design.
Best Value
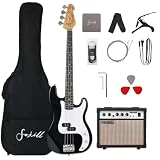
- Full Size Electric Bass Guitar,Maple Neck,Paulownia Body,Rosewood Fretboard,All That Wood Are Very Stable,they Can Offer Good playability.
- The 20W Amplifier Have Distortion/Bass/Treble Tone,It Have Removeable Power Cord,It Have 3.5 Headphone Plug,It also have Aux Plug.
- The Body is Phoenix Wood,Phoenix is Ligher Than Most of Other Wood species,So Better For Beginner,And The Phoenix Also Have Beautiful Wood Grain And Bright Sound.
- Noiseless Cable,Reducing Noise Risk From Guitar To Amplifier,600D Thicker Padded Gig Bag,More Thicker And Safe,Stronger Strap,More Thciker And Wider.
- All Accessory Included,Bag,Strap,Amplifier,Noiseless Cable,Picks,Extra String,Guitar Cloth,Allen Key.
Mains-powered construction
If mains voltage enters the enclosure, it requires an enclosed inlet, correctly rated fuse and holder, strain relief, insulated terminals, separation from signal wiring, and protective-earth bonding for a Class I metal enclosure. Wiring colors and practices must follow the requirements of your jurisdiction. Stored energy must be measured and made safe before internal work.
Inexperienced builders should use an external certified supply or have mains wiring inspected by a qualified technician.
Tube amplifiers
Do not copy a tube schematic and experiment casually. Tube amplifiers can retain lethal voltage after being unplugged. An Ampeg technical schematic explicitly warns about shock hazards and requires the supply to be discharged before service.
Quick wins for a faster PC:
Clear out junk files and repair common Windows errorsFree Scan →Fix the driver behind crashes, sound loss and screen glitchesFind Drivers →Discharge procedures do not replace measurement. Capacitors can recharge, a single meter reading does not prove the whole circuit is safe, and the output transformer must be matched to the correct speaker load or tap. Treat an all-tube build as an advanced project completed with qualified supervision.
Troubleshooting
No sound
- Check the bass, cable, and instrument output.
- Inspect input-jack switching contacts.
- Measure preamp supply rails.
- Check mute, standby, master-volume, and power-module enable wiring.
- Inspect the speaker connector and speaker continuity.
- Look for protection or fault indicators and DC-protection shutdown.
Loud hum
Test with the instrument unplugged. Persistent hum points to the amplifier. Inspect ground loops, unshielded input wiring, switching-supply noise, star-ground connections, input-jack grounding, and the distance between the power supply and preamp.
Buzz changes when touching controls
Look for a floating input ground, missing shield, incorrect chassis reference, excessive high-impedance wiring, or ungrounded potentiometer cases.
Protection shutdown
Check for a speaker impedance below the module’s rating, a shorted cable, incorrect bridged-output wiring, inadequate supply current, overheating, DC offset, oscillation, or a defective module.
Weak or distorted speaker output
Possible causes include a supply that is too low or current-limited, clipped preamp stages, excessive driver excursion, a cabinet that is too small or incorrectly tuned, incorrect filter settings, or a speaker wired out of phase with another driver.
Loud but little bass
Inspect the driver type, cabinet leaks, port tuning, high-pass cutoff, phase, input coupling capacitors, and EQ circuit values. A guitar speaker or incorrectly designed cabinet can make a powerful amplifier sound thin.
Build versus buy
DIY is not automatically cheaper. Materials, tools, shipping, failed parts, test equipment, and labor can exceed the cost of a used commercial amplifier. Building makes the most sense when you value learning, customization, repairability, a specific cabinet size, or a modular system you can upgrade. For a tube build, mains work, or an uncertain fault, paying a qualified amplifier technician is usually the safer commercial choice; Ampeg provides a service-support route.
Quick Recap
Final checklist
- The amplifier supports the cabinet’s minimum impedance.
- Output power is stated at a specified impedance, supply voltage, and distortion condition.
- The speaker’s continuous rating, sensitivity, excursion, and cabinet alignment are appropriate.
- A dedicated speaker cable is used.
- The supply is fused and correctly rated.
- No mains wiring is exposed.
- Bridged Class-D outputs are not connected to chassis ground.
- Heat sinking and ventilation are adequate.
- The cabinet is braced, sealed where required, and serviceable.
- A suitable dummy load and current-limited test procedure were used.
- A high-pass filter is available when the cabinet requires low-frequency protection.
- Tube and mains sections have been handled or inspected by someone qualified.
Product prices and availability are accurate as of the date/time indicated and are subject to change. Any price and availability information displayed on Amazon at the time of purchase will apply.
Do these 3 things before closing this tab:
1Fix the driver behind crashes, sound loss and screen glitches2Clear out junk files and repair common Windows errors3Scan for outdated or missing drivers - takes under a minute



