A thriving permaculture garden is not just a collection of fruit trees, herbs, and flowers. It is a small site-planning project. The best results come when you study the property first, build the soil and water systems next, and plant in phases instead of buying every interesting plant on the first weekend.
For a typical U.S. homeowner in 2026, a small DIY permaculture bed or tree guild can start around $150 to $800. A professionally installed edible landscape zone often lands between $1,500 and $6,000. A whole-yard conversion with grading, drainage corrections, paths, fencing, irrigation, trees, and design help can reach $5,000 to $20,000 or more.


That range is wide because the plants are rarely the expensive part. The cost drivers are site preparation, soil hauling, access, water management, edging, utilities, hardscape, drainage, and labor. On our job sites, we treat a permaculture garden the same way we treat any exterior improvement: water has to move safely, grades have to protect the structure, materials have to last, and maintenance has to make sense for the people who live there.
Use these 12 tips as a practical build sequence.
1. Observe the Site Before You Install Anything
The first job is to slow down. Before you order trees, rent equipment, or strip turf, spend several weeks watching the site. A full year of observation is ideal, but even 30 to 60 days will reveal useful patterns.
#1 Best Overall
Map the basics on paper or a simple digital drawing:
- Sun and shade at morning, midday, and late afternoon
- Low spots where water stands after a storm
- Roof downspouts and driveway runoff
- Slope direction and erosion channels
- Existing trees, roots, fences, sheds, patios, and utilities
- Wind exposure, especially on open lots
- Wildlife pressure from deer, rabbits, squirrels, and birds
- Daily access routes from the kitchen, garage, hose bibs, and compost area
Permaculture design often uses zones. The daily-use zone belongs closest to the house: herbs, salad greens, compost access, a hose bib, and a small harvest basket station. Lower-maintenance items such as fruit trees, berry shrubs, pollinator borders, wood-chip paths, and habitat areas can sit farther out.
This saves real labor. If the basil, lettuce, snips, and compost are 20 feet from the kitchen door, you will use them. If they are 120 feet away behind a wet lawn, they become another chore.
2. Test Soil Before You Spend Money on Amendments
Healthy soil is the engine of a permaculture garden. But guessing at amendments is a good way to waste money or create new problems. Start with a lab soil test before adding lime, sulfur, phosphorus, or large volumes of imported soil.
Free tools Windows power users keep installed
One-click scans. No signup required.
Testing is especially important on urban lots, older homes, former industrial properties, sites near old painted structures, and areas next to busy roads. Lead and other contaminants can be a concern in edible landscapes. If contamination is suspected, use raised beds with clean imported soil, keep edible roots out of questionable native soil, and maintain mulch cover to reduce dust exposure.
For most residential projects, we look at:
- Soil texture: sand, silt, clay, or loam
- Compaction: whether water and roots can move through it
- Organic matter level
- pH
- Drainage rate
- Contamination risk
Bulk soil costs vary by region and quality. In 2026, basic topsoil commonly runs about $10 to $55 per cubic yard before delivery. Screened loam or upgraded planting mixes often run $17 to $50 per cubic yard. Compost commonly falls around $20 to $80 or more per cubic yard. Delivery can add $50 to $150 or push delivered topsoil into the $20 to $120 per cubic yard range depending on distance, access, and material quality.
Do not bury poor drainage under expensive soil without fixing the cause. If the subgrade is compacted clay and the bed sits in a low spot, imported soil may become a bathtub.
3. Start With One Manageable Area
A common mistake is converting the entire yard at once. A better first phase is 100 to 300 square feet, one tree guild, or one side-yard production bed. That is large enough to learn from but small enough to maintain.
Do these 3 things before closing this tab:
1Scan for outdated or missing drivers - takes under a minute2Repair Windows errors before they cause bigger problems3Fix the driver behind crashes, sound loss and screen glitchesA phased plan usually works like this:
- Year 1: Observe, test soil, correct drainage, sheet mulch, install water access, and plant a small pilot area.
- Year 2: Add perennials, berry shrubs, dwarf fruit trees, pollinator plants, and better paths.
- Year 3: Expand based on what survived, what you used, and where water actually moved.
That first year is not passive. It is when most of the heavy lifting happens: weed suppression, irrigation tuning, mulch installation, soil building, and plant establishment. Permaculture does not mean no maintenance. It means designing so the maintenance curve drops over time.
4. Keep Water Onsite, But Do It Safely
Outdoor residential water use in the United States is roughly 8 billion gallons per day, much of it used for landscape irrigation. A good permaculture garden reduces irrigation demand with mulch, perennial roots, native and adapted plants, rainwater harvesting, drip irrigation, and better soil structure.
But water harvesting has to respect the house. Never direct roof runoff toward a slab, basement, crawlspace, or neighbor’s property without a clear drainage plan. Keep grade sloping away from foundations. As a general construction habit, we want water moving away from the building envelope first, then into safe landscape infiltration areas.
Options include:
- Rain barrels for small roof areas and hand watering
- Cisterns for larger storage systems
- Mulch basins around trees
- Swales and berms on suitable slopes
- Rain gardens in low areas with tested infiltration
- Drip irrigation tied to a timer
Rain gardens deserve extra care. They should be located where water can enter, infiltrate, and overflow safely during large storms. Many local guides expect a healthy rain garden to drain within roughly 24 to 48 hours, depending on soil and climate. If water stands too long, you can create mosquito habitat, soggy roots, erosion, or a neighbor drainage complaint.
Quick wins for a faster PC:
Fix the driver behind crashes, sound loss and screen glitchesFind Drivers →Clear out junk files and repair common Windows errorsFree Scan →Scan for outdated or missing drivers - takes under a minuteDriver Scan →Rainwater collection rules also vary by state and municipality. Some areas encourage it, some regulate storage size or use, and some require backflow protection when systems connect near potable water. Check local code before installing barrels, cisterns, pumps, or tied-in irrigation.
5. Use Sheet Mulch to Convert Lawn Without Stripping the Yard
Sheet mulching is one of the most practical ways to turn lawn into planting area. It suppresses turf, protects soil, and adds organic matter with less disturbance than full excavation.
A typical sheet mulch build looks like this:
- Mow the grass short.
- Water the area if the soil is dry.
- Add overlapping plain cardboard, usually 6 inches of overlap at seams.
- Keep cardboard away from tree trunks, siding, and wood fence posts.
- Add 2 to 4 inches of compost or planting mix where you will plant soon.
- Top with 3 to 6 inches of arborist wood chips, leaves, or natural mulch.
For planting right away, cut openings only where plants go. For a lower-effort conversion, sheet mulch in fall and plant in spring. Avoid glossy cardboard, plastic weed fabric under edible beds, and dyed mulches of unknown origin. Around buildings, do not pile mulch against siding, brick weep holes, door thresholds, or deck framing.
6. Install Drip Irrigation Instead of Relying on Overhead Sprinklers
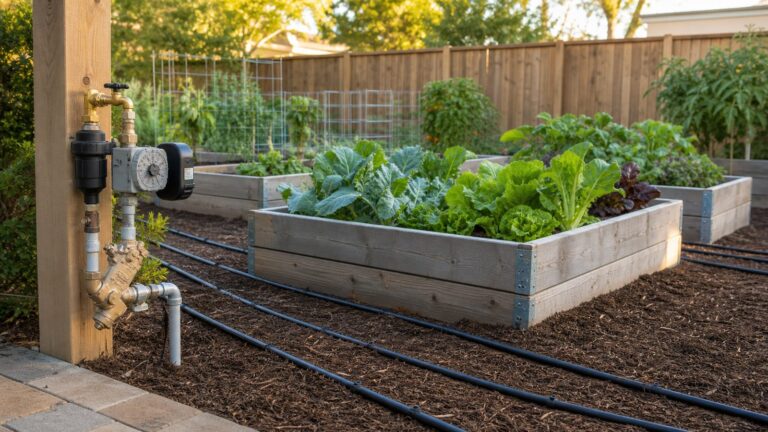
Mulch and drip irrigation are a strong pair. Drip puts water near the root zone, reduces evaporation, limits wet leaves, and usually uses less water than overhead sprinklers. It also fits permaculture better because different plant zones can receive different water volumes.
In 2026, garden drip installation is commonly estimated around $1.70 to $4.80 per square foot. Above-ground drip may run about $0.85 to $2.85 per square foot, while subsurface drip often lands around $2 to $5 per square foot. A simple DIY hose-bib drip kit for a small bed costs far less than a professionally zoned system, but it still needs a pressure regulator, filter, timer, and backflow prevention where required.
For edible landscapes, we prefer simple, serviceable layouts. Keep valves accessible. Label zones. Use 1/2-inch mainline for small garden runs and 1/4-inch distribution tubing only for short branches to individual plants. Flush the system at the start of the season and inspect emitters during dry weather.
7. Plant Perennials First, Then Fill With Annuals
Perennials are the backbone of a permaculture garden because they build root systems, stabilize soil, provide habitat, and reduce annual replanting. Start with native pollinator plants and adapted edible perennials, then fill gaps with annual vegetables while the system matures.
Depending on your region, the perennial framework might include:
Recommended Free Tools
- Dwarf or semi-dwarf fruit trees
- Berry shrubs
- Asparagus, rhubarb, artichoke, or perennial herbs where climate allows
- Native flowering perennials for pollinators
- Groundcovers that protect soil without becoming invasive
- Nitrogen-fixing shrubs or herbaceous plants suited to your area
Local beats national. A plant list written for the whole country will always be too broad. Use your county extension office, local native plant society, and master gardener program to choose species that match your rainfall, winter lows, summer heat, soil pH, and pest pressure.
8. Build Guilds and Layers Instead of Isolated Beds
A permaculture guild is a group of plants arranged to support one another. Around a dwarf fruit tree, for example, you might include a berry shrub, flowering herbs for beneficial insects, a groundcover to shade soil, a nitrogen fixer where appropriate, and bulbs or roots that occupy a different soil layer.
Think in layers:
- Canopy or small tree layer
- Shrub layer
- Herbaceous perennial layer
- Groundcover layer
- Vine layer where support exists
- Root layer
- Pollinator and habitat layer
Spacing still matters. Do not plant a young fruit tree as if it will always be 4 feet wide. Read mature size, then plan access for pruning, harvest, pest monitoring, and airflow. For many residential yards, dwarf trees are more practical than standard fruit trees because they are easier to prune, net, harvest, and keep clear of roofs and utility lines.
9. Keep Soil Covered All Year
Bare soil loses moisture, grows weeds, crusts over, and erodes. Soil health improves when the ground stays covered with mulch, living plants, leaves, cover crops, or crop residue. Reduced tillage also helps preserve soil structure and biological activity.
Crashes, No Sound, or Screen Glitches?
Random freezes, missing sound and display glitches usually trace back to one bad driver. Find and replace yours safely.Free scan · under a minutePC Slower Than It Used to Be?
A free scan shows the junk files, broken settings and background clutter dragging Windows down - then fixes them in one click.Free scan · Windows 10 & 11For home gardens, cover can come from:
- 3 to 4 inches of wood chips on paths and around perennials
- Leaves shredded and used as winter mulch
- Compost under mulch in active planting areas
- Low-growing groundcovers where they will not compete aggressively
- Cool-season cover crops in annual beds
Cover crops can suppress weeds, reduce erosion, add organic matter, and keep living roots in the soil. Choose species based on your region and planting window. Some winter-kill naturally; others need mowing, cutting, or termination before they set seed. If you are new to cover crops, start with one bed and one season instead of seeding the whole yard.
10. Make Paths Permanent and Wide Enough to Work
Paths are infrastructure. If you skip them, you will compact planting beds, drag hoses through young plants, and make harvest harder than it needs to be.
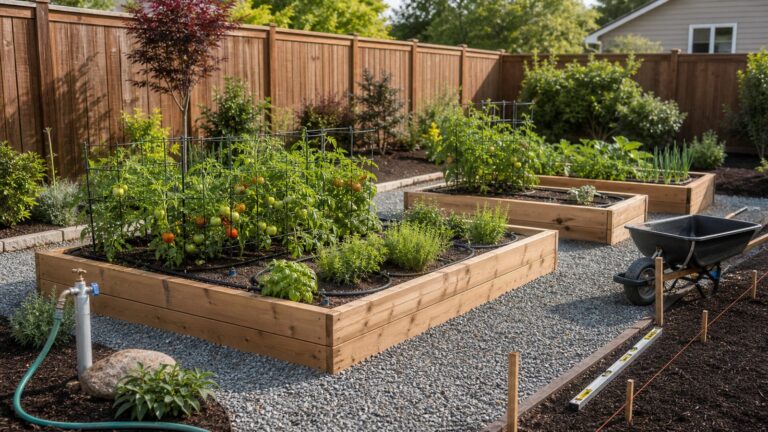
For small beds, 18 to 24 inches is a workable minimum footpath. For wheelbarrows, carts, aging-in-place access, and routine maintenance, 30 to 36 inches is more practical. Main routes from the gate, driveway, compost area, and water source should be the widest and most durable.
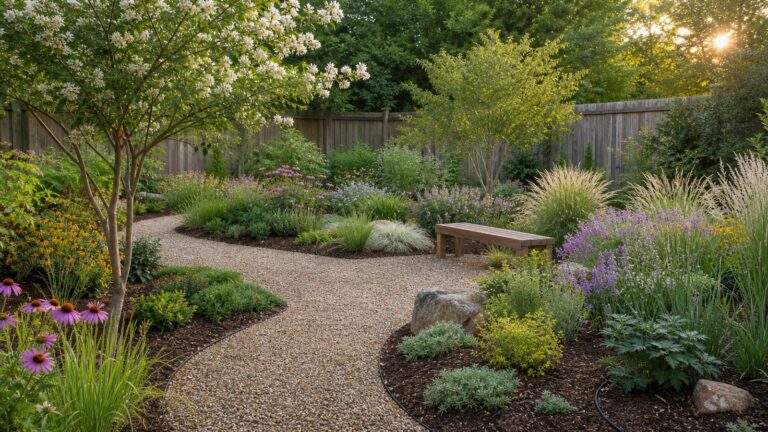
Good path materials include compacted gravel, wood chips over cardboard, stepping stones, pavers, or stabilized decomposed granite depending on budget and slope. On sloped sites, pay attention to erosion. A beautiful wood-chip path that channels stormwater toward the patio is not a success.
What’s actually slowing this PC down?
Pick the symptom - the matching free tool is one click away.
Edges also matter. Steel edging, stone, rot-resistant lumber, concrete curbing, and properly installed pavers keep mulch and soil from migrating into lawn, drains, and walkways. In edible areas, choose materials that are appropriate for food gardens and avoid questionable salvaged lumber, old railroad ties, and treated materials not rated for the intended use.
11. Plan for Wildlife, Pests, and Daily Maintenance
A thriving garden attracts life. Some of it is welcome. Some of it will eat your seedlings, fruit, and greens. Plan for wildlife before the first harvest.
Common protection measures include:
- Deer fencing where pressure is high, often 7 to 8 feet tall for serious exclusion
- Rabbit fencing with small mesh and a buried or bent-out bottom edge
- Bird netting on berries when fruit begins to color
- Hardware cloth under raised beds where burrowing pests are a problem
- Pollinator plantings away from high-traffic doorways and play areas
Also plan the unglamorous work. Keep compost, tool storage, a wash station, and water close to the most-used garden zone. A simple outdoor work surface near the hose can save dozens of trips into the house. If you have kids, pets, or frequent guests, use clear path edges and avoid thorny plants near narrow routes.
12. Check Local Rules Before You Build in the Front Yard
Food gardens, rain barrels, fencing, compost bins, front-yard plantings, chickens, setbacks, drainage changes, and retaining walls may be regulated by city code, HOA rules, or neighborhood covenants. Some communities actively support edible landscaping. Others restrict plant height, front-yard vegetable beds, accessory structures, or visible water tanks.
Before you install, check:
- HOA landscape restrictions
- Front-yard gardening rules
- Fence height limits and permits
- Rain barrel or cistern rules
- Stormwater discharge requirements
- Utility locating requirements before digging
- Retaining wall permit thresholds
- Setbacks from property lines, sidewalks, easements, and foundations
Call 811 before digging for posts, trees, swales, irrigation, drains, or electrical conduit. Even shallow garden work can conflict with utilities, low-voltage lighting, irrigation mains, or old private lines.
Permaculture Garden Cost Guide for 2026
Budgets depend on site size, access, soil quality, plant maturity, and how much infrastructure is needed. The table below gives realistic planning ranges for U.S. homeowners.
| Project Scope | Typical 2026 Cost | What Is Usually Included |
|---|---|---|
| DIY starter bed or tree guild | $150-$800 | Cardboard, compost, wood chips, seeds, a few perennials, hand tools, and a basic hose or drip kit |
| Small installed edible landscape zone | $1,500-$6,000 | Design help, bed prep, bulk compost and mulch, 1-3 fruit trees, shrubs, perennials, edging, and basic irrigation |
| Whole-yard conversion | $5,000-$20,000+ | Grading, drainage, tree work, fencing, walkways, irrigation zones, retaining edges, plantings, and professional labor |
| Design consultation or plan | A few hundred dollars to $8,000 | Site visit, concept plan, water strategy, plant schedule, phased installation plan, and construction details |
| Raised beds | DIY wood: about $25-$50 per sq. ft.; professional wood: $100+ per sq. ft. | Bed frame, clean soil, compost, hardware cloth if needed, and access paths |
| Bulk soil, loam, or compost | Topsoil: $10-$55 per cu. yd.; compost: $20-$80+ per cu. yd. | Material only in many cases; delivery may add $50-$150+ depending on distance and load size |
| Drip irrigation | About $1.70-$4.80 per sq. ft. | Tubing, emitters, filter, pressure regulator, timer, valves, and installation labor depending on system complexity |
Bagged soil is convenient for a few containers, but it gets expensive fast. For larger beds, bulk compost, screened loam, and arborist wood chips usually provide better value. The tradeoff is logistics: delivery access, driveway protection, wheelbarrow labor, and cleanup.
Independent reader supportYour contribution helps us test, update, and keep practical guides available for everyone.When to DIY and When to Hire a Pro
Good DIY Projects
DIY is a good fit when the work is small, shallow, and reversible. A homeowner can usually handle a 100 to 300 square foot sheet-mulched bed, a simple herb zone, a small berry patch, container gardens, basic above-ground drip kits, compost setup, and annual cover crops.
The Tool Desk
Outbyte Driver Updater FREEScan for outdated or missing drivers - takes under a minuteDriver Scan →Outbyte PC Repair FREERepair Windows errors before they cause bigger problemsFix Now →DIY also makes sense for phased planting. You can install one guild, observe it for a season, then repeat what worked. That learning is valuable.
When a Professional Is Worth It
Bring in a contractor, landscape professional, irrigation specialist, or drainage expert when the project affects water movement, structures, utilities, or significant grade changes.
Hire help for:
- Drainage problems near a basement, crawlspace, slab, driveway, or neighboring property
- Swales, berms, dry creek beds, or rain gardens that receive roof or driveway runoff
- Retaining walls, terraces, steps, and major slope work
- Irrigation tied into existing systems or requiring backflow protection
- Large tree planting near structures, septic fields, overhead lines, or underground utilities
- Front-yard conversions in strict HOA or municipal areas
- Large soil deliveries where access and staging are difficult
On our projects, we would rather solve grade, access, and water once than have a homeowner pay twice to move beds that were built in the wrong place. Plants are flexible. drainage mistakes are expensive.
What to Ask a Contractor Before You Start
If you hire help, ask practical questions. A good contractor should be able to explain how the garden will function, not just how it will look.
- How will water move during a 1-inch storm?
- Where is the overflow route if a rain garden or swale fills?
- How will grades protect the foundation, patio, driveway, and neighboring properties?
- Do we need utility locating before excavation or post holes?
- What materials are being used near edible plants?
- How wide will the main paths be, and can a wheelbarrow move through them?
- Where will soil, mulch, and stone be staged during construction?
- Does the irrigation system include a filter, pressure regulator, timer, and backflow protection where required?
- What is the phased plan if the full yard is too expensive to build at once?
The answer should include dimensions, materials, drainage direction, and maintenance access. If the plan is only a plant list, it is not complete.
A Practical Build Sequence
For most homeowners, the best order is simple:
- Observe the property for sun, water, access, slope, and existing constraints.
- Test the soil and identify contamination or compaction issues.
- Decide on one small first phase.
- Confirm local rules, HOA limits, and utility locations.
- Correct drainage and protect structures.
- Build permanent paths and edges.
- Install water access and drip irrigation.
- Sheet mulch and add compost where needed.
- Plant perennials, native pollinators, and adapted edible plants.
- Fill open areas with annuals, cover crops, or mulch.
- Observe for one season before expanding.
- Adjust plant choices, irrigation timing, and maintenance routes.
That sequence keeps the work grounded. A permaculture garden should become more resilient each year, but it starts with practical construction decisions: drainage, soil, paths, water, access, and durable materials. Build those correctly, then the plants have a real chance to thrive.
Frequently Asked Questions
How much does it cost to start a permaculture garden?
A small DIY starter bed or tree guild usually costs about $150 to $800 in 2026. A professionally installed edible landscape zone often runs $1,500 to $6,000, while a whole-yard conversion can reach $5,000 to $20,000 or more.
How big should my first permaculture garden be?
Start with 100 to 300 square feet or one tree guild. That is large enough to learn from but small enough to weed, water, mulch, and adjust during the first season.
Do I need drip irrigation for a permaculture garden?
Not always, but drip irrigation is usually worth it for establishment. Paired with mulch and a timer, it reduces evaporation, keeps foliage drier, and helps young perennials survive their first one to two growing seasons.
Can I put a permaculture garden in my front yard?
Often yes, but check municipal rules, HOA restrictions, fence limits, plant height rules, and stormwater requirements first. Front-yard edible gardens are allowed in many places but restricted in others.
What should I plant first in a permaculture garden?
Plant the long-term structure first: native pollinator plants, adapted edible perennials, berry shrubs, and dwarf fruit trees. Use annual vegetables to fill gaps while perennials mature.
When should I hire a professional?
Hire a pro when the project involves drainage near the house, slope changes, retaining walls, irrigation tie-ins, utility conflicts, large soil deliveries, rain gardens, or front-yard work with code or HOA concerns.
Quick Recap
Product prices and availability are accurate as of the date/time indicated and are subject to change. Any price and availability information displayed on Amazon at the time of purchase will apply.