Quick wins for a faster PC:
Repair Windows errors before they cause bigger problemsFix Now →Fix the driver behind crashes, sound loss and screen glitchesFind Drivers →To build a backyard playhouse safely, start with a suitable site and a complete plan—not a lumber order. Confirm the footprint, intended use, local requirements and whether the structure is ground-level or elevated. Then use the plan’s drawings to prepare a material takeoff and cut list, build the floor and walls to its specifications, frame and weatherproof the roof, and finish by checking connections and child-safety hazards. The dimensions and quantities in example plans are specific to those plans, not universal construction guidance.
How do I plan a backyard playhouse?
Choose the location, playhouse type and plan before buying materials. A design that suits the available space and your construction skills is easier to build and inspect than one whose dimensions or features are improvised after work begins. A porch, deck, slide or swing can change structural loads, connections, fall height and the space children need around the equipment; do not assume an existing plan still works after those changes.
As an Amazon Associate I earn from qualifying purchases.
Choose a visible, clear site
The U.S. Consumer Product Safety Commission’s Outdoor Home Playground Safety Handbook (Publication 324) recommends locating home playground equipment away from roads and driveways and where it can be seen from the home or patio. Before settling on a location, look for low branches, obstacles and other hazards, and allow space for the structure, access to it and the way children will use it. Think about how a child will approach the entrance and whether adults can see the play area from commonly used parts of the home.
Crashes, No Sound, or Screen Glitches?
Random freezes, missing sound and display glitches usually trace back to one bad driver. Find and replace yours safely.Free scan · under a minutePC Slower Than It Used to Be?
A free scan shows the junk files, broken settings and background clutter dragging Windows down - then fixes them in one click.Free scan · Windows 10 & 11Also consider the ground and drainage at the proposed location. The cited guidance does not establish a foundation design, soil suitability, frost depth, setback or permit rule for a particular property. Those depend on the site, design and local requirements. Ask the local building department what applies before construction; consult a qualified professional when the site or design raises structural questions. For a freestanding or elevated structure, follow the plan’s anchoring and installation details rather than assuming its weight alone will keep it in place.
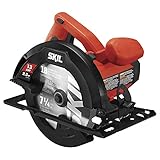
#1 Best Overall

- Powerful 15-amp motor delivers 5 300-RPM for greater speed and faster cuts
- 7-1 4-inch carbide-tipped blade included. Spindle lock for easy blade changes.
- 51° bevel capacity with a positive stop at 45° for a wide variety of cuts
- Dust blower keeps line-of-cut free of sawdust for improved visibility
- Safety lock/guarded trigger and power-on indicator minimize accidental starts
Decide whether the playhouse is ground-level or elevated
A ground-level playhouse with no elevated play surface presents a different fall-surfacing question from a structure with a raised deck or platform. CPSC’s handbook says a playhouse or other equipment with no elevated play surface does not need protective surfacing under its guidance. If the design adds an elevated play area, plan for appropriate shock-absorbing surfacing based on fall height and equipment, and account for the use zone around it. That guidance concerns the play area; it is not an engineered design for the raised building itself.
Height can also affect access, fall exposure, anchoring and the need for guardrails or other protective details. A plan drawn for a small ground-level cabin is not automatically suitable for a raised structure. Choose a plan that specifically addresses the intended configuration, and do not guess at structural changes or protective details.
Check local rules before committing to a plan
Whether a playhouse needs a permit, and what setbacks or construction requirements apply, depends on local rules and the final design. Do not infer an exemption from a plan found online or from the structure’s intended use. Ask the building department which requirements apply to your property and proposed dimensions, including whether the design’s height, location or anchoring changes the answer. Resolve those questions before ordering materials or cutting lumber.
Rank #2
- 13 Amp motor for more power and performance than the SKIL 5380
- 15% weight reduction vs. SKIL 5380, reduces user fatigue
- 51-Degree bevel with positive stops for great cut capacity
- Spindle lock for easy blade changes
- Improved dust blower keeps line of cut free of sawdust
What materials do I need to build a playhouse?
The chosen plan is the authority for lumber sizes, quantities, connectors and assembly details. The examples below show the kinds of materials that may appear on a playhouse list; they are not interchangeable specifications or a universal shopping list. NCCER’s carpentry training project, “Project 9 Storage Shed/Playhouse,” and Construct101’s “Playhouse Plans – Step-By-Step Plans” provide separate examples with different details. Both sources were accessed October 10, 2026.
| Material or component | Examples in the cited plans | What to verify for your design |
|---|---|---|
| Framing lumber | NCCER lists 2×4 framing lumber and pressure-treated 4×4, 4×6 and 2×6 members. Construct101’s example uses 2×4 members for walls and roof framing and pressure-treated lumber for its floor frame and skids. | Use the plan’s species or treatment, member sizes, lengths and quantities. Do not transfer a size or framing layout from a different plan. |
| Floor and roof panels | Construct101 lists tongue-and-groove plywood flooring and roof sheathing. NCCER lists plywood. | Check the plan for the specified panel material, thickness, orientation and location. The Construct101 example calls for a ¾-inch tongue-and-groove plywood deck; that is a detail of that example, not a general sizing recommendation. |
| Wall cladding | Both lists include T1-11 siding. | Confirm the siding type and installation details in the chosen plan, along with any trim and opening details. |
| Roof covering and edges | The examples include roof felt and shingles; Construct101 also lists drip edge and trim. | Match the roofing layers and edge details to the plan and the local climate. The cited examples do not establish that one roof system is best for every location. |
| Connectors and fasteners | NCCER lists joist hangers, framing and roofing nails, and hurricane clips or tiedowns. | Use the connector and fastener types specified by the plan, and verify that they are compatible with any treated lumber used. |
| Openings and accessories | NCCER’s project list includes windows and a door. | Check the plan’s opening dimensions and the intended door and window details before cutting framing members. |
Select outdoor-suitable wood and compatible hardware
CPSC advises choosing naturally rot- and insect-resistant outdoor wood, such as cedar or redwood, or wood treated to resist deterioration. It advises against creosote-treated wood and coatings that contain pesticides. This is material-selection guidance, not a substitution schedule: if a plan specifies a particular material, confirm that any proposed change is appropriate for the design before using it.
When lumber is pressure-treated, treatment chemicals can accelerate corrosion in some metals. Choose corrosion-resistant nails, screws, bolts and hangers that are compatible with the treatment used. Follow the plan for connections and finish them so bolt ends and hooks do not create snagging or entanglement hazards. A connector that fits physically is not necessarily suitable for the lumber or the load it must support.
Rank #3

- GRIPZONE OVERMOLD: The handles of this power tool are lined with a rubber mold. This increases friction between your hands and the tool, improving handling in most conditions
- TRANSPARENT LOWER GUARD: The polyurethane blade guard is clear, so you can get maximum visibility on your work while you make your cuts
- ADJUSTABLE BEVEL: You can adjust the foot of this cordless circular saw up to 50 degrees to cut at a variety of angles for different applications
- EXTRA SIDE HANDLE gives you improved control. Its location on the left side of the tool gives you greater visibility over your cuts while you work
- ONE+ COMPATIBLE: The circular saw works with Ryobi’s 18 Volt batteries. These battery models include the P100, P102, P103, P104, P105, P107, and P108 (Batteries not included)
Gather tools and protective equipment
NCCER’s training project lists a circular saw, table saw, measuring tape, hammer, pneumatic nailer and screwdrivers. Tool needs depend on the chosen plan and the equipment you already have. A saw need not be a purchase if you can borrow one or use a different construction approach that still follows the plan. Do not substitute a tool or assembly method in a way that compromises accurate cuts or specified connections.
Recommended Free Tools
Wear eye protection when using power tools and the required personal protective equipment when cutting or handling pressure-treated lumber. Follow the tool manufacturer’s safety instructions, keep the work area clear, and use the selected plan’s diagrams to check cuts before making them. NCCER and Construct101 list example materials and construction details; neither example should be treated as an engineering approval for a modified design.
How do you build a simple playhouse step by step?
The sequence below describes a common small timber-frame workflow. It is an overview, not a replacement for the drawings, cut list, bracing instructions and connector schedule in a complete plan. Build to one plan throughout; mixing details from unrelated examples can leave openings, connections or framing members incompatible.
Rank #4
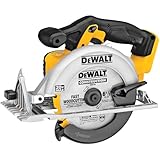
- 5150 RPM motor delivers power and speed to make the most demanding cuts with ease
- High strength and lightweight magnesium shoe provides jobsite durability for long-term cut accuracy
- Optimized rubber over molded comfort grip delivers optimal balance and control
- 0-50° bevel capacity allows for aggressive bevel cuts for a multitude of applications
- Confirm the site and design. Mark the intended footprint and check access, visibility, hazards and drainage. Confirm the design’s ground-level or elevated configuration, planned use zone and anchoring approach. Ask the local building department about permits and other applicable requirements before buying materials.
- Prepare the takeoff and cut list. Use the selected plan’s drawings to list lumber, sheet goods, siding, roofing, connectors, fasteners, openings and trim. Record the required lengths and quantities, and check that the list covers each assembly. NCCER’s project teaches preparing a material takeoff and cut list from drawings. Do not estimate quantities from a different plan’s list.
- Check materials before cutting. Match delivered or borrowed materials to the plan and keep treated lumber and connector compatibility in mind. Lay out cuts against the drawings, including window and door openings, before cutting. This is the point to resolve a missing component or discrepancy rather than compensate by changing the framing.
- Build the floor base and deck. Assemble the base and floor framing as shown, using the specified support and connector details. Construct101’s example uses a floor frame made from pressure-treated 2×4 members on 4×4 skids and a ¾-inch tongue-and-groove plywood deck. Those are that plan’s details, not general advice about sizing or supporting every playhouse. Check the assembly against its drawings before proceeding.
- Frame the walls and openings. Lay out each wall according to the plan, then assemble the framing and form the door and window openings shown. Check openings for plumb and square before fastening the assembly permanently; NCCER notes that out-of-square openings can make doors and windows difficult to fit. Do not enlarge or relocate an opening without confirming that the change is appropriate for the plan.
- Raise, square and connect the walls. Raise the wall assemblies in the order specified, keep them aligned and square, and install the plan’s bracing and connections. Use specified connectors and fasteners. Do not improvise a structural connection or omit bracing because a wall appears to stand securely before the roof is installed.
- Frame and install the roof. Build the specified rafters or trusses, use the required connectors, and attach the roof framing as shown. Construct101’s example calls for roof trusses at 24 inches on center; that spacing belongs to its particular plan and should not be generalized. If your plan calls for different framing, follow its drawings rather than this example.
- Install sheathing and weather protection. Add roof decking, siding, trim, drip edge, underlayment and roofing in the order and manner specified by the plan. The cited examples include plywood roof decking, roof felt, drip edge and shingles. Check the plan’s coverage and edge details as you work; the examples do not establish a universal roof assembly for every climate.
- Complete a child-safety and maintenance inspection. Check the structure for exposed fasteners, open hooks, snagging edges, splinters, loose connections and damaged components. Confirm that anchors are installed as instructed and buried or covered so they do not create exposed trip hazards. If the play area has protective surfacing, check and maintain it according to the design and its material guidance.
What safety details should I check before children use it?
CPSC’s handbook addresses home playground hazards including exposed fasteners, open hooks, entrapment openings, splinters, inadequate surfacing and tipping. Treat the finished structure as play equipment: the inspection is not just a cosmetic check. Pay particular attention to details a child can touch, climb on, snag clothing on or fall onto.
Inspect openings, edges and connections
- Look for protruding fasteners, open hooks, bolt ends or other hardware that could snag or entangle clothing or skin.
- Check surfaces and edges for splintering, broken pieces or damage that could injure a child.
- Make sure protective caps and plugs are in place where the design uses them.
- Check that doors and windows fit their openings and that the openings are not out of square.
- Confirm that the structure is anchored as the plan instructs and that anchors are buried or covered to avoid exposed trip hazards.
- For a design with an elevated play surface, assess fall protection and surfacing for the planned height and use zone; do not treat the building’s framing plan as a surfacing specification.
Keep up with maintenance
CPSC recommends checking nuts and bolts twice a month and inspecting caps and plugs twice a month. Its handbook also calls for periodic checks of wood condition and moving parts. Use those checks to catch loosening hardware, missing covers, splintering or broken components before they become a hazard. Where loose-fill surfacing is present, rake it as needed and maintain it as part of the play area. A playhouse with no moving parts still needs checks of its wood, connections and anchors.
The Tool Desk
Outbyte Driver Updater FREEFix the driver behind crashes, sound loss and screen glitchesFind Drivers →Outbyte PC Repair FREEClear out junk files and repair common Windows errorsFree Scan →What changes if the playhouse is raised or modified?
A raised playhouse is not simply a ground-level cabin with taller supports. Elevation affects fall exposure, access, anchoring, connections and the surrounding play area. CPSC’s surfacing guidance is relevant when the design has an elevated play surface, but it does not provide structural approval for a raised building. Select a plan designed for the intended height and follow its guardrail, bracing, anchoring and connection details.
Best Value

- Power corded circular saw:The corded circular saw is equipped with 4.8 Amps motor delivering a no load speed up to 4000 RPM.Compared with general mini circular saws,it has a 20% increase in cutting efficiency, which is suitable for home renovation, furniture making, and handmade projects, etc
- More precise cutting: Designs with laser guide settings and guide rails for better precision,it can help you make straighter and more precise cutting.Dust hose and adapter fits most vacuums, reducing flying wood and keeping a cleaner workspace for improved visibility
- Not just for wood: Unlike standard circular saws limited to wood, the compact circular saw has 3 blades (4½"), including TCT, HSS and diamond blades. It can cut for wood, soft metal, tile, plastic, achieving multi-material versatility and making multi-material projects simpler, safer, and more efficient. Skip the hassle of buying extra blades for unlimited projects, suitable for diy and home tasks. Good choice for DIYers who refuse to be limited by their tools
- Adjustable depth and bevel:Adjustable depth (1-11/16" at 90°) and 0-45° bevel capacity for angled cuts, you can freely adjust the cutting according to your needs. The maximum cutting depth at 90 degrees is 1-11/16", and the bevel cutting capacity at 45 degrees is 1-1/8"
- Safety and lightweight: Double switches control operation for your safety. Both the power switch and safety lock must be simultaneously pressed to start the machine. Compact circular saw weighs about 50% less than conventional 7-1/4” saws to one hand operation. The device is easy for the man, women and elderly to use
Likewise, adding a porch, deck, slide or swing may alter load paths, fall height, connections or use zones. The cited plans do not establish that any such modification is safe. If the desired change is not covered by the plan, do not assume that copying a detail from another design will preserve its structural adequacy. Get appropriate design guidance before building the change.
How should I choose a plan and materials?
Choose a complete plan that matches the users, available space, desired height and your construction skill. A useful plan should provide drawings and enough detail to create a material takeoff and cut list, including framing, openings, connections and roof assembly. The examples cited here illustrate common components and workflow, but they do not compare kits, establish current material prices or provide a verified product comparison.
Material decisions should follow the plan and the site. Outdoor durability, local availability, treatment compatibility and maintenance are all relevant; the cited sources do not provide current prices or a performance comparison among wood species, siding types or roofing choices. Where a plan’s material is unavailable, do not treat another material as equivalent without verifying the change for that design.
For this construction topic, the important distinction is not a universal “best” playhouse type or material, but whether the plan accounts for the actual location and intended use. A straightforward ground-level design avoids the elevated-play-surface surfacing requirement described by CPSC, while a raised design demands additional fall and structural planning. In either case, plan-specific details and local requirements govern.
Quick Recap
Product prices and availability are accurate as of the date/time indicated and are subject to change. Any price and availability information displayed on Amazon at the time of purchase will apply.




