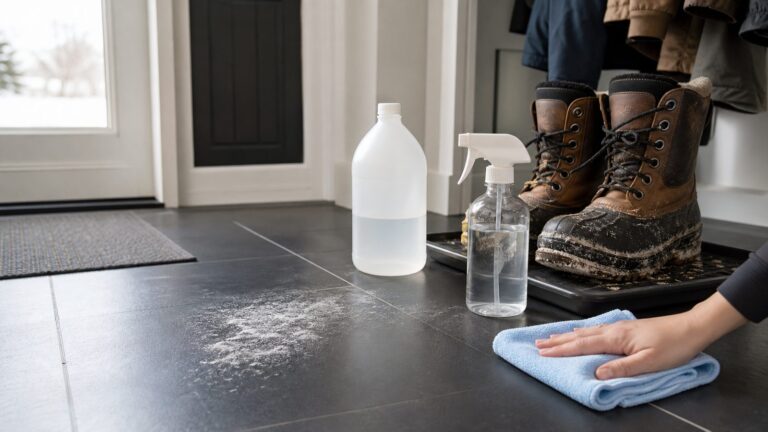
To avoid streaks and white residue, apply concrete densifier in a uniform film, keep it wet for the time specified by that product, and deal with puddles or unabsorbed excess before it dries. There is no universal dwell time, coverage rate, or cleanup method: follow the selected product’s label and current technical data sheet for the concrete and finishing plan you have.
Why densifier leaves streaks or white residue
Uneven application can leave visible bands, while excess material that remains on the surface can dry into a white deposit. Foundation Armor warns that dried excess L3000 may require mechanical removal, such as sanding or grinding. Do not assume that dried residue will wash off.
As an Amazon Associate I earn from qualifying purchases.
Concrete does not necessarily absorb densifier at the same rate everywhere. Sika identifies porosity, age, moisture, absorption, texture, and application method as factors affecting coverage. As a result, a uniform-looking wet coat may absorb unevenly; watch for areas where liquid is pooling or remaining on the surface rather than disappearing.
The Tool Desk
Outbyte PC Repair FREERepair Windows errors before they cause bigger problemsFix Now →Outbyte Driver Updater FREEScan for outdated or missing drivers - takes under a minuteDriver Scan →The practical goal is not to apply as much as possible. Distribute the product evenly, maintain the product’s specified wet contact time, and prevent unabsorbed material from collecting in low spots or drying as a surface layer. A change in how quickly liquid disappears is a reason to monitor that part of the slab and follow the product’s directions for redistributing or removing excess—not a reason to pour on more material automatically.
#1 Best Overall

- Valued Carpenter Pencil Set: You will get 2 pcs solid carpenter pencils with 26 piece 2.8 mm refills, 1 replaceable sharpener, 1 plastic storage box.The complete carpenter pencils combination allows you to finish your work faster and more easily
- Deep Hole Marker Pencil: The deep-hole construction pencils adopts 45mm elongated tip design, which is more convenient to mark in the small hole or in other tight areas that other carpenter markers cannot reach
- Carpenter Pencils with Sharpener: The sharpener is screwed into the top of the work pencil, which won't get lost either. Built-in pencil sharpener that keep the lead with pointed and smooth to Improves line of sight in fine work
- Stronger Solid Lead: This work pencil is matched with a 2.8 mm thick lead , which is much thicker and stronger during the drawing process of construction work, it will not break or damage easily
- Marks on Various Surfaces: 3 colors solid construction pencil can marks on various surfaces,such as metal, plastic, wood, paper etc. Ideals for woodworkers, contractors, craftsmen, builders, merchants and masons
Streaks and white residue are related to application control, but they are not exactly the same problem. Bands can reflect uneven distribution across the wet surface. A white deposit can form when excess product remains on the surface and dries. The safest prevention is to use a consistent application method, keep an eye on the entire working area, and complete the specified excess-removal or finishing step before material dries where it should not.
Before you start: confirm the product-specific procedure
Read the chosen densifier’s label and technical data sheet before opening the container. Product chemistry alone does not tell you how to apply or clean up a particular formulation. Check the following details:
- Substrate: Confirm that the product is intended for your concrete and its condition.
- Preparation and limits: Follow the stated surface-preparation requirements and any temperature or other application limits.
- Tools and coverage: Check approved application equipment and the product’s coverage guidance for the intended use.
- Wet contact time: Find the required time and the instructions for keeping the surface wet.
- Excess and finishing: Determine whether excess must be spread, removed, rinsed, or handled as part of polishing, and check compatibility with a planned coating.
These details vary. For example, one cited lithium densifier calls for active brooming and removal of excess, while another manufacturer describes a one-coat product that needs no brooming or rinsing during application.
Recommended Free Tools
Use the current instructions for the exact product, not a procedure remembered from a different densifier. Two products described as lithium densifiers can still have different directions for applicators, wet contact, puddles, and final cleanup. Likewise, an instruction for a polished-concrete process may not apply when the floor will receive a coating or be left unpolished.
It can help to note the required wet time and excess-removal method before you begin. That way, the person applying the product knows what to watch for, and the cleanup tool—such as a squeegee or wet vacuum when specified—is ready if needed. This is especially useful when dividing the floor into manageable work areas: the timing and cleanup plan should be clear before the first area is wet.
How to apply densifier evenly
- Prepare and inspect the concrete. Follow the product’s preparation instructions. Note changes in texture, condition, and absorption that could affect how quickly the liquid disappears. If appearance is especially important, or the product instructions recommend it, try a small test area first; a test patch is a prudent check, not a universal requirement established for every product. A small trial can also help you see how your chosen applicator distributes the liquid on this particular surface, but it does not replace the manufacturer’s stated application method.
- Choose an approved applicator. Depending on the product, tools may include a low-pressure pump sprayer, mop, brush, roller, sponge, or broom. For L3000, Foundation Armor lists a commercial pump sprayer, lint-free mop, or soft-bristle push broom. Sika lists a brush, roller, sponge, mop, or pump spray. Use only tools permitted by the selected product’s instructions. A soft-bristle push broom or mop can be used to spread product when the instructions call for it; do not assume every product needs active brooming.
- Work in manageable areas. Apply a consistent amount and spread it across the area without leaving dry gaps, heavy bands, or puddles. Keep an eye on sections already treated as you move forward, because different parts of the slab may absorb at different rates. Choose an area size that lets you observe the wet film and complete the product’s required contact and excess-removal steps without leaving an earlier section unattended.
- Maintain the stated wet contact time. Follow the product’s specific timing and any instructions to rework or redistribute the material during that period. Do not substitute another manufacturer’s timing. Crommelin’s November 2022 technical data sheet, for example, says to keep its cited lithium densifier wet for 20 minutes before removing excess with a squeegee. This is an example for that product, not a general target for other densifiers.
- Address excess before it dries. If liquid is pooling or remains unabsorbed, follow the product’s instructions for spreading, dilution, or removal. Foundation Armor says to remove puddle areas and rework excess for L3000. Sika’s cited directions recommend dilution and wet-vacuum removal if its product is puddled after 30 minutes. That 30-minute point is a product-specific puddle instruction—not a universal dwell time.
- Complete the specified cleanup or finishing step. Depending on the product and what follows, instructions may call for fresh-water washing, mechanical polishing, or neither. Do not combine steps from different products’ procedures. If the surface is going to be coated or polished further, check those specific instructions before deciding how to finish the densifier application.
During application, look across the wet area rather than focusing only on the spot immediately in front of the applicator. The aim is an even distribution without isolated dry gaps or a thick wet accumulation. If one area absorbs quickly while another stays wet, respond according to the instructions for that product; adding more everywhere can increase excess without correcting uneven absorption.
Rank #2

- Ergonomically Designed: Work in tight areas with a compact design that gets into tough spots
- Compact and Lightweight: Both tools are designed to fit into difficult to reach spaces. The 1/4" impact driver has a length of 5.55 in. and weighs just 2.8 lbs, while the 1/2" drill/driver measures only 7.5 in. and weighs 3.6 lbs
- Both the DEWALT impact driver and electric drill driver feature integrated LED work lights with a convenient 20-second delay, ensuring enhanced visibility in dimly lit or challenging work areas
- One-Handed Loading - Keep one hand free with a 1/4 in. hex chuck that accepts 1 in. bit tips
- Power drill cordless with 1/2" single sleeve ratcheting chuck provides tight bit gripping strength, making bit changes faster and more secure
Coverage figures are planning guides, not a promise that every slab will consume the same amount. Sika notes that porosity, age, moisture, absorption, texture, and method can change coverage. Surface variability is one reason to work methodically and watch what the liquid is doing instead of applying a fixed volume without regard to the actual concrete.
PC Slower Than It Used to Be?
A free scan shows the junk files, broken settings and background clutter dragging Windows down - then fixes them in one click.Free scan · Windows 10 & 11Crashes, No Sound, or Screen Glitches?
Random freezes, missing sound and display glitches usually trace back to one bad driver. Find and replace yours safely.Free scan · under a minuteProduct-specific examples: timings, coverage, and cleanup
The examples below illustrate why you need the instructions for the exact product. They are not interchangeable procedures or universal figures.
| Product or source | Application or timing detail | Excess, cleanup, or coverage detail |
|---|---|---|
| Foundation Armor L3000 | Foundation Armor lists a commercial pump sprayer, lint-free mop, or soft-bristle push broom. | Listed coverage is 300–400 sq. ft. per gallon on new concrete and 200–300 sq. ft. per gallon on existing concrete. The cited page gives no year. Remove puddles and rework excess; dried excess may leave white residue that requires mechanical removal. |
| Crommelin lithium densifier | The November 2022 technical data sheet says to keep the surface wet for 20 minutes. | After the stated wet contact time, remove excess with a squeegee. |
| Sika densifier | The cited 30-minute timing concerns puddled excess; it is not stated as a universal wet contact time. | If the product is puddled after 30 minutes, Sika recommends dilution and removal with a wet vacuum. Sika also directs fresh-water washing if the surface will not be polished further or will receive a coating. |
| Rust-Oleum Concrete Saver Lithium Densifier | Rust-Oleum describes a one-coat application. | Its cited guidance says no brooming or rinsing is needed during application. |
Foundation Armor’s coverage figures are estimates for L3000 and the stated new- or existing-concrete use. They should not be used to calculate another product’s coverage. Even for the same product, actual coverage can vary with the concrete’s porosity, age, moisture, absorption, texture, and application method.
When estimating how much L3000 to have on hand, use the appropriate stated range for the concrete—300–400 square feet per gallon for new concrete or 200–300 square feet per gallon for existing concrete—and treat it as a product-specific estimate. The range itself signals that a single exact figure is not guaranteed. Do not assume the lower or higher rate will transfer to a different densifier, or that a rate for new concrete applies to existing concrete.
Compare products by more than their chemistry or a headline coverage claim. Check that the product supports your substrate and use, what tools it permits, whether it requires active spreading, how long its instructions say to keep the surface wet, and what to do with material that does not penetrate. Then compare the prescribed final step: the cited directions vary between fresh-water washing in certain circumstances, polishing-stage residue removal, and no brooming or rinsing during application. If a coating is planned, include coating compatibility and any specified wash step in the comparison.
The tools should follow the same product-specific logic. A low-pressure pump sprayer, soft-bristle push broom, lint-free or microfiber mop, squeegee, and wet-dry vacuum may each be useful where the chosen product’s directions call for them. They are not a universal kit that every application requires. For example, a squeegee is tied to Crommelin’s cited excess-removal step, while a wet vacuum appears in Sika’s instructions for a particular puddling situation.
Rank #3

- 【Great Compatibility】This Katerk 1/4 inch hex shank bit holder is specifically designed for 1/4 inch hex shank drill bits. It's compatible with most 1/4 fast hex handles, hex sockets, various electric screwdrivers, and handheld screwdrivers. The bit holder makes it a valuable addition for any handyman.
- 【Secure and Safe】Built with a secure backup nut design, each drill bit holder securely locks onto your bits, ensuring they stay firmly in place. Additionally, our bit holder incorporates a high-quality steel ball rolling design that holds up to several kilograms of weight, ensuring your various drill bits don't fall off.
- 【Easy One-Handed Operation】The bit holder for impact driver allows you to change bits single-handedly, simplifying your workflow. Its multi-color design further allows for quick identification of the drill bit you need.
- 【Compact and Convenient】Thanks to its compact size, this 1/4 inch bit holder is easy to carry around. The bit holder allows for easy attachment to various tools, making this a convenient addition to your construction accessories. The Katerk bit holder is cast from high-quality alloy material, promising a long product lifespan. Despite its rugged strength, the bit holder remains lightweight, making it portable.
- 【Cool Christmas Gift For Men Stocking Stuffers】 This screwdriver bit holder, driver bit holder, impact bit holder, can be given as a gift to your loved one, especially for anyone involved in construction or electrical work. It's a must-have for stocking stuffers for men and women, tools gifts for dad, tech gadgets for men, gifts for dad, gifts for him, gifts for husband, gifts for boyfriend, cool gadgets for men, and cool gifts for dad.
What to do if a puddle or streak appears while the surface is wet
- Liquid is collecting in a low spot: Use the cleanup method and timing specified for your product. Do not leave the puddle to dry while deciding what to do.
- Some areas absorb faster than others: Keep the application even and follow the product’s instructions for maintaining wet contact. Avoid adding extra material simply to make faster-absorbing areas look as wet as slower ones.
- You are unsure whether excess should be rinsed: Check the product’s finishing directions. One product may call for a fresh-water wash in a particular situation; another may specify a polishing-stage process or no rinsing during application.
- You are applying before a coating: Check the densifier instructions for the coating scenario. Sika’s cited directions call for fresh-water washing when the surface will receive a coating; that instruction should not be assumed for every product.
If a band or uneven wet area is visible before the product dries, do not respond by applying a thick additional coat over the whole floor. First check whether the issue is a gap in distribution, an area absorbing more quickly, or a puddle. Redistribute or remove product only as directed. The product instructions—not a generic rule—determine whether to spread, dilute, vacuum, squeegee, wash, or leave the surface alone.
Keep track of the elapsed time when a manufacturer gives a timed instruction. Crommelin’s 20-minute wet-contact direction and Sika’s 30-minute puddle guidance describe different actions for different products. Treating Sika’s 30 minutes as a target dwell time, or applying Crommelin’s timing to another product, would confuse those instructions.
How to approach white residue that has already dried
First identify the product and consult its directions for dried residue. Do not assume that water or routine washing will remove it. Foundation Armor specifically warns that dried excess L3000 may require sanding or grinding. For its polished-concrete directions, Foundation Armor describes removing residue with polishing diamonds or pads and says flushing with water is not necessary for that specific procedure. That is a product- and process-specific instruction, not a general remedy for all densifiers or surfaces.
Because mechanical removal can affect the concrete finish, do not improvise a sanding, grinding, or polishing method based only on another product’s instructions. Confirm the appropriate process for the densifier and finishing plan involved.
The practical lesson is that residue prevention is usually simpler than correcting dried excess: watch for liquid that is not penetrating, follow the product’s directions for puddles, and finish the wet application as specified. If residue has already formed, identify the exact product and surface process before choosing a remedy. The cited Foundation Armor warning is not a reason to grind every white mark; it is a reason not to promise that the deposit will wash away and to verify the correct mechanical process for that product.
Choose cleanup steps based on the finishing plan
The right last step depends on what will happen to the floor after densifying. Sika directs fresh-water washing when the surface will not be polished further or will receive a coating. Foundation Armor’s polished-concrete procedure instead refers to removal with polishing diamonds or pads and says water flushing is not necessary for that procedure. Rust-Oleum says its Concrete Saver product needs no brooming or rinsing during application.
Rank #4

- Long Nib and Deep Hole Marker: Our mechanical carpenter pencil with 45mm nib is designed for easy marking of deep holes or narrow areas. These construction pencils are the great choice for woodworking tools, construction tools, carpenter tools, contractor tools, wood carpentry tools and architect tools
- Extra Refills in 2 Colors for Versatile Marking: The construction mechanical pencil comes with 12 extra 2.8mm refills, including 6 red and 6 black refills. The black refill is suitable for light surfaces, while the red wax is perfect for dark surfaces. Our carpenter mechanical pencil makes sure that you'll have an ample supply for extended use
- Built-in Sharpener: Our construction pencil comes with a built-in sharpener to ensure the mechanical pencil tip is always sharp and ready for use. Never buy an extra pencil sharpener again. A great tool for any woodworker pencil, contractor pencils. The refill can easily be extended or retracted with a simple click of the pencils mechanical, allowing you to work more efficiently and accurately
- Portable Clip Design: Our deep hole construction pencil features a portable clip design, easy to carry and attach to your pocket or tool box, so that you can keep the carpenter pencils mechanical close at hand, making it a convenient tool to have on the go. Great gifts choice for carpenters
- Stronger Pencil Lead: The black refills are made of lead, sturdy and smooth. The red refills are made of wax, clear and light. These marking pencils are much thicker and stronger than normal pencils during the marking process of construction work, suitable for various surfaces, such as glasses, metal, boards, floors, walls, furniture, etc. The written marks can be easily wiped with a wet paper towel when needed
Those differences matter: rinsing, polishing, and leaving the surface alone are not universal alternatives to choose by preference. Match the step to the exact product instructions and the intended finish.
What’s actually slowing this PC down?
Pick the symptom - the matching free tool is one click away.
Before applying, therefore, decide whether the concrete is being left as treated, polished further, or prepared for a coating, and check the relevant directions for that scenario. Do not take a wash step from one manufacturer and combine it with another manufacturer’s polishing directions. Even when the same tool is available, the sequence and reason for using it may differ by product and finishing plan.
Independent reader supportYour contribution helps us test, update, and keep practical guides available for everyone.Application checklist
- The product is suitable for the concrete and the next finishing step.
- The surface has been prepared as directed, and you have checked relevant application limits.
- Your applicator is approved for the product, and the amount to apply is based on that product’s coverage guidance.
- You know the product’s wet contact time and how to keep the surface evenly covered during it.
- You know how to handle puddles and excess before they dry.
- You have confirmed whether the final step is washing, polishing, or another product-specific procedure.
A final pass through the checklist can prevent the most avoidable mistakes: using an unapproved tool, treating an estimate as a universal coverage rate, leaving puddled excess unattended, or assuming that another product’s rinse or dwell time applies. Keep the technical sheet available during the work so that the response to a wet spot or changing absorption follows the chosen product’s directions.
Frequently Asked Questions
How do I apply concrete densifier without streaks?
Use the application method and tools allowed by the selected product, work in manageable areas, and distribute a consistent film without dry gaps, heavy bands, or puddles. Monitor areas that absorb at different rates and follow the product’s wet-contact and excess-removal directions.
How long should concrete densifier stay wet?
There is no universal wet time. Follow the exact product’s label and technical data sheet. Crommelin’s November 2022 sheet, for example, says to keep its cited lithium densifier wet for 20 minutes before removing excess with a squeegee. That timing should not be transferred to other products.
Why did my concrete densifier leave white streaks or residue?
Uneven distribution can leave visible bands, and excess that remains on the surface can dry as a white deposit. Foundation Armor warns that dried excess L3000 may require mechanical removal, such as sanding or grinding; do not assume it will wash off.
Best Value

- Milwaukee Ink all Fine Point Marker, Black, 4 Per Pack
- 4 per pack Features Clog Resistant Marker Tip Writes through Dusty, Wet and Oily Surfaces Durable Marker Tip for Writing on Concrete, OSB and Rough Surfaces
- Clog resistant tip writes on dusty, wet and oily surfaces and is optimized for rough surfaces such as OSB, cinderblock and concrete
- Hard hat clip- attaches for easy access
- Quick dry time with reduced smearing and marking
Can I rinse off concrete densifier after applying it?
Only if the selected product’s directions call for it in your situation. Sika directs fresh-water washing when its surface will not be polished further or will receive a coating. Foundation Armor gives different directions for its polished-concrete process, and Rust-Oleum says its Concrete Saver product needs no rinsing during application.
What should I do if densifier puddles?
Follow the product-specific timing and cleanup instructions before the material dries. Foundation Armor says to remove puddle areas and rework excess for L3000. Sika recommends dilution and wet-vacuum removal if its product is puddled after 30 minutes; that is not a general dwell-time rule.
How much densifier do I need per square foot?
Use the coverage guidance for the exact product and concrete. Foundation Armor lists 300–400 square feet per gallon for L3000 on new concrete and 200–300 square feet per gallon on existing concrete. These are product-specific estimates, and coverage can vary with concrete condition and application method.
Can dried white densifier residue be washed away?
Do not assume so. Foundation Armor warns that dried excess L3000 may require sanding or grinding. Its polished-concrete directions describe residue removal with polishing diamonds or pads, but that procedure is specific to that product and process. Confirm the correct approach before mechanical removal.
Do all concrete densifiers need brooming or rinsing?
No. Manufacturer procedures differ. Rust-Oleum describes its Concrete Saver Lithium Densifier as a one-coat application that requires no brooming or rinsing during application, while other cited product directions specify active spreading, excess removal, washing, or polishing steps.
The Bottom Line
Prevent streaks and white residue by applying a uniform film, observing the exact product’s wet-contact instructions, and handling puddles or unabsorbed excess before it dries. Coverage, timing, tools, and cleanup vary by product and finishing plan, so use the selected densifier’s current directions rather than borrowing another product’s procedure.
Quick Recap
Product prices and availability are accurate as of the date/time indicated and are subject to change. Any price and availability information displayed on Amazon at the time of purchase will apply.
Do these 3 things before closing this tab:
1Fix the driver behind crashes, sound loss and screen glitches2Repair Windows errors before they cause bigger problems3Scan for outdated or missing drivers - takes under a minute