The Tool Desk
Outbyte Driver Updater FREEFix the driver behind crashes, sound loss and screen glitchesFind Drivers →Outbyte PC Repair FREERepair Windows errors before they cause bigger problemsFix Now →Some links on this page are affiliate links: if you buy through them we may earn a commission, at no extra cost to you.
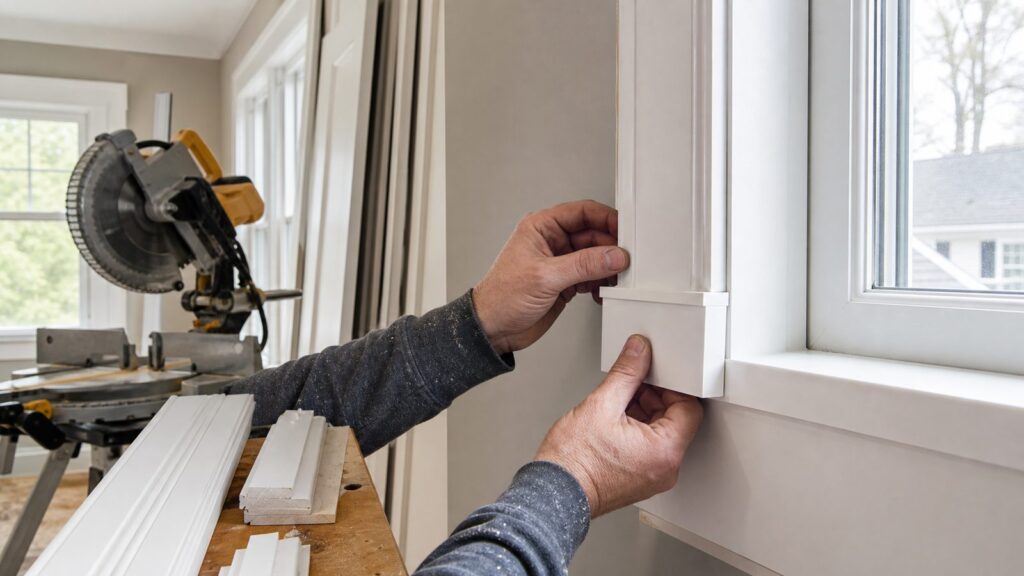
Beautiful door and window trim is not just a decorative upgrade. Interior casing hides the working gap between the jamb and the drywall or plaster, gives the opening visual weight, and ties together doors, windows, baseboards, crown, and built-ins. Exterior trim does all of that plus one more critical job: it has to work with flashing, siding, caulk joints, and the water-resistive barrier so the wall can shed water.
On our job sites, the best trim work starts before the first miter is cut. We check the opening, jamb depth, wall flatness, plumb, level, square, and existing finish conditions. A $3-per-foot piece of casing can look expensive when it is laid out well, installed with a consistent reveal, and finished cleanly. A costly hardwood profile can look poor if it is forced over wavy plaster, installed tight to damp exterior siding, or caulked into oversized gaps.
As an Amazon Associate I earn from qualifying purchases.
Quick wins for a faster PC:
Repair Windows errors before they cause bigger problemsFix Now →Scan for outdated or missing drivers - takes under a minuteDriver Scan →Clear out junk files and repair common Windows errorsFree Scan →For 2026 budgeting in the U.S., most straightforward interior door and window casing lands around $5 to $13 per linear foot installed, depending on material, finish, labor market, and complexity. Homewyse’s May 2026 national figures put general trim molding installation at $8.25 to $12.37 per linear foot and window trim molding at $10.01 to $15.34 per linear foot. Exterior trim commonly runs $6 to $15 per linear foot, with full exterior trim projects often ranging from about $500 to $9,000 depending on access, rot, flashing, material, and painting.
This guide explains how professional crews plan, build, install, and finish door and window trim so homeowners can choose the right style, compare bids intelligently, and know when a DIY weekend is reasonable versus when a finish carpenter or exterior remodeling crew is the better call.
Popular on Amazon

- Prefinished finger jointed pine casing set, ready to be installed
- Smooth surface, free of any defects
- Colonial style, great to cover gaps between drywall and windows or doors
- Pre-mitered for ease of installation
- Finger-jointed radiata pine has a smooth, defect-free surface
Start With the Opening, Not the Molding
The biggest mistake we see is choosing trim from a display rack before understanding the opening. Door and window trim is the last visible layer, but it depends on everything behind it. Before selecting a casing profile, measure and inspect these conditions:
- Jamb depth: The jamb should be close to flush with the finished wall surface. If it is recessed or proud by more than about 1/8 inch, plan for jamb extensions, planing, shimming, or scribing.
- Wall flatness: Drywall and old plaster often roll in or out near openings. A straight casing laid over a wavy wall will leave gaps or rock at the corners.
- Plumb and level: Out-of-plumb jambs make reveals wander. Out-of-level stools or heads make trim look crooked even if the pieces are cut accurately.
- Square corners: A 45-degree miter only closes cleanly when the opening and casing layout cooperate. Many real openings need 44-degree or 46-degree cuts, slight back-bevels, or coped/scribed details.
- Existing finishes: Tile, flooring, backsplashes, plaster returns, replacement window liners, and built-in cabinetry can change the trim approach.
For most interior doors and windows, a common reveal is about 3/16 inch from the inside edge of the jamb to the inside edge of the casing. The exact dimension is less important than consistency. We use a small reveal block or combination square and mark the reveal around every side of the opening before cutting. That simple habit keeps the work fast and repeatable.
On replacement windows, pay special attention to liners, vinyl replacement frames, old sill conditions, and whether the new window sits proud of or recessed from the old jamb. Many replacement projects need custom jamb extensions or carefully sized stops before casing can be installed cleanly.
Know the Parts: Casing, Trim, Molding, Stool, Sill, and Apron
Homeowners often use “trim” and “molding” as catch-all terms. That is fine in conversation, but clear language helps when you are comparing quotes or drawing details.
Door casing
Door casing is the trim installed around the sides and head of an interior or exterior door. In a simple interior setup, it is usually three pieces: left leg, right leg, and head casing. More detailed assemblies may include plinth blocks at the floor, rosettes at the top corners, backband molding, keystones, or layered build-ups.
Window casing
Window casing frames the sides and top of the window on the interior. Some styles use casing on all four sides. Others use side casing, head casing, a stool at the bottom, and an apron below the stool.
Window stool and sill
Inside the house, the horizontal ledge at the bottom of many traditional windows is commonly called a stool. Outside, the sloped lower member that sheds water is the sill. People often call both a sill, but they perform different jobs. Interior stools are mainly visual and functional as a ledge. Exterior sills must drain water away from the wall.
Apron
The apron is the trim piece below an interior window stool. Its height and profile should relate to the casing. A narrow 2-1/4 inch colonial casing may use a simple apron; a wide Craftsman casing may use a taller flat apron.
Backband, cap, and build-up pieces
A backband is a secondary molding applied to the outer edge of flat casing to add depth. A head cap or cornice detail can make a window or door feel more substantial. These pieces are common in traditional, Craftsman, and historical trim packages.
Choosing the Right Trim Material
The right material depends on whether the trim is interior or exterior, paint-grade or stain-grade, moisture-exposed or dry, simple or highly detailed. Price matters, but so does movement, durability, finish quality, and repairability.
Do these 3 things before closing this tab:
1Clear out junk files and repair common Windows errors2Scan for outdated or missing drivers - takes under a minute3Repair Windows errors before they cause bigger problems| Material | Best use | Typical notes | Budget impact |
|---|---|---|---|
| Primed MDF | Economical interior paint-grade casing | Smooth, stable, easy to paint, not ideal for wet areas or exterior use | Often about $1.25 to $3.25 per linear foot material-only for common profiles |
| Finger-jointed pine or poplar | Durable paint-grade interior trim | Stronger than MDF at edges, takes nails well, paints cleanly | Usually more than MDF, less than clear hardwood |
| Clear pine | Paint-grade or casual stain-grade interiors | Can show knots and grain variation unless carefully selected | Moderate |
| Oak, maple, cherry, or other hardwood | Stain-grade trim and high-end interiors | Requires cleaner cuts, color matching, and careful finishing because caulk cannot hide mistakes | High, especially for wide or custom profiles |
| PVC or composite | Exterior trim, damp locations, low-maintenance details | Resists rot, needs correct fastening, expansion gaps, compatible sealants, and paint colors approved by the manufacturer | Several dollars per linear foot and higher as board width and thickness increase |
| Custom-milled wood | Historical homes and exact profile matching | Best when matching old casing, backband, stool, or sill profiles | Can exceed commodity trim pricing substantially |
For paint-grade interiors, MDF is cost-effective and looks crisp after primer and paint. We avoid it where it may get wet, such as bathroom window stools, basement openings with condensation, or exterior doors where mopping and tracked-in moisture can swell the lower edges. In those spots, finger-jointed wood, poplar, PVC, or another moisture-tolerant detail is usually a better value.
For stain-grade work, material selection matters as much as installation. We sort boards for straightness, grain direction, color, and defects before cutting. A stain-grade casing package around six windows can look disjointed if one head casing is pale, one leg is dark, and a stool has wild grain. Paint hides that variation. Clear finish does not.
Also popular on Amazon

- This 12 PACK Fits most 2-1/4" interior door and window casings
- 2 Rosettes in each pack.
- Ready to paint. Installs in less than 1 minute
- No tools or special skills needed
- Classic Rosette design compliments any room
For exterior trim, we decide material after looking at exposure. A deeply protected porch door may do fine with properly primed and painted wood. A south- or west-facing window with heavy weather exposure may justify PVC or composite. Exterior wood trim should be back-primed and end grain should be sealed, especially at casing bottoms, sill ends, horizontal cuts, and any joint that can wick water.
Trim Styles That Work in Real Homes
Good trim should look connected to the house. It does not have to be ornate to be beautiful. In many homes, the cleanest result comes from matching the scale of the doors, windows, ceiling height, baseboards, and existing architecture.
Recommended Free Tools
Simple colonial casing
A common colonial casing is around 2-1/4 inches wide and works well in many production homes and remodels where the baseboards are modest. It is affordable, widely available, and fast to install. The downside is scale: narrow casing can look under-sized around large modern windows, tall doors, or rooms with 9-foot and 10-foot ceilings.
Flat Craftsman casing
Craftsman-style trim often uses flat boards with square edges, wider head casing, and sometimes a stool and apron at windows. Common interior widths include 3-1/2 inch side casing with a 4-1/2 inch or taller head. It works well in bungalows, farmhouses, transitional homes, and clean modern interiors. It is also forgiving because butt joints can replace some mitered corners.
Layered traditional casing
Layered trim may combine flat casing, backband, head caps, plinth blocks, and apron details. This can be excellent in formal rooms and older homes, but it needs careful proportion. If the baseboard, crown, and door trim do not relate to each other, the room can feel pieced together.
Historical profile matching
In older homes, do not assume the closest big-box profile is close enough. We often remove a short sample from a hidden or damaged area, trace the profile, and check local millwork shops. Matching casing, plinths, stools, and backband preserves the character of the house and usually looks better than mixing new generic trim into one opening.
Before buying trim for a whole house, mock up one door or window. Tape sample pieces around the opening or temporarily pin a small assembly. Look at it from the hallway, sitting areas, and adjacent rooms. A profile that looks good in your hand may look too narrow, too busy, or too shallow once it is installed.
How Professionals Install Interior Door and Window Trim
The basic steps sound simple: measure, cut, nail, fill, caulk, paint. The quality comes from how each step is handled.
1. Prep the jamb and wall
We scrape drywall lumps, cut back excess joint compound, set proud nails or screws, and correct obvious jamb issues before casing goes on. If the jamb is recessed, we install jamb extensions or tapered shims so the casing has a solid, even surface. If the jamb is proud, we may plane the jamb edge or back-cut the casing depending on the condition.
2. Mark a consistent reveal
A 3/16 inch reveal is common, but some profiles or historical details call for something different. We mark the reveal on all sides using a block or square. This avoids the “almost even” look that catches your eye every time light hits the casing.
Outdated Drivers Are Slowing You Down
One free scan finds every outdated or missing driver and matches the right update for your exact hardware.Free scan · exact hardware matchPC Slower Than It Used to Be?
A free scan shows the junk files, broken settings and background clutter dragging Windows down - then fixes them in one click.Free scan · Windows 10 & 113. Cut and test-fit the casing
For mitered casing, we cut slightly long, test-fit, and adjust. Real corners often need minor angle changes. On paint-grade work, tight joints still matter because heavy filler and caulk shrink and telegraph later. On stain-grade work, the cut is the finish; there is no visual rescue from caulk.
4. Glue and control the corners
For many door and window assemblies, we glue miters and pin or clamp them before final fastening where possible. That keeps corners tight as the wall moves slightly. On flat Craftsman trim with butt joints, we still use glue where appropriate and fasten into solid backing.
Also popular on Amazon

- Comprehensive Package: the set includes 1 pieces of 1/4 inch trim reveal tool, 1 pieces of 3/16 inch trim reveal tool and 2 pieces of wood pencils; This complete package ensures you have everything you need for precise woodworking projects, streamlining your workflow and keeping essential tools within easy reach
- Versatile Trim Solutions: the door casing trim reveal tool offers multiple offset settings including 1/4 inch decorative shim, 3/16 inch decorative shim, and 1/8 inch seam, suitable for ni seams or shiplap applications
- Portable and Convenient: compact and lightweight, our black trim tools are designed for portability; With dimensions of 2.75 x 1.5 x 0.5 inches, they fit snugly in your toolbox or tool belt; Have them ready for action anytime, anywhere, without adding unnecessary weight to your gear
- Durable Material: constructed from quality plastic, these trim reveal tools ensure longevity and reliable performance across different applications; Their sturdy build facilitates consistent operation, allowing you to focus on creating good trim reveals without worrying about wear and tear
- Widely Application: meet your exact woodworking needs with our versatile trim reveal tools; Whether you're working on door or window casings, these tools allow for precise measurements and consistent reveals; Achieve nicely results without the need for additional equipment – suitable for both DIY enthusiasts and seasoned carpenters
5. Fasten without distorting the trim
Most interior casing is fastened with 15-gauge or 16-gauge finish nails into framing and smaller 18-gauge brads or pins at delicate returns and miters. Nail length depends on material thickness and substrate, but the goal is simple: hold the trim firmly without blowing out edges, splitting hardwood, or pulling a straight board into a wavy wall so hard that the profile twists.
6. Scribe instead of burying problems in caulk
Old plaster, uneven tile, and out-of-plane drywall are common. Forcing trim flat can open a joint somewhere else. A better approach is often to scribe the casing edge to the wall, floor, or tile. A clean scribe beats a 1/4 inch caulk line every time.
What’s actually slowing this PC down?
Pick the symptom - the matching free tool is one click away.
7. Fill, sand, caulk, prime, and paint in sequence
For paint-grade trim, we fill nail holes, sand smooth, caulk small paintable gaps, spot-prime raw or filled areas, and apply finish coats. Caulk should be a narrow, controlled joint, not a substitute for fitting. Stain-grade trim is handled differently: nail holes need color-matched filler or putty, cuts need to be clean, and excess glue must be removed before finishing.
Window Stools, Aprons, and Tricky Existing Conditions
Window trim gets more complicated than door trim because the bottom detail can be built several ways. A picture-frame casing wraps all four sides with casing. A traditional stool-and-apron detail uses side casing that lands on the stool, with an apron below.
For a stool detail, the stool usually projects past the side casing. Those projections are called horns. The horn length depends on casing width and profile, but it commonly extends beyond each side casing enough to look intentional and allow the casing to sit cleanly on top. We template the stool, test the returns, and make sure the stool sits level before installing the apron.
Common window issues include recessed replacement units, plaster returns without wood jambs, old stools that are loose or water-stained, and windows set into thick walls. These conditions can add real labor. A simple casing replacement may take an hour or two per window in clean modern drywall. A window needing jamb extensions, a new stool, an apron, scribing, and plaster touch-up can take half a day or more before painting.
Bay windows, arched windows, eyebrow heads, and deep returns should be priced separately. They are not just “more linear feet.” They require layout, templating, flexible or custom molding in some cases, and more finish time.
Exterior Trim Is Part of the Weather Barrier
Interior trim can be mostly cosmetic. Exterior trim cannot. Around windows and doors, water control depends on the relationship between the trim, flashing, water-resistive barrier, siding, sealant, and drainage paths.
On exterior work, we look for head flashing or drip cap details above trim where the wall assembly requires them. Flashing should lap shingle-style with the water-resistive barrier so water drains out and down, not behind the trim. At the bottom of windows and doors, the assembly needs a path for water to escape. Sealing every edge without understanding drainage can trap moisture.
For exterior wood, we back-prime trim and seal end grain before installation whenever possible. The most vulnerable spots are horizontal surfaces, casing bottoms, sill ends, cut edges near masonry or roofing, and joints close to splash zones. A painted face does not protect an unsealed end cut that is sitting in water.
Free tools Windows power users keep installed
One-click scans. No signup required.
PVC and composite trim solve many rot problems, but they are not maintenance-free in the sense that installation no longer matters. PVC expands and contracts with temperature. Long runs need manufacturer-appropriate gaps, fastening patterns, adhesives, and sealants. Dark paint colors can create heat problems unless the product is rated for them. We also avoid thin smear caulk on exterior joints. Larger joints need the right width, depth, and backer rod so the sealant can stretch instead of tearing away.
For exterior replacement work, we photograph flashing layers before covering them. That gives the homeowner a record of what was done and helps avoid arguments later if siding, windows, or trim are inspected or repaired.
Also popular on Amazon

- This is a 10" sample piece of casing. The length for a standard piece is 90".
- Reversible Design: Features a fluted pattern on one face and a reeded profile on the reverse, giving you two distinct styles in one piece.
- Versatile Application: Ideal for door casing, window trim, or installed side-by-side to create a stunning custom fluted or reeded accent wall or paneling.
- Premium American Hardwood: Available in stain-grade Red Oak for a rich grain look that can be finished in clearcoat or your choice of stain color.
- Made in the USA: Crafted from real American hardwood in Elkhart, Indiana, delivering quality and craftsmanship for indoor millwork projects.
What Door and Window Trim Costs in 2026
Trim pricing varies because “install trim” can mean anything from nailing pre-primed casing around one bedroom door to rebuilding exterior window trim with rot repair, flashing correction, PVC boards, and paint. The numbers below are useful planning ranges, not a substitute for a site-specific quote.
| Scope | Typical 2026 U.S. cost | What can push it higher |
|---|---|---|
| Interior door casing | About $100 to $250 per simple interior door, or roughly $5 to $13 per linear foot installed | Tall doors, plinth blocks, rosettes, transoms, sidelites, stain-grade work, damaged jambs |
| Interior window casing | About $5.73 to $13.10 per linear foot in estimating guides; window trim projects commonly range from $500 to $1,200 | New stools, aprons, jamb extensions, bay or arched windows, plaster repair, painting |
| General interior trim molding | Homewyse May 2026: $8.25 to $12.37 per linear foot installed | Complex profiles, small job minimums, old trim removal, occupied-home protection |
| Window trim molding | Homewyse May 2026: $10.01 to $15.34 per linear foot installed | Out-of-square openings, stain-grade finish, replacement window conditions |
| Exterior trim | Often $6 to $15 per linear foot; full projects commonly $500 to $9,000, averaging around $1,800 | Rot repair, flashing correction, siding removal, ladders or scaffolding, PVC/composite, painting |
| Window trim replacement per window | Some 2026 guides cluster around $164 to $187 per window for simpler replacement, with about $176 average | Custom profiles, sill replacement, water damage, lead-safe procedures |
Material-only costs can be a small part of the job. MDF casing may run about $1.25 to $3.25 per linear foot for common profiles, while basic pine or poplar often costs more. PVC exterior boards are commonly several dollars per linear foot and increase with board width and thickness. Hardwood and custom-milled historical profiles can be substantially higher.
Waste also belongs in the budget. We typically plan 10 to 15 percent extra trim length for cuts, defects, long-piece layout, and mistakes. A homeowner buying exactly 100 linear feet for a measured 100 linear feet of openings will almost always come up short.
Make sure bids say what is included. Painting, caulking, primer, old casing removal, disposal, drywall or plaster repair, sill or stool replacement, exterior flashing, lead-safe containment, and furniture protection are often separate line items. Two quotes can look very different until you compare the actual scope.
Timeframes and Job Sequencing
A clean interior casing job in a modern drywall home can move quickly. A professional finish carpenter may trim several simple doors in a day if materials are on site, openings are consistent, and painting is handled separately. Windows with stools and aprons take longer. Stain-grade work takes longer again because board selection, sanding, fitting, and finish protection are less forgiving.
For planning, a single interior door casing replacement may take 1 to 3 hours including removal and installation, not including paint drying time. A simple window casing replacement may take 1.5 to 3 hours. A window with a new stool, apron, jamb extensions, and wall touch-up can take 4 to 6 hours or more. Exterior trim repairs often stretch across multiple days because of demolition, drying, rot repair, flashing, priming, sealant cure time, and paint coats.
Sequence matters. For interior remodels, trim normally follows drywall finishing and flooring decisions, but it may happen before final paint. Baseboards and door casing should be coordinated so plinth blocks, casing thickness, and baseboard height meet cleanly. For exterior work, trim sequencing must coordinate with windows, doors, WRB, flashing, siding, and painting. Installing pretty exterior casing before the drainage plane is correct is backwards.
When to DIY and When to Hire a Pro
Door and window trim can be a good DIY project if the scope is small and the conditions are friendly. It becomes a professional job when the opening is irregular, the finish standard is high, or water management is involved.
Good DIY candidates
- One or two interior doors in a dry room
- Paint-grade casing using standard profiles
- Modern drywall with jambs close to flush
- Simple picture-frame window casing
- Homeowners who already own or can rent a miter saw, nailer, level, square, clamps, and sanding tools
For DIY work, buy extra material, make test cuts, and use a reveal block. Paint-grade trim is the best place to learn because small gaps can be corrected with filler and caulk if the underlying fit is reasonable.
Hire a finish carpenter or remodeling crew when
- The home has old plaster, wavy walls, or out-of-square openings
- You need stain-grade hardwood
- The trim must match historical profiles
- Windows need new stools, aprons, jamb extensions, or custom returns
- Doors have sidelites, transoms, tall casing, plinth blocks, or layered build-ups
- The work touches exterior flashing, siding, rot repair, or water intrusion
- The home was built before 1978 and painted surfaces may contain lead
Lead-safe work deserves special attention. In pre-1978 homes, disturbing painted trim can create lead dust. That changes containment, cleanup, disposal, and worker protection. Do not treat old painted casing removal like ordinary demolition until lead risk has been addressed.
Permits, Codes, and Exterior Envelope Work
Replacing interior casing only, without changing the door, window, wall, structure, egress, or electrical work, usually does not require a permit. That changes when the project expands beyond finish trim.
Permits and code review may come into play when you replace windows or exterior doors, change opening sizes, alter structural headers, affect emergency escape and rescue openings, modify safety glazing, work in a historic district, or disturb the exterior wall envelope. Local rules vary, so the authority having jurisdiction is the final answer for your address.
Also popular on Amazon

- For attaching trim, window and door casing
- Similar to finish nails but with slightly larger head and heavier gauge for window frames and door jambs
- Deep countersunk head sinks into wood, aids with concealment
- Diamond point tip, outdoor galvanized finish
- Conforms to ASTM F1667-17 standard
From a construction standpoint, the big code-related issue for exterior trim is water management. Exterior openings need flashing and integration with the water-resistive barrier. Trim should not block drainage or hide missing flashing. If a contractor proposes exterior casing replacement around leaking windows without discussing flashing, sill condition, siding tie-in, and sealant joints, the scope is incomplete.
How to Compare Trim Installation Bids
A good trim bid should make the finish level, materials, and exclusions clear. Ask for enough detail that you can compare one proposal to another without guessing.
The Tool Desk
Outbyte PC Repair FREEClear out junk files and repair common Windows errorsFree Scan →Outbyte Driver Updater FREEScan for outdated or missing drivers - takes under a minuteDriver Scan →- Openings: Number of doors, number of windows, sizes, special shapes, and whether both sides of doors are included.
- Material: MDF, finger-jointed pine, poplar, hardwood, PVC, composite, custom profile, or owner-supplied trim.
- Profile and dimensions: Casing width, stool depth, apron style, backband, plinth blocks, rosettes, head caps, and any build-up pieces.
- Removal: Whether existing casing, nails, caulk, and debris disposal are included.
- Repairs: Drywall, plaster, jamb extensions, rot repair, sill replacement, and substrate correction.
- Finish: Filling, sanding, caulking, priming, painting, staining, clear coat, and number of coats.
- Exterior details: Flashing, drip caps, WRB integration, back-priming, end-grain sealing, sealant type, backer rod, and siding tie-ins.
- Site protection: Dust control, floor protection, furniture moving, occupied-home cleanup, and lead-safe practices if applicable.
Small projects often carry a mobilization minimum. That is normal. A contractor still has to load tools, protect the work area, set up saws, make cuts, clean up, and return for paint or touch-up. If you are already planning interior painting, flooring, window replacement, or door replacement, bundling trim work can reduce the per-opening cost.
Common Mistakes That Make Trim Look Cheap
Most bad trim work is not caused by one dramatic error. It is usually a stack of small shortcuts.
- Inconsistent reveals: The casing wanders around the jamb and makes the opening look crooked.
- Assuming every corner is 45 degrees: Real openings need measured adjustments.
- Oversized caulk joints: Caulk should finish a joint, not become the joint.
- No jamb extensions: Casing bridges a recessed jamb and leaves an awkward shadow or weak fastening.
- Unsealed exterior end grain: Water wicks into wood and starts early paint failure or rot.
- Poor profile scale: Narrow casing around large openings looks under-built; ornate casing in a simple room can feel mismatched.
- Painting too soon or in the wrong sequence: Filler, caulk, primer, and finish coats need proper order and drying time.
- Ignoring old-house conditions: Plaster, settled framing, and historical profiles need custom fitting, not production shortcuts.
The cleanest trim jobs look simple because the layout was deliberate. The casing lines are even. The stool horns match. The head casing has the right weight. The paint line is sharp. The exterior joints shed water. None of that happens by accident.
Our Practical Recommendation
If you are upgrading one room, start with a mockup on the most visible door or window. Choose a casing width that matches the room scale, verify the reveal, and decide whether the rest of the house will eventually follow. For most paint-grade interiors, finger-jointed pine, poplar, or quality MDF can deliver a sharp result without overspending. Use hardwood only when you want a true stain-grade finish and are willing to pay for the material selection and craftsmanship it requires.
Quick wins for a faster PC:
Repair Windows errors before they cause bigger problemsFix Now →Fix the driver behind crashes, sound loss and screen glitchesFind Drivers →For exterior trim, spend the money on water management before ornament. That means sound substrate, correct flashing, sealed end grain, properly sized sealant joints, and materials suited to exposure. A beautiful exterior casing detail that traps water is not a premium detail; it is a future repair.
Door and window trim is one of the highest-impact finish carpentry upgrades in a home because it is visible in every room and around every opening. Done well, it makes walls look straighter, doors feel more substantial, and windows look intentionally built into the house. Done poorly, it advertises every shortcut. The difference is careful prep, consistent layout, right-sized materials, and finish work that respects the building underneath.
Frequently Asked Questions
How much does it cost to install door and window trim in 2026?
Most interior door and window casing runs about $5 to $13 per linear foot installed. Homewyse’s May 2026 figures list general trim at $8.25 to $12.37 per linear foot and window trim molding at $10.01 to $15.34 per linear foot. Exterior trim commonly runs $6 to $15 per linear foot, with larger projects ranging from about $500 to $9,000.
What reveal should door and window casing have?
A common reveal is about 3/16 inch from the inside edge of the jamb to the inside edge of the casing. The exact number can vary by profile and style, but consistency around the full opening is what makes the trim look professional.
What is the best material for interior door and window trim?
For paint-grade interiors, primed MDF is economical and smooth, while finger-jointed pine or poplar is more durable at edges and better near moderate wear. For stain-grade work, clear pine, oak, maple, or another hardwood is better, but it requires cleaner cuts and careful grain and color matching.
Can I install door and window trim myself?
Yes, if the project is simple, interior, paint-grade, and the jambs are close to flush with modern drywall. Hire a pro for stain-grade trim, old plaster, historical profile matching, arched or bay windows, jamb extensions, exterior trim, flashing work, rot repair, or possible lead paint in pre-1978 homes.
Do I need a permit to replace trim?
Replacing interior casing only usually does not require a permit. Permits may be required if you replace windows or doors, change opening sizes, alter headers, affect egress, modify safety glazing, disturb the exterior envelope, or work in a historic district. Local rules control.
Why does exterior window trim cost more than interior trim?
Exterior trim has to manage weather. The job may include rot repair, siding removal, flashing, drip caps, water-resistive barrier tie-ins, back-priming, end-grain sealing, sealant joints, ladders or scaffolding, and exterior paint. Those details add labor but protect the wall from water damage.
Outdated Drivers Are Slowing You Down
One free scan finds every outdated or missing driver and matches the right update for your exact hardware.Free scan · exact hardware matchWindows Errors? Fix Them Before They Spread
Repair common Windows errors and clear accumulated junk for a smoother, more stable PC - no reinstall needed.Free scan · no reinstallQuick Recap
Product prices and availability are accurate as of the date/time indicated and are subject to change. Any price and availability information displayed on Amazon at the time of purchase will apply.

