Some links on this page are affiliate links: if you buy through them we may earn a commission, at no extra cost to you.
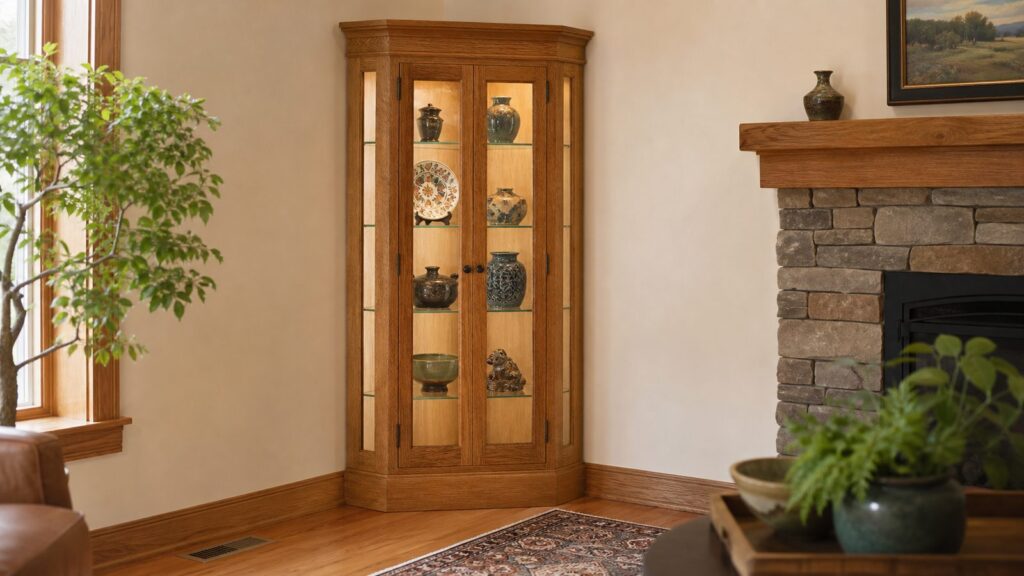
A good corner curio cabinet woodworking plan starts with the room, not the saw. The cabinet has to fit two walls, clear baseboards and trim, carry glass safely, open without hitting furniture, and stay anchored when loaded with collectibles. For most homes, the best design is a plywood carcass with solid-wood face frames, glass doors, adjustable shelves, a removable lighting access area, and a hidden anti-tip connection into studs or blocking.
For a typical freestanding corner curio cabinet, plan on a height of 60 to 78 inches, wall legs of 18 to 30 inches each, a front face width of about 24 to 36 inches, and shelf spacing of 10 to 14 inches. A DIY build usually lands around $350 to $1,500 or more in 2026 materials, depending on plywood, hardwood, tempered glass, lighting, hardware, and finish. A custom shop-built cabinet can cost far more, especially if it is scribed into an uneven corner, finished to match existing trim, or wired for built-in lighting.
As an Amazon Associate I earn from qualifying purchases.
Do these 3 things before closing this tab:
1Repair Windows errors before they cause bigger problems2Fix the driver behind crashes, sound loss and screen glitches3Clear out junk files and repair common Windows errorsOn our job sites, the projects that go well all have the same pattern: the corner is measured carefully, the cabinet has some room to be scribed or shimmed, the glass is ordered after the opening is confirmed, and the lighting is planned before assembly. The cabinet may look delicate when finished, but the planning needs to be sturdy and exact.
Start With the Type of Corner Cabinet You Actually Need
There are three practical versions of a corner curio cabinet, and they should not be designed the same way.
#1 Best Overall

- 【6-Roll 12V Black PCB LED Strip in Parallel】: 6-in-1 COB LED strips installed in parallel, controlled by a single sensor. Black PCB board with 320 LEDs/M, featuring efficient heat dissipation, high flexibility, uniform light distribution, enhanced luminous efficacy, and exceptional color rendering index (CRI>90). Eliminates dark spots entirely. Creates brighter, more even, and softer lighting effects. Ideal for interior applications including acoustic panel lighting, display cabinet illumination, cabinet lighting, kitchen lighting, shelf lighting, and TV backdrop wall decoration.
- 【Touch and Hand-Activated Dimmer Switch】:The COB light strip features two control methods: touch sensing and hand-sweep sensing. Press and hold the dimmer switch to adjust brightness (10% to 100%), or press briefly to turn the LED strip Light on/off. This switch is specifically designed for installation behind wooden panels (e.g., cabinets, wardrobes, shoe cabinets) or glass mirrors. Its concealed switch design allows installation without drilling.
- 【Customizable Length】: The Black PCB LED Strip Light is easy to cut to size, featuring cutting marks approximately every 2.5 cm. You can trim it to fit the exact dimensions of cabinets, wardrobes, shoe cabinets, display cases, wall decorations, and more, making it suitable for most applications.
- 【Flexible and Convenient Installation】: Under cabinet lighting offers versatile design to accommodate diverse needs and spaces. Featuring strong adhesive backing, the LED strip lights enable quick and effortless installation. Simply clean the surface, peel off the backing, and attach—no drilling or tools required.
- 【Versatile Applications】: Black PCB COB LED Strip Light can be used for wine cabinets, display cases, toy cabinets, shoe cabinets, showcases, kitchen cabinets, TV Background,Acoustic panel,wall decorations, and more. You can decide how many led light strips to use based on your needs.
Freestanding Furniture Cabinet
This is a movable cabinet that sits in the corner like a piece of furniture. It may have a triangular or pentagonal footprint, glass doors, a finished top, and a furniture base. It still needs an anti-tip strap or hidden bracket if it is tall, but it does not have to be permanently scribed to the walls.
This is the best DIY option for most woodworkers because it can be built in the shop, finished on sawhorses, and moved into place. A common size is 72 inches tall, 24 inches along each wall, and 30 to 34 inches across the front face.
Free tools Windows power users keep installed
One-click scans. No signup required.
Semi-Built-In Corner Cabinet
A semi-built-in cabinet is still a cabinet box, but it is trimmed to look integrated with the room. It may sit over the baseboard, receive small scribe strips, and tie into nearby casing or crown. This approach is common when the homeowner wants a custom look without opening walls.
Expect more layout time. The cabinet needs a consistent reveal against walls that may not be flat, plumb, or square. We typically allow 1/4 to 3/4 inch of scribe material at the back edges rather than forcing the cabinet tight to drywall.
True Built-In Cabinet
A true built-in is attached to framing, trimmed into the room, and often finished in place. If lights are hardwired, if outlets are moved, or if wall framing is changed, permits and licensed electrical work may apply depending on local rules. A true built-in can look excellent, but it has the highest finish expectations and the least forgiveness.
Measure the Corner Before You Draw the Cabinet
Do not assume the room corner is 90 degrees. Older homes, remodels, plaster walls, and even new drywall can vary enough to make a tight cabinet bind at the back and gap at the face. Before cutting plywood, make a simple worksheet and record these numbers:
Quick wins for a faster PC:
Repair Windows errors before they cause bigger problemsFix Now →Fix the driver behind crashes, sound loss and screen glitchesFind Drivers →- Wall A available length: measure from the corner to the nearest door casing, window casing, outlet, radiator, or furniture obstruction.
- Wall B available length: take the same measurement on the other wall.
- Corner angle: check with an angle finder or make a cardboard template.
- Baseboard height and projection: record height, thickness, shoe molding, and any cap detail.
- Floor slope: use a 4-foot level and note the amount of shim needed across the cabinet footprint.
- Ceiling clearance: measure if the cabinet is taller than 72 inches or if crown molding will be added.
- Outlet location: measure height from floor and distance from the corner on both walls.
- Door swing: confirm the cabinet door can open at least 90 degrees without hitting a wall, sofa, table, or adjacent cabinet.
- Desired shelf spacing: measure the tallest item you plan to display and add 1 to 2 inches of handling clearance.
For a first build, make a full-size footprint template from cardboard, hardboard, or scrap plywood. Set it in the corner and mark where it hits baseboard, shoe molding, floor humps, and outlet plates. Ten minutes with a template can save several hours of re-cutting face frames later.
Recommended Dimensions for a Practical Corner Curio
A corner curio cabinet needs enough depth to display objects without becoming a bulky triangle that eats the room. These dimensions work well in most living rooms, dining rooms, hallways, and offices.
| Cabinet Part | Typical Dimension | Builder Notes |
|---|---|---|
| Overall height | 60 to 78 inches | 72 inches is a good standard height; taller cabinets need stronger anchoring and careful delivery planning. |
| Wall legs | 18 to 30 inches each | Measure from the back corner along each wall. Larger wall legs increase shelf depth quickly. |
| Front face width | 24 to 36 inches | Wide enough for a usable glass door but narrow enough for a corner location. |
| Cabinet depth at center | 14 to 22 inches | Depth depends on whether the footprint is triangular or pentagonal. |
| Shelf spacing | 10 to 14 inches | Use adjustable pins so the cabinet can handle different display pieces. |
| Toe or plinth height | 3 to 4 inches | Furniture bases can be shorter; built-ins often align with room base trim. |
| Door rail and stile width | 1 3/4 to 2 1/4 inches | Keep glass doors stiff without making the frame visually heavy. |
A pentagonal cabinet is usually easier to build than a pure triangle because it gives you a flat front for doors and a little more control over shelf shape. A common layout uses two back sides against the walls, two angled front returns, and one flat front door plane. That shape also makes it easier to install concealed hinges or glass-panel doors.
Materials and Hardware That Hold Up
For the carcass, 3/4-inch cabinet-grade plywood is the practical choice. It is more stable than solid wood, resists seasonal movement, and gives consistent strength for sides, top, bottom, and fixed shelves. In 2026 retail pricing, 4-by-8 hardwood plywood sheets commonly range from about $40 to $125 for basic birch or maple options and $150 to $225 or more for premium white oak, marine-grade, or higher-grade veneer panels.
Recommended Free Tools
Use solid hardwood where the cabinet is touched and seen: face frames, door rails and stiles, shelf nosing, applied trim, and base details. Maple is clean and durable for painted cabinets. White oak gives a strong modern or Craftsman look. Cherry and walnut are excellent for furniture-grade stained work but raise cost quickly.
For the back, use 1/4-inch plywood if the cabinet will sit against a wall, or a mirror panel if you want more reflection and depth. If you use a mirror, plan the rabbet or retainer clips before assembly. A mirror back can make a small corner cabinet feel larger, but it also shows dust, wiring, and uneven shelf alignment.
For joinery, do not rely on butt joints and brads alone. Dados and rabbets give the cabinet box more glue surface and help keep the shape square during assembly. Confirmat screws, pocket screws in hidden locations, biscuits, dowels, or loose tenons can all work when used correctly. The main requirement is that the cabinet remains rigid before the glass goes in.
Rank #2
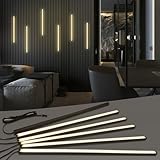
- 𝐅𝐮𝐬𝐞𝐝 𝐁𝐥𝐚𝐜𝐤 𝐂𝐨𝐥𝐥𝐞𝐜𝐭𝐢𝐨𝐧: This wall panel lights set Includes 6-piece of 16-inch 12V black LED strip lights. These slat wall lights feature black aluminum profiles, matte black diffuser covers and 3.1m black extension cables for flexible wiring. The 𝟎.𝟒-𝐢𝐧𝐜𝐡 𝐰𝐢𝐝𝐞 all-black wall panel LED lights seamlessly blends into slat panel gaps, easy to conceal and ideal for decorative black, matte black, gray oak, teak and black walnut wood slat wall panels etc. (𝐍𝐨𝐭𝐞: 𝐈𝐏𝟑𝟎 𝐍𝐨𝐭 𝐖𝐚𝐭𝐞𝐫𝐩𝐫𝐨𝐨𝐟 𝐖𝐢𝐫𝐞𝐝 𝐋𝐢𝐠𝐡𝐭 𝐒𝐭𝐫𝐢𝐩 𝐡𝐞𝐢𝐠𝐡𝐭: 𝟎.𝟒". 𝐏𝐚𝐧𝐞𝐥 𝐭𝐡𝐢𝐜𝐤𝐧𝐞𝐬𝐬 ≥𝟎.𝟒𝟑" 𝐢𝐬 𝐫𝐞𝐪𝐮𝐢𝐫𝐞𝐝 𝐟𝐨𝐫 𝐟𝐥𝐮𝐬𝐡 𝐢𝐧𝐬𝐭𝐚𝐥𝐥𝐚𝐭𝐢𝐨𝐧.)
- 𝐄𝐚𝐬𝐲 𝐖𝐢𝐫𝐢𝐧𝐠 & 𝐒𝐞𝐭𝐮𝐩: Each acoustic panel light comes with a 10‑cm cable, plus six 2‑m and six 1‑m extension cables for flexible layout matching. These wood panel lights supports screw‑clip or heavy‑duty double‑sided tape mounting for secure, long‑term installation. 12 black peel‑and‑stick cable clips are included for clean wire management, perfect for recording rooms and acoustic‑wall lighting retrofits
- 𝐃𝐢𝐦𝐦𝐚𝐛𝐥𝐞 & 𝐒𝐦𝐚𝐫𝐭 𝐌𝐞𝐦𝐨𝐫𝐲 𝐅𝐮𝐧𝐜𝐭𝐢𝐨𝐧: These LED strip lights for wood slat wall panels feature sensitive touch control. LED wall lights fully dimmable 10-100%, Light tap to turn LED panel lights on/off, long press for 10‑100% stepless brightness adjustment. Tailor your ideal mood lighting vibe for movie nights, leisure time or daily home use. This wall panel lights feature a built‑in memory feature, automatically recalling your last brightness setting when powered on
- 𝐃𝐢𝐯𝐞𝐫𝐬𝐞 𝐏𝐥𝐚𝐜𝐞𝐦𝐞𝐧𝐭 𝐎𝐩𝐭𝐢𝐨𝐧𝐬: Crafted for fluted wood panels, acoustic panels and WPC boards, these LED light wall panels serve as decorative ambient lighting for living rooms, bedroom headboards, hallways, home theaters and kitchen under cabinets. The soft 3000K warm glow from these LED panel lights highlights layered panel textures, creating a cozy, elegant ambiance to elevate your feature walls
- 𝐇𝐢𝐠𝐡-𝐂𝐑𝐈 𝐅𝐥𝐢𝐜𝐤𝐞𝐫-𝐅𝐫𝐞𝐞 𝐋𝐢𝐠𝐡𝐭𝐢𝐧𝐠: Eco-friendly lead-free construction makes our LED recessed lighting safe for daily use. These slat wall LED lights provide CRI>90 flicker-free light with zero voltage drop to reduce eye strain. Working on safe 12V low voltage, the glow LED strip lights for wood panels are energy-saving, weather-resistant and come with a 50,000-hour lifespan
Glass Doors and Shelves: Plan Them Like Structural Parts
Tempered glass is strongly preferred for curio doors and shelves because it breaks into safer pieces than ordinary annealed glass. It also must be ordered to final size. Tempered glass cannot be cut after tempering, so confirm every opening before placing the order.
The Tool Desk
Outbyte PC Repair FREEClear out junk files and repair common Windows errorsFree Scan →Outbyte Driver Updater FREEScan for outdated or missing drivers - takes under a minuteDriver Scan →For doors, 1/8-inch or 3/16-inch tempered glass is common depending on door size and frame design. For shelves, 1/4-inch tempered glass is a common starting point for light display use, but thickness, edge quality, shelf pin spacing, and the expected load all matter. Heavy ceramics, trophies, mineral collections, books, and stacked objects can overload thin glass, especially on triangular shelves where the bearing points are awkward.
Custom glass pricing varies widely. In 2026, cut-to-size glass can range from about $20 to $200 per square foot depending on glass type, edgework, local minimums, shipping, and fabrication. Some common 1/4-inch clear tempered glass estimates fall around $10 to $15 per square foot before premium options, but local minimum charges can make a small order more expensive than the square-foot math suggests.
Use polished or eased edges on exposed shelf glass. For doors, set panes into rabbets or stops so they can be replaced later. We avoid permanent adhesive-only installation on quality cabinets because it makes future glass replacement harder and can look messy through the pane. Removable wood stops, clear retainer clips, or glazing points hidden by stops are better choices.
Lighting and Electrical Planning
Curio cabinet lighting should be designed before the cabinet is assembled. Retrofitted lighting often leaves visible wires, inaccessible drivers, awkward switches, or hot spots on the top shelf.
What’s actually slowing this PC down?
Pick the symptom - the matching free tool is one click away.
Low-voltage LED tape, puck lights, or slim linear fixtures are the usual choices. Warm white light in the 2700K to 3000K range suits wood finishes and collectibles. A 90+ CRI LED is worth the small upgrade when glass, ceramics, artwork, or heirlooms are being displayed. Plan a wire chase at the back corner, a concealed driver location, and a removable top, rear panel, or service cavity so failed parts can be replaced.
If the cabinet plugs into an existing receptacle with a listed low-voltage power supply, the work is usually simpler. If you are adding a new outlet, relocating a receptacle, hardwiring lights, or modifying building wiring, local electrical code and permit rules can apply. In many US jurisdictions, electrical work must follow adopted code requirements, and some work must be performed by a licensed electrician. The safe approach is simple: build the cabinet, plan the access, and have a licensed electrician handle any new or modified household wiring.
Also think about heat. LEDs run cooler than older halogen or incandescent curio lights, but drivers still need ventilation and access. Do not bury a power supply permanently behind a sealed back panel.
Cost to Build or Buy in 2026
A DIY corner curio cabinet is not automatically cheaper than buying a mass-market cabinet, but it can deliver a better fit, stronger construction, and the exact finish you want. The cost depends heavily on glass, hardwood species, finish quality, and whether lighting is simple plug-in LED or part of a built-in installation.
| Option | Typical 2026 Cost | What Drives the Price |
|---|---|---|
| Mass-market lighted corner curio | $230 to $700+ | Imported construction, standard sizes, thinner materials, limited finish choices. |
| DIY plywood and hardwood build | $350 to $1,500+ | Plywood grade, hardwood species, tempered glass, hinges, finish, lighting, specialty bits, and jigs. |
| Single custom cabinet | About $1,256 to $1,534+ before upgrades | Shop labor, cabinet complexity, glass, finish, delivery, and installation. |
| Full custom cabinetry benchmark | $500 to $1,200+ per linear foot | Regional labor, custom finish, built-in trim, inset doors, electrical work, wall repairs, and premium materials. |
| Higher-cost installed markets | $500 to $1,500 per linear foot | Urban labor rates, delivery constraints, finish matching, and installation complexity. |
National 2026 custom-cabinet benchmarks put the average custom cabinet project around $7,421, with a common range of roughly $2,797 to $12,928. That is for broader cabinet work, not just one curio, but it gives useful context: once you ask a shop to build, finish, deliver, scribe, install, and possibly coordinate electrical work, the labor becomes a major part of the price.
Sheet-good pricing also moves. Plywood pricing data in 2026 showed a rise from February to June, so fixed numbers should be treated as planning ranges. Before buying, price the actual sheet count, veneer grade, and hardwood at your local lumberyard.
Woodworking Plan: Build Sequence
1. Make the Footprint Template
Cut a full-size template of the cabinet footprint from cardboard, hardboard, or scrap plywood. Mark the two wall legs, the front face, the door swing, and any baseboard notches. If the room corner is out of square, decide whether the cabinet will sit slightly forward, receive scribe strips, or have a relieved back corner.
2. Cut the Carcass Parts
Cut the side panels, top, bottom, fixed shelf, and back structure from 3/4-inch cabinet-grade plywood. Use a track saw, table saw, or straightedge guide. Label every part. For a pentagonal cabinet, keep matching angled parts together so small angle variations do not stack up across the build.
Rank #3

- Complete WiFi LED Recessed Lighting Kit: This 3000K Black Aluminum LED Recessed Lighting Kit includes 6 light bars in 3 customizable lengths: two pieces of 16in, two pieces of 24in, and two pieces of 36in (0.4in*0.4in). The kit comes with all necessary accessories: Power adapter, splitter box, WiFi controller, remote control, cable clips, and spare double-sided tape for easy installation and future repositioning
- Dual Function App & Voice Control: In addition to the basic functions on the remote control, you can connect to the mobile app via WiFi, allowing the Smart led recessed lighting kit for wall panels to work with Alexa and Google Assistant for intelligent voice control. You can also use the app for more precise dimming, group control, music sound control, microphone sound control, 8 built-in scene modes, candle mode, and more
- Easy Tool-Free Installation: This 3000K wall lights recessed uses high-tack adhesive for a peel-and-stick setup on any clean, flat surface. No drilling, wiring, or professional tools are needed for a seamless fit. It's versatile enough for kitchens, staircases, living room grid walls, and acoustic walls
- Safe and Sound Operation: Operating on a 24 V low-voltage system, the LED strip lights generate extremely low heat during operation, avoiding wall deformation or safety hazards caused by high temperatures, suitable for wood wall panels decor. It features a series of circuit protection measures and excellent energy efficiency, ensuring long-term safe and stable operation
- Warranty Coverage: Backed by a 2-year warranty, providing support and assistance whenever you need it for your HoliXLights product
3. Rout Dados and Rabbets
Rout dados for fixed shelves and rabbets for the back panel. A 1/4-inch back set into a rabbet helps square the cabinet and gives a cleaner interior. Dry-fit the case before glue. Measure diagonals or use a full-size square reference to confirm the front opening is true.
4. Drill Adjustable Shelf Holes
Drill shelf-pin holes before assembly while the panels are flat. Use a shelf-pin jig and keep the hole rows aligned from side to side. For triangular or pentagonal shelves, plan continuous rear support or blocked bearing points. shelf pins alone may not give enough support at the back point of a triangular glass shelf.
5. Assemble the Cabinet Box
Glue and fasten the carcass with dados, rabbets, screws, clamps, and square blocks. Check the front opening as you go. A cabinet can be technically square at the back and still have a twisted face if clamps are uneven.
6. Build the Face Frame
Use 3/4-inch solid hardwood for stiles, rails, and any front posts. Typical face-frame stock is 1 1/2 to 2 inches wide, with door stiles often 1 3/4 to 2 1/4 inches wide. Attach the face frame with glue and clamps, biscuits, pocket screws from the back, or brads used only as temporary alignment help.
PC Slower Than It Used to Be?
A free scan shows the junk files, broken settings and background clutter dragging Windows down - then fixes them in one click.Free scan · Windows 10 & 11Outdated Drivers Are Slowing You Down
One free scan finds every outdated or missing driver and matches the right update for your exact hardware.Free scan · exact hardware match7. Build Glass Doors
Build doors with stable hardwood rails and stiles. Leave rabbets for glass and use removable stops after finishing. Inset doors look refined but demand tighter tolerances. Overlay doors are more forgiving for a first build. Test the hinges before finish and allow consistent reveals, usually about 1/16 to 3/32 inch on inset work.
8. Fit Shelves, Back, and Lighting Access
Cut wood shelves or order glass shelves only after the case is assembled and measured. If using LED lighting, drill wire passages, mount aluminum LED channels if needed, and confirm driver access. Do this before finish so you are not drilling through a completed interior.
9. Sand, Finish, and Install Glass
Sand plywood veneer carefully. It is easy to sand through thin face veneer on edges and corners. Finish the interior before installing glass. Dust, fingerprints, overspray, and dried glue are very visible inside a lighted display cabinet.
10. Set, Level, and Anchor
Set the cabinet in place, shim it level, and fasten it to studs or blocking. For a freestanding cabinet, use a furniture anti-tip kit secured into framing. For a built-in, use hidden screws through structural cabinet members into framing. Drywall anchors alone are not the right primary restraint for a tall cabinet with glass doors.
Glass Shelves Versus Wood Shelves
Glass shelves keep the cabinet bright and let light pass through the display. They are best for collectibles, glassware, small sculptures, awards, and decorative objects. They also show dust and fingerprints, and they need careful sizing and support.
Wood shelves are stronger for heavier items and easier to make in the shop. A 3/4-inch plywood shelf with solid hardwood nosing can carry more everyday load than a thin glass shelf and is less expensive to replace. The tradeoff is that wood shelves block light and can make a narrow corner cabinet feel darker.
A mixed approach works well: glass shelves in the upper display area and one fixed wood shelf near the lower third to stiffen the case. That fixed shelf can also hide lighting wiring or create a lower storage compartment.
Safety, Anchoring, and Permits
A tall corner cabinet can feel stable because it touches two walls, but it still needs anchoring. Glass doors, open doors, and loaded shelves move the center of gravity forward. Children, pets, cleaning, and normal use add real tipping risk.
Anchor into studs, blocking, or another structural member. If you are building from scratch, include a hidden anchor rail near the top back of the cabinet. A 3/4-inch plywood or hardwood rail gives you a strong place to drive screws through the cabinet and into framing. For finished furniture, use a rated anti-tip strap or bracket and install it exactly into framing.
Permits are usually not triggered by placing a freestanding cabinet in a room. They may become relevant when you modify electrical wiring, add an outlet, alter framing, or create a built-in installation as part of a larger remodel. Local rules vary, so check your city or county requirements before roughing in wiring or changing walls. When household electrical work is involved, hire a licensed electrician.
Rank #4

- Increased diameter: The enlarged 7.2-inch diameter, fits 5/6-inch cans and perfect to covering rough drywall or hide oversized holes.
- Selectable Colors: Amico can lights have 5 color temperature selectable, 2700K, 3000K, 4000K, 5000K, 6000K. Don't worry about what color temperature to buy, avoid the hassle of returning or exchanging these due to inappropriate color temperature.
- Simple Installation: Saves you time and electrician costs. 5/6 inch led recessed can lights to have universal E26 base makes installation as easy as a bulb, can be installed independently without an electrician, and will only take you 3 minutes to install one.
- High Brightness: Our led can lights use the world's leading LED chips with higher lumens and lower power. 1050LM consumes 12 Watts, which equals to 110W halogen light, saving you up to 90% in energy costs.
- Eye protection: The brightness of the led flat can lights can be smoothly adjusted from 5% to 100%, you can choose the most comfortable brightness for your eyes. Note: This light is compatible with most dimmers on the market, except for the smart dimmer.
When to DIY and When to Hire a Pro
DIY makes sense if you have a table saw or track saw, router, clamps, accurate measuring tools, and experience building square cabinet boxes. It also makes sense if you are using a plug-in LED system, standard flat tempered glass, and a painted or clear finish you can execute cleanly.
Hire a cabinetmaker or finish carpenter if the cabinet must match existing built-ins, fit tightly into an out-of-square historic corner, include inset glass doors, carry heavy glass shelves, or receive a high-end stained finish. Hire an electrician if you need a new outlet, hardwired lighting, a wall switch, or concealed household wiring.
Quick wins for a faster PC:
Scan for outdated or missing drivers - takes under a minuteDriver Scan →Repair Windows errors before they cause bigger problemsFix Now →The labor premium is often worth it when the cabinet is part of a formal dining room, entry, library, or living room where flaws are obvious. Curio cabinets are unforgiving because glass reflects every uneven reveal, dusty corner, and crooked shelf line.
Common Mistakes to Avoid
- Building to a perfect 90-degree drawing without checking the actual wall angle.
- Forgetting baseboards, crown molding, outlet covers, and floor slope.
- Ordering tempered glass before the finished openings are confirmed.
- Using ordinary glass for doors or shelves where tempered glass is the better choice.
- Skipping a shelf load target before choosing glass thickness and support spacing.
- Trying to add lighting after the cabinet is finished.
- Gluing solid-wood panels rigidly into frames without allowing seasonal movement.
- Leaving plywood edges exposed where solid nosing or edge banding belongs.
- Using brads and butt joints as the main structure for a tall cabinet.
- Installing the cabinet without anchoring it to framing.
Maintenance and Long-Term Use
Design the cabinet so it can be serviced. LED drivers fail eventually. Hinges need adjustment. Glass needs cleaning. Shelf pins get moved. A removable top panel, back access panel, or concealed service cavity is a small detail that makes the cabinet much easier to own.
Keep the cabinet away from HVAC blasts, direct sun, and damp exterior walls when possible. Wood moves with humidity, and glass doors make small seasonal shifts easier to see. Leave proper reveals at doors, use floating panels where solid wood is involved, and choose plywood for broad cabinet surfaces.
For cleaning, use glass cleaner on a cloth rather than spraying into the cabinet. Overspray can damage wood finish and collect in shelf-pin holes. Once or twice a year, check the anchor, hinge screws, shelf pins, and lighting connections.
Bottom Line
A corner curio cabinet is a rewarding woodworking project when it is planned like both furniture and built-in cabinetry. Use stable plywood for the case, solid hardwood for the visible frame and trim, tempered glass for doors and shelves, and a real anchor into framing. Measure the room before designing, leave room for scribing, plan lighting access early, and order glass only after the cabinet openings are final.
For a capable DIY woodworker, a clean custom corner curio can be built over two to four weekends, plus finish curing and glass lead time. For a built-in or high-end display cabinet, professional help can quickly pay for itself in fit, finish, safety, and long-term serviceability.
Frequently Asked Questions
How much does it cost to build a corner curio cabinet in 2026?
A DIY corner curio cabinet typically costs about $350 to $1,500 or more in materials. Plywood, hardwood species, tempered glass, hinges, finish, lighting, and specialty tools drive the final number. A custom cabinetmaker will usually cost much more once design, finish, delivery, and installation are included.
What wood is best for a DIY corner curio cabinet?
Use 3/4-inch cabinet-grade plywood for the carcass because it is stable and strong. Use solid hardwood for face frames, doors, trim, and shelf nosing. Maple is excellent for paint, while white oak, cherry, and walnut are common choices for stained furniture-grade cabinets.
What’s actually slowing this PC down?
Pick the symptom - the matching free tool is one click away.
Do I need a permit to install a built-in curio cabinet?
A freestanding cabinet usually does not require a permit. A permit may be required if you add or move electrical wiring, alter framing, or make the cabinet part of a larger built-in remodel. Local rules vary, so check with your city or county before starting that work.
Can I add lights to a curio cabinet myself?
You can usually install a listed plug-in low-voltage LED system yourself if it uses an existing outlet and does not modify household wiring. Hire a licensed electrician for new outlets, hardwired lights, wall switches, or concealed building wiring.
Should curio cabinet shelves be glass or wood?
Glass shelves keep the display bright and allow light to pass through, but they must be tempered, properly supported, and sized for the expected load. Wood shelves are stronger and easier to build, but they block more light. Many good cabinets use glass shelves above and one fixed wood shelf for structure.
Can tempered glass be cut after I order it?
No. Tempered glass must be cut, edged, and drilled before tempering. Measure finished cabinet openings carefully and order the glass only after the doors, shelf supports, and case are confirmed.
Quick Recap
Product prices and availability are accurate as of the date/time indicated and are subject to change. Any price and availability information displayed on Amazon at the time of purchase will apply.

