Some links on this page are affiliate links: if you buy through them we may earn a commission, at no extra cost to you.
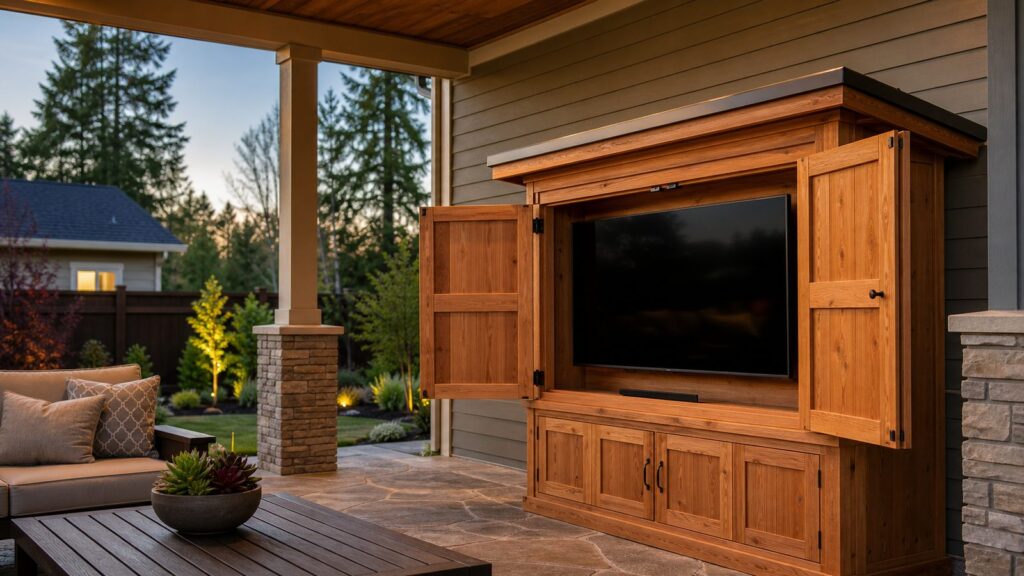
A good outdoor TV cabinet is not just a wooden box with doors. It is a small exterior wall assembly that has to shed water, breathe, hold serious weight, protect wiring, and still let you service the TV later. If you build it like indoor furniture, the failure usually shows up fast: swollen plywood edges, rusty hinges, trapped heat, condensation behind the screen, or a mount pulling against siding that was never meant to carry the load.
For most homeowners, a practical DIY wall-mounted outdoor TV cabinet costs about $250 to $750 in materials before the TV, mount, and any electrical work. A more upgraded build with cedar, stainless hardware, gas struts, screened vents, cable glands, and a better mount can run $500 to $900. A professionally built custom outdoor TV cabinet commonly lands around $1,200 to $3,500+, excluding the TV and major electrical work.
As an Amazon Associate I earn from qualifying purchases.
On our job sites, we treat outdoor TV cabinets as weather-management projects first and woodworking projects second. The cabinet has to manage rain, sun, heat, wind, insects, and service access. The trim details matter, but the hidden details matter more.
Start With the Site, Not the Cabinet
Before cutting plywood, stand where the TV will go and answer a few practical questions. This step saves more money than any clever material choice.
#1 Best Overall

- Waterproof, Impact Resistant, and UV resistant. MAX TV dimensions- (LxHxD) 50.4 x 30.10 x 4.25 inches. Maximum depth TV- 4 inches
- Front Cover is fully removable for unimpeded viewing and sound from TV
- TV Wall Mount Bracket is built from solid, heavy gauge steel with a durable coated finish.
- Fits most flat screen TVs from 45 inch to 55 inch (diagonal screen)
- 2 piece hard shell ABS plastic TV cover - Assembly Required
- Sun direction: Check glare at the actual time you plan to watch TV. A 6 p.m. west-facing patio can make a standard indoor TV nearly unusable.
- Rain exposure: A covered porch is very different from an open fence wall. Wind-driven rain can reach places that look protected on a calm day.
- Viewing distance: A 55-inch screen usually feels comfortable around 7 to 11 feet away. A 65-inch screen often wants about 8 to 13 feet.
- Mounting structure: The cabinet, TV, doors, and mount can easily exceed 100 pounds. You need studs, blocking, masonry, or another real structural backing.
- Power location: Outdoor receptacles need proper weather protection and GFCI protection. Do not run an indoor extension cord through the cabinet wall.
- Wi-Fi and signal: Check streaming performance with the door closed if you plan to keep a streaming device inside.
- Service access: You should be able to remove the TV, reach mount bolts, unplug devices, and replace a cable without dismantling the cabinet.
A cabinet on a fully covered patio can be simpler. A cabinet on a fence, pergola post, detached pavilion, or masonry wall needs more careful detailing because water and wind have more ways to get behind it.
Choose the Right Protection Strategy
A cabinet can protect a TV from direct rain and sun, but it does not turn an indoor TV into an outdoor-rated TV. That distinction matters. Outdoor TVs are built with weather-sealed housings, brighter panels, anti-glare glass or coatings, and wider temperature tolerances. A wood cabinet helps, but heat and humidity can still shorten the life of an indoor screen.
Recommended Free Tools
| Option | Typical 2026 Cost | Best For | Main Tradeoff |
|---|---|---|---|
| DIY wood cabinet plus indoor TV | $250-$900 for cabinet materials, plus TV and mount | Covered patios, budget builds, occasional use | Higher risk from heat, humidity, warranty issues, and replacement cost |
| Prebuilt hard TV enclosure | About $200-$750 for many 32-65 inch enclosures | Fast protection with less carpentry | Can look bulky and still needs proper mounting and power |
| Outdoor-rated TV | About $950-$5,000+ for common residential sizes | Exposed areas, sunny patios, frequent use | Higher upfront cost |
| Custom pro-built cabinet | About $1,200-$3,500+, excluding TV and major electrical | Integrated outdoor kitchens, masonry walls, premium finishes | Costs more, but solves fit, structure, and detailing cleanly |
If the TV is under a roof, used mostly in shade, and protected from wind-driven rain, a DIY cabinet can be a reasonable project. If the screen faces full sun or the cabinet will sit in a wet, exposed location, price out a true outdoor TV before assuming the DIY route is cheaper. Replacing a failed indoor TV every couple of seasons can erase the savings.
Recommended Cabinet Size and Layout
Build the cabinet around the actual TV, not the advertised screen size alone. A “55-inch TV” describes the diagonal screen, not the outside dimensions. Most 55-inch TVs are roughly 48 to 50 inches wide and 28 to 30 inches tall. Many 65-inch TVs are roughly 57 to 58 inches wide and 33 to 35 inches tall.
As a rule, design the inside of the cabinet 4 to 6 inches wider and taller than the TV where possible. That gives you room for airflow, cable bends, mounting movement, and future service. For depth, allow for the TV thickness, wall mount, plugs, streaming device, and rear ventilation. Many builds work well with an interior depth of 5 to 8 inches, but a full-motion mount may need more.
Example Size for a 55-Inch TV
- Typical TV body: about 49 inches wide by 29 inches tall
- Recommended inside cabinet opening: about 55 inches wide by 35 inches tall
- Recommended cabinet depth: about 6 to 8 inches for a slim fixed or tilting mount
- Top overhang: at least 1 inch on front and sides; 1 1/2 to 2 inches is better in exposed spots
- Bottom drainage gap or weep openings: 1/4 to 1/2 inch total open path, screened where insects are a concern
Do not make the cabinet tight around the TV just because it looks cleaner. Tight boxes trap heat, pinch cords, and make repairs miserable. A slightly larger cabinet with good trim proportions usually looks better and lasts longer.
Outdated Drivers Are Slowing You Down
One free scan finds every outdated or missing driver and matches the right update for your exact hardware.Free scan · exact hardware matchPC Slower Than It Used to Be?
A free scan shows the junk files, broken settings and background clutter dragging Windows down - then fixes them in one click.Free scan · Windows 10 & 11Materials That Hold Up Outside
Common DIY outdoor TV cabinet material lists include 1/2-inch exterior or pressure-treated plywood, pressure-treated 2x framing, treated fence boards or cedar cladding, deck screws, hinges, a latch, stain or sealer, peel-and-stick roofing membrane, vents, and a wall-rated TV mount. That basic package can work, especially under a covered patio.
For a longer-lasting cabinet, we prefer exterior-rated materials and corrosion-resistant hardware from the start. The most common failures happen at cut edges, end grain, penetrations, hinges, outlet openings, and flat ledges where water sits. The large flat face of the cabinet is rarely the first thing to fail.
Rank #2

- Waterproof, Impact Resistant, and UV resistant. Accommodates various VESA mounting patterns including 100 mm x 100 mm, 200 mm x 100 mm, 200 mm x 200 mm, 300 mm x 200 mm, 300 mm x 300 mm, 400 mm x 200 mm, 400 mm x 400 mm
- Front Cover is fully removable for unimpeded viewing and sound from TV
- TV Wall Mount Bracket is built from solid, heavy gauge steel with a durable coated finish.
- Fits most flat screen TVs from 32 inch to 44 inch (diagonal screen). MAX TV dimensions - (LxHxD) 41.75 in. x 23.5 in. x 3.75 in.
- 2 piece hard shell ABS plastic TV cover
Good Material Choices
- Frame: Pressure-treated 2×2 or 2×4 lumber, cedar, cypress, redwood, or exterior-grade structural framing.
- Cabinet box: Exterior plywood, MDO, marine-grade plywood, PVC sheet, or composite trim boards.
- Face and doors: Cedar, cypress, redwood, treated fence boards, PVC trim, or composite boards.
- Top protection: Sloped cap, aluminum drip cap, peel-and-stick membrane under a cap board, or small metal roof detail.
- Fasteners: Stainless steel is the premium choice. Hot-dipped galvanized can work in many locations. Use fasteners rated for pressure-treated lumber.
- Finish: UV-rated exterior stain, exterior paint system, spar urethane for selected trim conditions, or manufacturer-approved coating for composites.
Be careful mixing pressure-treated lumber and metal hardware. Treated wood can be corrosive to incompatible fasteners and hinges. In coastal areas, around pools, or anywhere with heavy moisture, stainless hardware is worth the upgrade.
Tools and Supplies
A straightforward wall-mounted cabinet is within reach for a capable DIYer with normal carpentry tools. Plan on one full weekend for a simple build, or two to three weekends if you are adding custom doors, a premium finish, electrical coordination, or masonry mounting.
- Circular saw or miter saw
- Drill and impact driver
- Level, tape measure, speed square, and stud finder
- Clamps and sawhorses
- Exterior screws, structural screws, and rated mounting hardware
- Exterior wood glue where appropriate
- Hinges, latch, door pulls, and hold-open hardware
- Gas struts or mechanical supports for a flip-up door
- Screened vents or aluminum vent strips
- Exterior sealant, flashing tape, and drip cap
- Exterior primer, paint, stain, or sealer
- Wall-rated TV mount sized for the TV
If you are mounting into brick, block, stone, stucco, or concrete, you will also need the correct masonry bit, anchors, and water-management details for that wall type. Stucco and EIFS deserve extra care because a bad penetration can create hidden moisture damage.
Build the Cabinet Step by Step
1. Mock Up the TV Height
Tape the TV outline on the wall before building anything. Sit where you will watch from and check the height, glare, and door swing. Outdoor TVs are often mounted too high because builders line them up with patio trim instead of eye level. For seated viewing, the center of the screen often works best around 42 to 54 inches above the finished floor, depending on furniture height and sightlines.
2. Build a Structural Back Frame
The back frame carries the weight. Fasten it into studs, blocking, masonry, or properly designed posts. Do not rely on siding, trim, thin sheathing, or drywall anchors. For a 55- to 65-inch TV, cabinet, doors, and mount, assume the assembly may exceed 100 pounds. If you use a full-motion mount, remember that pulling the TV away from the wall increases leverage on the fasteners.
Use structural screws or bolts sized for the wall condition. On a framed wall, hit at least two studs whenever possible. On new work, add solid blocking between studs before the siding or finish goes on.
Do these 3 things before closing this tab:
1Fix the driver behind crashes, sound loss and screen glitches2Clear out junk files and repair common Windows errors3Scan for outdated or missing drivers - takes under a minute3. Assemble the Cabinet Box
Build the side panels, bottom, and top frame square and flat. Seal every cut edge before assembly, especially plywood edges and board end grain. A 1/2-inch exterior plywood box can work for smaller screens, but 3/4-inch material gives better screw holding and stiffness for larger cabinets.
Leave an intentional air path. Use low intake vents and high exhaust vents so warm air can move out of the cabinet. In hot climates, consider a thermostatically controlled fan. A sealed box may look protective, but it can trap heat and condensation around electronics.
Rank #3

- Waterproof, Impact Resistant, and UV resistant
- Front Cover is fully removable for unimpeded viewing and sound from TV
- TV Wall Mount Bracket is built from solid, heavy gauge steel with a durable coated finish.
- Fits most flat screen TVs from 55 inch to 65 inch (diagonal screen) MAX TV dimensions - (LxHxD) 58.25 in. x 34.5 in. x 4.00 in. Maximum Depth TV – 4 inches
- 2 piece hard shell ABS plastic TV cover - Assembly Required
4. Detail the Top Like a Roof
The top should shed water, not hold it. Give the top a slope, add a separate cap with overhang, or install an aluminum drip cap. A flat top board with exposed end grain is one of the fastest ways to shorten the life of the cabinet.
We like a cap that overhangs the front and sides by at least 1 inch, with a drip kerf underneath so water breaks free instead of wrapping back toward the cabinet face. Flashing tape or membrane under the cap adds another layer of protection.
What’s actually slowing this PC down?
Pick the symptom - the matching free tool is one click away.
5. Add Doors That Stay Put
You can use side-opening doors, bi-fold doors, sliding panels, or a single flip-up front. The best choice depends on the patio layout. Side doors are simple, but they need catches or hold-opens so wind does not slam them. A flip-up door looks clean, but it needs rated struts or mechanical stops.
A large flip-up door acts like a sail. Use gas struts rated for the door weight and geometry, not just whatever fits in the hardware aisle. Test the door in real wind before trusting it near a TV. For a large 65-inch cabinet door, two struts are usually better than one.
6. Vent, Screen, and Drain the Bottom
Use a rainscreen mindset: let water shed, let air move, and let incidental water escape. Add screened low vents near the bottom and screened exhaust vents near the top. Keep vents protected from direct rain where possible.
At the bottom, avoid a sealed trough. Use weep openings, a small drainage gap, or a sloped bottom panel so moisture cannot sit inside the cabinet. Any insect screen should be removable or accessible for cleaning.
7. Mount the TV and Preserve Service Access
Install the TV mount to the structural backing, not just to the cabinet skin. Confirm the mount is rated for the TV size and weight. Leave enough clearance to reach release tabs, power cords, HDMI ports, and streaming devices.
A removable lower panel or side access hatch is worth the extra hour. Sooner or later you will need to change a cable, reset a device, replace a mount bolt, or remove the TV. If the only way to do that is to disassemble the cabinet, the build is too tight.
Rank #4

- 1. Upgraded Asphalt-Protected Top Panel: This outdoor TV enclosure features an upgraded top panel with a roofing-style asphalt protective layer. Compared with a standard solid wood top, this improved design helps protect the wood surface from outdoor moisture exposure and reduces the risk of warping over time, making it better suited for covered outdoor use.
- 2. Space-Saving Fold-Up Door Design: The convenient fold-up door minimizes space usage when opened and provides easy access to your outdoor TV. The upward-opening design helps reduce load on the gas struts, supporting smoother operation and longer-lasting durability.
- 3. Elegant Slim Wooden Enclosure for 65" TVs: Crafted from weather-resistant fir wood with a slim-profile design, this enclosure fits flat-screen TVs up to 65 inches. The black finish and clean cabinet-style appearance blend well with patios, decks, and outdoor entertainment areas while helping protect your TV from everyday covered outdoor conditions.
- 4. Precise Dimensions and Secure TV Fit: With actual usable interior dimensions of 59.5" × 37.2" × 10" and overall dimensions of 64.5" × 41.6" × 12.5", this enclosure provides a secure, tailored space for your TV while maintaining a compact outer profile for a clean built-in look.
- 5. Durable Double-Supported TV Mount and Installation Guidance: A heavy-gauge steel, double-supported TV mount is included to keep your TV firmly in place for enhanced stability. For best results, install the enclosure on solid surfaces such as brick, stone, wood, cement, or masonry. This unit is intended for use only under a covered patio or deck. If you encounter any quality or installation issues, our customer service team is ready to assist.
Electrical and Code Safety
Outdoor power is not a place to improvise. In the United States, outdoor receptacles generally need GFCI protection, weather-resistant components, and a weatherproof in-use cover where plugs remain connected. Local code, adopted NEC edition, and permitting rules vary, so use a licensed electrician for new circuits, new exterior receptacles, or any questionable existing outlet.
Do not run a cord through a wall, pinch a cord behind a cabinet, or hide an indoor power strip inside a damp enclosure. Use outdoor-rated covers, fittings, and cable management. Keep low-voltage cables and line-voltage wiring properly separated. If the cabinet is part of an outdoor kitchen or pavilion, coordinate the outlet location before the cabinet is built so you are not drilling awkward holes later.
Quick wins for a faster PC:
Clear out junk files and repair common Windows errorsFree Scan →Fix the driver behind crashes, sound loss and screen glitchesFind Drivers →A new exterior GFCI-protected receptacle or corrected weatherproof outlet can add a few hundred dollars to $1,000+, depending on distance to power, wall type, panel capacity, trenching, conduit, permit fees, and local labor. That number is highly local, but it is a real budget item.
Weatherproofing Details That Matter
Most outdoor cabinet failures are not dramatic. They start small: an unsealed plywood edge, a screw hole that wicks water, a hinge leaf that rusts, a flat ledge that stays wet, or a back panel that traps moisture against siding.
Use these details to extend the life of the cabinet:
- Seal all cut edges before assembly, then touch up exposed cuts after fitting.
- Use a sloped cap, drip edge, or overhanging top so rain does not sit on the cabinet.
- Keep the cabinet slightly proud of the wall or use spacers where appropriate so the back can dry.
- Flash wall penetrations, especially on stucco, siding, and masonry veneer.
- Use stainless or properly rated galvanized hardware.
- Choose exterior-rated caulk, but do not caulk every possible gap. Some gaps are needed for drainage and drying.
- Keep the bottom from becoming a water tray.
- Recoat stain or sealer on a predictable schedule, often every 1 to 3 years depending on exposure.
Painted cabinets need primer on all sides and edges, not just the visible face. Stained cedar or cypress can look excellent outdoors, but the end grain still needs extra attention.
The Tool Desk
Outbyte PC Repair FREERepair Windows errors before they cause bigger problemsFix Now →Outbyte Driver Updater FREEFix the driver behind crashes, sound loss and screen glitchesFind Drivers →Cost Breakdown for a DIY Outdoor TV Cabinet
For a typical 55-inch wall-mounted cabinet, the cabinet-only material budget usually falls into one of these ranges:
| Build Level | Material Allowance | What It Usually Includes |
|---|---|---|
| Basic pressure-treated build | $250-$500 | PT framing, exterior plywood, deck screws, basic hinges, latch, stain or sealer, simple vents, drip cap or membrane |
| Upgraded wood build | $500-$900 | Cedar or better exterior plywood, stainless screws and hinges, gas struts, lockable latch, screened vents, cable glands, quality finish |
| Custom professional build | $1,200-$3,500+ | Designed cabinet, premium materials, integrated trim, venting or fan, more complex mounting, higher-end finish |
Those prices do not include the TV. Outdoor-rated TVs remain premium products in 2026. Common residential models run roughly $950 to $5,000+ for 43- to 75-inch sizes, with full-sun and larger screens costing more. Full-shade outdoor models can start around $1,299 and climb past $4,600, while premium partial-sun and full-sun models can reach several thousand dollars.
Best Value
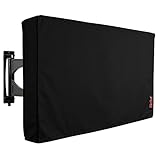
- Protect Your Outdoor TV: Protect your outdoor TV with our outdoor TV cover, featuring a long-lasting design and waterproof interior PVC coating. Our outdoor TV cover is the perfect solution for keeping your TV safe and secure, even during severe weather
- Find The Right Fit: Available in the perfect size for your outdoor TV, our cover measures 52 inch wide, 31 inch high, 5 inch deep. Before purchasing, be sure to measure your TV to ensure a proper fit
- Long-lasting Material: Our outdoor TV cover is made from heavy-duty materials, making it highly long-lasting and able to keep your TV protected for years to come. Keep your TV safe and secure with our high-quality TV cover
- Innovative Protection: Our TV cover is designed to meet your needs. In addition to offering full protection, the back flap offers extra protection for the TV stand. Enjoy your leisure time without worrying about your TV's safety
Professional carpentry pricing varies by region and scope. General carpenters commonly charge around $50 to $80 per hour, with broader ranges from $50 to $140 per hour. Worker wage data is lower than contractor billing because it does not include overhead, insurance, travel, tools, supervision, profit, and business costs.
When to DIY vs. When to Hire a Pro
DIY makes sense when the cabinet is going on a covered patio, the wall structure is easy to identify, an existing code-compliant outdoor outlet is already in the right place, and you are comfortable building square doors that will not sag. A simple hinged-door cabinet is a solid weekend project for a homeowner with basic carpentry experience.
Free tools Windows power users keep installed
One-click scans. No signup required.
Hire a pro when the project involves masonry mounting, stucco or EIFS penetrations, second-story work, a large 65- to 75-inch display, a full-motion mount, custom integration into an outdoor kitchen, or a new electrical outlet. Also bring in help if your HOA has exterior appearance rules or if the cabinet needs to match existing siding, trim, stone, or built-ins.
On our projects, the pro value is usually not just cleaner trim. It is correct backing, better water management, hardware that fits the door weight, safer power planning, and a cabinet that can be serviced later without damage.
Common Mistakes to Avoid
- Building the cabinet too tight: Leave 4 to 6 inches of extra width and height where possible.
- Skipping ventilation: Heat and condensation can damage electronics inside a sealed box.
- Using indoor hinges and screws: Outdoor humidity will punish cheap hardware quickly.
- Making the top flat: A flat top collects water. Slope it or cap it properly.
- Mounting to siding only: Fasten into structural framing, blocking, masonry, or engineered support.
- Ignoring wind: Large doors need hold-opens, catches, stops, or rated struts.
- Blocking service access: Plan for cable changes, device resets, and TV removal.
- Treating an indoor TV as weatherproof: A cabinet reduces exposure; it does not create an outdoor-rated product.
Final Builder’s Checklist
Before you call the project done, run through this checklist:
- The TV height and glare were checked at the actual viewing time.
- The cabinet is fastened into real structure.
- The top sheds water and has an overhang or drip edge.
- All plywood edges and board end grain are sealed.
- There are low intake vents and high exhaust vents.
- The bottom can drain incidental water.
- Hardware is rated for exterior use and compatible with treated lumber.
- Doors have wind-safe catches, stops, or struts.
- The outlet is GFCI-protected and weatherproof for in-use conditions.
- The TV, cords, mount bolts, and streaming device can be reached for service.
A well-built outdoor TV cabinet should look like it belongs with the house, but it should perform like a small roofed enclosure. Build it with drainage, ventilation, structure, and service access in mind, and you will have a cleaner installation that lasts longer than a simple plywood box.
Frequently Asked Questions
Can I put a regular indoor TV in an outdoor cabinet?
You can, especially in a covered patio cabinet, but the cabinet does not make the TV outdoor-rated. Heat, humidity, condensation, and warranty risk still apply. For exposed, sunny, or high-use areas, an outdoor-rated TV is the better long-term choice.
How much bigger should an outdoor TV cabinet be than the TV?
Plan for the cabinet interior to be about 4 to 6 inches wider and taller than the TV when possible. That gives room for airflow, cable bends, mount clearance, and service access.
Does an outdoor TV cabinet need ventilation?
Yes. Use low intake vents and high exhaust vents, preferably screened. In hot climates or tight cabinets, a thermostatically controlled fan can help. A sealed cabinet can trap heat and condensation.
How much does it cost to build an outdoor TV cabinet?
A basic DIY cabinet usually costs about $250 to $500 in materials. An upgraded DIY version often runs $500 to $900. A professional custom outdoor TV cabinet commonly costs $1,200 to $3,500 or more, excluding the TV and major electrical work.
Quick wins for a faster PC:
Repair Windows errors before they cause bigger problemsFix Now →Fix the driver behind crashes, sound loss and screen glitchesFind Drivers →Clear out junk files and repair common Windows errorsFree Scan →Do I need an electrician for an outdoor TV cabinet?
Use a licensed electrician if you need a new exterior receptacle, GFCI protection added, conduit, trenching, panel work, or correction of an unsafe outlet. Outdoor power must use proper weather-rated components and in-use protection.
Quick Recap
Product prices and availability are accurate as of the date/time indicated and are subject to change. Any price and availability information displayed on Amazon at the time of purchase will apply.

