Some links on this page are affiliate links: if you buy through them we may earn a commission, at no extra cost to you.
The best wall-mount pencil sharpener for most home offices is a manual helical-cutter model mounted into a stud, cabinet side with backing, or a small finished backer block. Expect to spend about $9 to $30 for a new standard wall-mount sharpener, $20 to $40 for a heavier-duty classroom-style model, or $12 to $80 for a vintage metal sharpener with more character. The sharpener itself is cheap. The difference between a useful fixture and a loose, wall-damaging nuisance is the installation.
That is the part most buying guides skip. On our job sites, pencil sharpeners show up in more places than people expect: built-in kitchen desks, mudroom command centers, garage workbenches, craft rooms, drafting tables, homeschool stations, and home offices where someone still marks paper plans, trim lists, labels, tile layouts, or lumber cut sheets. A wall-mounted sharpener keeps the desk clear, does not need an outlet, and is always in the same spot.
As an Amazon Associate I earn from qualifying purchases.
Recommended Free Tools
For a professional-looking home office, treat it like any other small fixture. Choose the right body, cutter, bin, and mounting pattern. Put it where pencils are actually used. Fasten it to solid material. Leave enough clearance to crank the handle and remove the shavings bin. If the room has new cabinetry, tile, paint, or wall paneling, protect the finished surface so a $20 accessory does not create a $200 repair later.
What Makes a Wall-Mount Pencil Sharpener Worth Buying?
A good wall-mount sharpener should do four things well: sharpen cleanly, stay tight on the wall, empty without a mess, and survive normal pulling force from daily use. That sounds basic, but it rules out a lot of flimsy options.
Popular on Amazon
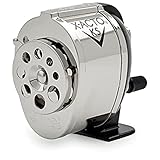
- Commercial grade pencil sharpener for high volume environments
- Dual helical cutters sharpen pencils with precision
- Mountable on wall, desk, or table with the included screws
- Adjustable to accommodate 8 pencil sizes
- Manual operation is easy for school children to use
For most homes, we recommend a manual sharpener with helical steel cutters. That cutter style grabs the pencil evenly and shaves the wood into a consistent point. It is quieter than an electric unit, has fewer parts to fail, and does not require a receptacle, cord route, or countertop space. In a shared home office or kitchen desk nook, the noise difference matters.
Look for a sharpener with a metal body or reinforced housing, a stable mounting base, a removable shavings bin that does not flex too much, and several pencil openings if you use more than standard No. 2 pencils. Some models mount vertically on a wall or horizontally on a desk, but do not assume both orientations are approved. Check the manufacturer’s instructions before drilling.
If you use carpenter pencils, do not expect a standard school-style sharpener to handle them. Most round-hole wall units are made for regular round or hex pencils. For framing, trim, drywall, and layout work, our crews usually use a dedicated carpenter-pencil sharpener or a utility knife. A home office sharpener can support construction paperwork and layout notes, but it is not a full replacement for job-site marking tools.
Best Type for Most Home Offices: Manual, Wall-Mounted, Helical Cutter
If we were outfitting a typical built-in desk, kitchen command center, homeschool wall, or garage office, we would start with a manual helical-cutter wall sharpener. The current U.S. product-only range is usually about $9 to $30 for common new wall-mount manual models. Heavier-duty office and classroom models often sit closer to $20 to $40. That is still a low-cost detail in a room where cabinetry, outlets, lighting, counters, and flooring can quickly move into the thousands.
The best value is usually not the cheapest plastic unit. A sharpener that costs $12 but loosens, cracks at the mounting slots, or dulls quickly is not a bargain if it scars a painted wall or cabinet side. A slightly heavier model with better cutter quality and a stronger base usually feels better every time someone cranks it.
For a polished home office, the finish also matters. Black, chrome, brushed metal, and vintage metal sharpeners can all look intentional when matched to the room. A black sharpener looks natural with black cabinet pulls or a dark desk grommet. Chrome or brushed metal fits utility rooms, garages, and classic schoolhouse details. Vintage metal can work well in a craft room, old-house office, or workshop, but inspect the cutter, clamp, bin, and mounting holes before buying used.
Crashes, No Sound, or Screen Glitches?
Random freezes, missing sound and display glitches usually trace back to one bad driver. Find and replace yours safely.Free scan · under a minutePC Slower Than It Used to Be?
A free scan shows the junk files, broken settings and background clutter dragging Windows down - then fixes them in one click.Free scan · Windows 10 & 11Wall-Mount Pencil Sharpener Cost in 2026
The sharpener is one of the least expensive parts of a home office, but the installed cost depends on the wall. Mounting into a wood stud or solid cabinet side may cost nothing beyond the sharpener. Mounting to drywall, plaster, tile, thin paneling, or a finished built-in can require better anchors, a backer block, touch-up paint, or a more careful layout.
| Option | Typical 2026 Cost | Best Use | Notes |
|---|---|---|---|
| Basic manual wall-mount sharpener | $9 to $30 | Home office, homework area, kitchen desk | Best default for most homes; quiet and outlet-free. |
| Heavier-duty classroom-style manual model | $20 to $40 | High-use family desk, homeschool room, shared office | Usually worth it when several people use the same station. |
| Vintage metal wall or desk sharpener | $12 to $80 | Craft room, workshop, traditional built-in | Price depends on condition, finish, brand, and original parts. |
| Electric office or classroom sharpener | $45 to $65 | High-volume desk or supply counter | Usually better on a counter or shelf unless the maker provides a proper bracket. |
| DIY mounting supplies | $0 to $20 | Most homeowner installs | Screws may be included, but better anchors, washers, or a backer block are often useful. |
| Bundled handyman installation | $75 to $200 | Punch-list visit with other work | Rarely worth a standalone trip unless wall repair, cabinetry, or tile drilling is involved. |
In a larger home-office remodel, the pencil sharpener is a detail inside a much bigger budget. Light home-office refreshes can run a few thousand dollars. For more involved remodeling, 2026 cost ranges often depend on cabinetry, lighting, wall work, flooring, and electrical changes. Angi cites roughly $50 to $200 per square foot for remodeling existing space. HomeAdvisor reports permit ranges around $380 to $1,900 for home-office projects and wall installation around $900 to $2,600. Against that backdrop, spending $15 on proper mounting hardware is not where we would cut corners.
Also popular on Amazon
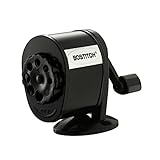
- Dual cutter technology for 6X longer life; replaceable cutters
- Comes with clams and screw to mount vertically or horizontally.
- Tip Saver prevents over sharpening
- 8-hole dial accomodates a variety of pencil sizes.
Where to Put a Wall-Mount Sharpener
Location matters more than brand. Put the sharpener within arm’s reach of the work surface where pencils are used. Do not mount it on whatever wall happens to be empty. A sharpener across the room will not get used; a sharpener mounted in the wrong tight corner will spill shavings and annoy everyone.
Good locations include the side of a built-in desk, the return wall beside a drafting surface, a garage workbench post, the inside face of a pantry office, or the wall of a kitchen command center. For children’s homework areas, mount it low enough that a child can turn the crank without hanging on the handle. For adult workstations, a comfortable centerline is often around 42 to 48 inches above the floor, depending on whether the user is sitting or standing. At a standing workbench, 48 to 54 inches can feel better. At a seated desk, the mounting point may be lower if it is on the side panel of the built-in.
Before marking holes, hold the sharpener in place and run the full motion. Check the crank swing. Slide the shavings bin out. Confirm the user can brace the sharpener naturally without pulling down on it. Make sure shavings will not fall onto carpet, upholstery, a food-prep counter, or a keyboard tray. If you are placing it in a kitchen desk area, keep it away from active food surfaces and mount it over an easy-to-wipe floor or counter zone.
How to Mount It So It Stays Solid
The best installation is into a stud, cabinet framing, solid wood blocking, or a dedicated backer block. Drywall alone is the weak point. Even a small sharpener gets repeated sideways and downward force because users push the pencil in while turning the crank. Over time, light screws in drywall can loosen, wallboard can crumble, and the sharpener can start to wobble.
Best Mounting Method: Stud or Backer
If the location lines up with a stud, use appropriately sized wood screws and drill pilot holes so the screws bite cleanly without splitting trim or cabinet material. Many sharpeners include screws, but included fasteners are often short and light. If the sharpener will be used daily, upgrade the fasteners. A #8 or similar wood screw, long enough to get meaningful bite into framing after passing through the sharpener base and finish surface, is usually more secure than the small screws in the box.
For built-ins, we like using a small painted or stained mounting block. A block around 4 inches by 6 inches, or sized to fit the sharpener base with at least 1/2 inch of reveal around it, gives the accessory a finished look. It also keeps future screw holes in the block instead of the cabinet side or drywall. If the sharpener ever gets replaced, the backer can be patched, repainted, or swapped more easily than a finished wall panel.
The Tool Desk
Outbyte PC Repair FREEClear out junk files and repair common Windows errorsFree Scan →Outbyte Driver Updater FREEScan for outdated or missing drivers - takes under a minuteDriver Scan →Drywall, Plaster, Tile, and Cabinet Sides
You can mount a pencil sharpener on drywall, but it is not our first choice for a high-use location. If you cannot hit a stud, use quality drywall anchors or toggle bolts sized for the wall thickness and expected use. Add washers if the screw heads are small relative to the mounting slots. Do not overtighten into a plastic base; you can crack the housing before the mount ever feels secure.
Plaster needs more care because it can crack around fasteners. Drill clean pilot holes, avoid hammering anchors aggressively, and consider a backer board to spread the load. Tile requires the correct bit, slow drilling, and a plan for what is behind the tile. Thin cabinet sides and hollow-core panels may need a backer plate or through-bolting. If a wall or cabinet surface is expensive to repair, test the plan before committing holes.
Also popular on Amazon

- Wall mount pencil sharpener – This classroom pencil sharpeners manual can be easily mounted to a wall or desktop, making this durable metal sharpener a convenient and space-saving solution for classrooms, offices, and learning environments.
- Wall pencil sharpener – Our hand crank pencil sharpener features 8 holes of different sizes, allowing it to accommodate 8 sizes of pencils for versatile sharpening of standard and specialty pencils.
- Manual pencil sharpener heavy duty – Designed with a spill-proof garbage receptacle and a transparent shavings container, making it easy to monitor when the tray needs emptying while helping keep work areas clean.
- Pencils sharpener for classroom – Built with heavy duty steel blades and a rugged steel construction, this sharpener is engineered for long-lasting performance and reliable everyday use.
- Pencil sharpener hand crank – The smooth manual operation is easy for school children to use, making it an ideal classroom supply for elementary teachers, students, homeschool settings, and learning centers.
Tools and Materials You Need
For a basic installation, gather the sharpener, screws or upgraded fasteners, a stud finder with AC detection, pencil, tape measure, level, drill/driver, and the correct pilot bit. If no stud or solid backer is available, add drywall anchors or toggle bolts. For weak drywall, plaster, paneling, or a high-use kids’ station, add a small backing board or finished mounting block.
Painter’s tape is helpful for marking holes without scuffing paint. A small vacuum or damp cloth makes cleanup easier after drilling. If you are mounting to a cabinet side, open the cabinet first and confirm screw length will not poke into stored items or interfere with drawer slides, hinges, electrical wiring, or shelf pins.
Quick wins for a faster PC:
Fix the driver behind crashes, sound loss and screen glitchesFind Drivers →Clear out junk files and repair common Windows errorsFree Scan →A simple install usually takes 15 to 30 minutes once the location is chosen. Add another 30 to 60 minutes if you are cutting, priming, painting, or staining a backer block. If paint needs drying time, the project may stretch over a day even though the hands-on labor is short.
Manual vs Electric Pencil Sharpeners
Manual wall-mounted sharpeners are the right choice for most home offices. They are quiet, inexpensive, reliable, and need no power. They also fit the way pencils are used in a real house: a few points sharpened during homework, sketching, estimating, labeling, or plan review.
Electric sharpeners make sense when the volume is high. If you run a homeschool room, art station, tutoring area, or shared office where dozens of pencils are sharpened every week, an electric unit can save time. But most electric sharpeners are countertop tools, not true wall-mount fixtures. Unless the manufacturer provides a wall bracket or mounting instructions, do not improvise a wall installation. Vibration, weight, cord strain, and bin access all become problems.
There is also an electrical planning issue. A manual sharpener avoids outlet placement entirely. An electric sharpener needs a receptacle nearby, a safe cord route, and a surface that supports its weight. In a remodel, outlets, lighting, and desk-height power should be planned together. Residential electrical code requirements change over time, and the 2026 National Electrical Code cycle includes updates that may affect new work depending on local adoption. Always follow the code enforced by your city or state, and use a licensed electrician for new receptacles, relocated outlets, or circuit changes.
Do these 3 things before closing this tab:
1Clear out junk files and repair common Windows errors2Fix the driver behind crashes, sound loss and screen glitches3Repair Windows errors before they cause bigger problemsWhen to DIY vs When to Hire a Pro
Most homeowners can install a manual wall-mount pencil sharpener as a DIY project if the mount lands in a stud, solid wood, or a simple painted backer. The job is low risk when you are drilling into ordinary drywall away from known wiring and plumbing, using the right fasteners, and comfortable with basic layout.
Hire a pro, or bundle the task with other punch-list work, when the wall surface is tile, plaster in an older home, expensive millwork, stone, metal paneling, or a finished cabinet side where a mistake will be visible. A handyman visit may run roughly $75 to $200 depending on local minimums, travel, wall type, and whether patching or painting is needed. That cost is hard to justify for the sharpener alone, but it makes sense if the same visit includes door adjustments, shelf installation, cabinet pulls, wall repair, or other small projects.
Also popular on Amazon

- Engineered for moderate sharpening usage at home
- Features X-ACTO hardened helical cutter
- Quickly vacuum mounts easily onto any nonporous surface
- Mounts easily onto any horizontal or vertical surface (screws included)
- Compact design fits easily in backpacks
You generally do not need a permit to mount a manual pencil sharpener. It is a small accessory fastened to a wall or cabinet. Permits become relevant when the surrounding home-office work includes new walls, structural changes, new electrical circuits, relocated outlets, lighting changes, HVAC work, or larger remodeling. If a contractor is building a home office or kitchen desk nook, ask them to include blocking, outlet locations, task lighting, cable management, and durable finishes before drywall closes. Those decisions matter more than the sharpener, but the sharpener benefits from the same planning.
Common Mistakes That Cause Wall Damage
The most common mistake is mounting the sharpener with light screws into drywall in a busy location. It may feel fine on day one, then loosen after a few weeks of children pulling the handle or adults pushing pencils into the cutter. Once the base starts moving, the screw holes enlarge and the repair becomes more visible.
What’s actually slowing this PC down?
Pick the symptom - the matching free tool is one click away.
The second mistake is installing it at the wrong height. Too high for kids means they pull downward on the crank. Too low for adults means awkward wrist angle and more leverage on the mount. Both conditions increase stress on the wall. Test the height with the actual users before drilling.
Another avoidable problem is ignoring the shavings bin. Some bins slide forward, some pull down, and some need side clearance. Test removal before marking screw holes. Do not trap the bin against a side wall, shelf, cabinet stile, or backsplash return. Leave enough room to empty it without tipping shavings onto the desk.
Also check pencil compatibility. Colored pencils, charcoal, soft art pencils, and oversized carpenter pencils may not behave well in a standard sharpener. Soft cores can gum up cutters, and thick pencils may not fit the opening. If the station supports art or construction use, keep the right sharpener or knife nearby instead of forcing the wrong tool.
Independent reader supportYour contribution helps us test, update, and keep practical guides available for everyone.How This Fits Into a Better Home Office or Kitchen Command Center
A wall-mount pencil sharpener is small, but it belongs to the same category as hooks, grommets, drawer dividers, charging shelves, cork strips, and undercabinet lighting. These are the details that make a room work after the contractor leaves.
In a kitchen command center, the sharpener should sit near paper storage, calendars, labels, and school supplies. In a built-in office, it belongs near the dominant writing hand if possible, not behind the chair. In a garage shop, put it near the cut-list clipboard or bench surface, but not where sawdust and pencil shavings mix with tool storage. In a craft room, mount it where the shavings can be emptied without crossing fabric, paper stock, or finished work.
For remodels, we prefer planning a small utility zone instead of scattering supplies. A narrow drawer for pencils, a wall sharpener, a task light, a reachable outlet, and a wipeable surface will outperform a larger desk with poor storage. If the wall is open during construction, add blocking. A short piece of 2x lumber or plywood backing behind drywall gives you freedom to mount accessories later without guessing stud locations.
Also popular on Amazon

- Durable and stylish pencil sharpener for high-volume environments
- Dual helical cutters sharpen pencils with precision
- Easily mounts on wall, desk, or table with included screws
- Adjustable to accommodate 8 pencil sizes
- Manual operation is easy for school children to use
Our Practical Recommendation
For most homeowners, buy a manual wall-mount sharpener in the $15 to $30 range with helical steel cutters, a removable shavings bin, a firm mounting base, and enough pencil-size adjustment for your actual use. Mount it into a stud or finished backer block. If the sharpener is going in a high-end built-in, use a painted or stained mounting block so future replacement holes stay out of the finished cabinet or wall.
Choose electric only when pencil volume justifies it, and place it on a counter, shelf, or desk unless the manufacturer specifically supports wall mounting. For carpenter pencils, buy a dedicated carpenter-pencil sharpener or use the method your trade work already requires.
The best wall-mount pencil sharpener is not complicated. It is the one that sharpens cleanly, lives exactly where pencils are used, empties easily, and stays tight because someone took ten extra minutes to mount it correctly.
Frequently Asked Questions
What is the best wall-mount pencil sharpener for a home office?
For most home offices, the best choice is a manual wall-mount sharpener with helical steel cutters, a sturdy mounting base, and an easy-to-remove shavings bin. Expect to spend about $9 to $30 for a good standard model, or $20 to $40 for a heavier-duty classroom-style sharpener.
Can you mount a pencil sharpener on drywall?
Yes, but a stud or solid backer is better. Drywall-only mounting can loosen with repeated cranking. If you cannot hit a stud, use quality drywall anchors or toggle bolts, and consider a small painted mounting block to spread the load.
How high should a wall-mounted pencil sharpener be installed?
For adult use, a centerline around 42 to 48 inches above the floor works well in many seated home-office setups, while 48 to 54 inches may be better at a standing workbench. For children, mount it low enough that they can crank without pulling downward.
Free tools Windows power users keep installed
One-click scans. No signup required.
Is a manual or electric pencil sharpener better for a home office?
A manual wall-mounted sharpener is better for most home offices because it is quiet, durable, inexpensive, and does not need an outlet. Electric sharpeners make sense for high-volume use, but they are usually countertop units unless the manufacturer provides a wall-mount bracket.
Do I need a permit to install a wall-mounted pencil sharpener?
No permit is typically needed to install a manual wall-mounted pencil sharpener. Permits may apply if the larger home-office project includes new walls, electrical work, lighting changes, HVAC modifications, or other regulated remodeling.
Can a regular wall pencil sharpener sharpen carpenter pencils?
Usually no. Most standard wall sharpeners are made for round or hex writing pencils, not flat carpenter pencils. Use a dedicated carpenter-pencil sharpener or a utility knife for construction layout pencils.
Quick Recap
Product prices and availability are accurate as of the date/time indicated and are subject to change. Any price and availability information displayed on Amazon at the time of purchase will apply.

