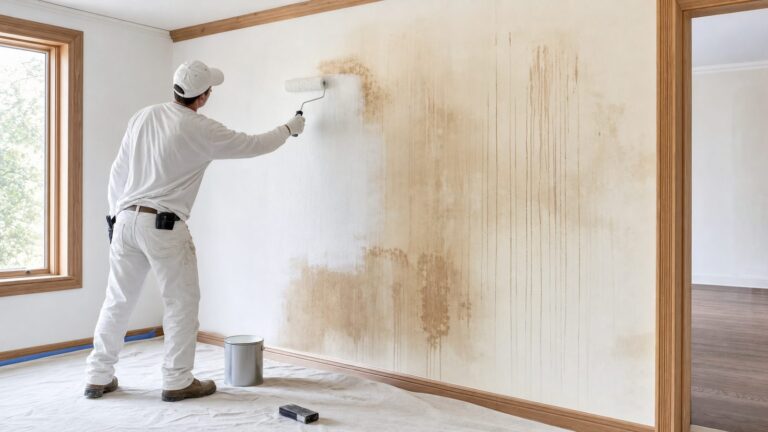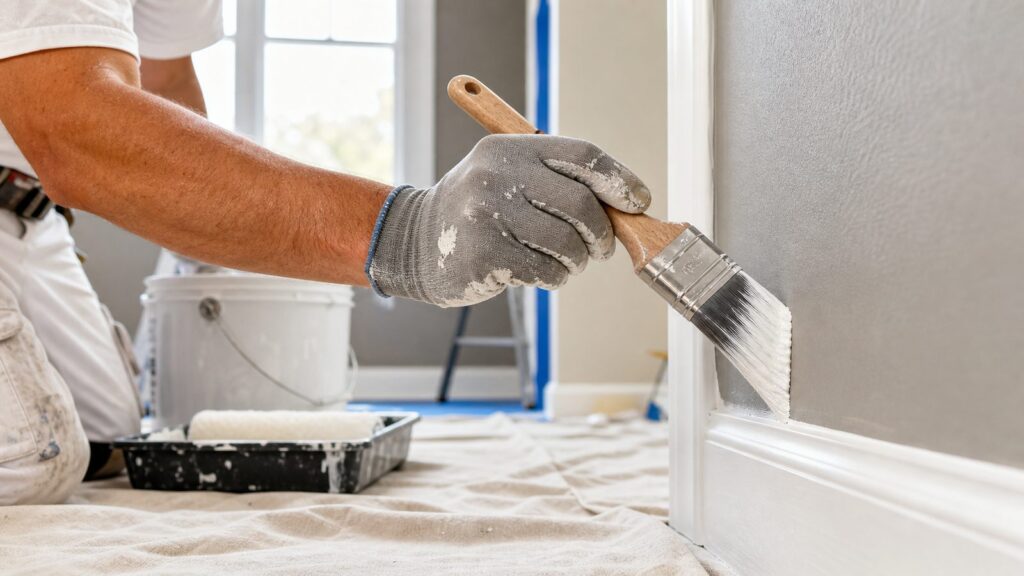
The best paint brush for interior walls is usually not the biggest brush on the shelf or the cheapest contractor pack. For most U.S. homeowners, the right choice is a high-quality 2- to 2.5-inch angled sash brush with synthetic nylon/polyester or polyester bristles. Use it for the first 2 to 3 inches along ceilings, baseboards, trim, corners, windows, doors, outlets, and built-ins. Then use a roller for the broad wall areas.
That answer sounds simple, but the finish quality depends on the details: brush width, bristle stiffness, wall texture, paint chemistry, humidity, sheen, and how quickly you roll into the brushed edge. On our job sites, we do not ask one brush to do every job. A smooth accent wall, a humid bathroom, an orange peel hallway, and a trim-heavy bedroom all call for slightly different brush behavior.
As an Amazon Associate I earn from qualifying purchases.
In 2026, a pro-grade interior paint brush typically costs about $8 to $26. Budget brushes often run $3 to $8, but they are more likely to shed bristles, leave drag marks, and lose their cutting edge after one room. If you are spending $25 to $75 or more per gallon on wall paint, saving $10 on the tool that controls every visible edge is usually false economy.
What’s actually slowing this PC down?
Pick the symptom - the matching free tool is one click away.
Our Straight Answer: Buy One Good Angled Sash Brush First
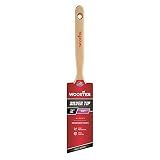
If you only buy one brush for painting interior walls, make it a 2.5-inch angled nylon/polyester sash brush with medium or firm stiffness. That size gives most homeowners enough paint capacity to move efficiently while still controlling the line at ceilings and trim.
#1 Best Overall
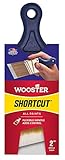
- Flexible purple Shergrip handle that measurers only 2 Inches long that adds maneuverability in tight spaces
- White nylon and gold polyester blend for all paints
- Brass-plated steel ferrule
- Package designed to peg hook brush by the handle and illustrate proper holding position
- Q3211 counter display carton has a full-color 9 Inch x 7 Inch sign
A 2-inch angled brush is easier for newer painters and tight rooms. A 2.5-inch brush is the best all-around size for most wall cut-in work. A 3-inch brush can be fast in experienced hands, but it can feel clumsy near crown molding, casing, narrow returns, and outlet boxes.
The brush is not meant to paint the whole wall. It is for precision work. Rollers still handle the field of the wall because they cover faster, create a more consistent texture, and blend sheen better over large areas.
What Makes a Paint Brush Good for Interior Walls?
A good interior wall brush does four things well. It carries enough paint to avoid constant dipping. It releases paint evenly without dragging dry. It holds a sharp edge when you cut in. It springs back after each stroke instead of splaying out like a broom.
The Tool Desk
Outbyte PC Repair FREERepair Windows errors before they cause bigger problemsFix Now →Outbyte Driver Updater FREEFix the driver behind crashes, sound loss and screen glitchesFind Drivers →Those qualities come from the bristle material, brush shape, ferrule construction, handle balance, and stiffness. Brand can matter because proven professional brush makers tend to build tools that hold their shape longer, but brand alone is not the whole decision. A good brush in the wrong size or stiffness can still make a project harder.
Synthetic Bristles Are the Default for Modern Wall Paint
Most interior wall paints used in U.S. homes are water-based latex or acrylic paints. For those coatings, synthetic bristles are the right choice. Nylon/polyester blends and polyester brushes resist swelling, keep their shape in water-based paint, and give better control than natural bristle brushes.
Natural bristle brushes are better reserved for oil-based coatings. With latex paint, natural bristles can absorb water, go limp, and lose precision. That makes clean ceiling lines and casing edges harder than they need to be.
Angled Sash Brushes Beat Flat Brushes for Wall Edges
For interior walls, the angled sash shape is the workhorse. The angled tip gives you a leading edge for cutting a straight line and helps the brush reach into corners, along casing, and around switch plates. Flat brushes still have uses, but they are less forgiving for wall cut-in work.
Quick wins for a faster PC:
Fix the driver behind crashes, sound loss and screen glitchesFind Drivers →Clear out junk files and repair common Windows errorsFree Scan →Scan for outdated or missing drivers - takes under a minuteDriver Scan →Brush Stiffness Changes the Result
Soft synthetic brushes are useful on smooth drywall, trim, and low-viscosity paints where brush marks show easily. Firm and extra-firm synthetic brushes hold their shape better in warm rooms, humid bathrooms, heavier paints, and textured wall surfaces. If the bristles are too soft for the conditions, the brush can feel floppy and leave a fuzzy edge. If the bristles are too stiff for a smooth, high-sheen wall, they can leave visible tracks under side lighting.
Brush Selection Matrix by Wall Condition
The right brush changes with the room. Use this matrix as a practical buying guide before you stand in the paint aisle.
Rank #2

- 2 Inch Angled Paint Brush for Precision Cutting-In – Designed for clean, sharp lines around trim, baseboards, ceilings, corners, and detailed edge work. The perfect size for control and coverage.
- Value 3-Pack for Pros & DIY Projects – Includes three professional 2-inch angled sash brushes — ideal for contractors, remodelers, and homeowners tackling multiple rooms or repeat paint jobs.
- Smooth Results on Walls, Trim & Cabinets – Great for interior wall painting, cabinet edges, furniture projects, and trim work where a smooth finish and crisp control matter most.
- Works with Latex Paint, Oil-Based Paint & Stains – Premium synthetic filaments hold more paint, reduce streaks, and provide a clean finish with latex paints, oil coatings, and wood stains.
- Works with Latex Paint, Oil-Based Paint & Stains – Premium synthetic filaments hold more paint, reduce streaks, and provide a clean finish with latex paints, oil coatings, and wood stains.
| Wall or Room Condition | Best Brush Choice | Why It Works | Typical Add-On Tool |
|---|---|---|---|
| Smooth drywall | 2 to 2.5-inch angled soft or medium nylon/polyester brush | Reduces brush marks and gives good control along ceilings and trim | 3/8-inch nap roller cover for many standard smooth walls |
| Orange peel or light texture | 2.5-inch angled firm synthetic brush | Firm bristles push paint into shallow texture and hold a cleaner edge | 3/8 to 1/2-inch nap roller depending on texture depth |
| Bathroom or laundry room | 2.5-inch angled firm or extra-firm nylon/polyester brush | Maintains control in humidity and with heavier moisture-resistant paints | Quality roller cover and bathroom-rated latex/acrylic paint |
| Accent wall | 2 or 2.5-inch angled soft/medium brush | Helps create a crisp color break where contrast makes errors obvious | Painter’s tape if needed, plus careful rolling while wet |
| Trim-heavy room | 2-inch angled sash brush plus 1-inch detail brush | Smaller tools fit around casing, built-ins, muntins, and tight returns | Separate trim brush if painting enamel |
| Older pre-1978 room | Use only after lead-safe planning if painted surfaces may be disturbed | Brush choice is secondary to lead-safe work practices | EPA RRP-certified professional if scraping, sanding, or repairs disturb paint |
| First-time DIY painter | 2-inch angled medium synthetic brush | Easier control than a 3-inch brush, with enough capacity for one-room work | Good tape, drop cloth, roller kit, and sanding sponge |
Best Brush Size for Cutting In Interior Walls
Most interior wall painting succeeds or fails in the cut line. That is the narrow band where the brush meets the ceiling, baseboard, door casing, window trim, cabinet side, or inside corner. If that 2- to 3-inch band is clean, the room looks professional. If it is wavy, fuzzy, thin, or overbrushed, even expensive paint looks ordinary.
1 to 1.5-Inch Brushes
Use these for tight details, narrow trim returns, small window parts, built-ins, and touch-ups. They are not efficient for cutting an entire room because they do not hold much paint.
2-Inch Brushes
A 2-inch angled sash brush is a strong choice for first-time DIY painters, powder rooms, bedrooms with lots of trim, or any room where control matters more than speed. It is also easier to manage near textured ceilings and delicate trim.
2.5-Inch Brushes
This is the best all-around size for interior walls. It carries more paint than a 2-inch brush but still gives good control. If our crew had to hand a homeowner one brush for walls, this is the size we would choose.
3-Inch Brushes
A 3-inch brush can cut long, open runs quickly, especially along baseboards and ceilings. It is better for experienced painters with steady hand control. For many homeowners, it is too wide near casing, corners, and tight room layouts.
Nylon, Polyester, or Natural Bristle?
For interior wall paint, choose synthetic bristles. Nylon/polyester blends are versatile and common in professional-grade brushes. Polyester holds stiffness well and can be useful with thicker acrylic paints or warm, humid conditions. Nylon adds flexibility and smooth release.
Natural bristle brushes are not the right default for latex or acrylic wall paint. They are made for oil-based coatings and can lose shape when used with water-based paint. That loss of control shows up as ragged cut lines, uneven coverage, and more touch-up time.
How Much Should You Spend on a Wall Paint Brush in 2026?
A good brush is one of the lowest-cost upgrades in an interior paint project. In 2026, homeowners should expect these approximate U.S. price ranges:
| Item | Typical 2026 Cost | Best Use |
|---|---|---|
| Budget paint brush | $3 to $8 each | Primer, rough utility areas, small disposable tasks |
| Pro-grade wall brush | $8 to $26 each | Visible interior wall edges, ceilings, trim lines, accent walls |
| Multi-pack brushes | $15 to $30 | Useful if quality is decent and sizes fit the project |
| Starter DIY painting kit | $40 to $120 | Brushes, roller frame, covers, tray, tape, drop cloths, sanding sponge, spackle, caulk, cleaning supplies |
| Interior wall paint | $25 to $75+ per gallon | Common latex/acrylic wall paints; premium and specialty paints can run higher |
| Specialty or low/no-VOC paint | About $40 to $100+ per gallon | Designer, mineral, limewash, specialty, or low/no-VOC products |
Current retail examples put common professional brushes in that same range. A compact Wooster angled sash brush may be listed around $7.47, contractor-style angle sash multi-packs around $22.48, and premium Purdy-style wall brushes roughly $13.99 to $25.99 depending on size and style. Prices move with retailer promotions, but the lesson stays the same: one good brush is usually a better value than a bag of throwaway brushes for visible wall edges.
How Brush Choice Affects Labor and Finish Quality
Poor brushes cost time. They do not pick up enough paint, they release unevenly, and they lose their shape right when you need a clean line. That means more dipping, more touch-ups, more sanding between mistakes, and more time trying to hide picture-framing.
Free tools Windows power users keep installed
One-click scans. No signup required.
Rank #3
Picture-framing happens when the brushed border dries or lays down differently than the rolled field of the wall. It can show as a slightly different sheen or texture around the perimeter. The fix is partly tool choice and partly workflow: cut in one wall at a time, feather the brushed edge outward with light pressure, and roll into it while it is still wet.
On smooth walls and higher-sheen paints, tool marks are easier to see. Side lighting from windows, sconces, or hallway fixtures will reveal brush ridges, roller lint, heavy edges, and missed sanding. In those rooms, buy the better brush and roller cover. The wall will tell on cheap tools.
Technique Matters More Than the Label on the Handle
A premium brush cannot overcome poor prep or bad technique. Before painting, repair nail pops, dents, failed caulk, glossy patches, stains, and torn drywall paper. Sand repairs smooth, remove dust, and prime patched areas where needed. Paint sticks to the surface you actually give it, not the one you hoped was under the dust.
Load the Brush Correctly
Dip only about one-third of the bristle length into the paint. Tap both sides against the inside of the pail. Do not scrape the brush dry on the rim. Scraping removes too much paint and encourages dry dragging. Keep paint out of the ferrule, the metal band that holds the bristles. Paint packed into the ferrule dries hard and shortens the life of the brush.
Recommended Free Tools
Cut In One Wall at a Time
Work one wall at a time instead of brushing the entire room and then rolling later. Brush the ceiling line, corners, trim edges, and obstacles for that wall. Then roll while the brushed paint is still wet. This helps the roller texture blend into the brushed band.
Feather the Edge
After placing paint near the line, use lighter pressure to feather the outer edge toward the center of the wall. The goal is not a thick ridge. It is a tapered band the roller can overlap cleanly.
Do Not Press Too Hard
Hard pressure splays the bristles and ruins the edge. Let the bristle tips do the precise work. If you need to mash the brush to get coverage, the brush is too dry, the paint is too thick for the tool, or the surface needs better prep.
Brushes for Trim-Heavy Rooms and Accent Walls
Rooms with a lot of casing, baseboard, crown, built-ins, or divided-light windows need more control. A 2-inch angled sash brush often works better than a 2.5- or 3-inch brush in those spaces. Keep a 1-inch brush nearby for small returns and detail work.
Windows Errors? Fix Them Before They Spread
Repair common Windows errors and clear accumulated junk for a smoother, more stable PC - no reinstall needed.Free scan · no reinstallOutdated Drivers Are Slowing You Down
One free scan finds every outdated or missing driver and matches the right update for your exact hardware.Free scan · exact hardware matchIf you are painting trim as well as walls, use a separate brush for trim enamel when possible. Trim coatings and wall paints behave differently. Cross-contamination can affect flow, sheen, and final texture. On professional jobs, we keep wall tools and trim tools separate because it reduces finish problems and cleanup headaches.
Rank #4

- COMPLETE 5-PIECE BRUSH SET FOR EVERY PAINTING TASK — Includes 1 Inch Flat, 1.5 Inch Angle, 2 Inch Flat, 2 Inch Angle Stubby, and 2.5 Inch Angle brush giving you every size professional painters use daily. Get all 5 for less than the price of a single brush from hardware store brands — professional grade performance at a fraction of the cost. Perfect for walls, trim, cabinets, doors, furniture, and detailed cutting-in work on any project.
- ZERO BRISTLE LOSS — GUARANTEED BY PRECISION ADHESIVE BONDING — Every bristle is locked in place with precision-set adhesive that keeps them in the brush — not in your paint job. The coated steel ferrule provides structural support while the adhesive bond ensures clean performance on every stroke. Premium SRT synthetic filaments load more paint and release it evenly for a smooth streak-free finish on walls, ceilings, and trim. Works with latex, oil-based paint, primer, sealer, and wood stain.
- INCLUDES THE ANGLE STUBBY MOST SETS LEAVE OUT — Professional painters know the 2 Inch Angle Stubby is the go-to brush for tight cabinet interiors, window sashes, inside corners, and detailed trim where standard angle brushes are too long. Combined with the 1.5 and 2.5 inch angle sash brushes you have precision cutting-in covered at every scale — baseboards, crown molding, door casings, and ceiling lines.
- FLAT BRUSHES FOR BROAD SMOOTH COVERAGE ON ANY SURFACE — The 1 and 2 inch flat brushes deliver even coverage on walls, furniture, shelving, doors, fences, decks, and wood surfaces. Ideal for applying primers, stains, varnishes, polyurethane, and specialty coatings. Solid wood handles provide all-day comfort and control for both professional contractors and weekend DIY homeowners tackling interior or exterior painting projects.
- TRUSTED BY PROFESSIONAL PAINTERS AND CONTRACTORS NATIONWIDE — Pro Grade delivers professional-grade results at a price that makes sense for crews who go through brushes on every job. Ideal for property managers, remodeling contractors, apartment turnover crews, maintenance teams, and commercial painting operations. Backed by thousands of verified reviews from working painters. Washable and reusable for multiple projects.
Accent walls deserve the same care. Dark colors, saturated colors, and high-contrast color changes reveal wavy cut lines. A 2- or 2.5-inch angled brush with good spring, careful layout, and a wet edge will do more for the finished room than rushing with an oversized brush.
Independent reader supportYour contribution helps us test, update, and keep practical guides available for everyone.When to DIY and When to Hire a Professional
Painting a standard bedroom or living room is a reasonable DIY project if the walls are in decent shape, the ceiling height is manageable, and you are using a similar color and sheen. A homeowner can often assemble a basic tool kit for about $40 to $120, plus paint at roughly $25 to $75+ per gallon for common interior latex/acrylic products.
Hiring a professional makes sense when the project includes tall stairwells, heavy drywall repair, stain blocking, extensive trim, occupied-home protection, multiple colors, dark-to-light color changes, high-sheen finishes, or tight completion timelines. Professional interior painting costs in 2026 commonly cluster around $2 to $6 per square foot depending on scope. National project ranges often land around $965 to $3,089 for typical interior painting projects, while room painting may run roughly $1,000 to $2,900 depending on size, prep, paint, ceilings, and trim. One-room painting can range from about $371 to $1,011, while full-home interiors can climb into the $5,401 to $24,282 range when the scope is broad.
The brush itself is not the expensive part of the job. Labor, prep, access, protection, repairs, paint quality, number of coats, and finish expectations drive the real cost. A good brush helps, but it does not replace professional surface preparation.
Safety, Lead Paint, VOCs, and Permit Notes
Most simple interior wall painting does not require a building permit. Many cities treat ordinary painting as cosmetic maintenance. That said, permit rules are local. If the painting is part of a larger remodel involving electrical work, structural changes, window changes, demolition, or occupancy changes, check your local building department before work starts.
Lead paint is the bigger safety issue in older homes. If your home was built before 1978, assume painted surfaces may contain lead until properly evaluated. Painting over intact surfaces is different from sanding, scraping, cutting, or repairing surfaces that disturb old paint. Projects that disturb lead-based paint in pre-1978 homes can trigger EPA Renovation, Repair and Painting requirements for contractors. If there is peeling paint, heavy sanding, window friction surfaces, or demolition, bring in an EPA RRP-certified professional.
Ventilation also matters. Many modern paints are lower odor than older coatings, but interior paints can still contain volatile organic compounds. Low-VOC and no-VOC options are widely available, often ranging from about $40 to $100+ per gallon depending on brand and chemistry. Follow the paint manufacturer’s ventilation and drying instructions, especially in bedrooms, nurseries, bathrooms, and occupied homes.
Do these 3 things before closing this tab:
1Repair Windows errors before they cause bigger problems2Fix the driver behind crashes, sound loss and screen glitches3Clear out junk files and repair common Windows errorsCleaning and Storing Brushes So They Last
A good brush can last through many rooms if you clean it immediately. For latex and acrylic paints, rinse with warm water and mild soap until the water runs clear. Work paint out of the heel of the brush near the ferrule. Use a brush comb to straighten the bristles. Shake out excess water, reshape the edge, and dry the brush in its original keeper if you still have it.
Do not leave a brush sitting bristle-down in water overnight. That bends the bristles and weakens the tool. Do not let paint dry in the heel. The next time you cut a ceiling line, dried paint inside the brush will make the stroke rougher and less predictable.
Best Value

- Made in United States
Common Brush Mistakes That Show Up on Interior Walls
The most common mistake is buying the cheapest brush for the most visible part of the job. Cheap brushes shed, drag, and lose their edge quickly. You may save $10 at checkout and spend two extra hours fixing fuzzy lines.
Another mistake is using natural bristles with water-based latex paint. The brush can swell and go limp, which makes it harder to control. Using a brush that is too wide is also common. A 3-inch brush can be efficient for a professional, but many homeowners are cleaner and faster overall with a 2- or 2.5-inch angled brush.
Skipping prep is the mistake no brush can fix. Paint will not hide dents, dust, glossy patches, failed caulk, stains, or rough drywall repairs. Overloading the brush creates runs and ridges. Wiping off too much paint creates dry drag. Pressing too hard splays the bristles and destroys the cut line.
Final Recommendation
For most interior wall projects, buy one premium 2.5-inch angled sash brush with synthetic nylon/polyester bristles. Choose medium stiffness for general rooms, softer bristles for very smooth walls and fine finishes, and firm or extra-firm bristles for humidity, heavier paints, textured walls, or long cut lines where you need the brush to hold its shape.
Add a 1-inch detail brush only if the room has tight trim, built-ins, narrow returns, or small touch-up areas. Use rollers for the field of the wall, cut in one wall at a time, feather the brushed edge, and roll into it while wet. That simple system produces cleaner lines, better sheen consistency, and fewer touch-ups than chasing a universal best brush.
Frequently Asked Questions
What size paint brush is best for interior walls?
For most interior walls, a 2- to 2.5-inch angled sash brush is best. A 2-inch brush gives newer painters more control, while a 2.5-inch brush carries more paint and is the best all-around size for cutting in ceilings, trim, corners, and outlets.
Is a 2-inch or 2.5-inch brush better for cutting in walls?
A 2.5-inch angled brush is usually better for most wall projects because it holds more paint and still cuts a clean line. A 2-inch brush is better for beginners, small rooms, tight trim, and detail-heavy spaces.
Should I use nylon, polyester, or natural bristles for interior latex paint?
Use synthetic nylon/polyester or polyester bristles for interior latex and acrylic paint. Natural bristles absorb water and are better reserved for oil-based coatings.
Do I need a brush if I am using a roller on walls?
Yes. Rollers cover the large open wall areas, but brushes handle the first 2 to 3 inches around ceilings, baseboards, trim, corners, doors, windows, outlets, and built-ins.
How much should I spend on a good interior paint brush in 2026?
Expect to spend about $8 to $26 for a quality pro-grade interior paint brush. Budget brushes often cost $3 to $8, but they are more likely to shed bristles, leave marks, and lose their edge.
Quick wins for a faster PC:
Clear out junk files and repair common Windows errorsFree Scan →Fix the driver behind crashes, sound loss and screen glitchesFind Drivers →What should I do before painting walls in a home built before 1978?
Assume old painted surfaces may contain lead until properly evaluated. If the work involves sanding, scraping, demolition, or disturbing old paint, consider hiring an EPA RRP-certified professional and follow lead-safe practices.
Quick Recap
Product prices and availability are accurate as of the date/time indicated and are subject to change. Any price and availability information displayed on Amazon at the time of purchase will apply.