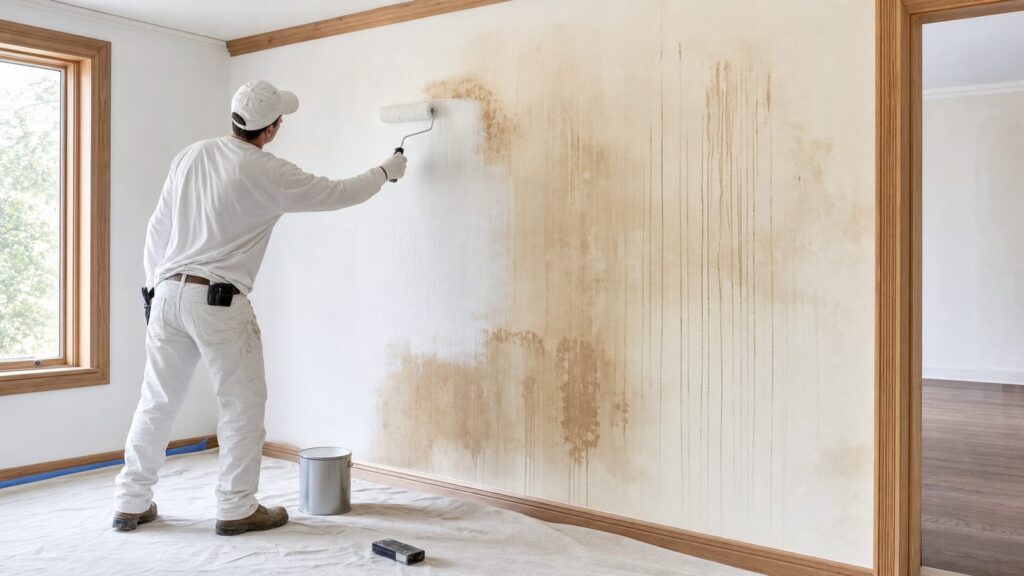
Paint or stain bleeding through a fresh finish usually means one thing: something under the coating is still active. It may be tannin in cedar, redwood, or oak. It may be pine knots, old furniture dye, nicotine, rust, water damage, marker, grease, pet contamination, asphalt, creosote, wax, stripper residue, or moisture moving through the material from behind. Ordinary latex paint, even good paint, is not built to lock down every one of those contaminants.
The reliable fix is not another heavy coat of wall paint. On our job sites, we treat bleed-through as a diagnosis problem first and a coating problem second. Find the source, correct active moisture, clean the surface, dull glossy finishes, sand where needed, isolate the stain with the right primer, let that primer dry properly, then topcoat. If the stain is severe, we test a small area for 24 to 48 hours before committing a whole room, cabinet run, or exterior elevation.
As an Amazon Associate I earn from qualifying purchases.
Bleed-through is different from poor hide. Poor hide means the old color is showing because the finish paint did not cover well enough. Bleed-through means a stain or extractive is migrating through the paint film after it dries, or after humidity, water, or solvents reactivate it. That distinction matters because poor hide is solved with better coverage; bleed-through is solved with stain isolation.
Free tools Windows power users keep installed
One-click scans. No signup required.
Start by identifying what is bleeding
Before buying primer, look at the color, shape, location, and timing of the stain. A brown or amber discoloration on cedar, redwood, oak, mahogany, or knotty pine usually points to tannin, sap, or resin. A circular brown mark on a ceiling or upper wall is more likely a water stain. Orange-brown dots around nail heads or fasteners suggest rust. Yellow film in an older kitchen, bath, or smoking room may be nicotine, cooking residue, or both. Pink, brown, or reddish cabinet bleed can come from wood dye, old stain, tannin, stripper residue, or a combination.
#1 Best Overall

- Sealer Paint & Stain Blocks
Timing tells you a lot. If staining appears quickly after priming or painting, the coating probably did not block the contaminant. If the stain appears weeks later after rain, humidity, or a plumbing issue, moisture may be carrying the stain through the surface. When a paint film looked good at first and later developed brown streaks, especially on exterior wood or around trim joints, we check for water pathways before applying more product.
Common bleed-through sources include cedar and redwood tannins, oak tannins, pine knots, sap streaks, old oil stain, furniture dye, smoke, nicotine, water damage, rust, ink, marker, asphalt, creosote, pet urine, grease, mildew staining, residual stripper, wax, and contaminated drywall paper. Each one needs a slightly different prep and primer choice.
Fix moisture before you prime
Moisture is the most common reason stain-blocking work fails. If water is moving through siding, trim, drywall, plaster, or cabinet material, it can dissolve tannins and other stains and carry them through the coating. Painting over that problem traps nothing for long.
Do these 3 things before closing this tab:
1Repair Windows errors before they cause bigger problems2Fix the driver behind crashes, sound loss and screen glitches3Clear out junk files and repair common Windows errorsFor interiors, investigate roof leaks, plumbing leaks, condensation, bath fan problems, exterior wall leaks, window flashing, and damp basements or crawl spaces. Ceiling stains should not be sealed until the leak is repaired and the material is dry. Drywall and wood should be given time to dry thoroughly; in a humid room, that may mean several days with airflow and dehumidification. If the drywall is soft, swollen, crumbly, or mold-contaminated, coating is not the repair.
For exteriors, inspect end grain, open joints, uncaulked trim returns, unprimed backs of replacement boards, missing flashing, and siding too close to grade or roofing. Cedar and redwood are especially prone to tannin movement when water enters from the backside and pushes extractives outward. When we replace exterior boards, we back-prime when practical and seal end grain because the exposed ends act like straws. A finish that looks perfect on day one can stain badly after the first hard rain if water has a path behind it.
Clean, dull, and sand the surface
Primer sticks to a prepared surface, not to dirt. Wash smoke, grease, hand oils, kitchen film, and exterior grime before sanding. For interiors, a degreaser or TSP substitute usually does the job. Rinse if the cleaner label requires it, then let the surface dry. On cabinets and trim, we clean before sanding so we do not grind wax, oil, or grease deeper into the surface.
Remove loose paint, failing stain, chalking, and peeling clear coat. Glossy surfaces need deglossing or scuff sanding so primer can bite. For most trim and cabinet work, 180- to 220-grit paper is a practical range after cleaning. For rough exterior wood, sanding may be more limited, but loose fibers and failed coating still need to come off. Vacuum dust and wipe with a clean cloth before priming.
Recommended Free Tools
Do not skip spot repairs. Fill nail holes, caulk open trim joints with a paintable caulk, replace rotten material, and tighten loose fasteners. Rusty nail heads should be cleaned and spot primed with a rust-inhibitive or stain-blocking primer. If the metal fastener is still exposed to moisture, expect the rust to return.
Choose the right primer for the stain
Paint-and-primer-in-one is not a stain-blocking system for serious bleed-through. It can help with adhesion and color change on clean, sound surfaces, but tannin, knots, smoke, water rings, ink, and odor contamination usually need a dedicated stain-blocking primer.
Primer chemistry matters. Shellac and oil or alkyd primers tend to block stains by forming a film that prevents migration. Some high-performance water-based restoration primers work differently; they may allow stain into the primer layer and then lock it as the primer dries. That can work well, but dry time and test patches matter more than they do with basic wall primer.
| Stain or surface | Best primer direction | Field notes |
|---|---|---|
| Cedar, redwood, oak tannin | Oil/alkyd tannin-blocking primer or high-grade exterior wood primer | Use full-section priming when bleed is widespread. For exterior boards, control backside moisture and seal end grain. |
| Pine knots and sap streaks | Shellac primer, often 2 thin coats | Spot prime knots before full priming. Heavy coats can wrinkle or dry slowly. |
| Water stains | Shellac, oil, or restoration water-based stain blocker | Repair the leak first. Let ceiling or wall material dry before priming. |
| Smoke and nicotine | Shellac or restoration primer after aggressive cleaning | Prime full walls or ceilings, not just spots, to avoid odor and color differences. |
| Rust from nails or fasteners | Rust-inhibitive spot primer or stain-blocking primer rated for rust stains | Clean the metal and stop moisture exposure where possible. |
| Marker, ink, dye, old stain | Shellac or high-performance stain blocker | Test before coating cabinets, trim, or furniture-grade surfaces. |
| Pet stains or odor | Restoration primer or shellac after cleaning | Contaminated carpet, pad, or subfloor may need deeper repair than paint. |
When shellac primer makes sense
Shellac primer is one of the strongest interior stain blockers we use for knots, sap, ink, marker, smoke odor, water stains, and stubborn tannin bleed. Product data for common shellac primers lists a wide stain range, including water and fire damage, grease, rust, creosote, asphalt, crayon, marker, knots, sap streaks, and tannin bleed. It dries fast and blocks aggressively, but it has strong odor, higher cost, and ventilation requirements. It is usually an interior tool, with limited exterior spot use depending on the product label.
When oil or alkyd primer is the better choice
Oil and alkyd stain-blocking primers are often the practical choice for exterior tannin-prone wood, full trim sections, and larger areas where shellac would be expensive or too intense to work with. Exterior alkyd wood primers are commonly promoted for tannin suppression on new and weathered wood. They dry slower than shellac, but they give crews more open time and can be a better fit for siding, fascia, and exterior trim.
When water-based restoration primers work
High-performance water-based restoration primers can block tough stains such as water damage, rust, smoke, nicotine, grease, tannin, ink, marker, pet stains, and odors. They are easier to clean up than shellac or oil, and many accept either water-based or oil-based topcoats. The tradeoff is that they need proper dry time. In cool, humid, or poorly ventilated rooms, we give them more time than the minimum label window before judging the result.
Rank #2

- Vertical aerosol for overhead professional projects
- Quick cure for water stains
- Flat white finish matches most ceiling tiles
- Great hide‐ non‐yellowing
- Low odor‐ all purpose interior use
Use a test patch before scaling up
A test patch is cheap insurance. Clean and sand a representative stained area, apply the primer you plan to use, let it dry per the label, and then give it extra time if the room is humid or cool. Apply the actual finish paint over the patch and check it after 24 to 48 hours. For cabinet dyes, oak tannin, knots, old water rings, and nicotine, this small test can save a full repaint.
Use the same number of coats and the same dry times you plan to use on the whole job. A primer that works in one thin coat on a small water stain may need two thin coats on knots, redwood, smoke, or oak cabinetry. Do not test only the primer color; test the primer plus the topcoat because some stains show after the finish coat reactivates the layer below.
Crashes, No Sound, or Screen Glitches?
Random freezes, missing sound and display glitches usually trace back to one bad driver. Find and replace yours safely.Free scan · under a minutePC Slower Than It Used to Be?
A free scan shows the junk files, broken settings and background clutter dragging Windows down - then fixes them in one click.Free scan · Windows 10 & 11If the stain returns in the test patch, change the system before expanding the work. That may mean switching from latex to oil, from oil to shellac, adding a second primer coat, extending dry time, or solving a moisture source you missed.
Apply primer correctly
Thin, even coats work better than one heavy coat. Heavy stain-blocking primer can wrinkle, sag, dry slowly, trap solvent, and still let stains migrate. For knots, smoke, water rings, oak cabinets, cedar, and redwood, two thin primer coats are usually more dependable than one overloaded pass.
Respect the label. Check minimum temperature, maximum humidity, recoat window, dry-to-touch time, topcoat time, ventilation, and whether sanding is allowed. Cool air, high humidity, poor airflow, and thick application can extend cure time. A primer that says it can be recoated in 45 minutes under ideal conditions may need longer in a damp basement or closed-up bathroom.
Prime to natural breaks. Spot priming can work for isolated knots or small stains, but it can also flash through the finish as a different sheen or texture. On walls, prime corner-to-corner when the staining is scattered. On doors, cabinets, and trim, prime full rails, stiles, panels, or boards so the finish looks consistent. After primer dries, scuff sand lightly if the label allows it, then remove dust before topcoating.
Quick wins for a faster PC:
Fix the driver behind crashes, sound loss and screen glitchesFind Drivers →Clear out junk files and repair common Windows errorsFree Scan →Scan for outdated or missing drivers - takes under a minuteDriver Scan →Special cases: wood, cabinets, ceilings, and exterior trim
Cedar, redwood, and oak
Cedar and redwood contain tannins that can bleed brown through water-based coatings, especially when moisture is present. Oak can do the same on interior cabinets, trim, and doors. For exterior cedar or redwood, we prefer a primer specifically rated for tannin blocking and exterior exposure, often an alkyd. Replacement boards should be primed on the back and ends where practical. End grain, miters, and butt joints deserve attention because they are common moisture entry points.
Pine knots and sap
Knots are concentrated resin pockets. Standard wall primer usually fails here. We spot prime knots with shellac primer, often twice, then prime the broader surface as needed. If sap is wet or sticky, scrape it, clean it, and give it time. Coating over active resin is asking for failure.
Cabinets and stained trim
Cabinet bleed is often a mix of tannin, dye, grease, old clear coat, and cleaning residue. We clean thoroughly, sand to a dull surface, vacuum, tack or wipe dust, then test the primer system on a door back or inconspicuous panel. Cabinet-grade work punishes shortcuts because glossy finishes, hand oils, and old stain all fight adhesion. Plan on more labor than a wall repaint.
Ceiling water stains
A ceiling stain should be treated as a leak report until proven otherwise. Repair the roof, plumbing, HVAC condensation, or bath fan issue first. Once the material is dry and sound, prime the stain with shellac, oil, or restoration primer. If the stain is broad, prime the full ceiling plane to reduce flashing.
What it costs in 2026
For DIY work, the cost is mostly materials: primer, finish paint, rollers, brushes, tape, sanding supplies, degreaser or TSP substitute, drop cloths, caulk, filler, respirator or cartridges where required, and disposal supplies. General latex primers may run about $16 to $25 per gallon in multi-gallon buys. Oil stain blockers are commonly around $34 to $38 per gallon. Water-based restoration primers can be about $44 per gallon in 5-gallon pricing. Shellac stain blockers are the premium option, often about $83 to $95 per gallon at major retail pricing checked in 2026.
Specific 2026 retail examples include KILZ 2 All Purpose 5 gallons at about $99, or $19.80 per gallon; KILZ Original oil primer at about $33.98 per gallon; Zinsser Cover Stain 5 gallons at about $183, or $36.60 per gallon; KILZ Restoration 5 gallons at about $218, or $43.60 per gallon; and Zinsser B-I-N shellac primer at about $94.48 per gallon. Primer coverage is commonly estimated around 200 to 300 square feet per gallon, but rough wood, patched drywall, and heavy staining can reduce that.
Professional interior painting in the U.S. commonly runs about $2 to $6 per square foot. A 2,000-square-foot whole-home interior often lands around $4,000 to $12,000 depending on prep, ceiling height, trim, location, access, and paint grade. Room painting averages vary by market and scope: many rooms fall around $350 to $850, while more involved 2026 room estimates put a national average near $1,892 with a typical range of $955 to $2,890. Smaller bedrooms may be $300 to $750, bathrooms $150 to $350, and living rooms $900 to $2,000.
Bleed-through prevention adds cost when the work requires extra cleaning, two primer coats, odor control, cabinet detail, full-section priming instead of spot priming, HEPA sanding, containment, or moisture repair. Labor is often 70% to 85% of a professional paint job, so the expensive part is usually diagnosis and prep, not the gallon of primer.
The Tool Desk
Outbyte PC Repair FREERepair Windows errors before they cause bigger problemsFix Now →Outbyte Driver Updater FREEFix the driver behind crashes, sound loss and screen glitchesFind Drivers →When to DIY and when to hire a pro
DIY is reasonable for small, dry, clearly identified stains: a few pine knots, a repaired ceiling ring, minor marker bleed, or a small tannin spot on interior trim. If you can clean the area, sand safely, ventilate properly, and follow the primer label, the job is manageable. Budget one day for cleaning and priming, plus another day for topcoating if dry times or humidity are not ideal.
Rank #3
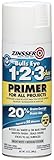
- Interior/exterior use on new or previously painted Drywall, concrete, wood, masonry, metal and glossy or difficult surfaces
- Oil-based formula seals uniformly and will Stick to surface without sanding
- Dries to the touch in just 30 minutes and covers up to 12 sq ft
- Has excellent stain blocking resistance and can be used over any oil or Latex topcoat
- Provides a smooth, White finish and; is designed to block imperfections with only one Coat
Hire a pro when the stain covers large areas, keeps returning, smells like smoke or urine, involves cabinets, appears on exterior cedar or redwood, or may be connected to moisture inside walls or ceilings. Cabinet refinishing and smoke restoration are especially easy to underestimate. They require cleaning discipline, controlled sanding, primer selection, spray or brush technique, and enough cure time between steps.
Also bring in qualified help for pre-1978 homes when sanding, scraping, or disturbing old coatings may involve lead-based paint. Federal renovation rules can require lead-safe work practices for contractors, and state programs may add their own requirements. Lead-safe setup, containment, cleanup, and HEPA equipment are not optional details when the rule applies.
Safety, ventilation, and permit notes
Most painting does not require a building permit, but repairs behind the stain might. Replacing drywall after water damage, changing structural material, repairing exterior wall assemblies, or fixing plumbing and electrical problems can trigger local permit rules. Requirements vary by city and state, so check your local building department before opening walls or making larger repairs.
Ventilation matters with stain-blocking primers. Shellac and oil primers can have strong solvents and higher odor. Use appropriate respirators, gloves, eye protection, and airflow based on the product label. Keep ignition sources away from solvent products, store rags safely, and follow local disposal rules. In occupied homes, plan the work so bedrooms, nurseries, and kitchens have enough cure time and fresh air before use.
Mildew is another safety issue. If discoloration is active mold or mildew, painting over it is not a fix. Clean and correct moisture first. If porous material is contaminated or damaged, replacement may be the responsible repair.
A professional workflow that prevents callbacks
Our standard sequence is simple because it has to hold up after the crew leaves: identify the stain, stop active moisture, dry the surface, clean contaminants, remove loose coating, sand or degloss, repair defects, spot prime severe stains, prime full sections where needed, test topcoat if the stain is risky, then apply finish coats at the proper spread rate.
On professional jobs, we also document the product system, batch numbers, dry times, room conditions, and stain locations. That record helps if a delayed stain appears later. If a brown streak shows up three months after exterior painting, notes can help separate a coating issue from new moisture intrusion. If a cabinet door bleeds after only the finish coat, the test patch and dry-time record point us toward the right correction.
What’s actually slowing this PC down?
Pick the symptom - the matching free tool is one click away.
The main lesson is this: do not ask finish paint to do primer’s job. Paint provides color, sheen, washability, and weathering performance. Stain-blocking primer isolates contaminants. When you choose the right product and give it the right conditions to dry, you stop most bleed-through before it reaches the finish.
Frequently Asked Questions
Why is the stain still bleeding through after two coats of paint?
Because bleed-through is stain migration, not poor coverage. The source may be tannin, water damage, smoke, rust, ink, knots, or old dye. Let the surface dry, clean it, sand or degloss as needed, then seal it with a dedicated stain-blocking primer before repainting.
What primer stops tannin bleed on wood?
For severe tannin on cedar, redwood, or oak, use an oil or alkyd tannin-blocking primer, shellac for interior spot problems, or a tested high-performance water-based restoration primer. Exterior wood usually needs an exterior-rated tannin-blocking system.
Is shellac primer better than oil primer for bleed-through?
Shellac is often stronger for interior knots, sap, smoke, ink, odor, and stubborn stains. Oil or alkyd primers are often more practical for larger exterior wood areas and full trim sections. The best choice depends on the stain, location, ventilation, and topcoat system.
Can I use paint-and-primer-in-one to stop stains?
Not for serious bleed-through. Paint-and-primer-in-one can help with color coverage and adhesion on clean surfaces, but tannin, water stains, smoke, rust, knots, and marker usually need a dedicated stain-blocking primer.
How long should stain-blocking primer dry before painting?
Follow the product label, then allow extra time in cool, humid, or poorly ventilated conditions. For severe stains, apply the finish paint over a small test patch and check it after 24 to 48 hours before coating the whole surface.
Do I need to prime the whole wall or just the stain?
Small isolated stains can be spot primed, but scattered staining should be primed corner-to-corner or to a natural break. On cabinets and trim, prime full panels, rails, stiles, or boards so the final sheen and texture stay consistent.
Quick Recap
Product prices and availability are accurate as of the date/time indicated and are subject to change. Any price and availability information displayed on Amazon at the time of purchase will apply.
The Tool Desk
Outbyte Driver Updater FREEScan for outdated or missing drivers - takes under a minuteDriver Scan →Outbyte PC Repair FREERepair Windows errors before they cause bigger problemsFix Now →
