Do these 3 things before closing this tab:
1Scan for outdated or missing drivers - takes under a minute2Clear out junk files and repair common Windows errors3Fix the driver behind crashes, sound loss and screen glitchesA kegerator conversion kit is one of the cleaner ways to turn a spare refrigerator, compact fridge, or chest freezer into a home draft system. The best kit is not simply the one with the most shiny parts. It is the one that fits your refrigerator, your keg type, your room, your ventilation, and the way you plan to use the bar.
For 2026 budgeting, most homeowners should expect a basic single-tap conversion kit to cost about $110 to $300. Better stainless parts, tower kits, dual taps, and kits with a 5 lb CO2 tank usually land around $300 to $420 or more before beer, CO2 fill, cleaning supplies, tools, carpentry, electrical work, plumbing, or cabinetry. If you already own a suitable fridge, a conversion kit can save money. If you have to buy a new fridge, build cabinets around it, add a circuit, install a sink, or run a drip-tray drain, the kit becomes only one line item in a larger home-bar project.
As an Amazon Associate I earn from qualifying purchases.
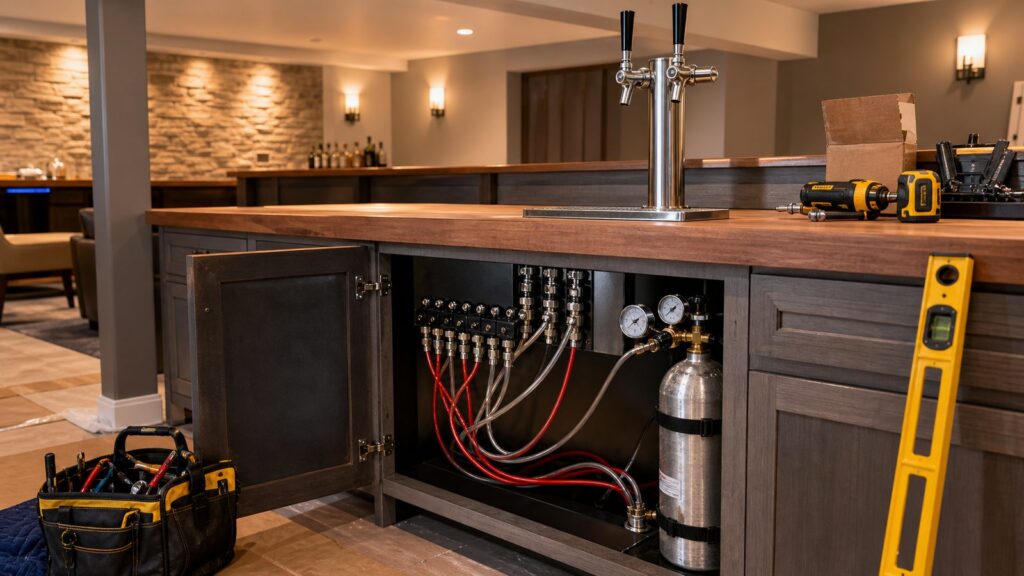
On our job sites, we treat a draft system like any other built-in appliance: measure first, confirm clearances, protect service access, plan electrical and ventilation, then finish the visible work. That approach prevents the two most expensive mistakes: buying hardware that does not fit and drilling into a refrigerator wall where refrigerant lines or wiring may be hidden.
Free tools Windows power users keep installed
One-click scans. No signup required.
What Comes in a Kegerator Conversion Kit?
Most kegerator conversion kits include the parts needed to move beer from a keg to a faucet using CO2 pressure. The exact hardware changes by kit, but a typical single-tap setup includes a faucet, shank or tower, beer line, gas line, clamps, keg coupler or homebrew disconnects, CO2 regulator, and sometimes a CO2 cylinder.
#1 Best Overall
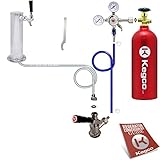
- PRO SERIES DUAL GAUGE REGULATOR: Easily measure PSI and CO2 volume and adjust CO2 output pressure using this Kegco 542 Pro Series Double Gauge Regulator packed with premium features. The top gauge indicates output pressure, while the side gauge tells you what's left in the CO2 tank, so you don't run out of gas during a party. The Standard plated brass body has a large pressure adjustment knob for easy use and includes a manual pressure release valve.
- LEVER HANDLE KEG COUPLER: This NSF-approved Kegco KT85D-L "D" System Keg Coupler features a sturdy nickel-plated forged brass body with a stainless steel probe, and is designed for use with all domestic brand American D system Sankey kegs. The lever-handle design is easy to use; simply pull out and then down on the handle to couple the keg. A 55-psi pressure relief valve makes this coupler even more convenient to use, allowing over-pressurized gas to escape before it enters your keg.
- SINGLE FAUCET DRAFT BEER TOWER: Featuring a beautiful Standard-plated metal finish and a matching Standard-plated faucet with metal lever, this 3" diameter air-cooled draft beer tower is the same stylish tower used on most commercial grade kegerators. This tower conveniently includes 5 feet of clear beer tubing ending in a nozzle and hex nut assembly for quick connection to all standard keg couplers, as well as a gasket and four screws for easy mounting.
- STANDARD METAL BEER FAUCET WRENCH: This beer faucet spanner wrench is an essential tool that allows you to quickly and confidently loosen or tighten shank collars without scratching your faucets. This wrench has been built to last with a rugged all-metal construction and a convenient 5-1/4" length.
- INCLUDES EMPTY 5 LB. ALUMINUM CO2 TANK: All of our brand new tanks are made from high strength aluminum alloy which is not as heavy as a steel tank and will not rust. These eye-catching tanks have a glossy red coating that acts as an extra layer of protection against corrosion and wear.
There are two main kit styles for homeowners:
- Door-mount kits: These are common for upright refrigerators. The faucet mounts through the refrigerator door or, in some cases, a carefully verified side wall. They usually use a beer shank, faucet, coupler, regulator, and tubing.
- Tower kits: These are common for compact fridges, bar counters, chest freezer conversions, and keezer builds. The faucet sits on a vertical tower mounted through the top surface.
A commercial beer keg usually needs a D-system coupler in the United States. Homebrew kegs commonly use ball-lock or pin-lock disconnects. Do not assume the fittings are interchangeable. A kit made for a domestic commercial keg will not connect to a homebrew Cornelius keg without different hardware.
Best Kegerator Conversion Kits by Use Case
The right kit depends on the build. A garage fridge used for weekend pours needs a different setup than a finished basement bar with millwork and a stone counter. Here is how we would sort the main options before buying.
Best Budget Garage Fridge Conversion
For a spare upright refrigerator in a garage, a basic single-tap door-mount kit is usually the most practical option. Current budget examples start around $110 to $175. BACOENG lists a standard single tower kit at about $109.99, while Kegco single-tap door-mount kits without a tank can sit around the low $130 range depending on configuration.
This is the lowest-cost path when you already own a fridge that can hold the keg. Before ordering, measure the inside floor area, clear height, compressor hump, shelf supports, door bins, and door swing. A sixth-barrel keg is much easier to fit than a half-barrel. A full-size half-barrel keg is roughly 16 inches in diameter and about 23 inches tall, and it weighs around 160 lb when full. That weight matters if the fridge floor is thin plastic or the unit sits on weak shelving.
For a garage setup, we usually prefer simple over fancy: one faucet, one regulator, one CO2 cylinder, one removable drip tray, and enough space to pull the keg out without disassembling the whole corner.
Best Single-Tap Kit for a Finished Home Bar
For a finished kitchen, basement, or bar wall, step up to a midrange single-tap kit in the $175 to $325 range. Look for a dual-gauge regulator, quality coupler, stainless steel faucet or shank where possible, and a drip tray strategy that matches the counter design.
Micro Matic’s standard 1-faucet conversion kit is a useful example of a higher-quality single-faucet kit, with pricing around $303.75. That is not the cheapest route, but the better hardware can be worth it in a finished room where leaks, stuck faucets, or poor pours are more than a minor nuisance.
PC Slower Than It Used to Be?
A free scan shows the junk files, broken settings and background clutter dragging Windows down - then fixes them in one click.Free scan · Windows 10 & 11Outdated Drivers Are Slowing You Down
One free scan finds every outdated or missing driver and matches the right update for your exact hardware.Free scan · exact hardware matchIf the faucet passes through a cabinet face or panel, the opening needs to be clean, sealed, and serviceable. We avoid burying tubing behind finished work without an access panel. Beer lines need cleaning. Regulators need adjustment. Washers and O-rings eventually need replacement.
Best Dual-Tap Kit for Homebrew or Two Beers
A dual-tap system is useful if you want two commercial beers, two homebrew kegs, or one beer plus cider, seltzer, kombucha, or another beverage. Expect about $300 to $450 or more for a proper dual-tap tower kit. Kegco’s dual-faucet tower kit with a 5 lb CO2 tank and ball-lock hardware is a current example around $418.25.
The detail that matters is gas control. A simple splitter can feed two kegs at the same pressure. That works if both beverages pour well at the same carbonation level. If one keg needs 10 PSI and another needs 14 PSI, use secondary regulators or a more flexible gas setup. Dual taps also mean twice the cleaning, twice the fittings, and more places for small CO2 leaks.
Best Keezer Conversion for Maximum Capacity
A keezer is a chest freezer converted into a draft system, usually controlled by an external thermostat so it runs at refrigerator temperature instead of freezer temperature. This setup can hold multiple kegs, but it is more of a small construction project than a simple appliance swap.
What’s actually slowing this PC down?
Pick the symptom - the matching free tool is one click away.
Most keezer builds need a wood collar between the freezer body and lid. The faucets mount through the collar instead of through the freezer wall. That matters because the freezer walls may contain refrigerant lines. A collar also gives you a place to route gas and beer lines, mount manifolds, and avoid damaging the appliance.
Budget for the kit, external temperature controller, lumber or finish material, sealant, hardware, casters if needed, and a drip tray. A keezer can be efficient and spacious, but it takes more planning to look appropriate in a finished room.
Rank #2
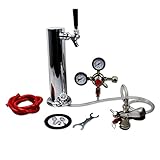
- PRO SERIES DUAL GAUGE REGULATOR: Easily measure PSI and Co2 volume and adjust Co2 output pressure using this Kegco 542 Pro Series Double Gauge Regulator packed with premium features. The top gauge indicates output pressure, while the side gauge tells you what's left in the Co2 tank, so you don't run out of gas during a party. The Standard plated brass body has a large pressure adjustment knob for easy use and includes a manual pressure release valve.
- LEVER HANDLE KEG COUPLER: This NSF-approved Kegco KT85D-L D System Keg Coupler features a sturdy nickel-plated forged brass body with a stainless steel probe, and is designed for use with all domestic brand American D system Sankey kegs. The lever-handle design is easy to use - simply pull out and then down on the handle to couple the keg. A 55-psi pressure relief valve makes this coupler even more convenient to use, allowing over-pressurized gas to escape before it enters your keg.
- SINGLE FAUCET DRAFT BEER TOWER: Featuring a beautiful Standard-plated metal finish and a matching Standard-plated faucet with metal lever, this 3" diameter air-cooled Kegco D4743T draft beer tower is the same stylish tower used on most commercial grade kegerators. This tower conveniently includes 5 feet of clear beer tubing ending in a nozzle and hex nut assembly for quick connection to all standard keg couplers, as well as a gasket and for screws for easy mounting.
- STANDARD METAL BEER FAUCET WRENCH: This beer faucet spanner wrench is an essential tool that allows you to quickly and confidently loosen or tighten shank collars without scratching your faucets. This wrench has been built to last with a rugged all-metal construction and a convenient 5-1/4" length.
- INCLUDES DETAILED INSTRUCTIONS: This kegerator conversion kit comes with easy-to-follow directions and all of the high-quality draft dispense components you'll need to quickly and easily convert your refrigerator into a high-performance draft beer dispenser
Best Outdoor Entertainment Setup
Outdoor bars are a different category. A conversion kit inside an old indoor refrigerator is not the same as an outdoor-rated kegerator. Heat, rain, pests, sunlight, GFCI protection, cabinet ventilation, and corrosion all matter. If the appliance sits in a patio kitchen, pavilion, pool house, or exposed bar, use equipment rated for the location.
For outdoor work, we normally treat the draft system as part of the larger outdoor kitchen plan. That means clear appliance specs, proper receptacle location, weather protection, service access, ventilation openings, and durable finishes. The kit price may still be $300 to $450, but the surrounding construction can cost much more than the draft hardware.
2026 Cost Comparison: Kit Price vs Real Project Price
The kit price is only the starting number. A homeowner can convert a suitable garage fridge for a few hundred dollars. A built-in basement or outdoor bar can move into remodel territory quickly because the work touches cabinets, counters, electrical, plumbing, ventilation, and finish carpentry.
| Project Type | Typical 2026 Kit Cost | Common Added Costs | Best Fit |
|---|---|---|---|
| Budget single-tap fridge conversion | $110-$175 | CO2 tank if not included, refill, cleaning kit, hole saw, clamps, drip tray | Garage or utility-room fridge |
| Midrange single-tap setup | $175-$325 | Stainless faucet, dual-gauge regulator, better coupler, replacement lines, finish trim | Basement bar, rec room, kitchen-adjacent bar |
| Dual-tap or tower system | $300-$450+ | Second faucet, manifold, secondary regulator, more tubing, larger drip tray | Homebrew, two-beer service, larger entertaining areas |
| Keezer build | $300-$600+ for draft parts and controls | Chest freezer, thermostat, collar, sealant, casters, lumber, stain or paint | Multiple kegs, homebrew, garage or basement |
| Built-in home bar | $300-$450+ for kit | Cabinetry, countertop cuts, electrical, ventilation, plumbing, access panels, finish labor | Finished basement, kitchen bar, entertainment room |
| Outdoor bar | $300-$450+ for kit, often more for rated equipment | Outdoor-rated refrigerator, GFCI, weatherproofing, drainage, corrosion-resistant materials | Patio, pool house, pavilion, outdoor kitchen |
A 5 lb CO2 cylinder is common for home systems. Some kits include it; others do not. CO2 refills or exchanges vary by supplier, tank size, certification status, and whether you use a welding supplier, beverage gas company, or homebrew shop. Public price references commonly fall around $5 to $22 for smaller home cylinders, but local pricing can be higher.
Cleaning equipment is another line item. A basic cleaning kit can cost about $15 to $90 or more depending on whether it uses a hand pump or recirculating pump and whether it includes alkaline cleaner, a faucet wrench, brushes, washers, and O-rings.
How to Know if Your Refrigerator Can Be Converted
Not every refrigerator is a good candidate. The best donor fridge has enough interior volume, a flat or modifiable floor, a door or verified drill-safe panel, dependable cooling, and enough room nearby for the CO2 tank and cleaning access.
Quick wins for a faster PC:
Scan for outdated or missing drivers - takes under a minuteDriver Scan →Clear out junk files and repair common Windows errorsFree Scan →Fix the driver behind crashes, sound loss and screen glitchesFind Drivers →Measure Before Buying
Measure the keg first, then the appliance. Check clear width, clear depth, clear height, door gasket interference, shelf supports, light housings, thermostat housings, and the compressor hump. Many compact fridges look large enough until the keg hits the hump at the back.
As a working rule, allow more space than the keg diameter alone. You need room for the coupler on top, beer and gas line bends, and your hands. A commercial keg coupler can add several inches above the keg. If height is tight, choose a low-profile coupler or a different keg size.
Do Not Drill the Back Wall
Do not drill the back wall of a refrigerator. Product instructions for conversion kits commonly direct homeowners to drill through the door or an appropriate sidewall and avoid the refrigerator back, where refrigerant lines and other components may be located. Hitting a refrigerant line can ruin the appliance and may create a safety issue.
Even sidewalls require caution. Some refrigerators route refrigerant lines through cabinet walls. If you cannot confirm a safe drilling location, use the door, build a collar, or choose a different appliance. For keezer builds, a collar is usually the safer place for faucets and penetrations.
Recommended Free Tools
Rank #3
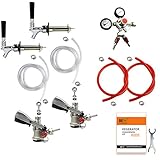
- 1. DUAL GAUGE REGULATOR: It comes with an appropriate pressure dial that features the style of a knob for regulating pressure. With a weight of 3 pounds, the unit comes with rubber covers for protective purposes. You can use the gauge to know the pressure outside and inside the CO2 tank –you will not have to be worried that your gas might run out. It also has a shutoff valve that features a built-in spring for preventing the backflow of beer. Pressure Relief Valve Releases at 45PSI.
- 2. LEVER HANDLE KEG COUPLER: This refers to a D System Keg Coupler that has a strong construction made of nickel-plated forged brass. The probe, on the other hand, is made of stainless steel. The unit can be used alongside any domestic brand American D system Sankey kegs. It features an easy-to-use design, where you only need to pull the lever handle out and down, in that order, to couple the keg. The coupling of the keg is quite convenient with the availability of a 55-psi pressure relief valve
- 3. CHROME BEER FAUCET WITH BRASS LEVER: Featuring a forged brass body and highly polished chrome finish, this beer faucet puts a stylish finishing touch on your kegerator at a price you'll love.The brass shaft assembly and lever includes a non-stick ball washer for smooth operation, and the lever has standard threading that is compatible with most branded tap handles. This 4-1/8" long beer shank with nipple assembly is constructed from chrome-plated brass and can be mounted through a 1" hole.
- 4. METAL BEER FAUCET WRENCH: You need the ideal wrench spanner for loosening or tightening shrank collars easily and quickly without the worry that you will scratch your faucets, and the standard metal beer faucet wrench is just the right tool. The all-mental sturdiness of this wrench makes it quite durable as well as ideal to handle any tightening or loosening needs. It is 5-1/4" in length, which makes it easy to use on any surface.
- 5. STANDARD METAL BEER FAUCET WRENCH: You need the ideal wrench spanner for loosening or tightening shrank collars easily and quickly without the worry that you will scratch your faucets, and the standard metal beer faucet wrench is just the right tool. The all-mental sturdiness of this wrench makes it quite durable as well as ideal to handle any tightening or loosening needs. It is 5-1/4" in length, which makes it easy to use on any surface.
Plan the CO2 Location
Keeping the CO2 tank inside the refrigerator is tidy, but it takes up keg space. Keeping it outside saves interior room and makes the regulator easier to read. If the gas line passes through the fridge wall, use a grommet, protect the tubing from sharp metal, and seal the opening appropriately.
The CO2 cylinder should stand upright and be secured so it cannot fall. A full cylinder with a damaged valve is a serious hazard. In built-in bars, we plan a dedicated cylinder bay or strap point instead of leaving the tank loose behind a cabinet door.
Draft Quality: Why Cheap Kits Often Pour Poorly
A draft system works when temperature, pressure, line length, and cleanliness are balanced. If one of those is wrong, the result is usually foam, flat beer, slow pours, or inconsistent pours.
Many home systems start with 3/16-inch inside-diameter beverage line and roughly 10 to 12 PSI, then adjust from there. That is a starting point, not a universal setting. Beer temperature, carbonation level, elevation, faucet height, line length, and tubing resistance all affect the pour.
Temperature is usually the first problem we check. Beer that warms in the line or tower foams when it reaches the faucet. Tower systems may need tower cooling, especially if the tower sits above a warm counter. A small fan or cooling line can make a noticeable difference.
Line cleaning is not optional. Brewers Association and Micro Matic guidance emphasizes regular draft line cleaning, commonly every keg or at least every two weeks. At home, that schedule may feel aggressive, but it is the standard that keeps flavor, hygiene, and system performance under control. At minimum, build the cleaning process into how the bar is designed. If the faucet, coupler, and lines are hard to reach, the system will not be maintained.
Safety, Permits, and Code Issues Homeowners Miss
A plug-in refrigerator by itself often does not require a permit. The project changes when you add a new electrical circuit, modify built-in cabinetry, add plumbing, install a sink, run a drip-tray drain, alter structure, or build an outdoor kitchen. Permit requirements are local, so the right answer depends on your city or county.
For example, many jurisdictions treat simple appliance replacement differently from new electrical or plumbing work. New receptacles, dedicated circuits, GFCI protection, wet-bar sinks, ice makers, and exterior appliance locations can trigger electrical or plumbing permits and inspections. The safest planning assumption is simple: if the project changes wiring, plumbing, structure, or exterior work, check local requirements before rough-in.
Electrical and GFCI Planning
Home bars often sit in basements, garages, kitchens, patios, and wet-bar areas. Those locations can involve GFCI protection requirements, receptacle spacing issues, and dedicated circuit questions. Do not bury an extension cord behind cabinets. Do not rely on a power strip inside a damp bar cabinet. The refrigerator needs a proper receptacle that remains accessible for service.
If the bar includes an undercounter refrigerator, icemaker, dishwasher drawer, sink pump, lighting, and countertop outlets, an electrician should lay out the circuit plan before cabinets are ordered. Moving a receptacle after stone counters and finished panels are installed is needlessly expensive.
Rank #4
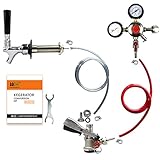
- 1. DUAL GAUGE REGULATOR: This unit weighs about 3 pounds and includes 2 rubber protective covers. It always tell you working pressure and tank pressure with pinpoint accuracy. A convenient knob style pressure dial that can be adjusted without tools. Shutoff valve with built in spring loaded check valve to prevent beer from flowing backward into the gas lines.
- 2. HANDLE D-SYSTEM KEG COUPLER: D-System Keg Coupler features a sturdy nickel-plated forged brass body with a stainless steel probe, and is designed for use with all domestic brand American D system Sankey kegs. The lever-handle design is easy to use - simply grip the handle and then down on the handle to couple the keg. A 55-psi pressure relief valve makes this coupler even more convenient to use, allowing over-pressurized gas to escape before it enters your keg.
- 3. CHROME BEER FAUCET WITH BRASS LEVER: Featuring a forged brass body and highly polished chrome finish, this beer faucet puts a stylish finishing touch on your kegerator at a price you'll love.The brass shaft assembly and lever includes a non-stick ball washer for smooth operation, and the lever has standard threading that is compatible with most branded tap handles. This 4-1/8" long beer shank with nipple assembly is constructed from chrome-plated brass and can be mounted through a 1" hole.
- 4. METAL BEER FAUCET WRENCH: This beer faucet spanner wrench is an essential tool that allows you to quickly and confidently loosen or tighten shank collars without scratching your faucets.
CO2 Safety in Basements and Closets
CO2 is not toxic like combustion gases, but it can displace oxygen in a poorly ventilated enclosed space. NIOSH lists exposure symptoms that include headache, dizziness, breathing difficulty, increased heart rate, coma, asphyxia, and frostbite from liquid or dry ice exposure. That does not mean a normal home kegerator is automatically dangerous. It does mean cylinders, regulators, and gas lines deserve respect.
Do a leak test at setup. Use gas-rated tubing and clamps. Secure the cylinder upright. Avoid placing CO2 equipment in a sealed closet, tiny mechanical room, or unventilated cabinet without thinking through leakage and ventilation. For basement bars, a CO2 alarm is a reasonable hidden-cost item, especially when the cylinder is stored in a cabinet or the room has limited air movement.
The Tool Desk
Outbyte PC Repair FREERepair Windows errors before they cause bigger problemsFix Now →Outbyte Driver Updater FREEFix the driver behind crashes, sound loss and screen glitchesFind Drivers →Drip Trays and Drains
A removable drip tray is simplest. It costs less, avoids plumbing, and keeps the project in low-risk territory. A plumbed drip tray is convenient in a busy bar, but it can trigger plumbing considerations and needs a trap, cleanable route, and odor control. We plan that before countertop fabrication because the tray location affects faucet placement, backsplash layout, and cabinet access.
Independent reader supportYour contribution helps us test, update, and keep practical guides available for everyone.Door-Mount vs Tower Kits
Door-mount kits are usually easier for upright refrigerators. They keep the faucet on the appliance door, minimize countertop work, and are easier to remove if the fridge is replaced. They are a good fit for garages, utility rooms, and simple basement setups.
Tower kits look more like a finished bar. They work well on compact fridges under counters, chest freezer collars, and bar tops. The tradeoff is installation complexity. You need a clean vertical path for the beer line, a stable mounting surface, and a plan to keep beer in the tower cold.
| Kit Type | Typical Use | Pros | Watchouts |
|---|---|---|---|
| Door-mount | Upright refrigerator | Lower cost, simpler drilling, good for DIY | Door clearance, gasket swing, visible appliance front |
| Single tower | Compact fridge or bar counter | Cleaner bar look, good for finished rooms | Top drilling, tower cooling, counter coordination |
| Dual tower | Two beers or homebrew | More serving options | More fittings, more cleaning, pressure balancing |
| Keezer collar | Chest freezer conversion | Large capacity, avoids drilling freezer walls | More carpentry, thermostat control, larger footprint |
When to DIY and When to Hire a Pro
A homeowner with basic tools can often handle a standalone garage fridge conversion. A built-in bar, outdoor installation, or project involving wiring, plumbing, cabinetry, or stone counters should be planned like a small remodel.
Good DIY Candidates
- A spare upright refrigerator with verified interior space.
- A single door-mounted faucet.
- No new electrical, plumbing, cabinetry, or exterior work.
- A removable drip tray.
- A CO2 tank secured nearby with easy access.
- A homeowner comfortable drilling clean holes and leak-testing gas fittings.
For a simple DIY install, expect a few hours after parts are on site. The time usually goes into measuring, removing shelves and door bins, drilling the faucet opening, assembling fittings, checking for gas leaks, and adjusting the pour.
Hire Help for These Conditions
- The refrigerator will be built into cabinets or under a counter.
- The bar needs a new receptacle, dedicated circuit, or GFCI correction.
- The project includes a sink, ice maker, drain, or plumbed drip tray.
- The system is outdoors or in a damp location.
- You need countertop drilling or stone fabrication.
- You cannot verify a safe drilling location on the appliance.
- The CO2 cylinder will be enclosed in a cabinet, closet, or basement service space.
On finished projects, the order of operations matters. We confirm appliance specs before cabinet drawings are finalized. We place the receptacle and ventilation before installation. We rough in any plumbing before counters. We leave removable access where regulators, lines, and drains need service. That sequence prevents beautiful millwork from becoming an obstacle every time the system needs cleaning.
Buying Checklist Before You Order
Use this checklist before buying a kit. It catches most compatibility mistakes.
- Measure the keg diameter and height, including coupler clearance.
- Measure the refrigerator interior width, depth, and clear height.
- Confirm whether the kit is for commercial kegs, homebrew ball-lock kegs, or pin-lock kegs.
- Choose door-mount, tower, or keezer collar based on the appliance and room.
- Decide whether the CO2 tank goes inside or outside the fridge.
- Confirm whether the kit includes a 5 lb CO2 tank or only the regulator.
- Choose stainless faucets and shanks if the system will see frequent use or acidic drinks.
- Plan the drip tray: removable for simplicity, plumbed only if the project supports it.
- Buy a cleaning kit, faucet wrench, replacement washers, and O-rings.
- Confirm electrical access, GFCI needs, ventilation, and service clearance before finish work.
Our Bottom-Line Recommendation
For the cheapest functional setup, use a budget single-tap kit only if you already have a suitable garage or utility-room refrigerator. Keep the design simple, use a removable drip tray, and spend a little extra on cleaning supplies and leak-testing materials.
Best Value
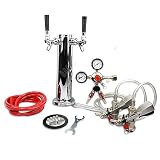
- PRO SERIES DUAL GAUGE REGULATOR: Easily measure PSI and Co2 volume and adjust Co2 output pressure using this Kegco 542 Pro Series Double Gauge Regulator packed with premium features. The top gauge indicates output pressure, while the side gauge tells you what's left in the Co2 tank, so you don't run out of gas during a party. The Standard plated brass body has a large pressure adjustment knob for easy use and includes a manual pressure release valve.
- LEVER HANDLE KEG COUPLER: This NSF-approved Kegco KT85D-L D System Keg Coupler features a sturdy nickel-plated forged brass body with a stainless steel probe, and is designed for use with all domestic brand American D system Sankey kegs. The lever-handle design is easy to use - simply pull out and then down on the handle to couple the keg. A 55-psi pressure relief valve makes this coupler even more convenient to use, allowing over-pressurized gas to escape before it enters your keg.
- SINGLE FAUCET DRAFT BEER TOWER: Featuring a beautiful Standard-plated metal finish and a matching Standard-plated faucet with metal lever, this 3" diameter air-cooled Kegco D4743T draft beer tower is the same stylish tower used on most commercial grade kegerators. This tower conveniently includes 5 feet of clear beer tubing ending in a nozzle and hex nut assembly for quick connection to all standard keg couplers, as well as a gasket and for screws for easy mounting.
- STANDARD METAL BEER FAUCET WRENCH: This beer faucet spanner wrench is an essential tool that allows you to quickly and confidently loosen or tighten shank collars without scratching your faucets. This wrench has been built to last with a rugged all-metal construction and a convenient 5-1/4" length.
- INCLUDES DETAILED INSTRUCTIONS: This kegerator conversion kit comes with easy-to-follow directions and all of the high-quality draft dispense components you'll need to quickly and easily convert your refrigerator into a high-performance draft beer dispenser
For a finished home bar, choose a midrange single-tap or dual-tap kit with better hardware, ideally stainless where the budget allows. The extra $100 to $200 is usually small compared with the cost of cabinets, countertops, trim, and electrical work.
For homebrew or multiple beverages, choose a dual-tap tower or keezer-style system with enough gas control to balance each keg properly. For outdoor bars, do not build around an indoor-rated refrigerator and hope it survives. Use equipment and electrical planning appropriate for the location.
The best kegerator conversion kit is the one that can be installed cleanly, maintained easily, and serviced without tearing apart the bar. Buy the draft parts after the room, appliance, and access plan are clear. That is how a simple beer project becomes a reliable home system instead of a frustrating appliance experiment.
Frequently Asked Questions
How much does a kegerator conversion kit cost in 2026?
Most basic single-tap kits cost about $110 to $300. Better stainless, tower, dual-tap, or included-CO2-tank kits usually cost about $300 to $420 or more before the keg, CO2 fill, cleaning supplies, tools, and any construction work.
Do these 3 things before closing this tab:
1Clear out junk files and repair common Windows errors2Fix the driver behind crashes, sound loss and screen glitches3Repair Windows errors before they cause bigger problemsCan any refrigerator be converted into a kegerator?
No. The refrigerator must have enough interior space for the keg, coupler, tubing, and airflow. Many compact fridges have compressor humps that block full-size kegs. You also need a safe drilling location, usually the door or a verified panel, not the back wall.
Do I need a permit to install a home kegerator?
A plug-in refrigerator alone often does not require a permit, but new electrical circuits, plumbing, a sink, a drip-tray drain, structural changes, outdoor kitchen work, or built-in cabinetry modifications may trigger local permits and inspections.
Is it safe to keep a CO2 tank in a basement bar?
Yes, if it is installed responsibly. Secure the cylinder upright, leak-test fittings, keep the area ventilated, and avoid sealed closets or tight unventilated cabinets. CO2 can displace oxygen, so a CO2 alarm is worth considering in enclosed basement setups.
How often should beer lines be cleaned?
Draft-quality guidance commonly recommends cleaning beer lines every keg or at least every two weeks. Homeowners should also inspect washers, O-rings, faucets, and couplers during cleaning.
The Tool Desk
Outbyte Driver Updater FREEFix the driver behind crashes, sound loss and screen glitchesFind Drivers →Outbyte PC Repair FREEClear out junk files and repair common Windows errorsFree Scan →Should I convert an old fridge or buy a ready-made kegerator?
Convert the fridge if it fits the keg, cools reliably, and can be drilled safely. Buy a ready-made kegerator if you need a cleaner finished look, lack a suitable fridge, want warranty support, or would spend so much modifying the old unit that the savings disappear.
Quick Recap
Product prices and availability are accurate as of the date/time indicated and are subject to change. Any price and availability information displayed on Amazon at the time of purchase will apply.




