What’s actually slowing this PC down?
Pick the symptom - the matching free tool is one click away.
Some links on this page are affiliate links: if you buy through them we may earn a commission, at no extra cost to you.
The best clear silicone for most showers is a 100% silicone kitchen-and-bath sealant labeled for tubs, tile, shower doors, glass, ceramic, porcelain, fiberglass, and metal fixtures. For a typical homeowner buying from a US home center in 2026, that usually means a product like GE Advanced Silicone Kitchen & Bath, GE Supreme Silicone Kitchen & Bath, Gorilla 100% Silicone Kitchen & Bath, or a comparable professional-grade clear bath silicone.
That answer comes with a contractor caveat: the product matters, but prep matters more. On our job sites, most failed shower caulk is not caused by buying the second-best tube. It is caused by sealing over old silicone, damp grout, soap film, active mildew, three-sided joints, or a gap that should have been corrected before caulk ever came out of the gun.
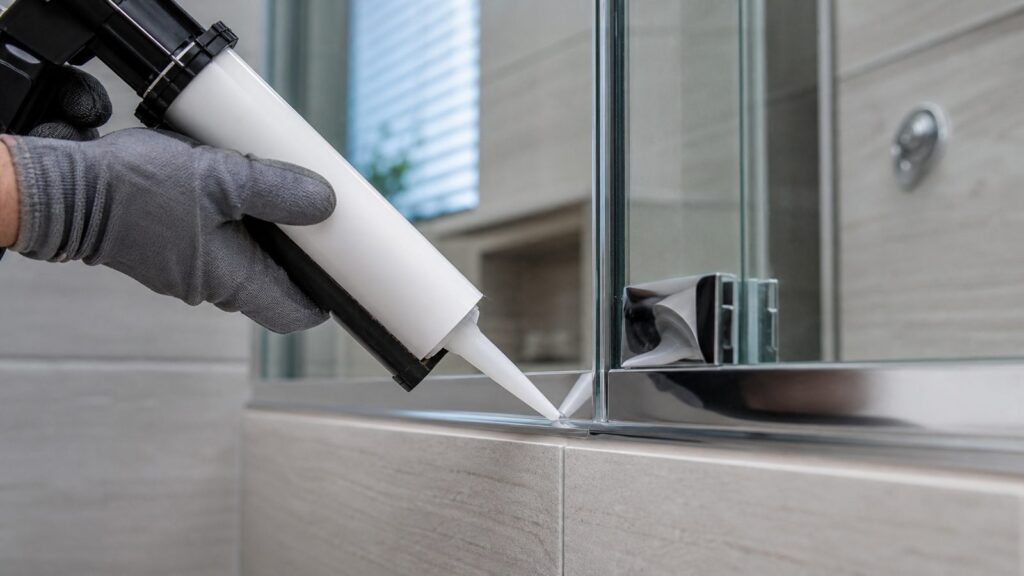
Clear silicone is a good choice where dissimilar materials meet: glass to tile, metal frame to tile, fixture escutcheons, glass panels, and some fiberglass or acrylic surrounds. It is not always the best-looking choice for every joint. In tile-to-tile inside corners, tub-to-tile transitions, or joints next to colored grout, a white, almond, gray, or grout-matched silicone often looks cleaner than clear because clear silicone shows shadows, dirt, uneven gaps, and rough edges behind it.
As an Amazon Associate I earn from qualifying purchases.
Use this guide to choose the right clear shower silicone, understand what you should pay, and decide whether this is a clean DIY maintenance job or a sign of a deeper waterproofing problem.
Our Short Answer: Best Clear Silicone for Most Showers
For most residential showers, choose a clear, mold-resistant, 100% silicone kitchen-and-bath sealant in a 10 to 10.5 oz cartridge. Look for these words on the label: 100% silicone, kitchen and bath, waterproof, mold or mildew resistant, and permanently flexible.
#1 Best Overall

- 100% Waterproof: This 100% silicone formula offers ultimate protection against water damage, providing a reliable seal in areas prone to consistent water exposure
- Strong and Flexible: Stays permanently flexible with a high-performing, durable seal
- 30-Minute Water-Ready: Ready for water exposure in as little as 30 minutes
- Shrink- and Crack-Proof: Withstands extreme expansion and contraction associated with temperature fluctuations
- Compatible with Most Materials: Adheres to most metals, plastics, and woods; glass, drywall, plaster, granite, cultured marble, ceramic and porcelain tile, and more
A mainstream 10 to 10.1 oz cartridge typically costs about $8 to $12 at large US retailers in 2026. Current retail examples in the research pack include DAP Kwik Seal Ultra clear 10.1 oz at about $8.78, Gorilla 10 oz clear 100% silicone at about $9.84, GE Tub and Tile Silicone 10.1 oz clear at about $9.48, and GE Advanced Silicone Kitchen & Bath 10.1 oz clear at about $11.58.
For a normal tub/shower surround, one 10 oz cartridge is usually enough if the joints are clean and reasonably sized. A large walk-in shower, multiple glass panels, bench seams, niches, and door-frame joints can require two cartridges or more. Most 10 to 10.5 oz cartridges cover roughly 24 to 30 linear feet at a 1/4-inch bead, but real coverage drops fast when joints are wider, deeper, uneven, or need rework.
If we had to write a simple job-site spec for a homeowner, it would be this: use clear 100% silicone kitchen-and-bath sealant for glass, metal, porcelain, ceramic, fiberglass, and acrylic shower joints; use color-matched 100% silicone at tiled inside corners and tub-to-tile joints when appearance matters; remove all old caulk; clean and dry the joint completely; tool the bead once; and keep the shower dry for the full cure window whenever possible.
Clear Silicone Product Comparison for Shower Use
Most homeowners do not need an exotic sealant. They need the right chemistry for a wet joint and a clean installation. The table below compares the practical choices we would consider for a shower repair or bathroom remodel.
| Product type | Best use in a shower | Typical 2026 cost | Pros | Watch-outs |
|---|---|---|---|---|
| 100% silicone kitchen-and-bath sealant | Most wet shower joints, glass, tile, fiberglass, acrylic, fixtures, door frames | $8-$12 per 10-10.1 oz cartridge | Waterproof, flexible, long service life, widely available | Not paintable; harder to tool than acrylic; old silicone must be removed |
| Premium or specialty clear sealant | High-visibility glass joints, difficult adhesion areas, specialty bath details | $10-$14 per 10-10.5 oz cartridge equivalent | May offer better clarity, adhesion, or specialty performance | Read substrate limits carefully; some products behave differently than standard silicone |
| Small squeeze tube clear silicone | Minor fixture touch-ups, small trim gaps, emergency repairs | $6-$9 for about 2.8-6 oz | No caulk gun needed; convenient for tiny repairs | Expensive per ounce; harder to lay a consistent long bead |
| Siliconized acrylic bathroom caulk | Paintable bathroom trim outside direct wet zones | Often similar or slightly less than silicone | Easier cleanup, paintable options, easier tooling | Generally less durable in constant shower exposure unless manufacturer specifically supports that use |
| Grout | Tile field joints only, not movement joints | Varies by grout type and project size | Matches tile work, hard wearing in the right location | Wrong material for changes of plane; can crack at corners and perimeters |
GE Advanced Silicone Kitchen & Bath, GE Supreme Silicone Kitchen & Bath, Gorilla 100% Silicone Kitchen & Bath, DAP Kwik Seal Ultra, Sashco CleanSeal, and clear Lexel-style specialty sealants all show up in the conversation for shower work. The right choice depends on joint location, substrate, cure time, appearance, and whether you need true 100% silicone or a different clear sealant with specific adhesion traits.
Recommended Free Tools
For standard wet shower joints, we lean toward 100% silicone first. If a manufacturer calls for a specific product around a shower door, solid-surface panel, stone, or prefabricated unit, follow that manufacturer. Compatibility beats brand loyalty.
Where Clear Silicone Looks Best
Clear silicone is not invisible. It is transparent, which means it shows the joint behind it. That can be good or bad depending on what the joint looks like before sealing.
Clear usually looks best in these locations:
- Glass shower panels to tile or stone
- Frameless or semi-frameless shower door hardware
- Metal trim to tile where a white bead would stand out
- Clear glass-to-glass joints when approved by the enclosure manufacturer
- Fixture trim where the wall finish is patterned or mixed color
- Fiberglass or acrylic shower surrounds with glossy light surfaces
Clear often looks worse in these locations:
- Deep shadow lines at inside tile corners
- Wide, uneven tub-to-tile gaps
- Joints with old staining behind the bead
- Edges where grout lines are rough or chipped
- Dark tile corners where clear turns into a glossy black line
For tile showers, our crews often use grout-matched 100% silicone at inside corners and perimeters, then clear silicone at glass and metal transitions. That gives the shower a finished look without pretending one product should handle every visual condition.
100% Silicone vs Siliconized Acrylic
The label can be confusing because many tubes use the word silicone. For continuously wet shower joints, the difference matters.
Do these 3 things before closing this tab:
1Scan for outdated or missing drivers - takes under a minute2Repair Windows errors before they cause bigger problems3Fix the driver behind crashes, sound loss and screen glitches100% silicone stays flexible and waterproof after curing. It handles movement better than acrylic latex, bonds well to many bath surfaces, and is the default choice for wet joints in showers and tubs. It is also not paintable, has a slicker feel when tooling, and usually requires mineral spirits or careful scraping for cleanup depending on the product and cure stage.
Siliconized acrylic or acrylic latex caulk is easier to apply, easier to clean with water before it cures, and often paintable. It can be useful for bathroom trim, casing, baseboard, or painted joints outside the direct wet zone. In constant shower exposure, however, it generally does not last like 100% silicone unless the manufacturer explicitly rates that exact product for that exact wet application.
DAP Kwik Seal Ultra is an advanced kitchen-and-bath product that many homeowners like because it is easier to work with than traditional silicone. That can be useful, but do not use ease of tooling as the only selection standard. Read the label for water exposure timing, substrate compatibility, mold resistance, and whether the product is appropriate for the joint you are sealing.
Neutral-Cure vs Acetoxy-Cure Silicone
Most homeowners never hear these terms until a sealant fails or a finish discolors. They are worth understanding.
Outdated Drivers Are Slowing You Down
One free scan finds every outdated or missing driver and matches the right update for your exact hardware.Free scan · exact hardware matchPC Slower Than It Used to Be?
A free scan shows the junk files, broken settings and background clutter dragging Windows down - then fixes them in one click.Free scan · Windows 10 & 11Acetoxy-cure silicone is common, strong, and easy to find. It releases a vinegar smell as it cures. It bonds well to many nonporous bathroom materials, but it can be less suitable around some metals, natural stone, and sensitive finishes.
Neutral-cure silicone is usually lower odor and preferred around sensitive metals, some stones, and finish conditions where discoloration or corrosion is a concern. It is often the better choice for higher-end fixtures, specialty metal finishes, stone surrounds, and commercial work where the sealant spec is more formal.
If the shower includes natural stone, plated metal, specialty coatings, or a manufacturer warranty, read the fixture, tile, panel, or enclosure documentation before choosing a tube. A $10 sealant should not be allowed to compromise a $2,000 shower door or a stone installation.
Rank #2

- 100% Silicone Caulk Protection: This silicone caulk clear provides ultimate waterproof protection, ensuring a reliable seal against water damage. Ideal for areas with consistent exposure, keeping your surfaces safeguarded and pristine under any weather condition.
- Strong and Flexible: Delivers a silicone sealant waterproof clear that remains permanently flexible, adapting to surface movements for a lasting, durable hold. Perfect for dynamic environments like bathrooms and kitchens where adaptability and resilience are paramount.
- Quick 30 Minute Water Ready Performance: Experience the convenience of a silicone caulk that becomes water resistant in just 30 minutes, making it perfect for time sensitive projects. No more waiting hours, dependable, quick sealing efficiency with clear silicone caulk.
- Shrink and Crack Proof: Experience superior durability with clear silicone caulk that withstands temperature fluctuations. Its flexibility guarantees your surfaces stay intact without shrinking or cracking, ensuring consistent protection and a flawless finish over time.
- Low Odor and Safe Indoors: Enjoy stress free application with this silicone sealant featuring a low odor, neutral cure formula. Great for indoor use without overwhelming fumes, enhancing comfort and safety while ensuring effective waterproof clear protection for your spaces.
Product Selection by Shower Joint
A better way to choose shower silicone is by joint location, not by a generic best-products list. Different joints move differently, get wet differently, and show defects differently.
| Joint location | Best sealant choice | Recommended color | Contractor note |
|---|---|---|---|
| Glass panel to tile | 100% silicone kitchen-and-bath or enclosure-approved silicone | Clear | Clean glass with alcohol after removing residue; avoid sealing weep paths |
| Metal shower door frame to tile | 100% silicone, neutral-cure if finish compatibility matters | Clear or color matched to frame/tile | Many framed systems are sealed on the exterior side while interior drainage paths stay open |
| Tile inside corner | Flexible sealant meeting tile movement-joint expectations | Grout-matched silicone | Do not grout changes of plane when movement accommodation is required |
| Tub-to-tile joint | 100% silicone kitchen-and-bath | White, almond, or grout-matched in many homes | Fill the tub before caulking when project practice calls for it, then let cure before draining |
| Fiberglass surround seam | Manufacturer-approved 100% silicone | Clear or white | Some panels have designed laps or drainage details; follow the unit instructions |
| Fixture escutcheon to tile | 100% silicone kitchen-and-bath | Clear | Leave a small drainage break if the fixture manufacturer requires it |
| Painted wall trim outside shower spray | Paintable bathroom-rated acrylic or siliconized acrylic | Paintable white | Do not substitute this for the main wet shower joint |
For remodels and commercial work, project documents may call for sealant meeting ASTM C920 or similar performance requirements. That is more specific than a retail label. If the spec says ASTM C920, use a compliant sealant and follow the manufacturer data sheet for primer, joint size, tooling, and cure.
What Shower Silicone Costs in 2026
For a DIY recaulking job, the caulk itself is usually the cheapest part. The real cost is prep time.
A mainstream clear 100% silicone cartridge runs about $8 to $12. Premium and specialty clear sealants usually fall around $10 to $14 per 10 to 10.5 oz tube. Small squeeze tubes cost about $6 to $9 for roughly 2.8 to 6 oz, which is convenient for a tiny repair but expensive per ounce.
If you are starting from scratch, budget another $20 to $60 for tools and supplies. A dripless caulk gun may cost $8 to $25. Plastic razor blades or scrapers run about $5 to $12. Utility blades are often $3 to $8. Painter’s tape is usually $4 to $8. Backer rod costs about $5 to $10. Silicone remover, mineral spirits, denatured alcohol, or isopropyl alcohol can add $6 to $15, depending on what you already own and what the sealant manufacturer allows for cleanup.
Free tools Windows power users keep installed
One-click scans. No signup required.
Bulk contractor pricing can reduce per-tube cost by about 10% to 25%. The 2026 research pack shows examples such as DAP Kwik Seal Ultra dropping from about $8.78 to about $7.90 when buying 12 or more, GE Advanced Silicone 12-packs at about $131.76, or roughly $10.98 per tube, and Gorilla 12-packs at about $126.17, or roughly $10.51 per tube.
Professional shower recaulking is usually priced around $105 to $290 nationally for tub or shower caulking, with the range driven by shower size, removal difficulty, access, mildew cleanup, joint depth, and whether the work is a simple tub surround or a large glass-and-tile walk-in shower.
How Much Silicone You Need
For planning, assume one 10 oz cartridge covers about 24 to 30 linear feet at a 1/4-inch bead. That is enough for many standard tub/shower surrounds, but it is not a guarantee.
A basic alcove tub might have 12 to 16 linear feet at the tub-to-wall joint, plus 6 to 10 feet at vertical corners, depending on layout. A walk-in shower with a glass door, fixed panel, bench, niche, curb, and multiple inside corners can easily exceed 30 linear feet of sealant joints. If the joints are wider than 1/4 inch, coverage drops.
Buy one extra tube if the shower is larger than average or if you are removing old silicone for the first time. Running out mid-bead is one of the easiest ways to end up with a patched, uneven line. Keep the receipt and return the unused cartridge if the retailer allows it.
Joint Design Matters More Than Brand
A shower joint is not supposed to be a giant glob of caulk. It should be a flexible bridge between two clean sides of the joint. That means the sealant should bond to the two opposing surfaces, not to the back of a deep gap.
For wider or deeper joints, use backer rod. Backer rod is a compressible foam placed in the joint before sealant. It controls sealant depth, saves material, and helps prevent three-sided adhesion. Three-sided adhesion restricts movement and can cause the bead to tear, split, or pull loose prematurely.
As a practical rule, a 1/4-inch wide joint should not be packed full 3/4 inch deep with silicone. Use backing to create a reasonable sealant profile. The bead needs enough thickness to stretch, but not so much bulk that it cures poorly or looks sloppy.
Do not use clear silicone to hide bad layout. If a gap is oversized, uneven, or missing proper backing, correct the substrate, trim, panel fit, or joint design first. Caulk is a service joint. It is not framing, tile layout, waterproofing membrane, or a filler for construction errors.
Rank #3
- Kitchen & Bath Ready – Premium clear silicone caulk formulated for kitchens and bathrooms, delivering a durable, long-lasting seal in wet, humid environments
- 100% Waterproof Seal – Perfect for showers, tubs, sinks, tile, and backsplashes, keeping water out where it matters most
- 30-Minute Water-Ready – Can be exposed to water in as little as 30 minutes; full cure in 24 hours for reliable results
- Flexible and Durable – High-flex silicone caulk prevents shrinking, cracking, or breaking down; perfect for indoor and outdoor projects
- Long-Lasting Mold-Resistant – Formulated to resist mold and mildew after curing; easy to clean with soap and water
Code, Tile Industry, and Waterproofing Notes
Shower caulk gets talked about like a cosmetic finish, but it sits in a wet assembly. US plumbing codes and model code language generally expect plumbing fixtures and surrounding joints to be watertight where water exposure occurs. In plain job-site terms: water should not be escaping through the joint into wall cavities, floors, framing, or concealed spaces.
Tile industry guidance also treats changes of plane differently from field grout joints. Inside corners, perimeters, and material transitions need movement accommodation. In a tile shower, that usually means a flexible sealant at changes of plane rather than hard grout packed into every corner.
This is where homeowners get into trouble. If the caulk at the shower base is black, split, and leaking, recaulking may solve a maintenance joint. If the shower pan, wall waterproofing, curb, or backer board was built incorrectly, new silicone only hides the symptom for a while. It does not replace a waterproofing membrane or correct a failed shower assembly.
The Tool Desk
Outbyte PC Repair FREEClear out junk files and repair common Windows errorsFree Scan →Outbyte Driver Updater FREEFix the driver behind crashes, sound loss and screen glitchesFind Drivers →Permits are not usually required for simple maintenance recaulking. They may be required when the work expands into shower replacement, plumbing relocation, pan replacement, structural repair, electrical changes, or larger bathroom remodeling. Local rules vary, so for anything beyond surface maintenance, check the building department or hire a licensed contractor familiar with your jurisdiction.
How to Prep a Shower Before Applying Clear Silicone
Good silicone work starts before the tube is opened. On our jobs, we would rather spend 90 minutes removing and cleaning than 10 minutes sealing over contamination and getting a callback.
1. Remove all old caulk
New silicone does not reliably bond to cured old silicone. Remove the old bead with a plastic scraper, utility blade, silicone removal tool, or chemical silicone remover where appropriate. Be careful around fiberglass, acrylic, coated metal, and stone. A sharp blade can scratch or gouge those surfaces quickly.
2. Clean soap film and mildew
Soap film, body oils, shampoo residue, and mildew prevent adhesion. Treat mildew first, then rinse if cleaners are used. Do not leave cleaner residue in the joint. Mold-resistant caulk does not fix active mold or trapped moisture behind the old bead.
Quick wins for a faster PC:
Scan for outdated or missing drivers - takes under a minuteDriver Scan →Clear out junk files and repair common Windows errorsFree Scan →3. Dry the joint completely
This is not a wipe-and-go step. Porous grout, tile edges, and backer materials can hold moisture. If the old caulk was leaking or black, give the joint more drying time. A fan and open door help. In problem showers, waiting overnight or longer is often smarter than sealing damp materials.
4. Install backer rod where needed
If the joint is deep or wider than a normal bead should span, install backer rod before caulking. Choose a rod diameter slightly larger than the gap so it compresses and stays in place. Do not puncture closed-cell backer rod with sharp tools.
5. Tape the joint
Tape both sides of visible joints if you want a crisp line. Keep the tape spacing consistent. A 3/16-inch to 1/4-inch finished bead is typical for many shower joints, but the right size depends on the gap and movement. Pull tape while the silicone is still wet. If you wait until it skins over, the edge can tear.
Application Tips for a Clean, Durable Bead
Cut the nozzle at a 30 to 45 degree angle and start smaller than you think. You can enlarge the opening. You cannot make it smaller. For many shower joints, a small opening that lays a 3/16-inch to 1/4-inch bead is easier to control than a large nozzle that floods the corner.
Hold the gun at a consistent angle and move steadily. A dripless caulk gun helps, but finger control still matters. Push or pull depending on what gives you the cleanest fill for that joint; the goal is full contact with both sides and no hollow skips.
Tool the bead once with a gloved finger or appropriate caulk tool. Do not keep reworking it. Silicone starts skinning, and repeated tooling can create drag marks, bubbles, thin spots, and lifted edges. If using a tooling liquid, make sure it is compatible with the sealant and does not contaminate the bonding surfaces before the silicone is placed.
For a tub-to-tile joint, many contractors fill the tub with water before caulking, then let the silicone cure before draining. The idea is simple: the tub drops slightly under load, so sealing it in the loaded position can reduce stress on the bead later when the tub is full and someone is bathing. Follow the tub and sealant manufacturer guidance, but this is a useful field practice in many standard installations.
Rank #4

- 100% Silicone Caulk Protection: This silicone caulk clear provides ultimate waterproof protection, ensuring a reliable seal against water damage. Ideal for areas with consistent exposure, keeping your surfaces safeguarded and pristine under any weather condition.
- Strong and Flexible: Delivers a silicone sealant waterproof clear that remains permanently flexible, adapting to surface movements for a lasting, durable hold. Perfect for dynamic environments like bathrooms and kitchens where adaptability and resilience are paramount and offers 100% more flexibility than Class 25 sealants and 7X stronger adhesion than our Silicone 1 sealant
- Quick 30 Minute Water Ready Performance: Experience the convenience of a silicone caulk that becomes water resistant in just 30 minutes, making it perfect for time sensitive projects. No more waiting hours, dependable, quick sealing efficiency with clear silicone caulk.
- Shrink and Crack Proof: Experience superior durability with clear silicone caulk that withstands temperature fluctuations. Its flexibility guarantees your surfaces stay intact without shrinking or cracking, ensuring consistent protection and a flawless finish over time.
- Low Odor and Safe Indoors: Enjoy stress free application with this silicone sealant featuring a low odor, neutral cure formula. Great for indoor use without overwhelming fumes, enhancing comfort and safety while ensuring effective waterproof clear protection for your spaces and lifetime product protection.
Shower doors need special attention. Many framed shower systems are designed to drain water through weep paths. Sealing the wrong side can trap water inside the frame. On many systems, exterior seams are sealed while interior weep paths remain open, but do not guess. Follow the shower door manufacturer’s instructions.
Cure Time: Water-Ready Is Not Always Fully Cured
Some shower silicones advertise water exposure in 30 minutes, 4 hours, or another fast window. That can be useful when a bathroom has to go back into service quickly, but water-ready is not always the same as full cure.
Cure time depends on bead size, temperature, humidity, air movement, and joint depth. A thin bead on glass may cure faster than a thick bead in a deep tub joint. Cool rooms and oversized beads can extend cure. When the schedule allows, keep the shower dry for 24 hours or more, or longer if the manufacturer specifies it.
Do not judge cure only by touching the surface. Silicone can skin on the outside while remaining soft deeper in the bead. Heavy water exposure, scrubbing, or movement too early can weaken the joint before it has developed full performance.
Why Shower Caulk Turns Black, Peels, Bubbles, or Splits
Black caulk is usually mildew growing on soap film, in surface texture, or in moisture trapped at the joint. Mold-resistant silicone slows growth, but it does not create a self-cleaning shower. Poor ventilation, standing water, shampoo residue, and porous old grout all shorten service life.
Peeling usually means poor adhesion. Common causes include old silicone left behind, wet surfaces, cleaner residue, dusty grout, glossy contamination, or movement beyond what the bead can handle. Silicone also struggles when it is too thin at the edge or smeared over a wide surface instead of formed into a proper bead.
Bubbles can come from trapped air, wet joints, aggressive tooling, or applying too much material at once. Deep joints without backer rod are more likely to cure unevenly and trap voids.
Splitting often points to movement, three-sided adhesion, thin bead geometry, or an oversized gap. If the tub moves, the shower pan flexes, or the wall assembly shifts, caulk takes the stress. A better sealant can help, but it cannot fix a loose tub, unstable enclosure, or failed substrate.
If caulk fails within a few months, do not just buy a more expensive tube. Look at the joint. Check for movement, moisture, staining, soft drywall, cracked grout, loose tile, missing backer rod, or water escaping from the shower door frame. Early failure is usually a diagnostic clue.
The Tool Desk
Outbyte PC Repair FREEClear out junk files and repair common Windows errorsFree Scan →Outbyte Driver Updater FREEScan for outdated or missing drivers - takes under a minuteDriver Scan →Ventilation and Maintenance Extend Sealant Life
Even the best clear silicone has an easier life in a bathroom that dries between uses. Run the bath fan during the shower and for at least 20 minutes afterward. If the bathroom has no working fan, sealant and grout will age faster, mirrors will stay wet longer, and mildew will be harder to control.
In bathrooms with repeat mildew problems, wipe down glass and lower tile after showers. It takes less than a minute with a squeegee, and it removes the water and soap film mildew feeds on. Keep shampoo bottles, mats, and accessories from sitting directly against caulked corners where they trap moisture.
Clean silicone gently. Avoid aggressive scraping, stiff brushes, or harsh chemical cycles unless the sealant manufacturer allows them. Once the bead is torn or debonded, cleaning will not restore it. Remove and recaulk instead.
When to DIY and When to Hire a Pro
DIY recaulking makes sense when the shower is otherwise sound, the joint is accessible, and the problem is limited to aged or stained caulk. A homeowner with patience can usually handle a simple tub surround or shower door touch-up for $30 to $80 in caulk, tools, tape, blades, and cleaner if they do not already own supplies.
Quick wins for a faster PC:
Clear out junk files and repair common Windows errorsFree Scan →Scan for outdated or missing drivers - takes under a minuteDriver Scan →Repair Windows errors before they cause bigger problemsFix Now →Plan on 2 to 4 hours for a careful first-time DIY recaulking job, plus drying and cure time. Most of that is removal and cleaning. The actual caulking may take 15 to 30 minutes, but rushing the prep is what ruins the result.
Best Value
- 10-year mold-free product protection is resistant to odor and stain-causing mold and mildew growth
- Brand name: GE Momentive Performance Materials
- Country of Origin: United States
- Material: 100% Silicone
Hire a pro when old silicone is buried under multiple layers, the shower has heavy mold staining, the gap is oversized, the glass enclosure is complicated, the shower is the only bathing fixture and downtime matters, or the joint keeps failing. Also bring in a contractor if you see loose tile, cracked grout at many locations, a soft wall, swelling baseboard, water stains below the bathroom, movement in the tub, or leakage outside the shower.
A professional recaulking cost of $105 to $290 is often reasonable when the work includes full removal, surface prep, mildew treatment, careful masking, and clean tooling. If hidden water damage is found, the cost changes because the job is no longer caulking. It becomes repair work.
Safety Notes for Shower Silicone Work
Ventilate the room. Silicone can release strong odors while curing, especially acetoxy-cure products with a vinegar smell. Open a window if available and run the bath fan. Wear gloves when handling cleaners, solvents, and uncured sealant.
Crashes, No Sound, or Screen Glitches?
Random freezes, missing sound and display glitches usually trace back to one bad driver. Find and replace yours safely.Free scan · under a minuteWindows Errors? Fix Them Before They Spread
Repair common Windows errors and clear accumulated junk for a smoother, more stable PC - no reinstall needed.Free scan · no reinstallUse blades carefully. A utility knife can easily cut skin, scratch tubs, damage fiberglass, or score metal finishes. Plastic razors are safer for delicate surfaces, though they may take longer.
Do not mix cleaners casually. If mildew treatment involves bleach, do not combine it with ammonia-based cleaners, acids, or other chemicals. Rinse as directed, then allow the joint to dry fully before sealing. Keep solvents and sealants away from flames and follow the safety information on the product label.
Final Recommendation
For most showers, the best clear silicone is a clear, mold-resistant, 100% silicone kitchen-and-bath sealant from a reputable manufacturer, matched to the surfaces you are sealing. Expect to pay about $8 to $12 for a standard 10 oz cartridge in 2026, or $10 to $14 for premium and specialty options.
Use clear silicone for glass, metal, fixtures, and mixed-material transitions. Use white, almond, gray, or grout-matched silicone where clear would expose shadows, staining, or uneven tile work. If the joint is wide or deep, use backer rod. If the joint is wet, moldy, loose, or moving, fix that condition before sealing.
The professional result comes from the full system: correct product, clean joint, proper bead size, good tooling, protected cure time, and a bathroom that dries out after use. Get those right, and a $10 tube of silicone can outperform a premium product installed over a bad joint.
Frequently Asked Questions
What is the best clear silicone for a shower?
For most showers, choose a clear 100% silicone kitchen-and-bath sealant labeled waterproof, mold resistant, permanently flexible, and suitable for tub, tile, glass, ceramic, porcelain, fiberglass, and metal surfaces.
Is clear silicone better than white silicone in a shower?
Clear silicone is best for glass, metal, fixtures, and mixed-material joints. White or grout-matched silicone often looks better at tub-to-tile joints and tile inside corners because clear silicone can show shadows, staining, and uneven gaps.
How long should shower silicone dry before using the shower?
Follow the product label. Some products advertise water exposure in 30 minutes or a few hours, but deeper beads and cool or humid rooms can extend cure time. When practical, keeping the shower dry for 24 hours or more gives a better margin.
Free tools Windows power users keep installed
One-click scans. No signup required.
How much does it cost to recaulk a shower?
DIY materials commonly run about $30 to $80 if you need caulk, tape, blades, scraper, backer rod, and cleaner. Professional shower recaulking commonly falls around $105 to $290, depending on removal, mold cleanup, size, and access.
Can I apply new silicone over old shower silicone?
No. New silicone does not reliably bond to cured old silicone. Remove the old bead completely, clean soap film and mildew, let the joint dry, and then apply the new sealant.
Why does shower caulk keep turning black?
Black staining is usually mildew growing on soap film, surface texture, or trapped moisture. Better ventilation, wiping down wet surfaces, full old-caulk removal, and sealing only dry, clean joints all help prevent it from returning quickly.
Quick Recap
Product prices and availability are accurate as of the date/time indicated and are subject to change. Any price and availability information displayed on Amazon at the time of purchase will apply.
Do these 3 things before closing this tab:
1Scan for outdated or missing drivers - takes under a minute2Repair Windows errors before they cause bigger problems3Fix the driver behind crashes, sound loss and screen glitches
