Outdated Drivers Are Slowing You Down
One free scan finds every outdated or missing driver and matches the right update for your exact hardware.Free scan · exact hardware matchPC Slower Than It Used to Be?
A free scan shows the junk files, broken settings and background clutter dragging Windows down - then fixes them in one click.Free scan · Windows 10 & 11An auxiliary rip fence is a temporary face, extension, or extrusion attached to a table saw’s main rip fence. Its job is simple: give the workpiece a better reference surface without permanently altering the saw. On exterior carpentry jobs, that can mean straighter deck-board rips, cleaner pergola trim, repeatable fence pickets, safer thin strips, and a sacrificial face for cuts where the blade needs to run close to the fence.
For most homeowners, a basic auxiliary fence can be made from straight 3/4-inch plywood or MDF in an hour or two for about $20 to $90, depending on what materials and clamps are already in the shop. A more refined version with T-track, knobs, laminate, or featherboard mounts usually lands around $75 to $175. Commercial add-on fences commonly run about $100 to $200, with one current 48-inch aluminum auxiliary rip fence listed at $159.99.
The real question is not whether an auxiliary fence is useful. It is when to use one, how to size it, and how to avoid creating a kickback hazard. On our job sites, we treat auxiliary fences as production aids, not shortcuts around table saw safety. The saw still needs a properly aligned fence, a riving knife or splitter where the cut allows it, adequate blade guarding, push sticks for small pieces, and enough infeed and outfeed support for the material being ripped.
What an Auxiliary Rip Fence Does
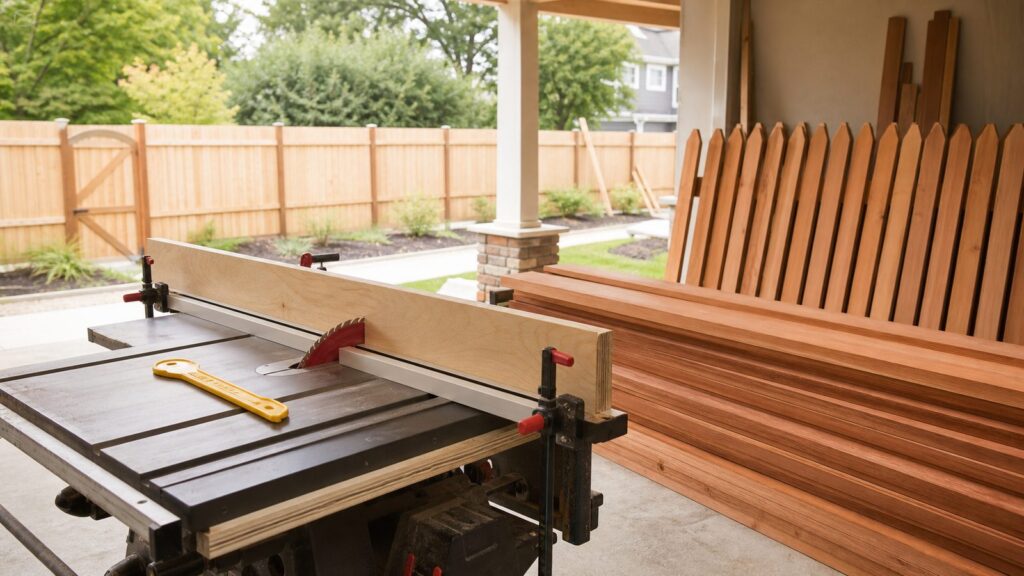
A standard rip fence is designed to guide material parallel to the blade. That factory fence may be accurate, but on a compact jobsite saw it is often short, low, slick, or awkward when handling long exterior boards. An auxiliary rip fence gives you a larger working face so the board stays registered through the cut.
What’s actually slowing this PC down?
Pick the symptom - the matching free tool is one click away.
#1 Best Overall

- SPECS - ARF-BSCS | 36 Inch Table Saw Fence | 3-1/2" Tall | Built In T-Track Slots | 7" Material Support | 2 Sliding Clamping Blocks | Fence & Clamping Block Thickness Measure Exactly 2" | Made in USA
- SIZED FOR COMPACT MACHINES - 36" fence length, ideal for job site table saws, band saws, vintage contractor’s saws, router tables, and more.
- QUICK SETUP & REMOVAL - Installs in seconds without modifying your existing fence. Just use standard track clamps (not included).
- ENHANCED SUPPORT - Includes two 7" material supports to stabilize workpieces on the infeed and outfeed side of the blade.
- AMERICAN MADE QUALITY - Like all Woodpeckers products, the Compact Auxiliary Rip Fence is precisely built and carefully inspected in our Strongsville, Ohio facility.
In practical terms, an auxiliary fence can do six useful jobs:
- Add length: A longer face gives deck boards, fascia, siding, and trim more bearing surface before and after the blade.
- Add height: A taller face supports vertical panels, edge cuts, bevel work, and tall trim profiles.
- Act as a sacrificial fence: The blade can cut slightly into the auxiliary face for rabbets, dados, bevels, or zero-clearance work without damaging the factory fence.
- Hold accessories: T-track, featherboards, stops, and material supports can mount to the auxiliary fence instead of the saw’s original fence.
- Protect the saw: Clamps, screws, fasteners, and repeated abrasive material contact stay away from the factory fence face.
- Improve repeatability: Once set up, a straight auxiliary fence helps crews make batches of matching rips with less measuring and less drift.
For outdoor structures, those benefits show up quickly. A pergola with inconsistent trim rips looks rough even when the posts are plumb. Fence pickets that vary by 1/8 inch across a long run create wandering shadow lines. Deck-board edge rips that bow or burn can leave gaps that catch water and dirt. Better table saw support does not replace good layout, but it reduces the small errors that become visible after installation.
Common Jobsite Uses for Exterior Carpentry
We use auxiliary fences most often when the saw’s original fence is technically accurate but not enough support for the material. Exterior stock is rarely perfect. Pressure-treated lumber can be damp and heavy. Cedar can be soft and prone to tearout. PVC trim can be flexible. Composite boards can be dense and slippery. The auxiliary fence gives the operator more control.
Deck boards and picture-frame borders
Deck work often requires ripping boards to width at the house, along borders, around posts, or at stairs. A 5-1/2-inch nominal deck board may need to be trimmed to 4-3/4 inches, 3-1/2 inches, or a tapered width depending on the layout. A longer auxiliary fence, usually 36 to 48 inches, helps keep the board against the fence before it reaches the blade and after it exits.
For full-length deck boards, the fence alone is not enough. We still use roller stands, a helper, or an outfeed table so the board does not lever upward or pull sideways at the end of the cut. A fence extension improves the reference surface; it does not solve unsupported weight.
Fence pickets, rails, and lattice strips
Fence work often involves repeated parts. If a batch of pickets needs a narrow ripped edge to fit a layout, the auxiliary fence helps keep every piece consistent. For lattice strips or narrow battens, a sacrificial face and a push stick are usually part of the setup.
Thin-strip ripping deserves extra care. Avoid trapping a thin offcut between the blade and fence. When possible, set up a thin-rip jig so the keeper strip is cut on the outside of the blade, or use a setup that leaves the narrow piece free instead of pinched between the blade and fence. That one choice can be the difference between a calm production cut and a kickback event.
Pergola trim, fascia, and siding
Pergola skirts, rafter tails, fascia returns, and exterior trim often demand clean, straight edges because they stay visible. A 4- to 6-inch-tall auxiliary fence supports these pieces better than many stock jobsite-saw fences. If the trim is PVC or primed engineered material, a smooth laminated or waxed face helps it slide without chatter.
Quick wins for a faster PC:
Clear out junk files and repair common Windows errorsFree Scan →Scan for outdated or missing drivers - takes under a minuteDriver Scan →Repair Windows errors before they cause bigger problemsFix Now →Rank #2

- SPECS - ARF-48 | 48 Inch Table Saw Fence | 3-1/2" Tall | Built In T-Track Slots | 12" Material Support | 3 Sliding Clamping Blocks | Fence & Clamping Block Thickness Measure Exactly 2" | Made in USA
- STRAIGHTER, SMOOTHER CUTS - Clamp the Auxiliary Rip Fence to any table saw fence for a longer, straighter, and more precise reference surface - no twisting or warping like plywood fence faces.
- MORE CONTROL FOR BIG PROJECTS - The 48" length and 12" material support keep panels balanced and stable on the infeed or outfeed side of the blade for safer, cleaner cuts.
- VERSATILE SETUP OPTIONS - Configure high, low, or L-fence positions to match the task - from thin rips to box lids to edge jointing straight stock.
- MADE IN THE USA - Built and inspected to our strict standards in Strongsville, Ohio, ensuring top-tier accuracy and durability.
For bevel rips, we make a dry run with the saw off before cutting. The blade tilt, fence face, clamp heads, and push stick path all need clearance. We also mark the blade contact zone on sacrificial fences so nobody later drives a screw or T-track bolt where the blade may pass.
DIY vs Commercial Auxiliary Rip Fences
A shop-made fence can be accurate and perfectly adequate if it is straight, flat, secure, and sized for the work. A commercial aluminum fence is usually faster to set up, more durable, and easier to accessorize. The right choice depends on how often you use it and how much repeat work you do.
| Option | Typical 2026 Cost | Best For | Tradeoffs |
|---|---|---|---|
| Basic DIY plywood or MDF face | $20-$60 with scraps and clamps; $45-$90 when buying sheet goods | Occasional deck, fence, trim, and sacrificial cuts | Needs careful material selection; can swell if stored damp |
| Upgraded DIY fence with T-track | $75-$175 | Repeat parts, featherboards, stops, and cleaner workflow | More build time; hardware placement must avoid blade paths |
| Commercial auxiliary fence | $100-$200; a current 48-inch Woodpeckers unit is listed at $159.99 | Frequent use, fast setup, jobsite-to-shop consistency | Must confirm compatibility with your saw and fence profile |
| Full rip fence replacement | $250-$500+ before premium saw upgrades | When the original saw fence is inaccurate or unreliable | Higher cost; installation and calibration required |
| Custom pro-built setup | $100-$300+ in labor and materials | Production work, specialty exterior profiles, crew-standard jigs | Worth it only when accuracy and repeatability save real time |
Material prices also matter. In 2026, wholesale plywood pricing has been rising, with the U.S. plywood producer price index moving from 272.226 in February 2026 to 290.979 in June 2026. At retail, 3/4-inch plywood commonly ranges from about $40 to $120 or more per 4×8 sheet, depending on grade and region. Sheathing may be cheaper, while ACX, Baltic birch, and cabinet-grade panels cost more but are usually flatter and more stable.
For a homeowner building one deck or one fence, a straight plywood auxiliary face and a pair of proper fence clamps may be enough. For a remodeler, deck crew, or trim carpenter making repeated exterior cuts, a commercial extrusion or a well-built T-track fence pays back in setup speed and repeatability.
Free tools Windows power users keep installed
One-click scans. No signup required.
Recommended Sizes and Materials
There is no single correct size because the fence should match the saw and the material. For most carpentry use, we like a working face between 3-1/2 and 6 inches tall. That height supports common deck boards, 1x trim, fence pickets, PVC boards, and many fascia pieces without becoming unstable.
Length depends on the saw. A compact jobsite saw may work well with a 36-inch auxiliary fence. A contractor saw or cabinet saw can often handle 48 inches. Longer is not always better. If the auxiliary fence overhangs too far, it can flex, interfere with the operator, or become harder to clamp securely.
Good material choices
- 3/4-inch plywood: The best common choice for jobsite use. Choose the flattest sheet available. ACX, cabinet-grade plywood, or Baltic birch is better than warped sheathing.
- MDF: Very flat and inexpensive, but vulnerable to moisture. Use it in a dry shop, not loose in a damp truck box.
- Melamine: Smooth feeding surface, good for shop use, but edges chip and moisture can swell the core.
- Straight hardwood: Good for a replaceable face or narrow sacrificial strip if it is jointed flat.
- Aluminum extrusion: Durable, straight, and accessory-friendly. Usually found in commercial systems or more advanced DIY builds.
If we are building a plywood fence for exterior work, we usually break the exposed edges with sandpaper or a small roundover, then wax the face. For PVC and composite boards, a slick face matters. Material that drags can cause the operator to push harder, and harder pushing often leads to poor control.
Practical dimensions
A good all-purpose auxiliary fence for a portable jobsite saw is 3/4 inch thick, 4 to 5 inches tall, and 36 inches long. For a larger saw, 3/4 inch thick by 5 to 6 inches tall by 48 inches long is a useful size. For tall-panel support, the fence may be 8 to 12 inches tall, but that requires stronger clamping and careful checking for flex.
Do these 3 things before closing this tab:
1Repair Windows errors before they cause bigger problems2Fix the driver behind crashes, sound loss and screen glitches3Clear out junk files and repair common Windows errorsRank #3

- PRECISION TABLE SAW RIP FENCE UPGRADE : Built from high-strength extruded aluminum, this table saw rip fence extension provides a stable, straight reference surface for cleaner and more consistent cuts. The rigid profile helps reduce flex and supports accurate alignment during repeated table saw operations
- 46" EXTENDED SUPPORT WITH SPACE-SAVING DESIGN : This 46" table saw fence extension kit with featherboards measures 47-1/4" overall and adds support when working with long boards or sheet goods. It functions as a table saw extension and outfeed support without requiring a bulky outfeed table
- VERSATILE 3-IN-1 MULTI-FUNCTION FENCE SYSTEM : Configure the fence for different cutting tasks: High Fence Mode supports tall panels and box work, Low Fence Mode 3/4" helps with controlled thin ripping, and L-Fence Mode supports edge jointing or template-guided cuts. It also works as a thin rip jig and table saw jig for added workshop flexibility
- 8 BUILT-IN T-SLOTS FOR CUSTOM JIG SETUPS: The fence body features eight integrated T-slots for mounting featherboards, stop blocks, hold-downs, and custom woodworking jigs. The included drop-in T-bolts can be inserted directly through the slot opening, allowing faster setup and adjustment without sliding hardware in from the ends of the track
- FITS MOST TABLE SAW FENCES WITH 1-1/4" OFFSET ALIGNMENT :Designed to clamp securely to most table saw rip fences without drilling or permanent modification. The 1-1/4" total thickness provides a clear offset reference
Sacrificial faces should be replaceable. A 3/4-inch plywood body with a 1/2-inch or 3/4-inch replaceable face lets you cut rabbets or bevels without rebuilding the entire fence. Keep all screws and bolts well outside the blade contact zone. Countersunk fasteners are fine only when you know exactly where the blade can and cannot reach.
How to Build a Basic Auxiliary Rip Fence
A basic fence does not need to be complicated. Accuracy comes from flat material, square assembly, firm attachment, and calibration. Plan on 1 to 2 hours for a simple version if the saw is already tuned. Add another hour if you are installing T-track, laminate, or replaceable faces.
Materials and tools
- One straight 3/4-inch plywood or MDF panel, cut to the planned fence size
- Two universal table saw fence clamps, or compatible bolts/knobs for your fence
- Drill and countersink bit
- Straightedge at least as long as the fence
- Square and tape measure
- Sandpaper, paste wax, or laminate surface if desired
- Optional T-track, knobs, featherboard hardware, and replaceable sacrificial face
Build sequence
- Start with the straightest edge you can produce. If the plywood edge has a bow, that bow becomes part of every cut.
- Cut the fence face to height and length. For general exterior carpentry, 4-1/2 inches tall by 36 or 48 inches long is a practical target.
- Break the sharp edges so material does not catch during feeding.
- Lay out clamp positions near both ends. Do not rely on a single clamp. The fence must not pivot under side pressure.
- If adding screws, bolts, or T-track, mark the maximum blade-height and blade-tilt zones first. Hardware does not belong anywhere the blade might reach.
- Attach the auxiliary face to the factory fence and lock the saw fence.
- Check that the auxiliary face is parallel to the blade or miter slot according to your saw’s manual.
- Make a test rip, then measure the front and back of the cut. If the cut tapers, burns, or binds, stop and correct the setup.
Labeling is a professional habit worth borrowing. On our crew-made jigs, we mark the intended saw, maximum blade contact zone, and any setup notes. That prevents a fence built for one saw from being casually clamped to another saw with different blade geometry or guard clearance.
Safe Setup: What Cannot Be Compromised
An auxiliary rip fence should make the cut more controlled, not defeat the saw’s safety systems. OSHA table saw guidance calls for guarding above the table, spreader or riving-knife protection for rip cuts, self-adjusting guards that contact the material, and push sticks for small pieces. Those requirements exist because table saw injuries are severe and common enough to take seriously. A federal safety review cited a 2017 special-study estimate of 26,500 emergency-department-treated blade-contact injuries, with 96.4 percent involving fingers, 60.9 percent lacerations, 20.6 percent fractures, and 10.7 percent amputations.
Those numbers are not abstract on a jobsite. A table saw cut happens fast, and exterior carpentry often adds awkward stock, wind, uneven ground, extension cords, and schedule pressure. A jig that saves 30 seconds is not worth removing basic protection without a saw-manual-approved reason.
Safety checks before cutting
- Keep the riving knife or splitter installed whenever the cut allows it.
- Confirm the blade guard, push stick path, featherboards, and outfeed support do not interfere with the auxiliary fence.
- Clamp the auxiliary fence at both ends, and check that it cannot shift under side pressure.
- Set featherboards before the blade, not after it, so they hold the board to the fence without pinching the kerf closed.
- Do not trap thin offcuts between the blade and fence.
- Use push sticks or push blocks for narrow pieces and small parts.
- Run a test piece before production cuts.
- Stop if you see burn marks, hear the saw labor, or feel the stock pulling sideways.
One common mistake is treating a sacrificial fence as permission to bury the blade without thinking through the cut. A sacrificial face is useful for rabbets, flush trimming, and zero-clearance support, but blade clearance, guard position, and kickback direction still matter. If the setup requires removing a safety device, verify that the saw manual permits that operation and reinstall the device immediately afterward.
Common Mistakes That Ruin Accuracy
The most common auxiliary fence failure is using bad material. A warped 2×4 or twisted strip of construction plywood is not a fence; it is a pattern for crooked cuts. The working face needs to be dead flat. Check it with a straightedge before building and again after clamping.
The second mistake is poor clamping. A fence held at one end can pivot into the blade or pinch the workpiece. Use two clamps minimum, placed so they do not interfere with the operator’s hands or the blade path. If the saw fence has a narrow or rounded profile, use clamps designed for that fence rather than improvising a weak grip.
Rank #4
- Accurate Cutting: Upgrade your rip guide precision with the Wixey digital rip saw fence system that offers ±0.002" accuracy per ft and a digital readout for reliable, repeatable cuts across all woodworking projects
- Heavy-Duty Build: Crafted from durable steel and aluminum, this professional-grade table fence delivers long-lasting stability and is perfect for woodworking benches, rip cuts, and shop work tables
- Digital Readout: Features a backlit digital display showing readings in inches, fractions, or millimeters; constant memory preserves calibration even when powered off or removed from the bench rail
- Smooth Adjustment: Micro-adjust wheels and roller glide ensure fine-tuned, smooth fence movement - ideal for setting precise bevels, rip cuts, and repeat measurements on contractor or cabinet saws
- What’s Included: You get (1) Wixey Table Saw Fence System (WR750) - (1) Digital Readout Display – (1) 72” Fence Rail (ships in two parts) - (1) Drilling Jig & Bit - Mounting Hardware Included - Batteries (2×AAA, not included) with this digital fence tool
Another mistake is making the auxiliary fence too short. If you are ripping 12-foot fascia or long deck boards on a compact saw, a 24-inch fence face will not provide much help. For long stock, combine a longer auxiliary fence with real infeed and outfeed support. The goal is a smooth feed path where the board does not sag, twist, or steer itself away from the fence.
Moisture is also a problem. MDF and untreated plywood can swell in a damp garage, trailer, or job box. Once the face swells, it may still look usable but no longer be straight. If the fence lives with jobsite tools, seal the edges or use more moisture-resistant material.
Independent reader supportYour contribution helps us test, update, and keep practical guides available for everyone.When to DIY and When to Hire a Pro
A homeowner can build a basic auxiliary rip fence when the work is straightforward, the saw is in good condition, and the operator is comfortable using a table saw safely. Ripping a few cedar pickets, trimming deck boards, or making a replaceable sacrificial face is reasonable DIY territory if you understand blade alignment, push-stick use, and kickback risk.
DIY makes sense when the cut list is short, tolerances are normal carpentry tolerances, and the material is manageable. Expect to spend about $45 to $90 if you need to buy plywood and hardware, or $20 to $60 if suitable offcuts and clamps are already on hand. A simple build can be ready the same afternoon.
Hire a pro, or have a professional shop fabricate the pieces, when the work affects a finished exterior detail, the material is expensive, or the cuts are long, narrow, repetitive, or risky. Examples include custom pergola trim packages, large batches of matching pickets, tapered deck borders, wide panel work, or thin strips where kickback risk is high. Professional fabrication often runs 1 to 3 labor hours plus materials, which can put a custom setup or cutting session in the $100 to $300+ range before premium hardware.
A full fence replacement is a different decision. If the factory rip fence will not lock square, drifts out of parallel, or flexes under normal pressure, an auxiliary face will not fix the root problem. In that case, budget about $250 to $500+ for an aftermarket fence and rail upgrade, or consider whether the saw itself is due for replacement.
Permits, Codes, and Jobsite Responsibility
You do not need a building permit to use an auxiliary rip fence. Permits apply to the structure being built, not the table saw accessory used to cut parts. A deck, pergola, privacy fence, porch repair, or structural exterior modification may still require a permit, setback review, HOA approval, or inspection depending on the city and scope.
For contractors, the larger responsibility is jobsite safety. A shop-made jig should be treated like any other tool setup: suitable for the saw, suitable for the cut, and understood by the person using it. Crew members should not have to guess whether a sacrificial fence can be cut into, where the screws are, or whether it fits a specific saw.
The Tool Desk
Outbyte Driver Updater FREEScan for outdated or missing drivers - takes under a minuteDriver Scan →Outbyte PC Repair FREERepair Windows errors before they cause bigger problemsFix Now →Best Value

- EXPERIENCE ENHANCED FEED CONTROL AND SAFETY: The XT XTENDER T Track Fence adds a 5” tall face to improve workpiece guidance on table saws and bandsaws. The increased surface helps stabilize material, supporting straighter cuts and controlled feeding.
- UNIVERSAL FIT FOR MULTIPLE SAWS: Designed to clamp onto existing fences using Bow T-Track clamps, this 46” XTENDER works with portable saws, cabinet saws, UniSaw, Harvey, and bandsaws. Upgrades fence capability without full replacement.
- MULTIPLE T-SLOTS FOR ACCESSORIES: Features three T-slots on the face, top, and back for 1/4” and 5/16” T-bolts. Our table saw fence system supports featherboards, stops, and feed accessories for customizable setups and improved control.
- HEAVY-DUTY ALUMINUM CONSTRUCTION: Built from aluminum extrusion with sandblasted anodized finish. The 4” flat face supports smooth material glide, while rigid 1” width maintains stability and alignment during woodworking operations.
- ADJUSTABLE POSITIONING AND EXTENSION SUPPORT: With milled rear slots, our table saw fence allows quick repositioning for infeed, center, or outfeed use. Standoffs help smooth movement, while accessory compatibility extends support for longer boards.
For homeowners, the best rule is simple: if the setup feels improvised, stop. Long exterior boards can be cut with a track saw, circular saw guide, or shop fabrication when a table saw setup is not stable. The right tool is the one that controls the material through the entire cut, not just the first 12 inches.
Bottom Line
An auxiliary rip fence is one of the most useful table saw upgrades for exterior carpentry because it solves a real field problem: stock needs more support than a standard fence often provides. Built correctly, it helps produce straighter rips, cleaner repeat parts, smoother feed, and safer handling of deck boards, fence pickets, pergola trim, fascia, lattice, siding, PVC, cedar, and composite material.
The best version is not always the most expensive one. A flat 3/4-inch plywood face with solid clamps may be enough for occasional work. A T-track or commercial aluminum fence makes sense when you repeat cuts often. A professional setup is worth the cost when the material is expensive, the finish is highly visible, or the cuts carry higher risk.
What matters most is discipline: start with a tuned saw, use flat material, clamp both ends, keep safety systems in place whenever possible, support long boards, and test before production cutting. That is how an auxiliary rip fence becomes a useful building aid instead of just another piece of plywood clamped to a saw.
Recommended Free Tools
Frequently Asked Questions
What is an auxiliary rip fence used for?
It is used to add height, length, accessory mounting, or a sacrificial cutting surface to a table saw’s main rip fence. It helps with long deck boards, fence pickets, trim, thin strips, rabbets, bevels, and repeat cuts.
Is an auxiliary rip fence safe to use on a table saw?
Yes, if it is straight, securely clamped, and does not interfere with the blade guard, riving knife, push sticks, featherboards, or outfeed support. It should never trap an offcut against the blade or require unnecessary removal of safety equipment.
Can I make an auxiliary rip fence from plywood or MDF?
Yes. A common DIY version uses 3/4-inch plywood or MDF. Plywood is better for jobsite use because it handles moisture better than MDF. The face must be flat, smooth, and clamped at both ends.
How tall and long should a table saw auxiliary fence be?
For most carpentry work, 3-1/2 to 6 inches tall is practical. A 36-inch length works well on many jobsite saws, while 48 inches is useful on larger contractor or cabinet saws. Tall-panel work may need 8 to 12 inches of height with stronger clamping.
Should I buy a commercial auxiliary rip fence or build one?
Build one for occasional cuts and simple sacrificial work. Buy a commercial fence if you need fast setup, aluminum extrusion, T-track slots, reliable clamping, and repeat use across many projects. Commercial options commonly cost about $100 to $200.
Do I need a permit to use an auxiliary rip fence for deck or fence work?
No permit is required for the tool accessory itself. The deck, fence, pergola, or exterior structure may still need a permit, inspection, setback approval, or HOA approval depending on your local rules.
Quick Recap
Product prices and availability are accurate as of the date/time indicated and are subject to change. Any price and availability information displayed on Amazon at the time of purchase will apply.