What’s actually slowing this PC down?
Pick the symptom - the matching free tool is one click away.
Some links on this page are affiliate links: if you buy through them we may earn a commission, at no extra cost to you.
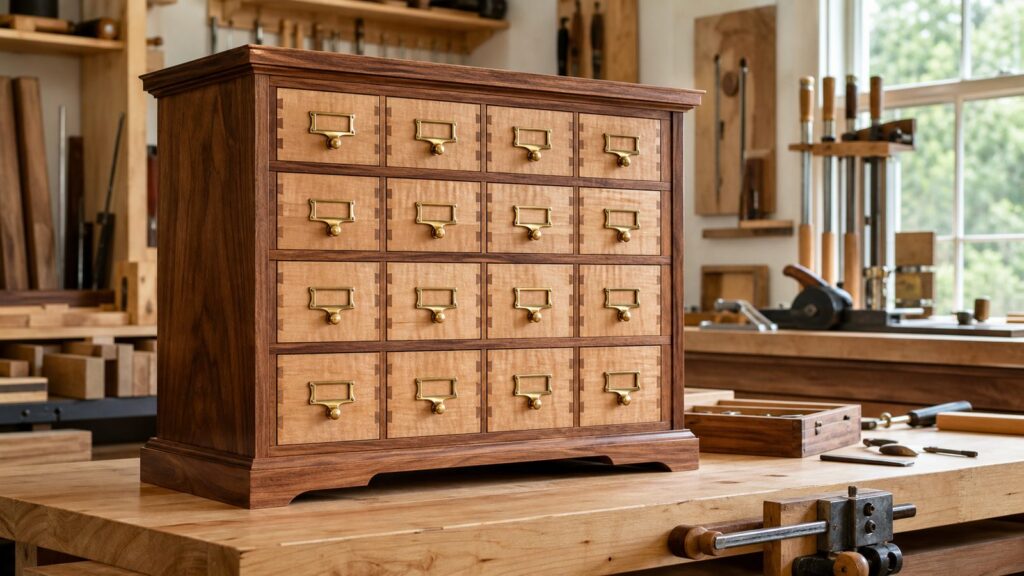
An apothecary-style cabinet looks simple from across the room: a compact case, a tidy grid of small drawers, handsome pulls, and a furniture-grade finish. Up close, it is one of those woodworking projects where every small mistake repeats across the whole face. If one reveal is off, one pull is crooked, or one drawer front swells, the cabinet tells on you.
The well-known Apothecary’s Friend Cabinet plan is a compact furniture project measuring 35-1/4 inches high, 33 inches wide, and 10-1/4 inches deep. The paid plan is listed at $14.95 and presents the piece as an updated American apothecary-style storage cabinet. That size makes it closer to an accent cabinet, entryway organizer, craft cabinet, or dining-room storage piece than a full kitchen cabinet run.
As an Amazon Associate I earn from qualifying purchases.
Recommended Free Tools
For a homeowner or serious hobbyist, the useful question is not just whether the plan is attractive. It is whether the cabinet is worth building yourself, what it will actually cost in 2026, what tools and accuracy it demands, and when the project crosses over into finish-carpenter or custom-cabinet territory. On our job sites, small cabinets like this often take more layout discipline than larger built-ins because there is nowhere for uneven reveals or rushed hardware placement to hide.
What the Apothecary Cabinet Plan Really Is
The Apothecary’s Friend Cabinet is a compact storage cabinet with the visual language of old pharmacy and general-store casework: many small drawers, a shallow footprint, and a finished face that relies on repetition. At 35-1/4 inches high, it lands around console height. At 33 inches wide, it can fit in a hallway, office, mudroom, craft room, dining room, or boutique retail space. At 10-1/4 inches deep, it is shallow enough for small goods but not deep enough for bulky kitchen equipment, heavy tool cases, or full-size pantry storage.
Popular on Amazon

- Premium Home Improvement Tool: Take the guesswork out of drawers with the Drawer Slide Jig; easily create level drawers that slide smoothly
- Eliminate Measuring: Kreg jig has built-in indexing tabs to precisely align drawer slides and drawers without measuring
- Works with Many Drawer Slides: Drawer jig aligns undermount, ball-bearing, and epoxy-coating slides
- Multipurpose Carpenter Tools: Works for cabinets, cases, drawers, desks, and more
- Premium Kreg Tools: We offer products that help woodworkers close the gap between idea and outcome
That shallow depth is part of the appeal. It keeps the cabinet from dominating a room, and it makes small drawers practical for hardware, sewing supplies, stationery, keys, pet items, chargers, spices, tea, small craft tools, and display goods. It also means the cabinet must be planned honestly. A 10-1/4 inch deep case does not leave much room for thick backs, face-frame projection, drawer stops, interior charging equipment, or hidden wiring without eating into drawer space.
The build is best treated as furniture, not rough storage. The eye reads the front as a grid. Consistent gaps matter. Pull alignment matters. Drawer-front grain selection matters. If the finished cabinet has 12, 20, or 30 small faces, each operation is multiplied: cutting, sanding, fitting, drilling, labeling, finishing, and adjusting. That is where many DIY posts understate the work. The case may be small, but the drawer count makes it labor-heavy.
2026 Cost to Build an Apothecary Cabinet
For a compact apothecary cabinet, a realistic DIY material range in 2026 is about $250 to $900. A careful builder using cabinet-grade plywood, modest hardwood, simple pulls, and a wipe-on finish can stay near the lower half of that range. Premium hardwood drawer fronts, brass label pulls, dovetailed drawers, specialty stains, sprayed finish, and extra jigs can push the project above $1,000 before labor is counted.
The cabinet plan itself is a small cost at $14.95. The real money is in sheet goods, hardwood, hardware count, finishing supplies, and waste. Small cabinets are not always cheap because materials are sold in full sheets and standard board lengths. A 33-inch-wide cabinet may still require a 4×8 sheet, extra hardwood for matching fronts, and more hardware than a larger two-door cabinet.
| Cost item | Typical 2026 range | What changes the price |
|---|---|---|
| Plan | $14.95 | Download or printed plan format |
| Cabinet-grade plywood | $30-$165 per 4×8 sheet, depending on grade and species | Birch, maple, veneer grade, core quality, local supplier pricing |
| Hardwood for frame, top, trim, drawer fronts | $75-$350+ | Poplar, oak, maple, cherry, walnut, board width, waste, grain matching |
| Drawer pulls and label holders | $40-$250+ | Number of drawers, brass versus steel, screw spacing, finish consistency |
| Fasteners, glue, sandpaper, finish | $50-$180 | Finish system, test boards, brushes, rags, abrasives, PPE |
| Optional jigs and tooling | $0-$300+ | Pull drilling jig, dado blade, router bit, clamps, stop blocks, saw blade |
| DIY total materials | $250-$900 typical; $1,000+ premium | Hardware count, hardwood species, finish expectations, mistakes and rework |
| Hiring installation only | About $274-$422 per cabinet as a national starting estimate | Wall conditions, anchoring, scribing, trim, local labor |
| Commissioned custom cabinetry | About $500-$1,200+ per linear foot installed; some sources show $500-$1,400+ | Shop labor, finish, inset fronts, specialty hardware, site fitting |
Commodity lumber context helps, but it does not tell the whole story. Lumber was reported around $614 to $615 per 1,000 board feet on July 31, 2026, down roughly 11.6 percent year over year. That does not mean your local cabinet plywood, walnut, maple, or brass hardware dropped by the same percentage. Retail sheet goods vary heavily by species, veneer grade, core, region, and freight. In 2026 retail examples, cabinet plywood listings ranged from roughly $27 to $68 for some cabinet plywood products at one supplier, while another showed hardwood plywood from about $28.88 for thin birch to $163.88 for a 3/4-inch A-1 birch 4×8 sheet.
For a one-off cabinet, waste is a major cost driver. A shop building ten cabinets can spread extra sheet yield, finish, jig setup, and hardware templates across the batch. A homeowner building one cabinet absorbs the entire setup cost. That is why a project that looks like $200 of wood on paper can become a $700 weekend-and-evenings build once pulls, finish, sandpaper, drill templates, test boards, and replacement parts are included.
Quick wins for a faster PC:
Clear out junk files and repair common Windows errorsFree Scan →Scan for outdated or missing drivers - takes under a minuteDriver Scan →Best Materials for a Stable Furniture-Grade Build
For this style of cabinet, we prefer a stable plywood case with solid wood used where it earns its keep: face frame, top, trim, base details, and drawer fronts. That approach keeps the cabinet flatter through seasonal humidity swings and still gives the finished piece the warmth and crisp edges of real wood.
Cabinet-grade plywood is a practical choice for the carcass, dividers, shelves, and drawer components. Hardwood plywood, MDF, and particleboard used in cabinets should be TSCA Title VI compliant in the United States. That standard applies to hardwood plywood, MDF, particleboard, and finished goods containing those composite wood products. When we buy sheet goods for built-ins or furniture-grade storage, we verify the labeling instead of assuming every panel in the rack meets the same emissions standard.
For paint-grade work, poplar and birch plywood are common choices. Poplar machines cleanly, paints well, and keeps cost under control. For stained work, maple, cherry, white oak, and walnut can all work, but they raise the stakes. Stain blotching, grain mismatch, and color variation become more visible across a grid of small drawer fronts. A clear or lightly tinted finish is often more forgiving than trying to force every small face into the same dark stain tone.
Solid wood drawer fronts need careful moisture control. Wet or unstable stock can cup, shrink, swell, or telegraph cracked finish lines around the reveals. On a cabinet with narrow margins, even a 1/16-inch seasonal movement can be enough to create a drawer that rubs. Bring hardwood into the shop early, let it acclimate, mill in stages, and avoid using boards straight from a damp garage or delivery stack.
Also popular on Amazon
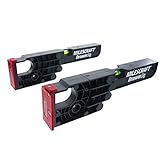
- Alignment fences and tabs make sure your jig is accurately aligned on both framed and frameless cabinets
- Large clamping area allows for tight and secure clamping to cabinet
- CABINET MUST BE AT LEAST 15" DEEP TO SUPPORT SLIDE INSTALLATION
- Reverse the DrawerJig and face outwards to support and align drawer while attaching slides
- Built-in level helps indicate if your cabinets have been installed accurate and true
Tools, Skill Level, and Time Commitment
This is not a beginner’s first cabinet project. A patient beginner with good tools can learn from it, but the cabinet rewards intermediate skills: accurate milling, repeatable cuts, square assembly, clean dados or rabbets if the plan uses them, controlled sanding, and precise hardware layout.
At minimum, expect to need a table saw or track saw setup, miter saw or crosscut sled, drill and bits, clamps, square, measuring tools, sander, router or dado method if the plan calls for grooves, and a dependable way to make repeatable drawer parts. A brad nailer can help in assembly, but it does not replace square joinery. A pull-drilling jig is not mandatory, but for 12 or more drawer fronts it quickly becomes worth the cost.
A realistic DIY schedule is 25 to 60 hours depending on drawer count, finish quality, and shop experience. The first third of the project is layout and milling. The middle is case assembly and drawer batching. The final third is sanding, finishing, fitting, and hardware. Many homeowners underestimate the last third. Drilling pulls, applying labels, easing edges, sealing interiors, and adjusting small drawers can consume several evenings.
If you are building this around a paid plan, read the plan all the way through before buying material. Then make a cut list, confirm actual plywood thickness with calipers, and decide whether you are following the plan exactly or adapting drawer fronts, pulls, or finish. Nominal 1/2-inch and 3/4-inch panels often measure differently from their names. That matters when dados, drawer sides, and reveals are tight.
How We Would Plan the Build
The best way to build an apothecary cabinet is to remove as many one-off measurements as possible. Repetition is your friend only if the setup is accurate. If every drawer opening is measured independently, small errors stack fast.
Start with the Pulls
Design from the pulls backward. Confirm pull width, screw spacing, label-holder size, projection, and finger clearance before finalizing drawer-front dimensions. A pull that looks perfect online may crowd a narrow drawer front or leave too little room between the label frame and the edge. Order one sample if the hardware is expensive or unfamiliar.
Lay a drawer front full size on scrap, mark the pull, and check how it feels with your hand. If the cabinet will be used daily in an entryway or office, comfort matters more than catalogue appearance. If children will use it, avoid sharp label frames and tiny knobs that loosen easily.
Use a Story Stick
For the drawer grid, use a story stick for vertical and horizontal reveals. A story stick is simply a physical layout reference marked with drawer heights, openings, rails, stiles, and gaps. It keeps you from transferring small tape-measure errors across the cabinet. On our trim and cabinet work, we use story sticks whenever repeated reveals need to look deliberate.
The Tool Desk
Outbyte Driver Updater FREEFix the driver behind crashes, sound loss and screen glitchesFind Drivers →Outbyte PC Repair FREEClear out junk files and repair common Windows errorsFree Scan →Pair the story stick with stop blocks at the saw. Mill like parts together: all drawer sides, all backs, all fronts, all dividers, all rails. Label parts as soon as they are cut. Dry-fit each drawer bank before glue-up. If a divider is off, it is better to find it while clamps are still on the bench than after finish has started.
Pre-Finish Tight Interiors
Pre-finish drawer interiors or at least seal them before final assembly when access will be tight. Small compartments are tedious to finish after the case is together. A thin coat of shellac, waterborne finish, or compatible sealer can keep interiors cleaner and reduce rough fibers without leaving heavy buildup where drawers need clearance.
Also popular on Amazon

- Drawer Slide Jig: Install drawer hardware quickly, accurately and more easily than ever with this innovative jig! Our center-mount drawer slide jigs are the ultimate aid for installing drawer slides of almost any type.
- Compatible With: Our cabinet hardware jig is compatible with almost any drawer slide including center-mount slides, epoxy-coated side mount, and ball bearing slides. Not compatible with Blum Tandem Drawer Slides.
- Locking Wedge: Our drawer jig features a locking wedge that holds the slide securely with no risk of slippage. Place our drawer slide jig against the face of your cabinet and position the cabinet drawer slides at level with the proper outback before use.
- Adjustable Indexing Rod: Our cabinet hardware jig tool can be clamped to the face of the cabinet. This woodworking jig features an indexing rod that references off of the face frame rails or cabinet bottom for fast, repeatable height settings.
- Rotating ABS foot: The rotating foot allows you to rotate the indexing rod from the top or bottom. And the cutouts in the cabinet jig allow easy access for drill and driver bits.
Do finish test boards from the same plywood and hardwood before committing. Plywood veneer, end grain, and solid fronts can absorb stain differently. If the cabinet will sit near a window, choose a finish that can tolerate UV exposure and routine dusting.
Where an Apothecary Cabinet Works Best
This cabinet shines when the storage items are small, varied, and worth separating. An entryway version can hold keys, sunglasses, pet leashes, stamps, batteries, and seasonal odds and ends. A craft-room version can organize thread, beads, blades, brushes, glue sticks, and markers. In a dining room, it can hold napkin rings, candles, tea, serving labels, bar tools, and small linens.
Do these 3 things before closing this tab:
1Fix the driver behind crashes, sound loss and screen glitches2Clear out junk files and repair common Windows errors3Scan for outdated or missing drivers - takes under a minuteIn an office, the shallow drawers work well for stationery, chargers, adapters, labels, clips, envelopes, and personal items. In a mudroom, it can become a catch-all as long as wet gloves and heavy footwear stay elsewhere. For boutique retail, the apothecary front is useful for jewelry, stationery, samples, hardware, or packaged goods where customers and staff need a visible organizing system.
The cabinet is also a strong candidate for a freestanding furniture piece when you want storage without committing to built-in cabinetry. Because it is only 10-1/4 inches deep, it can live in spaces where a standard 24-inch-deep base cabinet would feel bulky.
Where It Is a Poor Fit
A shallow apothecary cabinet is not right for every space. It is a poor fit for damp bathrooms unless the finish, joinery, and ventilation are planned for humidity. Unsealed drawer interiors can absorb moisture, and small drawers can begin to stick. If the piece goes into a bathroom, use a durable finish, seal all sides, keep it away from splash zones, and avoid trapping it against a chronically damp wall.
It is also a poor fit for heavy tool storage unless the drawers are reinforced. Small drawer boxes, thin bottoms, and decorative pulls are not designed for pounds of fasteners, wrenches, sockets, and drill accessories in every compartment. If the goal is shop storage, upgrade drawer bottoms, joinery, slides or runners, and anchoring.
Do not use an unlocked, child-accessible apothecary cabinet for medication storage. The style comes from pharmacy history, but a modern home needs modern safety. Medicines should be stored according to label instructions, away from children, and locked when appropriate. A decorative label pull is not a security device.
In kitchens, be careful that a shallow feature cabinet does not block required receptacles, appliance clearances, ventilation paths, or countertop work zones. If a cabinet becomes part of a kitchen layout, it stops being just furniture and starts interacting with electrical and building-code requirements.
Built-In, Wall Anchoring, and Electrical Code Triggers
As a freestanding furniture piece, the cabinet is usually a woodworking project. Once you anchor it to the wall, build it into a room, add outlets, run low-voltage lighting, or place it in a kitchen or bathroom, the conversation changes. Local rules vary, but the practical triggers are consistent: structure, electrical work, plumbing conflicts, clearances, and access.
Use a subtle anti-tip method even for a freestanding version. A French cleat, hidden L-brackets into studs, or blocking installed during remodel work can prevent the cabinet from tipping when loaded drawers are opened. The cabinet is not extremely tall, but a shallow 10-1/4-inch depth gives it less front-to-back stability than a deeper base cabinet.
Windows Errors? Fix Them Before They Spread
Repair common Windows errors and clear accumulated junk for a smoother, more stable PC - no reinstall needed.Free scan · no reinstallOutdated Drivers Are Slowing You Down
One free scan finds every outdated or missing driver and matches the right update for your exact hardware.Free scan · exact hardware matchAlso popular on Amazon

- 【DRAWER SLIDE JIG】Works with most of standard drawer slide types (side-mount, undermount) and cabinet materials (wood, MDF, plywood). The magnetic arm securely holds slides during installation without damaging surfaces
- 【DRAWER TRACK MOUNTING JIG】The adjustable clamp (0 - 4cm/1.5inch range) locks slides in place with one press, eliminating measurement errors. Achieve perfect alignment every time for multiple drawers without recalibration, saving times on cabinet projects
- 【TIME-SAVING & EFFICIENT DESIGN】Constructed of durable plastic and stainless steel, lightweight and sturdy. Durable fade-resistant laser markings, simply align, mark the drill points and install the drawer slides in seconds without any measuring tools.
- 【WIDE APPLICATIONS】Suitable for any project - cabinets, drawers, nightstands, DIY furniture or professional woodworking, making it easy to achieve professional results in all your woodworking projects.
- 【NOTE】This drawer jig DO NOT fit for face-frame cabinets, only apply for frameless cabinets
If you add a charging drawer, receptacle, LED lighting, or low-voltage transformer, coordinate with an electrician early. Do not run extension cords through drawer backs or drill random holes after the cabinet is finished. Receptacles and wiring need proper boxes, protection, access, and compliance with local electrical code. Kitchen islands and peninsulas have had code changes in recent cycles, and kitchen receptacle placement is not something to improvise around a decorative cabinet.
For built-ins, plan access panels before construction. If the cabinet hides an outlet, junction point, shutoff, cleanout, or low-voltage driver, that access must remain serviceable. On remodels, we would rather spend an hour coordinating blocking and electrical locations before cabinet fabrication than spend a day cutting into a finished piece.
Also think about live loads and attachment. Residential building provisions commonly use minimum live-load assumptions for floors and structural planning, but a small cabinet full of hardware, tools, or dense supplies can become surprisingly heavy. The issue is usually not floor capacity in a normal home; it is drawer strength, fastener pullout, and tip resistance.
DIY vs Hiring a Cabinetmaker
DIY makes sense when you want the woodworking experience, can tolerate a multi-week pace, and already own most tools. It also makes sense if you are comfortable with small imperfections or plan to use a painted finish that can hide minor grain and patching issues. Buying the plan and building carefully can produce a beautiful cabinet for less cash than commissioning one, but only if you do not price your own labor like a shop.
Hire a finish carpenter or cabinetmaker when the cabinet must match existing built-ins, fit between walls, handle daily family use, include electrical work, or meet a high furniture standard. In 2026, custom cabinets commonly fall around $500 to $1,200+ per linear foot installed, with some estimates reaching $1,400+ per linear foot depending on market and scope. A one-off apothecary cabinet can price higher than its size suggests because the labor is in drawers, hardware, finishing, and fitting.
| Best choice | Choose it when | Budget expectation |
|---|---|---|
| Buy the plan and DIY | You have tools, patience, and want a furniture project | $250-$900 typical materials, plus $14.95 plan |
| DIY case, hire finish help | You can build square but want a better sprayed or stained finish | DIY materials plus local finishing labor |
| Hire a finish carpenter | You need wall anchoring, trim integration, scribing, or minor built-in work | Installation benchmarks may start around $274-$422 per cabinet, before custom labor and options |
| Commission a cabinet shop | You want premium hardwood, perfect reveals, custom dimensions, inset fronts, or matching cabinetry | Often $500-$1,200+ per linear foot installed, higher in premium markets |
The decision often comes down to tolerance. If a 1/32-inch reveal variation will bother you every time you walk by, hire the work or build several practice drawers first. If you enjoy careful layout and are willing to tune the piece slowly, this is a satisfying project.
Independent reader supportYour contribution helps us test, update, and keep practical guides available for everyone.Common Mistakes That Make the Cabinet Look Amateur
The most common mistake is underestimating drawer labor. Twelve small drawers are not one drawer repeated in theory; they are 12 chances to cut slightly off, sand unevenly, drill hardware crooked, or apply finish too thick. Twenty or 30 drawers multiply that again.
The second mistake is building openings without a story stick or stop-block system. Apothecary cabinets depend on rhythm. Uneven reveals show immediately because the whole face is a grid. Use physical references, fixed stops, and batch milling rather than chasing measurements with a tape.
Free tools Windows power users keep installed
One-click scans. No signup required.
Another frequent problem is choosing hardware too late. Label holders and pulls may collide visually or physically on narrow fronts. Cheap hardware can look acceptable on one drawer and inconsistent across a full bank. Buy one sample, check screw spacing, and make a drilling template before touching finished fronts.
Material assumptions cause trouble too. Plywood thickness varies. Solid wood moves. Wet stock swells. MDF edges need sealing. Drawer bottoms need enough support for the intended contents. If you mix materials without measuring actual thicknesses, dados and drawer fits can get sloppy fast.
Also popular on Amazon

- Upgraded Drawer Slide Clamp: Features innovative removable clamping system with high-quality clamps and rubber heads. Secure drawer slides quickly by placing them in the desired position for stable fixation
- Creative Positioning Design: Built-in blue positioner for fast operation positioning. Special blue protrusions on the support arm fit tightly with wood to prevent displacement and ensure stability
- Magnetic Support Arm: Equipped with strong built-in magnets to hold long drawer slide tracks securely, freeing hands for precise adjustment. Provides alignment assist to ensure parallelism and verticality between slide tracks, cabinets and drawers
- Expandable Extension: With connector design, extend working length by connecting multiple stainless steel bodies for tall cabinet drawer slide installation
- Multiple Track Compatibility: Compatible with standard side-mounted and bottom-mounted drawer slides. Suitable for wood, MDF, plywood and common cabinet materials, ensuring stable and error-free installation
Finally, many builders finish too late. Waiting until the whole cabinet is assembled can leave rough interiors, finish runs, and uneven sheen inside small compartments. Pre-finishing or sealing interior surfaces before final assembly is slower at the front end and cleaner at the back end.
Practical Specifications We Would Use
For a painted or lightly stained cabinet, a sensible specification would be 3/4-inch cabinet-grade plywood for the case, stable hardwood for the face frame and drawer fronts, 1/2-inch plywood for drawer sides where appropriate, and 1/4-inch or thicker drawer bottoms depending on load. For heavier contents, step up the drawer bottom thickness and capture it in grooves rather than relying only on staples or nails.
What’s actually slowing this PC down?
Pick the symptom - the matching free tool is one click away.
For drawer movement, traditional wood runners can work if they are waxed, aligned, and not overloaded. For a modern utility version, small mechanical slides may be useful, but they change dimensions and the period look. Decide that before cutting parts. A decorative apothecary face with hidden modern slides can be excellent, but it must be designed from the start.
Use a finish schedule that matches the room. For dry living spaces, a clear waterborne polyurethane, wiping varnish, shellac-based system, or lacquer-type shop finish may be appropriate depending on skill and equipment. For bathrooms, mudrooms, or kitchens, use a more moisture-resistant finish and seal all faces, including backs, bottoms, and drawer interiors. Any finish used inside storage drawers should be fully cured before the cabinet is loaded.
Bottom Line
The Apothecary’s Friend Cabinet is worth building if you want a compact, furniture-grade storage piece and you are prepared for precision work. Its 35-1/4 by 33 by 10-1/4 inch size is manageable, but the drawer grid makes it more demanding than a basic bookcase or utility cabinet. The plan cost is modest at $14.95; the real investment is materials, hardware, finish, time, and accuracy.
For most DIY builders in 2026, plan on $250 to $900 in materials, with premium versions exceeding $1,000. If the cabinet becomes a built-in, charging station, kitchen feature, bathroom cabinet, or custom-matched furniture piece, bring in a finish carpenter, cabinetmaker, or electrician as needed. Built well, an apothecary cabinet is not just decorative. It is one of the most efficient small-item storage pieces you can add to a home.
Frequently Asked Questions
What are the dimensions of the Apothecary’s Friend Cabinet woodworking plan?
The finished cabinet is 35-1/4 inches high, 33 inches wide, and 10-1/4 inches deep. That makes it a compact accent cabinet rather than a full-depth kitchen cabinet.
How much does it cost to build an apothecary cabinet in 2026?
A realistic DIY material budget is about $250 to $900, plus the $14.95 plan. Premium hardwood, brass label pulls, dovetailed drawers, specialty finishes, and new jigs can push the project above $1,000.
Is an apothecary cabinet a beginner woodworking project?
It is better for an intermediate woodworker. The case is not large, but the many small drawers require accurate batching, consistent reveals, square assembly, and precise pull installation.
What wood is best for an apothecary-style cabinet?
Use cabinet-grade plywood for the stable case and solid wood for the face frame, trim, top, and drawer fronts. Poplar is practical for paint, while maple, cherry, white oak, and walnut are good stained or clear-finished options.
Free tools Windows power users keep installed
One-click scans. No signup required.
Can I add an outlet or charging drawer inside an apothecary cabinet?
Yes, but it should be planned before construction and handled according to local electrical code. Use proper boxes, access, wire protection, and electrician coordination rather than routing extension cords through drawers.
Is it cheaper to build an apothecary cabinet or hire a cabinetmaker?
DIY is usually cheaper in cash if you already own the tools and accept the time investment. Hiring a cabinetmaker costs more, often using custom cabinet benchmarks around $500 to $1,200+ per linear foot installed, but it is the better choice for built-ins, premium finishes, exact matching, or electrical integration.
Quick Recap
Product prices and availability are accurate as of the date/time indicated and are subject to change. Any price and availability information displayed on Amazon at the time of purchase will apply.

