For consistent interior window trim, build the extension jambs, stool, and casing together on a flat workbench, test-fit the assembly at the opening, and install it as one unit. The method is most useful when openings have similar, reasonably uniform jamb widths; measure each opening rather than assuming the walls are identical, and check sash and hardware clearance before fastening.
What this method does—and what it does not
Robert Davol’s approach is to assemble the interior trim away from the window, where the parts can be laid out flat and aligned, then fit the completed assembly to the opening. It brings the extension jambs, stool, and casing together before installation, helping the carpenter maintain consistent reveals and repeatable head and side details across a group of windows.
Davol developed the workflow on a project with eight closely spaced windows, where small differences in casing and reveals would be easy to see. He reports continuing to use it for nearly all new-construction windows in his renovation projects. That is his account of a finish-carpentry practice, not an independent comparison proving it is faster or better for every opening. In the Fine Homebuilding article, he estimates that two carpenters can build an assembly in 30 minutes or less, with a few more minutes to install it.
This is an interior finish-trim method. It does not specify how to attach the window unit to the structure or how to flash, seal, or manage water around it. Those details depend on the product and installation condition; follow the applicable manufacturer instructions, such as the product-specific guidance from Pella for new-construction windows, Pella Steady Set, Andersen, or Simonton.
The Tool Desk
Outbyte Driver Updater FREEScan for outdated or missing drivers - takes under a minuteDriver Scan →Outbyte PC Repair FREEClear out junk files and repair common Windows errorsFree Scan →#1 Best Overall

- 6 pcs Door Casing for 2 doors: this package includes 2 complete door casing kit, each set contains all necessary components for framing a standard interior door frame; You will receive 4 vertical pieces measuring about 7 ft and 2 horizontal pieces measuring about 36 inches, all pieces feature a consistent about 2-1/4 inches width; This ensures a matching look for your door frame project, everything needed for 2 doorways is provided in one convenient purchase
- Easy DIY and Installation and Finger Jointed : The 6 pcs door trim kit is cut to fit standard doors. Simply measure and trim as needed. Cuts and nails just like wood, making it easy to install,our door trim molding is crafted using a finger jointed technique; This manufacturing process enhances the stability of the wood; It helps minimize warping and shrinking over time; The result is a straight and reliable piece of door casing that is easier to work with during installation
- Smooth Prefinished Casing: these white door casing pieces arrive with a smooth prefinished surface; The paint is already applied at the factory; This saves you considerable time and effort on preparation and painting; The finish is designed to be even and ready for use right out of the package; It allows for a quicker project completion with less mess
- Radiata Pine Casing Material: this prefinished finger jointed door casing set is made from radiata pine; This wood is known for its consistent grain and ability to take a finish well; It provides a stable base for the pre applied paint; The material is suitable for interior trim applications and is favored for its workability
- Conceals Gaps and Joints: the primary function of this door frame trim is to neatly conceal the transition between the wall and the door jamb; It covers gaps and uneven edges for a built in look; It can also be applied around windows for a matching aesthetic; It creates a polished and completed appearance in your home
Check the opening and choose the reveal
Set the extension-jamb position
Use a combination square to mark where the extension jamb will sit and to carry the reveal consistently around the frame. If the window has a manufacturer’s groove, Davol uses it as the reference. If there is no groove, his typical layout is a 1/4-inch reveal from the sash-side edge of the frame. That is his usual finish-layout choice, not a universal window requirement.
Measure wall depth at four corners
Measure from the window frame to the interior wall finish at all four corners, then average the measurements to determine the extension-jamb width. For example, Davol gives measurements of 2-1/8, 2-1/8, 2, and 1-7/8 inches; their average is 2 inches. The point is to fit the actual wall, not cut every jamb to a nominal dimension. Plaster thickness can vary, and older houses may have different wall finishes and depths even within one project.
Rank #2

- Prefinished finger jointed pine casing set, ready to be installed
- Smooth surface, free of any defects
- Colonial style, great to cover gaps between drywall and windows or doors
- Pre-mitered for ease of installation
- Finger-jointed radiata pine has a smooth, defect-free surface
Davol aims to keep corner variation within 1/8 inch. He says a difference of up to 1/4 inch can be accommodated by selectively planing or sanding the casing where it meets the plaster. Treat these as his stated finish-work tolerances, not a substitute for checking each opening.
Match the material to the finish
For stain-grade trim, use stock that matches the window frame and sash. For painted trim, Davol describes using S4S poplar. Cut the extension jamb stock to the measured width, and keep pieces for each opening identified if wall depths differ.
Crashes, No Sound, or Screen Glitches?
Random freezes, missing sound and display glitches usually trace back to one bad driver. Find and replace yours safely.Free scan · under a minuteWindows Errors? Fix Them Before They Spread
Repair common Windows errors and clear accumulated junk for a smoother, more stable PC - no reinstall needed.Free scan · no reinstallRank #3

- Door Molding Kit: you will receive 1 sets of pre cut peel and stick door molding, a total of 10 pieces, which can be easily matched and connected to give a sophisticated look to a door or wall, meeting your various decoration needs
- Interior Decor: this door trim molding kit will add depth and style to any room; You can try different spacing and amounts, even mix and match our different sizes to add variety to your space and breathe a new life
- Self Adhesive Applications: the door molding kits come with built in adhesive backing that makes them easy to use without the need for additional adhesives or tools; They can also be effortlessly affixed with silicone quick drying glue or wall studs, giving you the flexibility to match your DIY style
- Save Your Time: our door trim DIY is pre cut to decorate your doors or walls without cutting or aligning; These wall and door molding kits can be painted with any interior paint to beautify your space and ensure a quick and effective makeover of your decor
- Lightweight and Reliable: these door panels for interior door are made of polystyrene material, lightweight but reliable; Besides, they retain a wood like texture, beautiful and practical, not easy to deform, keeping your space looking elegant for long
Build and test the assembly before installation
- Fit the stool. Measure it for the opening and notch it to fit around the jambs as needed. Check its position against the intended trim layout and the window’s operating parts.
- Assemble jambs and stool on a flat workbench. Establish the jamb position and reveal from your layout marks, then join the parts. Davol uses 18-gauge brad nails at narrow jamb corners; wider jambs can take pocket screws. Where a screw could split the wood, predrill for trim screws. He also describes using glue at the stool joints.
- Attach the casing to the jamb assembly. Cut and fit the casing, including its miters, on the flat surface. Glue the casing miters as described in Davol’s method. The miter saw is one of the tools he uses for casing, jamb parts, and apron returns.
- Test-fit the completed assembly at the opening. Check the reveal, stool placement, and fit against the wall before fastening. If there are several similar windows, make one test assembly and try it at the other openings before batching identical parts; confirm that the measurements and fit really are consistent.
- Shim and fasten the assembly. Once the fit is right, shim the casing at the wall as needed and fasten it to framing with pairs of 16-gauge finish nails spaced about every 8 inches, as in Davol’s practice.
- Add the apron. Fit and install it after the assembly is in place. After priming and painting, caulk the small gap between the wall and casing.
Confirm clearances before you commit
A trim assembly can fit the opening and still cause trouble if it blocks sash movement or hardware. Test the window through its normal operation before fastening the trim permanently.
- Tilt-in double-hung windows: Check that the sash tilts in freely and that the trim does not interfere with tilt hardware or sash lifts.
- Casement and awning windows: Position the stool so it does not obstruct operating hardware.
- Inswing Euro-style windows: Check the swing and hardware clearance with the sash opened through its operating range.
When to fit the parts individually
The one-piece approach assumes the extension-jamb widths are uniform enough for a square, repeatable assembly. If an old opening is out of plumb and the jambs need to taper, a preassembled frame may not sit properly. Davol’s alternative is to rip or plane the pieces individually and install them one at a time; he mentions a track saw for tapered jambs. A careful test-fit is the point at which to decide whether the opening can take a uniform assembly or needs that individual fitting.
Rank #4

- Prefinished and ready for install
- Pre-mitered for effortless fitting
- Crafted from finger-jointed lumber to reduce warping
- Smooth surface, free of any defects
- Perfect for finishing interior doors and windows
Why preassembly can help on a run of windows
On multiple windows with similar openings, building on a flat surface makes it easier to reproduce the same reveal, stool relationship, and casing joints. The benefit depends on the openings actually matching: measure the wall depths, test the first assembly at the other windows, and verify operation before making a batch. Where dimensions or plumb vary substantially, individual fitting may be more reliable than forcing identical parts.
Quick Recap
Best Value
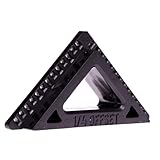
- Precision & Accuracy: Experience professional-level accuracy with Trimble - a standout scribe tool among wood working tools and accessories. Engineered with ±0.01" precision, it delivers consistent spacing for every door casing and window reveal, elevating your wood molding trim projects.
- Versatile Trim Options: Trimble offers multiple offset settings including a 1/4 trim spacer, 3/16 trim spacer, and a 1/8 gap for nickel gap or shiplap applications. This trim tool adapts seamlessly to various finish carpentry tasks, making it a vital addition to your trim tools for carpentry collection.
- Streamlined Reveal Setting: Designed specifically for setting consistent reveals on trim, Trimble simplifies your woodworking process. It enables precise measurements for both door and window casings, ensuring flawless, professional-level trim reveals every time without the need for additional jigs.
- Built to Last in the USA: Crafted from durable injection molded black plastic and backed by a lifetime warranty, Trimble is engineered to withstand rigorous use. Proudly made in the USA, it stands as a trusted wood working tool for both professionals and DIY enthusiasts seeking reliable trim tools for carpentry.
- Compact & Portable – Perfectly Sized: With dimensions of 2.75 x 1.5 x 0.5 inches and weighing just 15g, Trimble is as pocket-friendly as a standard credit card with extra thickness. This ultra-compact design makes it easy to carry in any tool belt or pocket, ensuring you always have your essential trim reveal tool at hand.
Product prices and availability are accurate as of the date/time indicated and are subject to change. Any price and availability information displayed on Amazon at the time of purchase will apply.
Recommended Free Tools