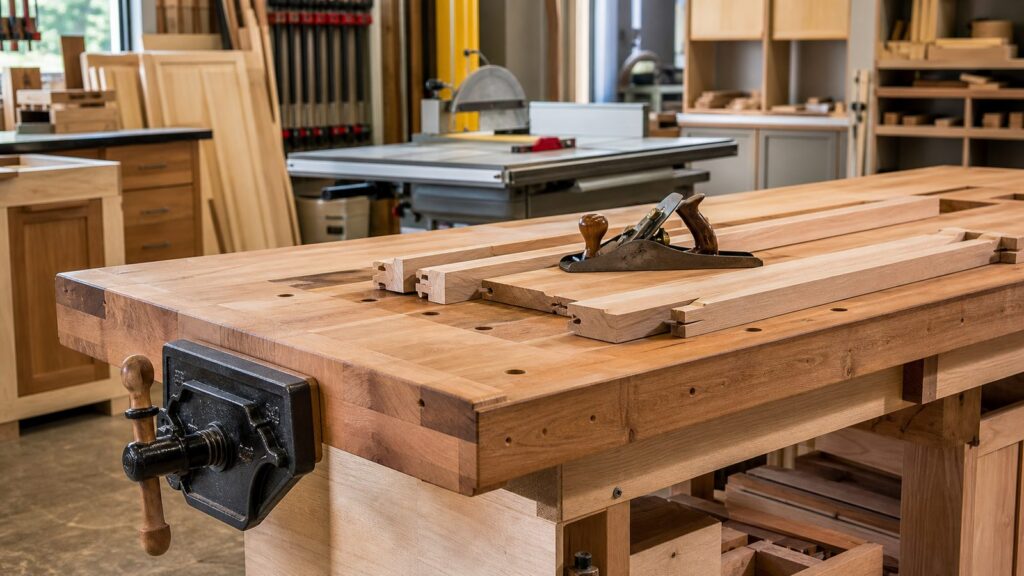
For most right-handed woodworkers, the main face vise should go on the left front corner of the workbench. For most left-handed woodworkers, it should be mirrored to the right front corner. That is the fast answer, and it is still the best starting point for cabinet work.
But it is not a law of woodworking. The correct vise location depends on how you work: which hand controls the saw or plane, where your long boards need to extend, whether the bench sits against a wall, where your bench dogs run, and what type of vise you are installing. On our job sites and in shop setups, we treat vise placement as a workholding decision, not a tradition to copy blindly.
If you are building cabinets, trimming doors, fitting face frames, or doing general finish carpentry, the goal is simple: mount the vise so the work is supported by the bench, the tool pressure pushes the material into solid structure, and your body can stand naturally without fighting the handle, wall, legs, drawers, or apron.
The Short Rule: Match the Vise to Your Dominant Hand
If you are right-handed and installing one woodworking face vise, start with the left front corner of the bench. If you are left-handed, start with the right front corner. For a shared shop, mark out both layouts before drilling and choose the side that serves the primary user or the most common task.
Quick wins for a faster PC:
Repair Windows errors before they cause bigger problemsFix Now →Scan for outdated or missing drivers - takes under a minuteDriver Scan →The reason is workflow. A right-handed cabinetmaker usually saws, planes, pares, or chops with the right hand controlling the tool. With the face vise on the left, the board can be clamped near the left corner while the longer keeper piece is supported along the front edge of the bench. The offcut is easier to control, the saw line is visible, and the work is less likely to twist away from the bench.
#1 Best Overall
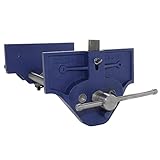
- Body and sliding jaw are from high quality grey cast iron and this material has excellent shock absorbing qualities
- Slide rods and main screw from steel with a single start thread
- Fitted with an adjustable front stop (dog) which gives an additional clamping facility when used in conjunction with a bench stop, this also provides a nromal vise and a tail vise in one tool
- Quick release trigger to open and close the vise quickly without using the main screw
- For added safety, the tommy bar will bend before the vice becomes over-stressed
For left-handed users, the same logic points the other way. A right-front face vise usually gives better body position, better saw control, and more natural planing direction. Do not make a left-handed worker adapt to a right-handed bench if this is a new build. A vise is permanent enough that it should fit the person who will use it most.
A useful starting layout for cabinet work is this: right-handed primary user, left-front face vise and right-end tail or end vise; left-handed primary user, right-front face vise and left-end tail or end vise. Then adjust for wall clearance, doors, machinery, and actual board lengths.
Why the Left Side Became Traditional for Right-Handed Woodworkers
The traditional left-front vise placement is not random. It works because many hand-tool operations apply force from right to left or from the worker into the bench. When the vise is on the left front corner, a right-handed user can stand comfortably at the front of the bench with the tool hand free and the off hand guiding the work or steadying the offcut.
Recommended Free Tools
Consider a cabinet face-frame rail clamped vertically for a tenon shoulder cut. A right-handed person can clamp the rail at the left-front corner, stand just right of the vise, and saw with a natural stroke. The keep side remains supported, and the waste can fall away or be held by the off hand. If that same vise is mounted on the right, the saw stroke may crowd the bench end, put the body in a twisted position, or leave the good portion of the work hanging unsupported.
Edge planing follows the same pattern. With a board clamped in a left-front face vise and supported by a peg, deadman, or the bench edge, the right-handed user can plane from right to left into the fixed mass of the vise and bench. The force should tighten the setup, not pry it loose.
This is the rule we use when laying out shop benches: tool pressure should drive the work into something solid. If your vise placement makes the work rack, bounce, twist, or pull away from the bench, the placement is wrong for that operation.
Face Vise, End Vise, tail vise, wagon vise: Placement Is Not the Same
Before drilling holes, be clear about the vise type. A face vise, end vise, tail vise, wagon vise, leg vise, and metalworking vise all solve different problems. The left-or-right question mainly applies to a front or face vise, but cabinet shops often use more than one form of workholding.
Face or Front Vise
A face vise mounts along the front long edge of the bench, usually near a front corner. It is the everyday cabinetmaking vise for holding boards vertically, clamping drawer sides for dovetails, securing rails for edge work, and gripping smaller parts for shaping or sanding. For one all-purpose woodworking vise, this is usually the first one to install.
Typical jaw widths run from about 6 inches on smaller vises to 10 inches or more on cabinetmaker-style models. Many common woodworking vises open 7 to 13 inches, depending on the screw and guide rods. For cabinet work, a vise that opens at least 7 inches is more useful than a small metal vise because it can hold wider stock with wood liners.
End or Tail Vise
An end vise or tail vise mounts at the end of the bench and is commonly used with bench dogs to hold boards flat on the benchtop. This matters for planing cabinet panels, door parts, shelves, and tabletops. The tail vise is less about left or right hand alone and more about the dog-hole row, planing direction, and whether the screw or handwheel interferes with the user.
For a right-handed bench, a common arrangement is a face vise at the left front and a tail vise at the right end. That lets the user plane boards along the length of the bench with dogs while keeping the front edge available for vertical clamping.
What’s actually slowing this PC down?
Pick the symptom - the matching free tool is one click away.
Rank #2

- Quick-Release Mechanism for Effortless Operation –The quick-release system works in gravity and friction, allowing you to instantly engage or disengage the lead screw by simply changing the handle’s cranking direction. The front jaw slide freely in and out when disengaged
- Heavy-Duty Cast Iron & Precision Engineering-Built with a durable cast iron base and front plate, this vise delivers exceptional strength and stability. The 3/4” diameter steel guide rods and lead screw ensure smooth, precise linear motion, while its 9-1/8” travel span (without wooden jaws) provides ample clamping capacity
- Versatile Woodworking Workbench Compatibility – Designed for use as a front vise or end vise, this unit fits various workbench styles. The base mounting footprint is 9-5/16” x 3-7/16”, and the installation space is 9-5/16” x 12-3/4”. The gap between the guide rods and lead screw accommodates workpiece up to 2-1/8” wide
- All-Inclusive Installation Kit – The hardware bag comes with all the hardware you need for installing this bench vise which are #12 lag bolts, 7/8” O.D. 1/4” I.D. washers, M6 countersunk machine screws, and Torx barrel nuts. A detailed instructional guide and drilling templates simplify installation, making this notoriously tricky task a breeze
- 10” Beech Handle with Flat Finials – The 10” beech handle gives you the leverage to generate clamping power more than you need. Features flat-style finials with threaded inserts, making them fast to detach and durable after disassembly
Wagon Vise
A wagon vise is a compact tail-vise style mechanism built into the benchtop. It moves a dog block rather than a full end jaw. Its handedness depends heavily on dog-hole layout. If the dog holes are too far from the front edge, the screw, handwheel, or handle may land in an awkward position. For most cabinet work, keep dog holes close enough to the front working edge that narrow rails and stiles can be held without tipping.
Leg Vise
A leg vise uses the bench leg as part of the clamping structure. It is strong, simple, and excellent for edge work, but it needs a substantial front leg and clear floor space. In a compact garage shop, a leg vise can be a good choice if the bench is heavy and the user does not need drawers or cabinets directly behind the front apron.
metal bench vise
A metalworking vise is built for steel, pipe, and fabrication tasks. It usually has serrated jaws and a swivel base. It can be useful in a construction shop, but it is not ideal as the only vise for cabinet-grade woodwork. Serrated jaws can bruise maple, oak, walnut, painted parts, and prefinished plywood. If you use one, add magnetic jaw pads, wood jaw liners, or a removable mounting plate so it does not live in the way of woodworking operations.
Placement Checklist Before You Drill
A vise install is easy to regret because the holes are large, the bolts are structural, and the underside of a bench can be crowded with legs, stretchers, drawers, and aprons. Before drilling, clamp the vise temporarily and run real motions for at least 15 to 20 minutes.
Do these 3 things before closing this tab:
1Fix the driver behind crashes, sound loss and screen glitches2Clear out junk files and repair common Windows errors3Scan for outdated or missing drivers - takes under a minuteDo not just stand in front of it and open the handle. Clamp a 36-inch rail vertically and make a pretend tenon saw stroke. Clamp a 48-inch board on edge and run a plane along it. Put a panel flat on the bench between dogs. Hold a drawer side as if you were cutting dovetails. Swing the handle through a full rotation. Check whether your hip, wall, cabinet base, or bench leg gets in the way.
For cabinet work, test these dimensions:
- Front overhang: many face vises need enough overhang or underside clearance for the rear jaw, guide rods, screw, and mounting plate.
- Jaw flushness: the fixed jaw or wood liner should sit flush with the front edge of the benchtop when possible, so long boards register against the bench face.
- Free length beside the vise: leave enough bench length to support 36-inch to 96-inch cabinet parts, face-frame rails, door stiles, and trim stock.
- Handle swing: check the full handle radius plus knuckle clearance. A handle that hits a wall or drawer pull will irritate you every time you use it.
- Bench structure: avoid mounting where bolts conflict with legs, stretchers, dog holes, drawers, or metal brackets.
- Dog-hole alignment: if the vise has a dog, align it with a straight row of bench dogs. A row that wanders even 1/8 inch can make panels clamp unevenly.
As a practical rule, keep a face vise close enough to the corner that vertical work can hang freely, but not so close that the mounting bolts weaken the corner or run into the leg joinery. On many benches, the inner jaw lands 2 to 6 inches from the end, depending on the vise hardware and leg position.
Garage and Small-Shop Constraints Change the Answer
Magazine-style benches often sit in open rooms. Real home shops do not. Many benches are against a garage wall, tucked between shelving, or sharing space with a table saw, miter saw stand, lawn equipment, or a parked vehicle.
If the bench sits tight against a left wall, a left-front vise may be technically traditional but functionally poor. Long boards may hit the wall, and the handle may not swing. In that case, a right-front vise, a mobile bench, or a removable Moxon vise may be the better answer even for a right-handed user.
We like at least 36 inches of standing clearance along the working face of a bench. More is better. For long cabinet parts, plan for the board to extend 48 inches or more past the vise without hitting a wall, storage rack, water heater, or garage door track. If you routinely work with 8-foot stock, you need either open air to one side or a bench that can be pulled into the room.
A mobile base can solve more problems than a perfect left-or-right decision. If the bench normally parks against a wall but rolls out 24 to 36 inches for handwork, the traditional vise orientation may still work. Locking casters must be solid enough that the bench does not creep during planing. A 250-pound bench behaves very differently from a 90-pound folding table.
Cost to Add a Workbench Vise in 2026
Vise cost varies by jaw width, opening capacity, quick-release mechanism, casting quality, guide-rod stiffness, and whether the hardware is a simple face vise or premium tail-vise system. Installation cost depends just as much on the bench as the vise. A thick hardwood top with open underside access is straightforward. A bench with drawers, aprons, metal framing, or thin plywood may need blocking or rebuilding.
Rank #3
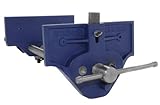
- Quick release trigger allows you to quickly adjust the opening to either release or clamp a piece you’re working on
- Fitted with an adjustable front stop (dog) to provide a normal vise and a tail vise in one tool
- Vise comes with two predrilled holes for quick sturdy mounting to your workbench
- To increase safety, the fused tommy bar will bend before the vise can become over-stressed
- 10" jaw width, 4" throat depth; 39 lb. net weight; Voted #1 Woodworking Vise as seen on Wiki Video
| Vise Type | Typical 2026 Material Cost | Best Use | Install Complexity |
|---|---|---|---|
| Portable or clamp-on vise | $40-$105 | Temporary workholding, renters, shared garages | Low; usually no permanent bench modification |
| Entry woodworking face vise | $55-$100 | Basic cabinet work, light-duty home shop use | Moderate; usually needs jaw liners and bolts |
| midrange quick-release front vise | $130-$270 | Frequent cabinetmaking, doors, drawers, trim parts | Moderate; alignment matters |
| Premium leg, tail, or wagon vise hardware | $230-$745 before wood and labor | Dedicated hand-tool bench, serious furniture or cabinet work | High; often part of a bench build |
| DIY installation materials | $20-$100 | Hardwood jaws, bolts, washers, blocking, finish, bench dogs | Depends on bench access and thickness |
For a homeowner upgrading an existing bench, the realistic all-in material range is often $100 to $370 for a good woodworking face vise with liners and hardware. A premium bench build with a leg vise and tail vise can exceed $1,000 once hardwood, hardware, dog holes, finish, and labor are included.
Professional labor is not usually priced like a standard fixture install. It is shop carpentry. The time depends on whether the bench needs reinforcement, whether the vise must be mortised into the top, whether an apron interferes, and whether dog holes need to be drilled accurately. A simple face-vise install may take 2 to 4 hours. A tail vise, wagon vise, or leg vise integrated into a new bench can take a full day or more.
How to Choose the Best Side for Your Bench
Use this sequence before committing to left or right.
1. Identify the Primary User
If one person will use the bench 80 percent of the time, build for that person. Right-handed users should start with a left-front face vise. Left-handed users should start with a right-front face vise. If the bench is shared evenly, consider a removable Moxon vise, dog-hole clamps, or a second workholding station instead of forcing one permanent vise to satisfy everyone.
2. List the Real Work
A cabinet shop bench has different needs than a metal repair bench. If your work is mostly drawer boxes, face frames, door trimming, scribing fillers, and edge planing, a face vise near the front corner is valuable. If you mostly sand, assemble, and use power tools, bench dogs and holdfasts may matter more than a large traditional vise.
3. Check the Direction of Force
Plane, saw, and chisel as if the work were clamped. The best side is the one where force drives the work into the bench and lets your body stay balanced. If you feel yourself pulling the board away from the vise or twisting your shoulders to finish a cut, change the layout.
4. Confirm Long-Board Support
Cabinet parts are often longer than people expect. Door stiles may be 80 inches. Face-frame rails may be 30 to 60 inches. Pantry cabinet sides can be 84 to 96 inches. The vise should leave the longer portion of the work supported by the bench or open space, not jammed into a wall.
5. Map Dog Holes and Accessories
If your vise includes a pop-up dog, align it with the bench dog row before drilling. Common dog holes are 3/4 inch in diameter, and spacing often falls around 3 to 4 inches on center for flexible workholding. Keep the row straight. For face work, make sure the dog row holds narrow cabinet rails as well as wide panels.
Can You Mount a Vise in the Middle?
You can mount a vise in the middle of a bench, but it is rarely the best location for a primary woodworking face vise. A middle-mounted vise can be useful on an assembly table, shared workbench, school bench, or island where people work from both sides. It can also help if walls block both ends.
Free tools Windows power users keep installed
One-click scans. No signup required.
The drawback is that vertical boards cannot hang freely near the corner, and long stock may interfere with more of the bench. You also lose the natural corner advantage for sawing and chopping. For cabinet work, a corner-mounted face vise is usually more versatile.
Rank #4

- Woodworking Vise For Workbench: This powerful workbench wood vise is perfect for custom workbenches. Sturdy dual guide rods eliminate racking, while the quick-release feature lets you slide the vise all the way open or closed with an easy 1/4 turn.
- Convenient Design: Slides open or closed in seconds! You can easily mount this workbench wood vise. The 9-inch guide bar's convenient design makes it easy to work and holds things more firmly.
- Solid Construction: The woodwork vise has an iron and steel structure. The guide rods provide absolute resistance to racking, while an extra-wide 9" wide handle-plate delivers maximum stability to handle any project. This vise for woodworking also has a solid hardwood handle.
- Easy To Use: Simply pull up on the handle and hold, this will cause the bench front vise nut to disengage. Adjust the wooden jaws to the appropriate opening and let go of the handle. A simple turn of the main handle will engage the screw and tighten the vise on the front.
- Widely Applied: The workbench vise clamps for woodworking are a great solution for wood shops and woodworking studios. Our quick release vise bench is easy to mount with 1/4" lag bolts (not included).
If the only available location is the middle, use a wider jaw liner, add dog holes, and consider a sliding deadman or support peg along the front edge. That keeps long boards from sagging while the vise grips one end.
Independent reader supportYour contribution helps us test, update, and keep practical guides available for everyone.Safety and Permit Notes for Home Shops
Installing a vise on an existing bench usually does not require a building permit. Building or remodeling a garage shop can be different. Electrical circuits, structural framing, attached-garage changes, dust collection, heating appliances, and new walls or openings may require permits depending on the city. Before adding 240-volt machinery, permanent dust collection, gas heat, or structural storage, check your local building department.
For safety, treat the vise as a clamping tool, not a press, an anvil, or a substitute for proper machine guarding. Inspect the screw, guide rods, mounting bolts, and jaw liners periodically. If the vise racks badly, slips under normal pressure, or the bench moves during planing, fix the support before forcing the tool harder.
PC Slower Than It Used to Be?
A free scan shows the junk files, broken settings and background clutter dragging Windows down - then fixes them in one click.Free scan · Windows 10 & 11Crashes, No Sound, or Screen Glitches?
Random freezes, missing sound and display glitches usually trace back to one bad driver. Find and replace yours safely.Free scan · under a minuteFor woodworking, dust control matters. Cabinet work creates fine dust from plywood, MDF, hardwood, and sanding. Use dust collection at machines, wear appropriate eye and respiratory protection, and keep ignition sources away from heavy dust buildup. In professional environments, combustible wood dust and machine guarding are regulated safety concerns, and even a home shop benefits from the same habits: clean floors, clear exits, guarded blades, hearing protection, and no loose clothing around rotating tools.
Bench-vise safety is also simple and often ignored. Do not extend the handle with pipe for extra leverage. Do not hammer on a woodworking vise unless the vise and bench are designed for that abuse. Keep fingers clear of the jaws, use wood liners for finished parts, and clamp irregular shapes with blocks so they do not eject under pressure.
When to DIY vs. When to Hire a Pro
A careful homeowner can install many face vises with ordinary shop tools: drill, bits, wrenches, square, clamps, and a router or chisel for recessing the rear jaw if needed. If your bench has a solid top at least 1-1/2 inches thick, clear underside access, and no drawer bank in the way, a DIY install is reasonable.
Plan on 2 to 4 hours for a first-time face-vise installation, plus time to make hardwood jaw liners. Maple, beech, ash, white oak, or another durable hardwood works well. Jaw liners are commonly 3/4 inch to 1-1/2 inches thick. Slightly chamfer the top edges so cabinet parts do not bruise on a sharp corner. Keep the inner jaw flush with the bench edge when possible.
The Tool Desk
Outbyte Driver Updater FREEScan for outdated or missing drivers - takes under a minuteDriver Scan →Outbyte PC Repair FREERepair Windows errors before they cause bigger problemsFix Now →Hire a carpenter, cabinetmaker, or experienced woodworker if the bench needs structural reinforcement, the top is too thin, the vise conflicts with legs or drawers, or you are installing a premium tail vise, wagon vise, or leg vise. Also bring in help if you need a new bench base built. A vise is only as good as the mass and stiffness behind it.
Professional installation is also worth considering when the bench supports paid work. A poorly mounted vise can waste minutes on every door, drawer, and face frame. Over a year, that costs more than the install.
Common Placement Mistakes
The most common mistake is copying a standard left-side layout without checking the room. A left-front vise is excellent for many right-handed users, but not if the bench is trapped in a corner and every long board hits drywall.
Best Value

- Trustworthy Quality - Stationary Body is made from Ductile Iron(60,000 PSI). Floating Body is made from high strength Gray Iron (30,000 PSI). The surface of the product is Powder coating to prevent rust and corrosion that ensure its durability and longevity
- Vise Size - Jaw width: 178mm(7"), Opening: 200mm(8"), Throat Depth: 75mm(3"). Sawtooth thread brings much higher clamping force: 1500kg (3300lbs)
- Convenient Operation - Quick Release Fuction for easy, rapid & smooth operation. Adjustable front stop (bench dog) clamp oversize workpiece easily
- Versatile Use - Heavy Duty Design for workshop and home use, predrilled holes make sturdy and quick under-bench mounting
- Smooth Operation - Heavy duty woodworking vise has a smooth operation, thanks to its precision-machined parts and high-quality materials, making it an essential tool for any woodworking workshop
The second mistake is mounting the vise too far from the front edge. If the fixed jaw sits back from the bench face, long boards cannot register cleanly. You end up clamping a board that rocks against the benchtop instead of lying flat against the front face.
The third mistake is ignoring the underside of the bench. Vise screws, guide rods, quick-release parts, and mounting bolts need space. Aprons, drawers, stretchers, and legs can all block the hardware. Check from below before drilling from above.
The fourth mistake is expecting one vise to do every job. For cabinet work, the best setup is a system: face vise for vertical holding, dogs or tail vise for flat planing, holdfasts for quick clamping, a planing stop for rough work, and a bench hook for small sawing tasks.
Our Practical Recommendation
If you are right-handed and have open space around the bench, mount the face vise on the left front corner. If you are left-handed, mount it on the right front corner. If you also want a tail or end vise, put it at the opposite end and align it carefully with a straight dog-hole row.
If your bench is in a garage or tight shop, let clearance overrule tradition. The best vise location is the one that lets you clamp a 6-foot board, swing the handle, stand square to the cut, and push tool force into the mass of the bench. Test those motions with the vise clamped in place before you drill.
Free tools Windows power users keep installed
One-click scans. No signup required.
For most homeowner cabinet and trim work, a midrange quick-release woodworking face vise in the $130-$270 range is the sweet spot. Add $20-$100 for hardwood liners, bolts, blocking, finish, and dogs. Spend more on premium hardware only if the bench is heavy enough and your work justifies it.
A vise should make the bench feel like a second pair of hands. Put it where your work naturally wants to be held, and the left-or-right decision becomes much easier.
Frequently Asked Questions
Should a workbench vise go on the left or right side?
For most right-handed woodworkers, a face vise should go on the left front corner. For most left-handed woodworkers, it should go on the right front corner. Adjust that rule if walls, bench legs, dog holes, or long-board clearance make the traditional side awkward.
Where should a left-handed person mount a workbench vise?
A left-handed primary user should usually mount the main face vise on the right front corner of the bench. That mirrors the traditional right-handed layout and usually gives a more natural stance for sawing, planing, and paring.
Windows Errors? Fix Them Before They Spread
Repair common Windows errors and clear accumulated junk for a smoother, more stable PC - no reinstall needed.Free scan · no reinstallCrashes, No Sound, or Screen Glitches?
Random freezes, missing sound and display glitches usually trace back to one bad driver. Find and replace yours safely.Free scan · under a minuteWhat is the difference between a face vise, end vise, and tail vise?
A face vise mounts on the front edge and holds boards vertically or on edge. An end vise mounts at the bench end. A tail vise or wagon vise works with bench dogs to hold boards flat on the benchtop for planing and surface work.
Can I use a metal bench vise for woodworking?
You can, but it is not ideal for finished cabinet parts. Metal vises often have serrated jaws that dent wood. Use wood liners, jaw pads, or a removable mounting plate, and consider a dedicated woodworking face vise for cleaner work.
How much does it cost to add a workbench vise in 2026?
Portable vises commonly run about $40-$105. Entry woodworking vises are about $55-$100. Midrange quick-release front vises are roughly $130-$270. Premium leg, tail, or wagon-vise hardware can run about $230-$745 before wood, installation materials, and labor.
Do I need a permit to install a vise in my garage?
Usually, installing a vise on an existing bench does not require a permit. Permits may apply if you modify garage structure, add electrical circuits, install permanent dust collection, change heating equipment, or alter walls and openings. Check your local building department before larger shop upgrades.
Quick Recap
Product prices and availability are accurate as of the date/time indicated and are subject to change. Any price and availability information displayed on Amazon at the time of purchase will apply.