Free tools Windows power users keep installed
One-click scans. No signup required.
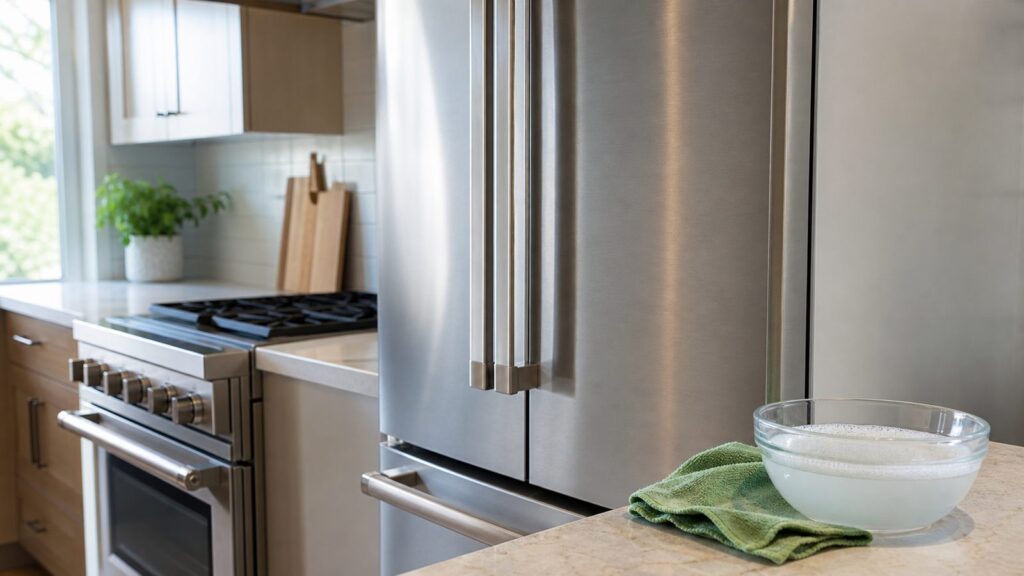
To clean stainless steel appliances without leaving streaks, use three clean microfiber cloths: one damp cloth with mild dish soap to remove grease, one damp cloth with clean water to rinse, and one dry cloth to buff immediately with the grain. Use very little product, never let water air-dry, and avoid bleach, abrasive pads, oven cleaner, rust remover, and heavy polish on coated finishes.
That is the short answer. The longer answer matters because most streaks are not caused by a bad appliance or a weak cleaner. They come from residue, hard-water minerals, oily cloths, wiping across the grain, or using a polish on a surface that should not be polished.
On our job sites, stainless steel gets cleaned at the very end of a kitchen remodel or punch-list day. Drywall dust, sawdust, tile grit, and cabinet filler dust can scratch appliance skins if someone wipes too early. We treat stainless appliance care like finish protection, not just housekeeping. A refrigerator door, range face, dishwasher panel, or built-in microwave trim may be only a thin finished panel over the appliance body. Once it is scratched, chemically stained, or pitted, cleaning may not fix it.
The Pro Sequence: Clean, Rinse, Dry, Buff
The best streak-free method is a sequence, not a single miracle product. Manufacturer guidance is generally consistent: use warm water, mild detergent, a Nonabrasive sponge or microfiber cloth, wipe with the grain, rinse the surface, and dry with a soft lint-free cloth.
Here is the exact workflow we use for stainless refrigerator doors, dishwasher fronts, oven doors, microwave trim, and range hoods after installation or remodeling work:
- Check the finish. Look for bare stainless, fingerprint-resistant stainless, black stainless, painted stainless-look panels, or coated trim. If the appliance has a coating, read the owner’s manual before using polish, oil, vinegar, or powder cleaner.
- Find the grain. Use side lighting from a window, under-cabinet light, or phone flashlight. Most refrigerator doors have vertical grain. Handles, trim, and control-panel surrounds may run horizontally.
- Remove loose grit first. If the appliance is dusty from construction, use a clean dry microfiber cloth with almost no pressure or a lightly damp cloth. Do not scrub dust into the surface.
- Wash with diluted dish soap. Mix a few drops of mild dish detergent into a bowl of warm water. Wring the cloth so it is damp, not dripping. Wipe in long, overlapping strokes with the grain.
- Rinse with a separate damp cloth. This is the step many homeowners skip. Soap residue dries into haze and streaks. In hard-water areas, use Distilled water for the final wipe.
- Dry immediately. Do not let water sit on stainless. Buff with a dry microfiber cloth in the direction of the grain until the surface goes from damp to clear.
- Polish only if appropriate. If the manual allows stainless polish, apply a small amount to the cloth, not directly to the appliance. Buff lightly with the grain and use less than you think you need.
For a typical 36-inch refrigerator, this takes about 8 to 12 minutes once you have the materials ready. A dishwasher front may take 3 to 5 minutes. A greasy range hood can take 15 to 25 minutes because the first pass is about removing cooking oil, not making the metal shine.
#1 Best Overall

- Cleans, polishes & protects stainless steel: Our stainless steel cleaner for appliances, which won a 2026 Good Housekeeping Cleaning Award, helps clean delicate, hard-to-clean surfaces. This appliance cleaner removes grease, fingerprints, water spots and residue while restoring a polished, like-new shine.
- No streak residue when used correctly: This stainless steel cleaning cloth & spray kit leaves a brilliant, streak-free finish when wiped in the direction of the metal grain and buffed with soft, dry cloth - no rinsing required.
- Safe for all stainless steel finishes: Our stainless steel polish & clean kit contains pH-neutral formula and is safe for stainless steel kitchen appliances, sinks, trash cans, grill exteriors, backsplashes, and countertops. This cleaning supplies for home kit does not contain Tetrachloroethylene (PCE) and will not dull or damage finishes.
- Prevents future smudges & water marks: This stainless steel appliance cleaner & polisher leaves behind a protective barrier that repels fingerprints, dust, and smudges, helping keep surfaces cleaner and shinier for longer.
- For appliances, sinks & Outdoor grills: Our spray & appliance cloth stainless steel kit is safe to use on stainless steel refrigerators, sinks, ovens, stovetops, microwaves, range hoods, trash cans, and grill exteriors.
Materials and Tools That Actually Matter
You do not need a large cleaning kit. You need clean materials and the discipline to keep washing, rinsing, and drying separate. Cross-contamination is one of the biggest reasons stainless looks cloudy after cleaning.
| Item | Best Use | Typical 2026 US Cost | Pro Note |
|---|---|---|---|
| Microfiber or soft lint-free cloths | Washing, rinsing, and dry buffing | $5-$20 per pack | Use at least 3 cloths. Launder without fabric softener to avoid haze. |
| Mild dish soap | Fingerprints, food smudges, light grease | $5-$15 with basic supplies | A few drops in warm water is enough for routine cleaning. |
| Distilled water | Final rinse in hard-water areas | Usually a low-cost grocery item | Helps prevent mineral spotting when tap water leaves marks. |
| Manufacturer-approved stainless cleaner or polish | Final shine on bare stainless | About $5-$12 for common sprays | Use sparingly. Too much product creates an oily film. |
| Cleaner and wipe kits or multipacks | Multiple appliances or recurring maintenance | Roughly $18-$35 | Good for full kitchens, but only if compatible with your finish. |
| Nonabrasive sponge | Stuck-on food deposits | Usually included in basic cleaning supplies | Never use steel wool or gritty pads on appliance panels. |
Common stainless-specific sprays and wipes from major retailers were generally in the $5 to $12 range in 2026. For example, Weiman stainless products were commonly listed around $4.72 to $12.06 depending on size and retailer, with some 22-ounce sprays around $9.98 and bundles or multipacks around $18 to $35.
The Tool Desk
Outbyte Driver Updater FREEFix the driver behind crashes, sound loss and screen glitchesFind Drivers →Outbyte PC Repair FREERepair Windows errors before they cause bigger problemsFix Now →That said, polish is not the first tool we reach for. If the appliance is streaky because it is greasy, polish just moves oil around. If it is streaky because soap was not rinsed off, polish traps residue under a shine layer. If it is black stainless or fingerprint-resistant stainless, polish may damage the coating. Start with soap, water, rinse, and dry.
How to Identify the Grain Before You Wipe
Stainless steel appliances often have a brushed finish. The fine lines are the grain. Wiping with those lines helps lift residue cleanly and makes any remaining microscopic marks less visible. Wiping across the grain can leave drag marks and push residue into the brush pattern.
To find the grain, stand to the side of the appliance and angle a light across the surface. On many refrigerator and dishwasher doors, the grain runs vertically. On handles, trim strips, range control panels, and microwave frames, it may run horizontally. A single appliance can have two or three grain directions.
Work panel by panel. Do not wipe a refrigerator door vertically and then drag the same stroke across a horizontal handle. Change direction when the metal changes direction. Around logos, water dispensers, control panels, and seams, spray cleaner onto the cloth instead of spraying the appliance. Liquid should not be forced into buttons, vents, display edges, gasket lines, or ice and water dispenser openings.
The Three-Cloth Method for Everyday Fingerprints
For normal fingerprints, smudges, and cooking film, the three-cloth method is the most reliable approach.
Cloth 1: Damp Clean
Use warm water with a few drops of mild dish soap. Wring the cloth until it is damp but not dripping. Wipe with the grain using long strokes that overlap by about 1 to 2 inches. Do not scrub in circles. Circular rubbing can leave uneven shine patterns, especially under kitchen lighting.
For heavy fingerprints around handles, spend more time on degreasing before you polish. Skin oils build up exactly where hands land: refrigerator handles, dishwasher pulls, oven knobs, microwave buttons, and range hood controls. If you skip the soap step, those oils smear into a larger cloudy area.
Cloth 2: Damp Rinse
Use clean water on a separate cloth. This removes detergent, loosened grease, and cleaner residue. If your home has hard water and stainless always seems to spot, use distilled water for this rinse. Mineral-heavy water left to air-dry can create white spots, rainbow haze, or dull streaks.
Rank #2

- Cleans, polishes & protects stainless steel: Our stainless steel cleaner for appliances removes fingerprints, grease, residue, and water spots. Weiman appliance wipes leave a streak-free shine and a protective barrier that helps prevent future smudges.
- Safe for all stainless steel finishes: This stainless steel cleaning cloth & wipes kit is safe for all stainless steel finishes, including black stainless surfaces. Our stainless steel polish & cleaner a non-abrasive formula that doesn't scratch or dull. Does not repair existing scratches.
- For indoor & outdoor stainless steel: Our stainless steel wipes & cloth kit is ideal for stainless steel refrigerators, dishwashers, ovens, cooktop, sinks, range hoods, trash cans, and outdoor stainless steel grills. This stainless steel kitchen sink cleaner is a great choice for both inside appliances & outdoor grill exteriors.
- Easy, no-rinse application: Wipe in the direction of the metal grain, then buff with the included stainless steel cleaner cloth for a streak-free shine.
Cloth 3: Dry Buff
Dry the surface immediately with a clean microfiber cloth. Buff from dry to shine with the grain. Use light pressure. After the first pass, step to the left and right and inspect the panel from multiple angles. Stainless streaks are light-dependent; a door may look perfect straight on and streaky from the kitchen island.
If you see faint haze after buffing, do not automatically add more cleaner. Flip to a clean side of the dry cloth and buff again. If the haze remains, rinse once more and dry again. Most streak problems are residue problems.
What Causes Streaks on Stainless Steel?
Streaks usually come from one of six sources: cleaner residue, dirty cloths, hard-water minerals, excess polish, wiping across the grain, or skipping the final dry buff.
Cleaner residue is common when too much dish soap, vinegar solution, or commercial cleaner is used. Stainless needs very little product. On vertical refrigerator panels, excess polish can migrate downward and collect along lower edges, under handles, and around trim.
Outdated Drivers Are Slowing You Down
One free scan finds every outdated or missing driver and matches the right update for your exact hardware.Free scan · exact hardware matchPC Slower Than It Used to Be?
A free scan shows the junk files, broken settings and background clutter dragging Windows down - then fixes them in one click.Free scan · Windows 10 & 11Dirty microfiber is another problem. A cloth that was used on a greasy cooktop, dusty countertop, or wood polish can leave a film on stainless. Fabric softener can also reduce microfiber performance and leave haze. We keep dedicated cloths for appliance exteriors during turnovers.
Hard water leaves minerals behind as it dries. If you see spotting after every cleaning, try a final wipe with distilled water. The cost is small, and it often solves the problem without stronger chemicals.
Too much polish creates an oily film. Stainless polish can work well on bare stainless, but it is a finishing step, not a cleaning step. Apply a small amount to a cloth and spread it thinly. If the surface feels oily after buffing, you used too much.
Wiping across the grain makes streaks more visible and may push residue into the brushed texture.
What’s actually slowing this PC down?
Pick the symptom - the matching free tool is one click away.
Air drying is the final mistake. Water, even clean water, can spot or streak as it dries. Stainless should be dried immediately.
What Not to Use on Stainless Steel Appliances
Stainless steel is durable, but appliance finishes are not indestructible. The corrosion resistance comes from a passive chromium-oxide surface. Chlorides, including bleach and salty residue, can attack that protective layer and lead to pitting or rust-like spots. Once pitting starts, cleaning may not restore the surface.
Rank #3

- Cleans, polishes & protects stainless steel: Our stainless steel cleaner for appliances, which won a 2026 Good Housekeeping Cleaning Award, helps clean delicate, hard-to-clean surfaces. This appliance cleaner removes grease, fingerprints, water spots and residue while restoring a polished, like-new shine.
- No streak residue when used correctly: This stainless steel cleaning cloth & spray kit leaves a brilliant, streak-free finish when wiped in the direction of the metal grain and buffed with soft, dry cloth - no rinsing required.
- Safe for all stainless steel finishes: Our stainless steel polish & clean kit contains pH-neutral formula and is safe for stainless steel kitchen appliances, sinks, trash cans, grill exteriors, backsplashes, and countertops. This cleaning supplies for home kit does not contain Tetrachloroethylene (PCE) and will not dull or damage finishes.
- Prevents future smudges & water marks: This stainless steel appliance cleaner & polisher leaves behind a protective barrier that repels fingerprints, dust, and smudges, helping keep surfaces cleaner and shinier for longer.
- For appliances, sinks & Outdoor grills: Our spray & appliance cloth stainless steel kit is safe to use on stainless steel refrigerators, sinks, ovens, microwaves, range hoods, trash cans, and grill exteriors.
Avoid these products unless your appliance manufacturer specifically says otherwise:
- Bleach or chlorine-based cleaners
- Oven cleaner on exterior stainless panels
- Rust remover or acidic industrial cleaners
- Steel wool, scouring pads, or abrasive powders
- Ammonia-heavy cleaners on coated finishes
- Heavy oil or polish on fingerprint-resistant or black stainless coatings
- Gritty sponges that were previously used on tile, grout, cookware, or outdoor items
Do not clean a warm or hot cooktop surface. Heat can bake on residue, flash-dry cleaner into streaks, and damage cloth fibers or coatings. Let the surface cool first. For gas ranges, avoid flooding around burners, igniters, knobs, and control panels. For electric or induction cooktops with stainless trim, keep moisture away from seams.
Recommended Free Tools
Special Finishes: Fingerprint-Resistant and Black Stainless
Not every stainless-looking appliance is bare stainless steel. Many newer appliances use fingerprint-resistant coatings, clear films, tinted finishes, or black stainless coatings over metal. These finishes can be permanently marred by abrasive pads, stainless polish, vinegar, or oil if the manufacturer does not approve them.
If the appliance was installed within the last 5 to 10 years, assume the finish may be coated until you confirm otherwise. Check the model manual or manufacturer care label. If you do not have the manual, search by the model number from the door frame, side wall, or rating plate.
For coated finishes, the safest starting point is usually a soft cloth with warm water and mild dish soap, followed by a clean damp rinse and immediate drying. Avoid powder cleaners, scouring pads, and heavy polish. Black stainless can show scratches as bright lines because the coating is darker than the base metal below. Once scratched, those marks are often permanent.
For high-end built-in appliances, panel replacement can be expensive and may depend on brand, model age, and part availability. Prevention is much cheaper than repair. A $10 cleaner used incorrectly can create a problem that requires a service call, replacement trim, or a new door skin.
Do these 3 things before closing this tab:
1Fix the driver behind crashes, sound loss and screen glitches2Repair Windows errors before they cause bigger problems3Scan for outdated or missing drivers - takes under a minuteGrease, Water Spots, and Stubborn Marks
Different marks need different treatment. The mistake is using the strongest cleaner first. Start mild, then step up only when needed and only if the finish allows it.
Greasy Range Hoods and Oven Doors
Use warm water with mild dish soap. Let the damp cloth sit on the greasy area for 30 to 60 seconds if needed, then wipe with the grain. Rinse with a separate cloth and dry. Repeat rather than scrubbing harder. Cooking grease usually takes two or three gentle passes, especially above a range.
Hard-Water Spots Around Dispensers
Ice and water dispensers often collect mineral spots. Use a damp cloth first, then dry. If your manual allows vinegar, use it sparingly on the cloth, not sprayed into the dispenser area, and rinse afterward. Do not leave acidic cleaner sitting on stainless trim or near plastic parts.
Food Splatter on Microwave and Range Trim
Use a nonabrasive sponge or microfiber cloth with warm soapy water. Work lightly and rinse well. Avoid letting liquid enter vents, control buttons, and display seams.
Quick wins for a faster PC:
Repair Windows errors before they cause bigger problemsFix Now →Fix the driver behind crashes, sound loss and screen glitchesFind Drivers →Clear out junk files and repair common Windows errorsFree Scan →Rank #4

- STAINLESS STEEL CLEANING BUNDLE: Includes a 16 oz. bottle of stainless steel cleaner and a premium 16" x 16" microfiber cloth
- PLANT-POWERED FORMULA: Made with 100% USDA Certified Biobased Content, our stainless steel cleaner leaves a brilliant polished finish.
- STREAK-FREE SHINE: Remove streaks, smudges, and residue with ease, revealing a brilliant finish that rejuvenates your appliances.
- VERSATILE & SAFE: With a pH-neutral formula, this is the best stainless steel cleaner for appliances, grills, sinks, refrigerators, microwaves, stoves, range hoods, trash cans, and more.
- BLACK STAINLESS SPECIALIST: Expertly cleans black stainless steel and leaves a protective barrier against fingerprints, dust, dirt, and smudges, keeping surfaces cleaner for longer.
Rust-Like Spots or Pitting
Brown spots on stainless are often contamination, chloride attack, or damage to the passive surface. Do not attack them with steel wool. Steel wool can embed carbon steel particles that later rust. Use only manufacturer-approved stainless cleaners and consider calling the appliance manufacturer or a qualified appliance service technician if pitting is visible.
Disinfecting Is Different From Polishing
Cleaning removes soil. Disinfecting targets germs. Polishing changes the appearance of the surface. Do not treat those as the same job.
If you need to disinfect stainless appliance exteriors, clean the surface first so soil is removed. Some manufacturer guidance allows 70% rubbing alcohol on a microfiber cloth for stainless disinfection, followed by proper drying. Do not use bleach on appliance exteriors. Spray disinfectant onto the cloth rather than flooding seams, controls, handles, vents, or dispenser areas.
EPA Safer Choice is a useful buying filter when you want lower-hazard cleaning products. The EPA maintains a searchable product list, including household cleaning categories. It does not replace the appliance manual, but it can help narrow cleaner choices when you are comparing products at the store.
DIY Cost vs Professional Cleaning Cost
For most homeowners, exterior stainless cleaning is a low-cost DIY task. The real cost is time and attention, not materials. A full kitchen with a refrigerator, dishwasher, range, microwave, and hood usually takes 30 to 60 minutes if the appliances are not heavily soiled.
| Option | Typical Scope | 2026 Cost Range | Best For |
|---|---|---|---|
| Basic DIY | Dish soap, water, microfiber, dry buff | About $5-$15 if you already own cloths | Weekly fingerprints and light kitchen film |
| DIY with stainless cleaner | Cleaner or polish plus microfiber cloths | About $10-$35 depending on product and kit size | Bare stainless that needs a finished shine |
| House-cleaning add-on | Exterior appliance detailing | About $25-$75 per appliance | Move-outs, listings, deep cleans, heavy grease |
| Standard house cleaning visit | Whole-home cleaning with possible appliance add-ons | Commonly $120-$280 or $30-$75 per cleaner-hour | Bundled cleaning before guests, photos, or turnover |
| Repair or panel replacement | Scratched, pitted, chemically stained, or damaged panels | Varies widely by brand and part availability | Damage that cleaning cannot correct |
If you are preparing a home for sale, photos, rental turnover, or post-remodel walkthrough, appliance detailing is worth scheduling after all dust-generating work is complete. Cleaning stainless before sanding, drilling, drywall patching, or tile work is wasted effort and increases scratch risk.
When to DIY vs When to Hire a Pro
DIY is the right choice for normal fingerprints, light grease, water spots, and routine weekly care. If you can identify the finish, keep the cloths clean, and avoid aggressive chemicals, you can handle the job in under an hour for a full kitchen.
Hire a professional cleaner when the appliance is part of a move-out, estate cleanout, rental turnover, open-house preparation, or post-construction cleanup. A pro is also a good call when grease has built up for months around a range hood, when there are multiple high-end appliances, or when the finish is black stainless or coated and you are not sure what products are safe.
Call an appliance service technician or the manufacturer, not a house cleaner, when you see pitting, peeling coating, rust-like spots that do not lift with approved cleaner, damaged control panels, loose trim, or moisture intrusion around displays and dispensers. Those are repair issues, not routine cleaning issues.
Safety, Remodel, and Permit Notes
Cleaning appliance exteriors usually does not require a permit. But kitchen cleaning often happens during a larger project, and that is where the line matters.
Best Value
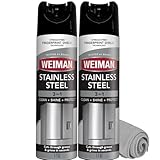
- Cleans, polishes & protects stainless steel: Our stainless steel cleaner for appliances helps clean delicate, hard-to-clean surfaces. This appliance cleaner removes grease, fingerprints, water spots and residue while restoring a polished, like-new shine.
- No streak residue when used correctly: This stainless steel cleaning cloth & spray kit leaves a brilliant, streak-free finish when wiped in the direction of the metal grain and buffed with soft, dry cloth - no rinsing required.
- Safe for all stainless steel finishes: Our stainless steel polish & clean kit contains pH-neutral formula and is safe for stainless steel kitchen appliances, sinks, trash cans, grill exteriors, backsplashes, and countertops. This cleaning supplies for home kit does not contain Tetrachloroethylene (PCE) and will not dull or damage finishes.
- Prevents future smudges & water marks: This stainless steel appliance cleaner & polisher leaves behind a protective barrier that repels fingerprints, dust, and smudges, helping keep surfaces cleaner and shinier for longer.
- For appliances, sinks & Outdoor grills: Our spray & appliance cloth stainless steel kit is safe to use on stainless steel refrigerators, sinks, ovens, stovetops, microwaves, range hoods, trash cans, and grill exteriors.
If you are simply wiping down a refrigerator, dishwasher, microwave, or range, no permit is typically involved. If you are moving, disconnecting, reinstalling, or replacing appliances, local rules may apply, especially for gas, electrical, ventilation, and built-in equipment.
Gas appliances must be installed and connected according to the manufacturer’s instructions and applicable fuel gas code requirements. Mechanical systems, ventilation, clearances, and appliance installation rules are covered by building codes and local enforcement. Some cities require permits or inspections for certain appliance installations, relocations, gas line work, electrical changes, or venting changes.
Recommended Free Tools
Practical rule: clean what is safely accessible, but do not pull out a built-in range, disconnect a gas appliance, remove a hardwired dishwasher, alter venting, or move electrical connections just to clean behind an appliance unless you know the work is allowed and safe. During remodels, we coordinate appliance movement with the right trade because a clean panel is not worth a gas leak, damaged floor, pinched water line, or code issue.
A Maintenance Schedule That Keeps Stainless Looking New
For most kitchens, stainless appliance care works best on a simple schedule:
- Daily or as needed: Wipe handles, dispenser areas, and control zones with a damp microfiber cloth, then dry.
- Weekly: Use the three-cloth method on visible panels. Expect 15 to 30 minutes for an average kitchen.
- Monthly: Detail edges, trim, handle bases, range hood surfaces, and lower dishwasher panels where drips collect.
- After cooking heavy grease: Clean the range face and hood after the appliance cools. Waiting days allows oil to collect dust and harden.
- After construction or repairs: Clean stainless last, after sweeping, vacuuming, drilling, sanding, and countertop work are finished.
Keep one small set of cloths dedicated to appliance exteriors. Wash them separately from greasy towels when possible. Skip fabric softener. Store stainless cleaner away from abrasive powders, bleach products, and shop chemicals so the wrong bottle does not get grabbed during a rushed cleanup.
Bottom Line
Streak-free stainless steel comes down to clean materials, light pressure, and the right order of operations. Identify the finish, follow the grain, remove grease before polishing, rinse off residue, and dry immediately. Use distilled water if hard water is causing spots. Avoid bleach, abrasives, and unapproved polish, especially on fingerprint-resistant and black stainless finishes.
From a builder’s point of view, the goal is not just shine. It is protecting a finished surface that may be expensive or difficult to replace. A careful 10-minute cleaning method will do more for your appliances than a stronger chemical used the wrong way.
Frequently Asked Questions
What is the best way to clean stainless steel appliances without streaks?
Use the three-cloth method: clean with a damp microfiber cloth and mild dish soap, rinse with a separate damp cloth, then dry and buff immediately with a clean dry microfiber cloth. Always wipe with the grain.
Can I use vinegar on stainless steel appliances?
Only if the appliance manufacturer allows it. Vinegar can help with mineral spots, but it should be used sparingly on a cloth, rinsed off, and never left sitting on stainless or used on coated finishes without approval.
Why does my stainless steel fridge look streaky after cleaning?
The usual causes are too much cleaner, soap residue, hard-water minerals, a dirty or oily cloth, wiping across the grain, or letting water air-dry. Rinse with clean water and buff dry with the grain.
Can bleach damage stainless steel appliances?
Yes. Chlorides in bleach can attack stainless steel’s protective surface and cause pitting or rust-like spots. Avoid bleach and chlorine-based cleaners on appliance exteriors.
How do I clean fingerprint-resistant or black stainless steel?
Treat these as coated finishes unless the manual says otherwise. Use warm water, mild dish soap, a soft cloth, a clean rinse, and immediate drying. Avoid polish, oil, abrasive pads, and powder cleaners unless specifically approved.
Do I need a permit to move appliances while cleaning or remodeling?
Basic exterior cleaning does not usually require a permit. Moving, disconnecting, reinstalling, or replacing gas, electrical, vented, or built-in appliances may trigger local code or permit requirements.
Quick Recap
Product prices and availability are accurate as of the date/time indicated and are subject to change. Any price and availability information displayed on Amazon at the time of purchase will apply.
The Tool Desk
Outbyte PC Repair FREERepair Windows errors before they cause bigger problemsFix Now →Outbyte Driver Updater FREEScan for outdated or missing drivers - takes under a minuteDriver Scan →