Outdated Drivers Are Slowing You Down
One free scan finds every outdated or missing driver and matches the right update for your exact hardware.Free scan · exact hardware matchPC Slower Than It Used to Be?
A free scan shows the junk files, broken settings and background clutter dragging Windows down - then fixes them in one click.Free scan · Windows 10 & 11A durable mow strip starts with a stable, well-prepared foundation and a finished surface that sits flat beside the lawn. Before choosing materials or digging, check where the mower wheels will travel and confirm the blade can cut to the edge without striking the hard surface. A mow strip is a narrow mowing aid—not necessarily a retaining wall or patio—and the right construction depends on soil, drainage, frost exposure, mower traffic, and the shape of the edge.
Choose a mow-strip material and width
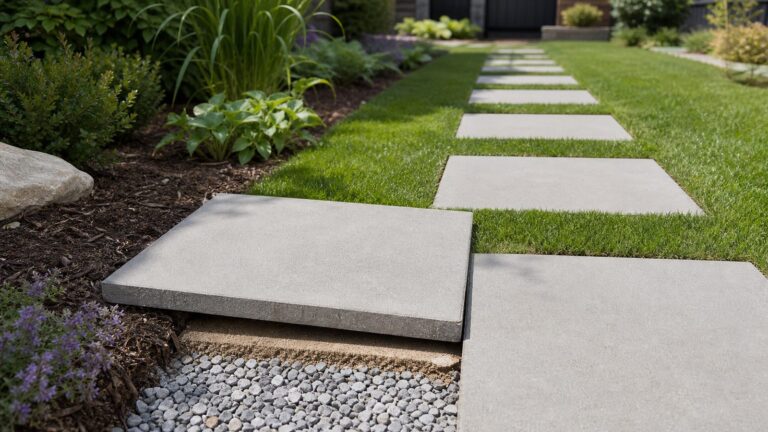
Concrete pavers, flat concrete slabs, brick pavers, and cast-in-place concrete can all create a mowing surface. Select an option based on the line you want, whether it curves, how much traffic it will see, local site conditions, and whether you want modular pieces that can be repaired individually or a continuous edge.
| Option | Useful when | Trade-offs |
|---|---|---|
| Concrete pavers, slabs, or brick | You want a DIY-friendly, modular surface and a defined path for a mower wheel. | Individual units can shift. Frost heave or expansive clay can move masonry, so bedding and any needed edge restraint matter. Pavingexpert and the Landscaping Network describe these considerations. |
| Cast-in-place concrete | You want a continuous edge or custom finish. | Forming and pouring take more specialized work; the Landscaping Network identifies forming labor as a major cost factor. Landscaping Network |
| Extruded concrete | You want a continuous curb made with a machine rather than conventional forms. | This is a contractor-installed service, not the typical DIY paver approach. Landscaping Network |
Set the finished width by checking the mower itself: locate the wheel that will ride on the strip, then confirm the deck and blade can reach the lawn edge safely. Pavingexpert gives 200 mm as a possible domestic width and describes 300 mm slabs on larger commercial projects; these are examples, not universal minimums. Rectangular units may leave open joints around curves, so plan for shaped units or suitable joint finishing.
A wider planted or rock-mulch buffer strip is a different feature, sometimes used between lawn and pavement to capture sprinkler runoff. Its dimensions and purpose should not be confused with a narrow surface designed for mower passage. University of Nevada, Reno Extension
The Tool Desk
Outbyte Driver Updater FREEFix the driver behind crashes, sound loss and screen glitchesFind Drivers →Outbyte PC Repair FREERepair Windows errors before they cause bigger problemsFix Now →#1 Best Overall
- No Digging Required
Install a paver mow strip
The following is a general sequence, not a construction specification for every soil or climate. Choose the base and bedding method for your paving system and site; do not combine different source recipes without checking the product instructions and local practice.
- Mark the line and test mower clearance. Lay out the edge with a string line or other guide. Decide which wheel will ride on the hard surface, and check that the blade can cut to the lawn edge without contacting the paving. Mark curves carefully; unit shape affects the joints.
- Select the units and set the finished level. Choose paving that suits the intended width and appearance. Plan for the top to meet the adjacent grade so the mower can pass smoothly, without creating a lip that catches wheels or puts the blade at risk.
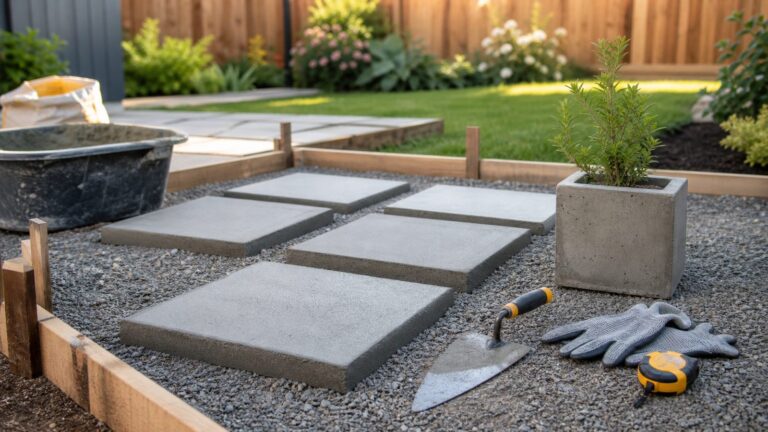
- Excavate to suit the paving and foundation. Remove sod, roots, and loose organic material. Pavingexpert says many narrow mowing strips need about 60–70 mm of excavation when no concrete or mortar bed is used; a bed of either material requires additional depth. For deeper installations, allow for the actual unit thickness plus the chosen base and bedding layers rather than applying patio dimensions automatically. Pavingexpert
- Prepare and compact the foundation. Pavement performance depends on soil and base quality. Where the soil or expected traffic warrants it, add a suitable compactable base and compact it in controlled layers. Iowa State University Extension describes quarried gravel 3/4 inch and smaller in its paver method and stresses compacting both subgrade and gravel. Soil, frost conditions, and mower traffic may require a different depth or specification. Iowa State University Extension and Outreach
- Prepare a suitable bedding layer. For a narrow strip on a sand bed, Pavingexpert suggests a 25–50 mm layer of coarse grit sand, and also describes mortar or concrete bedding as alternatives. Its guidance cautions against building sand because it can move when waterlogged. Iowa State’s method for a broader paver area calls for concrete sand and warns against substituting limestone screenings or stone dust. These are different methods and contexts: use the paving system’s instructions and local practice rather than mixing them into one recipe. Pavingexpert; Iowa State University Extension and Outreach
- Set the units flush and aligned. Place each paver along the guide and tap it into position with a rubber mallet. Use the string line and adjacent lawn grade to keep the surface level and consistent with the mower’s path.
- Restrain edges and finish joints. Add an appropriate edge restraint where the installation could shift, and fill joints with material suited to the paver system. Some restraints must be installed before bedding and pavers, so follow the specific product instructions. Iowa State University Extension and Outreach
- Check drainage and mower passage. Where the strip is near a building, grade the surface to drain away from it. After the installation is stable, pass the mower along the edge and confirm that the wheels travel smoothly and the blade cannot touch the paving. Iowa State University Extension and Outreach; Landscaping Network
Account for soil, frost, and runoff
There is no single mow-strip design established as best for every region or soil. Freeze-thaw exposure and expansive clay can move masonry, while drainage and mower traffic affect how the surface performs. A sound base and suitable restraint help address movement, but the required build-up depends on local conditions. Landscaping Network; University of Illinois Extension
Rank #2
- SNIP TO FLEX PAVER, BRICK, OR LANDSCAPE EDGING: Create a beautifully landscaped yard and paver designs without having to hire a professional with easy to install commercial grade edging
- KIT INCLUDES: 10 6-foot segments for 60 feet of commercial grade plastic edging, measuring 1.75 inches tall
- SNIP TO FLEX: Cut spines where needed to create smooth curves, or leave spines uncut to create rigid straight sections
- DO-IT-YOURSELF: Place the edging around your paved patios, concrete paths, and rock gardens and secure with anchoring stakes (sold separately) for a secure, long lasting border
- DURABLE & FLEXIBLE: Flexible commercial grade plastic allows the edging to be installed in a straight line or molded to form curves
For a paved area, Iowa State’s example uses 5 inches of gravel and 1.5 inches of concrete sand. Those are dimensions for its broader paver installation, not requirements for every mow strip; the page dates to 1995 and cautions that its information may not be the most current or accurate. Use it as a regional example of base preparation, compaction, and grading principles—not a universal detail. Iowa State University Extension and Outreach
Keep a mow strip distinct from a landscape buffer. Nevada Extension’s buffer-strip guidance concerns a wider area that can reduce lawn and capture sprinkler runoff between turf and pavement; those recommendations are not strip-width specifications for a mower path. University of Nevada, Reno Extension
Do these 3 things before closing this tab:
1Fix the driver behind crashes, sound loss and screen glitches2Clear out junk files and repair common Windows errors3Scan for outdated or missing drivers - takes under a minuteRank #3

- Pound‑In Lawn Edging – Create clean, defined garden borders without hiring a professional; installs with minimal ground preparation.
- Simple DIY Installation – Score the soil and gently pound edging into place with a rubber mallet for a secure, long‑lasting border.
- Durable & Flexible Plastic – Made from sturdy recycled plastic that installs in straight lines or tight curves around plants and trees.
- Low‑Maintenance Landscape Border – Designed to withstand string trimmers, temperature changes, and seasonal ground movement.
- Bonus Stake Kit Included – Includes (1) 20‑ft coil of edging and 6 anchoring stakes—triple the stakes of standard kits for added stability.
Maintain the mowing surface
Check the joints, edges, and finished level periodically, especially after freezing weather or noticeable soil movement. If units have shifted, correct the cause—such as a weak foundation or failed restraint—before resetting them; replacing only the visible paver may leave the movement problem in place. Follow the paver and restraint manufacturers’ instructions for repairs and joint maintenance. Landscape edges can create a clean division between planting and turf, but the cited sources do not establish a universal lifespan or a quantified reduction in trimming time. University of Illinois Extension
Quick Recap
Best Value

- Quality Metal Material: Our galvanized garden edge is processed using high-precision CNC technology, ensuring accuracy down to every millimeter. Innovative 3D ripple design not only enhances the aesthetic appeal of the fence but also strengthens its structural integrity.
- Weather Resistance: Made of quality material, it undergoes special anti-corrosion treatment and is combined with advanced coating technology to ensure that the metal landscape edging remains bright and new even in harsh weather conditions, extending its service life.
- Stylish Corrugated Design: Corrugated Metal Landscape Edging strengthens a contemporary flair to your garden or lawn, enhancing its overall aesthetic and visual effect.
- DIY-Friendly Metal Edging: Our garden edging border is designed for easy self-installation, allowing you to transform your garden space without the need for professional assistance. The simple and intuitive design ensures a hassle-free setup, making it the perfect choice for DIY enthusiasts looking to add a polished and refined edge to their garden.
- Easy to Install: Our metal flower bed edging borders simply confirm the location and dimensions for easy installation. If the ground soil is soft, the inlay can be pushed into the ground after the soil is soaked; if the ground soil is firm, a trench can be dug, and the landscape inlay can be inserted into the soil, and then backfilled.
Rank #4
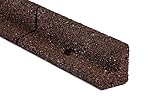
- No Digging Required
Product prices and availability are accurate as of the date/time indicated and are subject to change. Any price and availability information displayed on Amazon at the time of purchase will apply.