Driveway snow removal gets easier when you stop treating it as one big cleanup at the end of a storm. The better method is simple: plan where the snow will go, clear it before it compacts, use the right tool for the surface, and save deicer for the thin ice that remains after the pavement is mostly exposed.
On our job sites, we think about snow the same way we think about water: it needs a path, a storage area, and a surface that can survive repeated abuse. A driveway is not just a slab or strip of asphalt. It connects to garage drainage, sidewalk routes, road plows, foundations, utility meters, landscaping, and local snow-clearing rules. A sloppy snow pile in the wrong spot can block sightlines, dam meltwater against a garage door, or send icy runoff across the walking path the next morning.
The nine hacks below are practical, not gimmicky. Some cost nothing. Some involve a $30 shovel, a $700 snow blower, a $60 service visit, or a targeted heated mat system. The point is not to buy every tool. The point is to choose the least expensive method that keeps the driveway usable, protects the surface, and does not wreck your back.
Start With a 10-Minute Storm Plan
The fastest driveway snow removal usually happens before the storm gets serious. Walk the driveway once in daylight and decide three things: where snow will be pushed, which icy areas need pretreatment, and how you will handle the street plow windrow at the end of the drive.
What’s actually slowing this PC down?
Pick the symptom - the matching free tool is one click away.
Measure the driveway while you are at it. A common two-car driveway that is 20 feet wide by 30 feet long is about 600 square feet. That single number helps you estimate deicer use, contractor quotes, snow blower size, and heated driveway cost. If your drive is 12 feet wide by 80 feet long, that is 960 square feet and a much different job than a short suburban apron.
#1 Best Overall

- SNOW SHOVEL AND SHOW PUSHER: 18-in combination blade shape is ideal for shoveling and pushing snow
- DURABLE BLADE: Nylon wear strip prolongs blade life and does not cause damage to deck, patio and other ground surfaces
- ERGONOMIC HANDLE: Ergonomic handle for easier shoveling; 37.4 in. ergonomic handle for more comfortable shoveling
- OVERSIZED HANDLE: Oversized D-Grip handle for comfortable grip with gloved hands
Good snow storage follows construction logic. Pile snow downhill when possible, away from the foundation, garage door, basement windows, downspout outlets, swales, storm drains, utility meters, mailboxes, hydrants, and sidewalk routes. Keep corner sight triangles open so drivers can see pedestrians and traffic when backing out. Do not stack snow where meltwater will run back across the driveway and freeze overnight.
Pretreat only where ice is likely to bond hard: shaded north-facing strips, steep aprons, the garage threshold, steps, ramps, and the tire track where vehicles pack snow. Deicer is not a snow shovel in a bag. It works best as a bond breaker before freezing rain or as a final treatment after snow has been cleared.
Hack 1: Clear at 2- to 4-Inch Intervals
Waiting until the storm ends is the classic mistake. Six inches of fresh powder is one job. Six inches that has been driven on, walked on, rained on, and refrozen is a different job. It becomes heavier, slicker, and more likely to need chipping, salt, or a plow.
Quick wins for a faster PC:
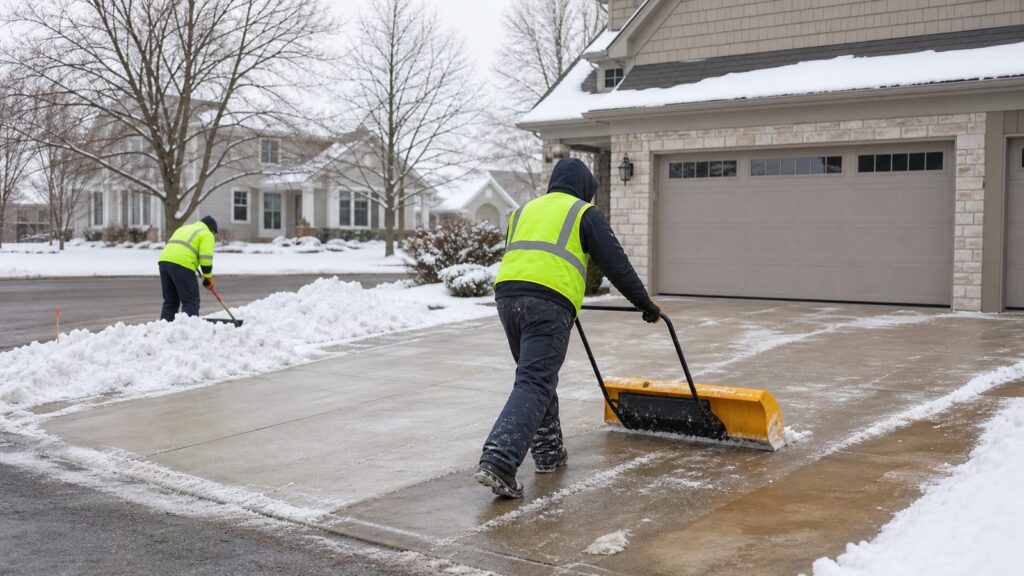
Repair Windows errors before they cause bigger problemsFix Now →Fix the driver behind crashes, sound loss and screen glitchesFind Drivers →For moderate and heavy storms, clear the driveway every 2 to 4 inches when practical. That interval is easy to push, manageable for most single-stage snow blowers, and less likely to compact under tires. If the forecast calls for 8 to 12 inches overnight, one pass before bed and one pass in the morning can save an hour of hard work.
Timing matters most at the driveway apron. Municipal plows often leave a dense ridge at the street after you already cleared the drive. That ridge can set up like concrete if temperatures drop. Knock it down while it is fresh, even if you do not clear the whole driveway again.
If you hire snow removal, ask whether the quote is per visit, per push, or triggered by accumulation depth. Many contractors start service at 2 inches, 3 inches, or 4 inches. A cheap per-visit rate can get expensive in a lake-effect area if the trigger is low and storms linger for 24 hours. A seasonal contract can be better where access before dawn matters.
Hack 2: Push Snow Before You Lift It
The safest shovel load is the one you never lift. For flat paved driveways, a wide snow pusher is usually faster than a scoop shovel. Push straight lanes from the garage toward the storage side, then clean edges and corners with a smaller shovel.
A good setup for a typical two-car driveway is a 24- to 30-inch pusher plus a lighter 18-inch shovel for steps, tight areas, and the garage threshold. Expect to pay roughly $20 to $115 for residential snow shovels depending on blade size, handle design, and build quality. Ergonomic bent handles can reduce bending, but they do not change the basic rule: keep loads small and avoid twisting.
When lifting is unavoidable, keep the shovel close to your body, step toward the pile, and toss low. Do not throw snow over a tall bank if you can push the bank farther back earlier in the season. Once piles freeze along the driveway edge, every later storm has less storage room and more snow ends up in your walking path.
Snow shoveling is also a health issue. The American Heart Association warned in 2026 that heavy shoveling can be comparable to a treadmill stress test, especially in cold weather and for sedentary people or anyone with heart risk factors. If you feel chest pressure, unusual shortness of breath, dizziness, or pain radiating to the arm, jaw, or back, stop and seek help.
Hack 3: Use a Nonstick Blade, Not a Slippery Driveway
One common household hack is to spray a shovel with cooking spray or silicone so wet snow slides off. That can work, but the target matters. Coat only the shovel blade. Do not spray oil, lubricant, or nonstick products on the driveway.
Recommended Free Tools
Oil on concrete, asphalt, pavers, or stamped surfaces can create a slip hazard, stain the surface, and track into the garage. If you use a spray, apply a light coat to the shovel blade outdoors, away from walking areas, then wipe off excess. silicone spray generally lasts longer than cooking spray, but either one should be treated as a tool coating, not a pavement treatment.
This is also where surface protection comes in. Avoid aggressive steel choppers on decorative concrete, pavers, stamped concrete, asphalt edges, and expansion joints. A sharp metal edge can gouge softened asphalt during a mild spell and chip concrete at joints or spalled areas. For newer concrete, be especially careful with deicers and metal scraping. Concrete needs proper curing, air entrainment, drainage, and sealing to stand up to freeze-thaw cycles.
Hack 4: Create a 6- to 10-Foot Plow Pocket at the Street
If the city plow keeps blocking your driveway, you cannot stop the plow blade from sending snow off the road. You can, however, give that snow somewhere to land before it crosses your driveway opening.
Stand facing the street and look at the direction traffic plows travel. On the upstream side of your driveway, clear a pocket along the curb or road edge about 6 to 10 feet long and a few feet deep. When the municipal plow comes by, some of the spill drops into that pocket instead of forming a full ridge across the mouth of your drive.
This is not perfect during heavy storms, but it helps. It is especially useful on roads where plows make multiple passes and widen the lane after the first cleanup. Keep the pocket within your property limits and do not shovel snow into the street. Many cities restrict pushing or throwing private snow into public roads because it creates traffic hazards and refreezing problems.
Clear the mailbox, hydrant, and sidewalk separately. In many cities, property owners are responsible for clearing adjacent sidewalks within a set period after snowfall. Rules vary by municipality, so check your local ordinance before assuming the city handles it.
Hack 5: Match the Tool to the Driveway Surface
The right tool for a smooth asphalt driveway can be the wrong tool for gravel. Before buying equipment, match the machine and blade to the driveway material, slope, and typical snow depth.
Paved Flat Driveways
For smooth concrete or asphalt, snow pushers and single-stage snow blowers can work well. Single-stage blowers are lighter, easier to store, and often enough for short paved drives with moderate snow. Many residential single-stage machines average about $525, with typical prices around $280 to $770.
Free tools Windows power users keep installed
One-click scans. No signup required.
Long or Heavy-Snow Driveways
For longer drives, heavy wet snow, or frequent 8-inch-plus storms, a two-stage snow blower is usually more capable. Two-stage models commonly average about $1,400, with typical ranges around $785 to $2,015. Consumer-grade snow blowers overall can span roughly $200 to more than $3,000 depending on size, power source, features, and clearing width.
Gravel Driveways
Gravel needs a raised scraper or raised skid shoes. The goal is to leave a compacted snow base early in the season so the blower or plow does not throw stone into the yard, windows, or vehicles. Do not scrape gravel to bare grade unless the surface is frozen hard and you know what you are doing.
Rank #2

- 18-inch poly combo blade
- Durable ergonomic bent steel handle
- Steel wear strip for extended blade life
- Extra-large D-grip for maximum comfort with gloved hand
- Blade shape enables shoveling and pushing snow
Steep Driveways
Steep drives need traction first. A cleared but icy slope can be more dangerous than a snow-covered one. Use grit, targeted deicer, traction mats, or professional service if the apron is steep enough that a vehicle slides toward the street or garage. For chronic shaded ice, heated tire-track mats or a built-in melt zone can be more practical than salting the same strip 30 times per winter.
Hack 6: Use a Broom or leaf blower Only for Light Powder
A leaf blower can clear a dusting of dry powder from a short driveway, steps, vehicles, and the garage apron. A stiff broom can do the same on walkways and textured concrete. This is useful when snow is under about 1 inch, dry, and not bonded to the surface.
Do these 3 things before closing this tab:
1Repair Windows errors before they cause bigger problems2Fix the driver behind crashes, sound loss and screen glitches3Clear out junk files and repair common Windows errorsThe trick fails when snow is wet, crusted, sleeted on, or compacted by tires. It also fails when wind simply blows the snow back across the driveway. Use it early, before anyone drives over the snow. Once tire tracks compress the surface, switch to a shovel, pusher, or blower.
A blower or broom is also handy after the main pass. Clearing the thin film left behind reduces how much deicer you need. Less snow on the slab means less meltwater at night, which means less black ice the next morning.
Hack 7: Salt After Clearing, and Measure the Dose
Salt works best on residual ice, not deep snow. Clear the driveway first, expose as much pavement as possible, then apply a measured dose only where traction is needed. Broadcast salting the entire driveway before shoveling wastes material and can increase damage to concrete, steel, plants, and nearby waterways.
Smart-salting guidance from Minnesota agencies gives a useful scale: about 12 ounces of salt can treat roughly 1,000 square feet, with granules spaced about 3 inches apart. For a 600-square-foot two-car driveway, that means roughly 7 ounces for a light treatment, not half a 50-pound bag. If you can see piles of salt after the ice melts, you used too much. Sweep up leftovers and reuse them.
Outdated Drivers Are Slowing You Down
One free scan finds every outdated or missing driver and matches the right update for your exact hardware.Free scan · exact hardware matchPC Slower Than It Used to Be?
A free scan shows the junk files, broken settings and background clutter dragging Windows down - then fixes them in one click.Free scan · Windows 10 & 11Temperature matters. rock salt, or sodium chloride, performs poorly below about 15 F pavement temperature. Pavement temperature is not always the same as air temperature. A dark asphalt drive in sun may be warmer than the air. A shaded concrete apron may be colder and stay icy all day.
| Condition | Best Move | Why It Works |
|---|---|---|
| 25 F to 32 F pavement | Clear snow, then use a light rock salt dose on remaining ice | Sodium chloride is usually effective in this range when used sparingly |
| 15 F to 25 F pavement | Clear first; consider magnesium chloride or a blend for stubborn ice | Rock salt slows down as pavement temperature drops |
| Below about 15 F pavement | Use sand or grit for traction; use specialty deicer only where justified | Rock salt becomes inefficient and repeated heavy applications cause more harm |
| Steep or shaded ice | Use traction grit, mats, or targeted calcium chloride with caution | Calcium chloride works colder but costs more and can be more corrosive |
Magnesium chloride is often gentler than rock salt in residential use, but it is still a chloride and should be used sparingly. Calcium chloride can work at much lower temperatures, but it is more expensive and more corrosive. No deicer is completely safe for every concrete mix, metal railing, garage door, pet paw, or planting bed.
Hack 8: Use Sand or Grit When Melting Is the Wrong Goal
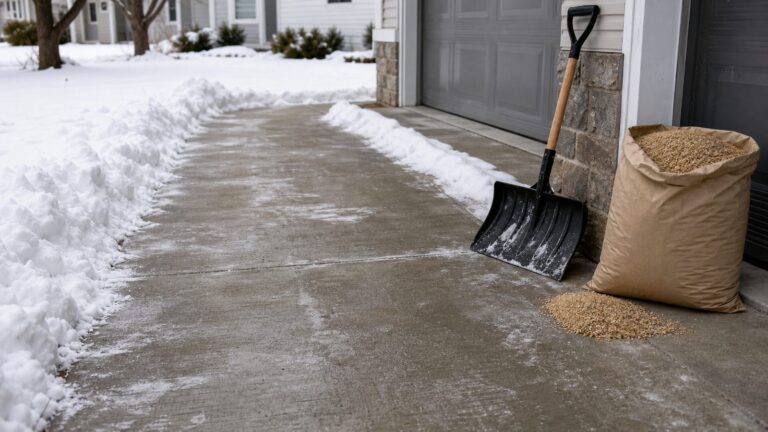
Below salt’s useful range, traction is often the better goal than melting. Sand, poultry grit, fine gravel, or commercial traction grit can make a steep driveway or sidewalk usable without trying to chemically melt ice at 5 F.
Grit does not disappear. It must be swept up later, and it can clog drains or track into the garage. Use it like a traction layer, not a landscaping project. Focus on tire paths, walking routes, and the transition from driveway to sidewalk or street.
The Tool Desk
Outbyte PC Repair FREERepair Windows errors before they cause bigger problemsFix Now →Outbyte Driver Updater FREEFix the driver behind crashes, sound loss and screen glitchesFind Drivers →Avoid hot water as a driveway hack. It may loosen a small frozen latch or spot-treat a tool, but pouring hot water across a driveway often creates a larger ice sheet once temperatures drop. Vinegar and DIY liquid mixes are also oversold. They can refreeze, stain surfaces, harm plants, or make pavement slick if used carelessly.
Hack 9: Heat Only the Chronic Ice Zones
Heated driveways can be excellent, but they are not automatically the best use of money. Built-in electric or hydronic snow-melt systems commonly cost about $12 to $25 per square foot installed. Removing an existing driveway can add about $1 to $2 per square foot before unusual electrical, boiler, drainage, or demolition work. For a 600-square-foot two-car driveway, that puts many full-drive systems around $7,200 to $15,000 before complications.
The strongest case for heat is targeted installation. Tire tracks on a steep apron, a shaded north-facing strip, front steps, an accessibility ramp, or the walkway from driveway to door can deliver most of the safety benefit at a fraction of full-drive coverage. Portable heated mats may cost about $50 to $500 for small mats, while tire-track systems can run into the low thousands.
Built-in systems are easiest to justify during driveway replacement, resurfacing, or major hardscape work. Retrofitting later means cutting, demolition, electrical upgrades, or hydronic equipment. Electric systems must be designed with proper controls, ground-fault protection, outdoor-rated components, and code-compliant installation. Hydronic systems need pumps, tubing, heat source capacity, antifreeze strategy, controls, and service access. Depending on your jurisdiction, permits and inspections may be required.
Heat does not eliminate drainage. Meltwater still needs somewhere to go. If a heated tire track drains across an unheated sidewalk, you may move the ice problem instead of solving it. On our projects, the melt path is part of the design, especially at garage thresholds, trench drains, curb cuts, and sloped aprons.
Driveway Snow Removal Costs in 2026
Costs vary by region, storm timing, driveway length, slope, and whether the work is shovel, blower, plow, or ice management. In 2026 national consumer data, residential driveway plowing commonly lands around $30 to $70 per visit, with other sources showing typical pro pricing around $30 to $75 per visit and broader averages near $105 to $126 depending on scope. Angi’s wider range for a visit can run about $51 to $203.
Thumbtack-style examples put a one- to two-car driveway around $35 per visit, a two- to three-car driveway around $40, and a three-car or 150-foot driveway around $60, but storm markets can surge. If every contractor in town is clearing after 10 inches of wet snow, expect higher rates and longer wait times.
| Option | Typical 2026 Cost | Best For |
|---|---|---|
| DIY shovel | $20 to $115 for the tool | Short drives, light snow, healthy homeowner, flexible schedule |
| Single-stage snow blower | About $280 to $770 typical; around $525 average | Paved short to medium drives with moderate snow |
| Two-stage snow blower | About $785 to $2,015 typical; around $1,400 average | Long drives, heavier snowfall, plow windrows, some gravel setups |
| Per-visit pro plowing | Commonly $30 to $75; broad averages can exceed $100 | Occasional storms, long drives, early access, heavy wet snow |
| Seasonal contract | Often $300 to $1,000; high-snow regions can reach $800 to $1,200+ | Predictable service, vacation homes, frequent storms |
| Hired salt/deicer application | About $20 to $65 per 1,000 sq ft | Commercial-like needs, steep drives, liability-sensitive routes |
| Built-in heated driveway | About $12 to $25 per sq ft installed | Replacement projects, chronic ice, accessibility, steep aprons |
The payback on a snow blower depends on how many storms you get and whether you would otherwise hire out. If pro service is $50 per visit and you get 12 serviceable storms per winter, that is $600 per season. A $700 single-stage blower may pay for itself quickly if you have storage, maintenance ability, and no health restrictions. If you only get three nuisance storms a year, hiring a pro or using a shovel may make more sense.
When to DIY vs When to Hire a Pro
DIY is reasonable for a short, flat, paved driveway when snow is light to moderate, you are physically able to work safely, and timing is flexible. It is also reasonable when you have the right storage space for tools and can clear during the storm before compaction.
Rank #3

- Yocada 55" Snow Shovel for Driveway Home Garage Snow Removal: Rapid Snow Clearance with Wide Blade Boasting a 16 inch shovel blade, you can clear pathways in a flash. The aluminum wear strips allow for effortless shoveling, even when dealing with hard snow and ice. Its large capacity ensures fewer stoops, making snow removal efficient
- Yocada 55" Snow Shovel for Driveway Home Garage Snow Removal: The comfortable, ergonomic dual handle design of this snow shovel will help you reduce muscle strain or back injury while shoveling snow. This snow shovel has 3 strong iron handles and 16 inch wide plastic scoop, it makes an essential tool for clearing snow from driveways, sidewalks, or other outdoor areas
- Yocada 55" Snow Shovel: The snow shovel has sufficient length and width to increase the area of snow removal, improve the efficiency of snow removal, and quickly remove a large amount of snow on roads or lanes. It has 3 poles for you to adjust the length, it can be adjusted from 48inch to 55inch. It is an ideal tool for snow removal in winter
- Yocada 55" Snow Shovel for Driveway Home Garage Snow Removal: Our snow shovel boasts a good performance iron handle that's both sturdy and lightweight. The ergonomic D-grip design ensures optimal comfort and ease of use. Detachable for easy storage, this shovel promises longevity even under heavy loads
- Our shovel is easy to install, you can just connect the poles. When installing, you can refer to our installation picture, when connecting the pole, you need to use greater strength. Align with the groove, press the silver ball, insert it firmly, and turn the pole until you hear a click
Hire a pro when the driveway is long, steep, gravel with poor edges, regularly blocked by municipal plows, or needed before dawn. Also hire out when storms are heavy and wet, when you travel often, when the home is a rental or vacation property, or when anyone in the household has heart, mobility, or balance risks. Professional service is not just convenience; sometimes it is the lower-risk construction and access solution.
Ask contractors specific questions. What accumulation depth triggers service? Is the rate per push, per event, or per visit? Is salting included? Where will snow be stacked? Do they use skid shoes on gravel? Are sidewalks included? What happens when the city plow blocks the apron after the driveway was cleared? A good snow contractor can answer without guessing.
Safety, Surface, and Legal Notes Homeowners Miss
Most bad snow removal advice ignores the driveway material. Concrete, asphalt, pavers, and gravel tolerate different tools and chemicals. New or weak concrete is vulnerable to freeze-thaw damage, especially when deicer increases saturation and repeated freezing. Asphalt can be gouged by sharp metal edges during warmer periods. Pavers can shift if edges are hammered or ice is chipped aggressively at joints.
Local rules matter too. Cities such as Boston, New York, and Chicago publish snow-clearing requirements for sidewalks and public ways, and many municipalities prohibit moving private snow into streets. Your exact deadline and responsibility depend on your city or town. If you own a corner lot, rental property, or business frontage, check the local rule before the first storm.
Finally, keep access clear for emergency and service needs. Do not bury hydrants, gas meters, electric meters, vents, heat pump outdoor units, or mailbox approaches. Keep a walking path wide enough for deliveries and emergency access. A 36-inch clear path is a practical residential target, and wider is better where people carry packages or use mobility aids.
A Simple Driveway Snow Removal Playbook
Before the storm, move cars to the side that lets you clear the longest straight path. Mark driveway edges on gravel or rural drives. Pretreat only the high-risk ice spots if freezing rain or hard bonding is likely. Stage your shovel, pusher, blower, broom, and grit where you can reach them without walking across ice.
During the storm, clear every 2 to 4 inches when accumulation is building. Push first, lift only when needed, and keep widening your snow storage zones so piles do not squeeze the driveway later in the season. Cut the 6- to 10-foot plow pocket near the street before municipal plows make their final widening pass.
After the storm, expose pavement, treat leftover ice with the smallest effective deicer dose, and use grit where temperatures are too low for salt to work. Check the melt path the next day. If runoff crosses a walking route and refreezes, adjust the snow pile location or add drainage improvements when weather allows.
The real genius in driveway snow removal is not a secret kitchen ingredient. It is sequencing. Clear early, push more than you lift, respect the surface, measure your salt, plan for the plow, and spend money only where it solves a recurring problem.
Frequently Asked Questions
How much does driveway snow removal cost in 2026?
Most residential driveway plowing runs about $30 to $75 per visit, though broader averages can land around $105 to $126 depending on location and scope. Seasonal contracts commonly range from $300 to $1,000, with high-snow regions sometimes reaching $800 to $1,200 or more.
What is the fastest way to remove snow from a driveway?
Clear during the storm at 2- to 4-inch intervals, push snow instead of lifting it, and make straight lanes toward a planned storage area. For deeper or repeated storms, a correctly sized snow blower is usually faster than shoveling.
Should you salt a driveway before or after shoveling?
Salt usually works best after shoveling or blowing, when most pavement is exposed. Pretreat only high-risk ice areas before a storm. For normal snow, clearing first and then applying a light measured dose to remaining ice saves salt and reduces surface damage.
What deicer is safest for concrete driveways?
No deicer is completely harmless to concrete. Use the smallest effective amount, avoid heavy applications on new or damaged concrete, and remove slush promptly. Magnesium chloride is often gentler than rock salt, while calcium chloride works colder but can be more corrosive.
Can I shovel driveway snow into the street?
Many municipalities prohibit pushing private snow into public streets because it creates traffic hazards and refreezing problems. Rules vary, so check your local ordinance. The safer practice is to pile snow on your property without blocking sidewalks, drains, hydrants, mailboxes, or sightlines.
Is a heated driveway worth it?
A full heated driveway is expensive at roughly $12 to $25 per square foot installed, so it is usually best during replacement or resurfacing. Targeted heat for tire tracks, steep aprons, steps, ramps, or shaded ice zones often gives better value than heating the entire driveway.
Do these 3 things before closing this tab:
1Repair Windows errors before they cause bigger problems2Fix the driver behind crashes, sound loss and screen glitches3Clear out junk files and repair common Windows errorsQuick Recap
Product prices and availability are accurate as of the date/time indicated and are subject to change. Any price and availability information displayed on Amazon at the time of purchase will apply.