What’s actually slowing this PC down?
Pick the symptom - the matching free tool is one click away.
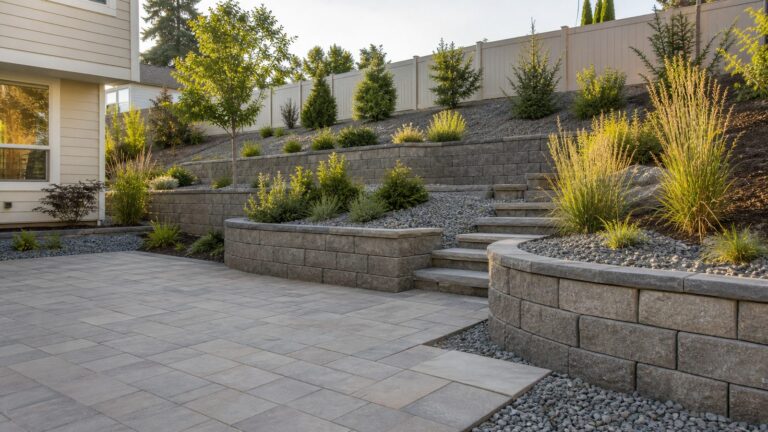
A mow strip is a flat, firm border between a lawn and a flower bed, wall, or fence. It gives a mower wheel a consistent route and can reduce hand trimming, but it will not eliminate all edging or maintenance. For many DIY projects, a continuous course of pavers or slabs is a straightforward option: excavate for the chosen paving system, prepare its specified bed, set the units level and aligned, then secure the edges as required.
Choose a material and decide how the mower will use the strip
A mow strip is a maintenance aid, not a retaining wall. Pavingexpert describes it as “a flat strip that makes it easier to mow against hard edges such as walls” (Pavingexpert’s edging guidance). Plan the finished surface around the mower’s wheel path: the wheel should be able to travel beside or over the strip as intended, without a raised lip that blocks the mower.
| Material | What to consider |
|---|---|
| Concrete pavers or slabs | Modular units can be replaced individually. They need a stable, even bed and any edge restraint called for by the product and site. |
| Brick or flat-laid kerbs | These are also paving options. Their stability and finished height depend on the setting bed and site conditions. |
| Cast-in-place concrete | Creates a continuous strip but requires forming and finishing. A universal mix, thickness, reinforcement detail, or control-joint spacing is not established; follow a design suitable for your site and local requirements. |
There is no established comparable cost or durability ranking across these materials. Compare local material costs, installation effort, how easily the layout can follow curves, likely settlement and repair needs, and whether the mower wheel can track on the finished surface.
Plan the width, route, and finished height
Walk the proposed boundary with the mower in mind. Mark endpoints and curves, check clearance for the wheel, and choose whether the wheel will run on the strip or beside it. A strip that is too narrow for the intended wheel path, uneven, or raised above the lawn can make mowing harder rather than easier.
Crashes, No Sound, or Screen Glitches?
Random freezes, missing sound and display glitches usually trace back to one bad driver. Find and replace yours safely.Free scan · under a minutePC Slower Than It Used to Be?
A free scan shows the junk files, broken settings and background clutter dragging Windows down - then fixes them in one click.Free scan · Windows 10 & 11#1 Best Overall
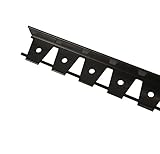
- SNIP TO FLEX PAVER, BRICK, OR LANDSCAPE EDGING: Create a beautifully landscaped yard and paver designs without having to hire a professional with easy to install commercial grade edging
- KIT INCLUDES: 10 6-foot segments for 60 feet of commercial grade plastic edging, measuring 1.75 inches tall
- SNIP TO FLEX: Cut spines where needed to create smooth curves, or leave spines uncut to create rigid straight sections
- DO-IT-YOURSELF: Place the edging around your paved patios, concrete paths, and rock gardens and secure with anchoring stakes (sold separately) for a secure, long lasting border
- DURABLE & FLEXIBLE: Flexible commercial grade plastic allows the edging to be installed in a straight line or molded to form curves
One HomeSteady DIY guide recommends making a concrete strip at least twice as wide as the mower wheels and describes digging a 6–8 inch trench (HomeSteady’s concrete mow-strip instructions). Those are that guide’s recommendations, not code requirements or universal dimensions. Choose actual width and excavation depth for your mower, materials, soil, paving-system instructions, and site conditions.
- Mark straight runs with a taut string line; check curves and transitions before purchasing materials.
- Check for buried utilities before digging.
- Check local drainage, frost, and permit requirements where relevant; these depend on the site and jurisdiction.
Install a paver or slab mow strip
- Set out the run. Mark the edge, endpoints, and curves. Use a taut string line to guide straight sections and confirm the mower-wheel route before excavation.
- Excavate for the selected system. Remove turf and dig a trench wide and deep enough for the paving unit and its specified bedding. Do not reuse a generic trench dimension without checking the product and site.
- Prepare the bed. Create a firm, even setting surface appropriate to the paving system. Base requirements vary; use the selected product’s instructions rather than assuming one standard depth.
- Lay and align the units. Set pavers or slabs in a continuous line at a consistent finished height. Check alignment against the string line and lawn level; a rubber mallet can help adjust units (Bob Vila’s paver installation guide).
- Restrain and backfill as needed. Secure the edges and backfill according to the product instructions and site conditions. Then check that the mower can pass along the boundary as planned.
What to check before finishing
- The surface is even and does not create an obstructive lip at the lawn edge.
- The units form a continuous, aligned course, including at curves and endpoints.
- The bed and any edge restraint suit the chosen paving product and site.
- Water can drain as intended, and digging has not conflicted with buried services.
A mow strip can make it easier to mow against a hard boundary and reduce the need for hand trimming. It does not guarantee that all trimming or other maintenance will disappear.
Quick Recap
Best Value
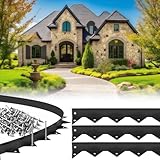
- Easy to Install: creating stunning landscaped courtyards and intricate paving brick patterns is possible without the need for professional help, as these edges are simple to install and of commercial-grade quality
- Package Includes&Precautions: the package comes with 10 pcs paver edging, each about 39.37 inch long, adding up to a total of 32.81 feet of reliable stainless steel edging, with a height of 1.2 inches.Precautions: The provided nails are ordinary iron nails, suitable for soil but not for hard surfaces such as concrete. After use, the nails need to be secured with cement to prevent them from loosening.
- Durable Material: stainless steel edging does not rust, crack, rot, or become brittle, requiring almost no maintenance
- Multi Purpose: these edges can be placed around paved terraces, concrete paths, or rock gardens, and can be secured with separately sold anchor stakes for a reliable and lasting border
- Flexible: the edges are designed to maintain straight lines but are flexible enough to easily create curves
Rank #4

- Uses - Designed for areas to be prepared with pavers, bricks, or stones along walkways, driveways, or patios.
- Simple Install – Dig Free Edging is flexible allowing for easy installation for elegant curves or straight edges to help keep pavers in place. Simply install the stakes (not included) by anchoring them every 2 ft. to provide the recommended hold.
- Weed And Grass Shield – Don’t let weeds and grass creep into your immaculate paver patio or path. This Edging provides protection by placing a plastic barrier between the grass and your pavers, brick or stones.
- Maximum Durability – Heavy duty HDPE (high-density polyethylene) plastic holds up against the toughest of the outdoor elements without chipping, fading, rotting or peeling for many years to come. Don’t keep replacing or paying for Landscape paver edging year over year. ORDER NOW while these are still in-stock.
- Order From A Brand You Trust – Master Mark has been manufacturing HDPE plastics since 1966 and has built its brands around gaining loyalty from every guest. If you are unhappy with your purchase, we stand behind the return policy. Your lawn and garden deserve the best. Thank you for considering Master Mark to be a part of your beautiful lawn and garden projects. Made in USA.
Rank #3
- Easy to Install: creating stunning landscaped courtyards and intricate paving brick patterns is possible without the need for professional help, as these edges are simple to install and of commercial-grade quality
- Package Includes&Precautions: the package comes with 20pcs paver edging, each about 39.37 inch long, adding up to a total of 65.62ft feet of reliable stainless steel edging, with a height of 1.2 inches.Precautions: The provided nails are ordinary iron nails, suitable for soil but not for hard surfaces such as concrete. After use, the nails need to be secured with cement to prevent them from loosening.
- Durable Material: stainless steel edging does not rust, crack, rot, or become brittle, requiring almost no maintenance
- Multi Purpose: these edges can be placed around paved terraces, concrete paths, or rock gardens, and can be secured with separately sold anchor stakes for a reliable and lasting border
- Flexible: the edges are designed to maintain straight lines but are flexible enough to easily create curves
Rank #2
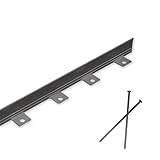
- EASY TO INSTALL: EasyFlex Aluminum No-Dig Edging provides an easy installation for a permanent and maintenance-free edging solution
- MULTIPURPOSE: Use for landscape beds, patio gardens, or any DIY landscaping or paver project
- DURABLE: Aluminum edging willl not rust, crack, rot, or become brittle - virtually maintenance-free
- FLEXIBLE: Maintains straight edges, but is flexible enough to form curves
- INCLUDES: (10) 5 ft. edging pieces and (36) nylon anchoring spikes; edging pieces are 1.7 inches tall x 5 feet long x 1.2 inches wide at the base
Product prices and availability are accurate as of the date/time indicated and are subject to change. Any price and availability information displayed on Amazon at the time of purchase will apply.
Independent reader supportYour contribution helps us test, update, and keep practical guides available for everyone.