The Tool Desk
Outbyte PC Repair FREERepair Windows errors before they cause bigger problemsFix Now →Outbyte Driver Updater FREEScan for outdated or missing drivers - takes under a minuteDriver Scan →For a straightforward drawer that fits and moves reliably, build a four-sided box with a plywood bottom, size it to the opening and the chosen slides, and check it for square before installation. This guide uses side-mounted full-extension slides as its main method: they typically need 1/2 inch of clearance on each side, so the box is usually 1 inch narrower than the opening. Confirm the exact clearance and installation positions in the instructions for your slide model before cutting.
Choose the drawer front and mounting method first
An inset front sits flush within the cabinet frame; an overlay front covers some or all of the frame. Decide which style you want, then choose compatible slides or runners. The steps and clearances below focus on a separate inset front with side-mounted, full-extension slides. Other hardware can require different clearances and positioning.
Measure the opening’s width, height, and usable depth at several points if the cabinet may be out of square. Use the smallest relevant measurement when a tight fit is constrained by an uneven opening. Select the slide model before finalizing the box dimensions, and consult its installation sheet: the figures here are starting points, not universal rules.
Size the box to the opening and slides
Width: allow for the slide clearance
For side-mounted full-extension slides, WOOD Magazine and Kreg describe a typical allowance of 1/2 inch per side. With that hardware, calculate the box width as:
#1 Best Overall
- DOOR TRACK – The closet track is used to hang a pair of by-passing sliding closet door panels; features double-J tracks for the installation of a 2-door panel system; the kit will safely hold doors that weigh up to 60-pounds each
- INCLUDES – Each closet door kit includes an adjustable bottom guide (constructed of a steel base with adjustable plastic tips), brass-plated stamped-steel finger pulls and installation instructions
- DURABLE – Constructed of a galvanized track with other steel and plastic components, the door track kit features brass-plated stamped-steel finger pulls
- DIMENSIONS – The track length is pre-cut to 71 inches to minimize the need for cutting; the closet door track is commonly used with wooden door panels measuring 3/4 inch, 7/8 inch, 1-1/8 inch, or 1-3/8 inch thick
- NOTE – Please refer to the line art drawing for further dimensional information, please see the rear drawer back plate line drawing (Not Universal)
Drawer-box width = opening width − 1 inch
For example, a 16-inch opening would give a 15-inch box width under this typical-clearance rule. Check the selected slide’s instructions before cutting; not every slide or mounting method uses this allowance.
Depth: fit the usable cabinet space
Measure the usable depth inside the cabinet, accounting for obstructions and the slide’s mounting requirements. Kreg recommends choosing the longest slide that fits the measured depth. The box depth must suit that slide and the cabinet; do not choose a slide based only on the drawer opening’s front-to-back measurement.
Rank #2

- 【Universal Fit for Multiple Brands】The Chenyu rite-trak II replacement drawer slides are engineered to seamlessly replace worn-out drawer guides for old drawers from top manufacturers like Vaughan Bassett, Legacy, Ashley, Pottery Barn, and more. Designed as a direct kenlin rite-trak ii replacement, these dresser drawer slides match the exact dimensions and functionality of original parts. Check compatibility using images 2. Perfect for drawer track repair kits and restoring vintage furniture.
- 【Industrial-Strength Durability】Upgrade flimsy OEM parts with drawer guides built to last. Made from high-quality PP hard plastic and galvanized iron drawer track back plates, these bottom mount drawer slides resist corrosion, rust, and wear. The reinforced metal caps add sturdiness, making them 10x stronger than plastic drawer slides—ideal for heavy-duty drawer hardware in kitchens, offices, or trucks.
- 【Effortless Installation & Restoration】Transform squeaky, wobbly drawers in minutes! These drawer sliders feature a simple pop-and-screw design—no tools needed. Replace broken drawer rollers or plastic drawer guides effortlessly. Watch our YouTube tutorial (search "rite-trak II") to master installation for undermount drawer slides, side mount drawer slides, or center mount drawer slides. Perfect for DIY drawer repair kits or furniture hardware upgrades.
- 【Lifetime-Quality Guarantee】Chenyu stands behind every kenlin rite-trak ii compatible product. Our drawer glides bottom mount come with 5-year support—contact us via seller info for replacements or compatibility queries. Trust these cabinet sliders for dresser rails replacement, wooden drawer slides, or kitchen drawer slides that stay silent and smooth for decades.
- 【Multi-Use Versatility】From 2 drawer dressers to large drawer systems for trucks, these drawer slides 16 inch/18 inch adapt to any project. Use them as drawer stoppers for dressers, false drawer front clips, or correderas para cajones in Spanish-speaking households. Compatible with drawer brackets for slides, drawer slide brackets, and center drawer slides bottom mount configurations.
Height and the separate front
Set the box height to suit the opening, the desired reveal, and the slide’s requirements. The decorative front is a separate piece in this method, fitted after the box and slides work. WOOD Magazine’s guidance for its full-extension setup subtracts 1/8 to 1/4 inch from opening width and height for the front; it gives a different 1/4-inch allowance for European-style slides. These are design-specific examples, not values to combine. Follow the instructions for your hardware and the gaps you want.
Choose stock and fit the bottom
The drawer consists of two sides, a front, a back, and a bottom. WOOD Magazine favors poplar for box parts for its strength, low weight, and price, and prefers Baltic birch plywood for bottoms. Plywood provides a stable panel; Kreg also shows plywood sides with a plywood bottom in a simple project approach.
Recommended Free Tools
Rank #3

- 【Heavy Duty 100 lb Capacity】 BAIDICE full extension drawer slides are built with 1.0mm cold-rolled steel and dual industrial-grade ball bearings, supporting up to 100 lbs—40 lbs more than standard slides. The precision ball bearing mechanism ensures smooth gliding even under heavy loads, while the built-in rubber crash pad keeps operation as quiet as 35 decibels.
- 【Full Extension & Detachable Design】 The 3-section foldable structure allows drawers to open completely for easy access to every corner. A detachable buckle at the back of each side mount slide rail makes installation and removal quick and hassle-free—ideal for both new cabinet builds and replacing worn-out slides.
- 【Installation Note】 Color: Black; Qty: 1 pair. Length: 12"(304.8mm), full extension lengths: 24"(609.6mm), suitable for drawers with inner depth ≥ 12"-14". Left side mount clearance: 0.5" (12.7mm), right side mount clearance: 0.5" (12.7mm). Please push the inner ball bearing to the top of the slide first, and then install it to the slide. There are 8 screws in the card box of the product. We provide a detailed installation video in the listing.
- 【Premium Anti-Rust Coating】 Unlike ordinary slides that corrode over time, BAIDICE side mount drawer slides feature a special electrophoretic coating that delivers superior rust resistance and oxidation protection. The wear-resistant rubber crash pad prevents collision damage, extending service life even in humid kitchens and bathrooms.
- 【Versatile Side Mount Application】 BAIDICE ball bearing drawer slides fit a wide range of cabinetry and furniture—kitchen cabinets, bathroom vanities, bedroom dressers, office file drawers, pantry shelves, workshop tool chests, and garage storage. Available in 8 to 24 inch lengths with 1 pair, 5 pairs, and 10 pairs options to fit any drawer size.
If the bottom will sit in grooves, measure its actual thickness before cutting them. Some sheet stock sold as nominal 1/4-inch material is thinner than a true quarter inch and can rattle in an oversized groove. Test the fit on scrap first. WOOD Magazine suggests a drop of glue at the center of each bottom groove to help keep a plywood bottom from rattling while allowing the rest of the panel room within the grooves.
A bottom attached underneath is another possible construction, but it uses a larger bottom panel than a captured, grooved bottom. Use a complete plan for that approach rather than transferring dimensions from a grooved-bottom drawer.
Rank #4

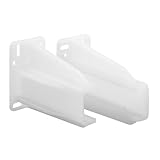
- Ideal Use: Repairs and supports bottom- and side-mounted steel drawer slide systems for smoother drawer operation.
- Dimensions & Compatibility: Features 3/8 in. x 1 in. x 3-9/16 in. openings and is designed for use with 3/8 in. x 1 in. drawer tracks
- Materials & Components: Durable white plastic construction includes both left- and right-hand back plates plus mounting fastener
- Key Features: Helps stabilize drawer tracks, restore proper alignment, and supports up to 75 lbs. per pair when installed correctly
- Fit Guidance: Compare opening dimensions and track size with existing hardware before purchasing to ensure compatibility
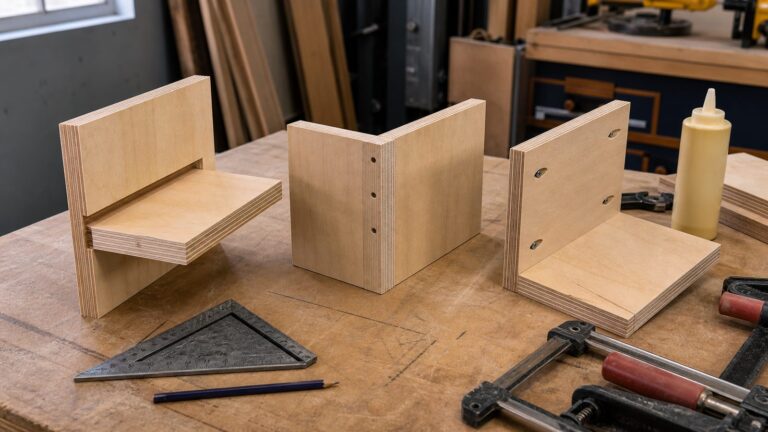
Assemble a simple, strong box
Lock-rabbet joints: a solid option if you have a table saw
WOOD Magazine’s method uses lock-rabbet joints, a strong alternative to dovetails that can be cut without a special jig. It does require a table saw, a dado setup, careful adjustment, and test cuts. The method suits a woodworker who is comfortable setting up that operation; it is not the simplest choice if you do not have the tools or experience.
- Cut matching parts. Cut the two sides, front, and back to the dimensions required by the chosen joinery and bottom method. Use a stop or another repeatable setup so matching parts are the same length.
- Test the joint and groove. Make trial cuts in scrap and adjust the fit before machining the drawer parts. Cut the bottom grooves to match the measured panel thickness.
- Dry-fit the box. Assemble the parts without glue and check that the bottom seats as intended and the corners meet cleanly.
- Glue, clamp, and check square. Apply glue to the joints, add the small amount of glue at the center of each bottom groove if using that method, and clamp the box. Measure both diagonals: they should match. Adjust the clamps while the glue is workable if they do not.
Other plans use different joints and dimensions
Not every simple drawer needs lock-rabbets. Kreg’s plans use pocket-hole screws with glue and dadoes to capture a 1/4-inch bottom; another Kreg plan permits an enlarged panel attached underneath instead of dadoes. Bosch DIY describes glue with screws or dowels and advises predrilling thin parts to reduce splitting and avoid protruding screw heads. These are distinct methods: follow one plan’s jointing and bottom dimensions rather than mixing parts from different designs.
Best Value

- High-quality drawer slide track guide and glide for center mount drawers, compatible with Kenlin and Rite-Trak 1 drawer systems.
- Replacement furniture parts in brown color, suitable for dressers, hutches, and nightstand drawer systems.
- Made of high-quality materials for durability and long-lasting performance
- Easy-to-install drawer track and rail kit, perfect for DIY drawer repair and restoration projects.
- Smooth and seamless operation with bottom mount design, ensuring effortless opening and closing of drawers.
Pick slides or runners for the job
| Mounting option | What it offers | What to consider |
|---|---|---|
| Side-mounted full-extension slides | Access to the drawer’s contents; used in WOOD Magazine’s inset-drawer method. | Require side clearance and precise installation. Check the chosen model’s instructions for clearance, length, and mounting positions. |
| European-style slides | A distinct slide option with its own hardware-specific front-gap guidance. | Do not apply the full-extension method’s dimensions automatically; verify the actual slide instructions. |
| Low-friction tape or wooden runners | Can suit an all-wood or traditional look without visible metal hardware. | They take careful fitting; WOOD Magazine notes that drawers on low-friction tape can be loose. Bosch DIY recommends metal runners for heavier loads. |
| Roller guide rails | Bosch DIY describes them as simple and economical. | Bosch says they are less stable and often do not extend fully. Its general guide claims roller rails support up to 100 kg; that figure is not tied to a specific product or model. |
| Ball-bearing guide rails | Bosch DIY describes greater stability and a self-closing mechanism. | Bosch says they cost more than roller rails; check a specific product’s load rating and fit. |
No box construction alone establishes a safe load capacity. Capacity depends on the materials and thickness, joints, slide or runner specification, cabinet attachment, and installation.
Install, test, and fit the front
For WOOD Magazine’s particular inset setup, the case-mounted slide front sits 7/8 inch behind the case front, allowing for a 3/4-inch drawer front and a 1/8-inch margin. The box-mounted slide is positioned 1/8 inch from the front end of the box side. These positions belong to that setup; use your slide’s instructions rather than applying them to other hardware.
- Install the cabinet rails level and aligned, following the hardware instructions. Bosch DIY warns that misaligned rails can cause a drawer to move by itself.
- Attach the matching slide members to the box, then fit the box into the cabinet. Use adjustment slots where available and check that it travels smoothly without binding.
- Position the separate decorative front with temporary tape, spacers, or clamps to establish even gaps around it.
- Fasten the front from inside the drawer once its position is right, then open and close the drawer to check its movement and reveal.
Tools, safety, and final checks
The tools depend on the method. A lock-rabbet build calls for a table saw with a dado setup, a drill, clamps, and suitable stock. A different plan may instead use a circular saw or jigsaw, drill, measuring tools, clamps, glue, screws or dowels, and sanding supplies. Pocket-hole screws or a drawer-slide jig appear in particular Kreg projects but are not required for every drawer build.
- Check the opening and usable depth at multiple points before sizing the box.
- Verify slide clearances and length against the actual hardware instructions.
- Measure the bottom stock and test groove fit on scrap before machining all the parts.
- Dry-fit, clamp, and compare the box diagonals before the glue sets.
- Check that cabinet rails are level, then test the drawer’s travel before fitting the front.
Follow the manuals for your saw, drill, and slide hardware and established woodworking safety guidance. Bosch DIY also links to its safety precautions at Bosch DIY safety instructions; its general drawer guide does not replace tool-specific safety procedures.
Quick wins for a faster PC:
Clear out junk files and repair common Windows errorsFree Scan →Fix the driver behind crashes, sound loss and screen glitchesFind Drivers →Repair Windows errors before they cause bigger problemsFix Now →Quick Recap
Sources
- WOOD Magazine, “Make and Mount Super-Simple Drawers” (updated February 16, 2022).
- Kreg Tool, “Demystifying drawer sizing.”
- Bosch DIY UK, “Build your own drawer in 6 simple steps.”
Product prices and availability are accurate as of the date/time indicated and are subject to change. Any price and availability information displayed on Amazon at the time of purchase will apply.