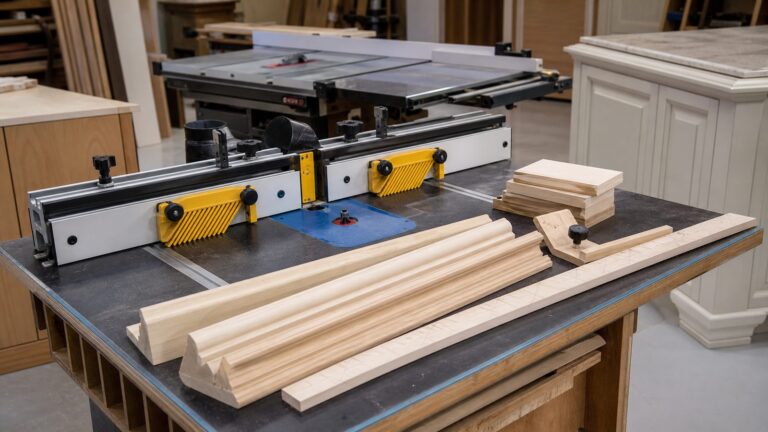
For accurate crown molding cuts, keep the molding in one consistent orientation: either hold it upside down against the saw fence and base as it sits between the wall and ceiling, or lay it flat and use the compound settings for its spring angle. Cope inside corners, miter outside corners, measure corners that may not be square, and test the setup on scrap before cutting finished lengths.
Choose a cutting setup and keep the orientation consistent
Before cutting, identify the molding’s wall edge and ceiling edge. A power compound miter saw is useful for corner and splice cuts, but its capacity and bevel range must suit both the molding and the method you choose. The Home Depot recommends eye, ear, and dust protection when using a power miter saw (How to Cut Crown Moulding).
Nested cuts: hold the molding as installed
For a nested cut, turn the molding upside down and hold it against the saw fence and base in the same orientation it occupies between the wall and ceiling. The ceiling edge rests on the base; the wall edge sits against the fence. Keep that relationship unchanged as you make the cuts. Tom Silva, general contractor at This Old House, emphasizes: “The most important thing that you have to know is holding the molding in the right orientation with the wall and the ceiling, and you have to hold it in that same orientation in all three cuts.” (How To Cut Crown Molding, updated May 28, 2026.)
Flat cuts: use the saw’s compound settings
If you lay the molding broad-back-down on the saw table, the cut depends on the molding’s spring angle and the corner angle. Use the chart in the manual for your specific saw and molding rather than treating a setting from another saw as universal. The Bosch operating instructions provide conditional settings for a 90-degree corner and particular molding dimensions; they also advise testing on scrap (Bosch miter-saw operating instructions, 2010). If your saw cannot make the required bevel and miter settings, use a suitable nested setup or another appropriate method instead of forcing the cut.
Recommended Free Tools
#1 Best Overall

- The Right Cut: Beautiful, seamless-fitting crown molding takes the guesswork out of crown molding
- Many Angles: Adjustable spring base locks anywhere from 30 to 60°; compatible with 10- and 12-inch miter saw
- Crown Molding Cutting Tool: Eliminates compound-angle cuts; cuts molding up to 5 1/2 inches wide
- Angle Finder: Measures exact angle of inside and outside corners; also measures molding spring angle
- Premium Kreg Tools: We offer products that help woodworkers close the gap between idea and outcome
Measure the corner before setting the angle
A 45-degree cut is appropriate for each side of a conventional 90-degree corner when the joint is divided evenly. Walls are not always square, so measure a questionable corner and bisect its actual angle rather than assuming the nominal setting will fit. An adjustable angle finder or bisecting square can help determine the angle; This Old House explains the bisecting method in How To Bisect Angles for Cutting Miters.
Make short test cuts from offcuts and dry-fit the pieces before cutting or fastening finished lengths. For a flat-on-table setup, use the saw manual’s chart for the molding’s spring angle and the measured corner angle.
Rank #2

- NO MATH REQUIRED FOR PERFECT ANGLES: The aluminum protractor’s inner Miter Cut scale instantly gives the exact setting needed for corner joints, eliminating guesswork, calculations, and the waste of expensive trim material
- ROCK-SOLID NESTED CUTS: Heavy-duty metal stops mechanically lock the crown molding upside down and backwards at the correct spring angle, eliminating complex compound angle confusion and ensuring repeatable 45° cuts
- GUARANTEED REPEATABLE ACCURACY: This 2-in-1 system ensures flawless synergy: the protractor provides precision input, while the stops provide rigid support, preventing material shifting or rolling for consistently tight joints
- PRO-GRADE DURABILITY & TRANSFER: Protractor built from CNC-machined aluminum with laser-engraved scales that never fade, featuring adjustable tension to firmly hold the angle when transferring to your saw
- UNIVERSAL PROTRACTOR & CUSTOM CROWN STOPS: ⚠️ IMPORTANT: While the included protractor is universal and works with any tool, the metal crown stops are designed to fit ONLY specific factory-compatible DEWALT saws, including DW702, DW703, DW706, DW708, DW712, DW713, DW715, DW716, DW717, DW718, and DWS780. Installs in seconds with the included Clip Nuts and knobs, supporting both threaded and pre-existing non-threaded mounting holes. (Note: For the stops, other brands or unlisted models are incompatible and will require custom drilling to fit.)
Cut and fit an inside corner
A coped joint is a practical choice for an inside corner, particularly when slight wall variation makes two meeting miters difficult to fit. One piece ends with a square cut; the adjoining piece is shaped to follow the first piece’s profile.
- Cut the first piece square at the corner and install it.
- Cut a miter on the end of the adjoining piece to expose the molding profile.
- Darken the leading edge of that profile so the line to follow is easy to see.
- Use a coping saw to cut along the profile, angling the cut slightly back so the visible edge meets the installed piece.
- Refine the edge with sandpaper or a file, then test-fit and adjust until the joint closes neatly.
See This Old House’s illustrated explanation of How to Cope a Joint for Crown Molding. A coping saw is the hand tool used to follow the profile.
The Tool Desk
Outbyte PC Repair FREERepair Windows errors before they cause bigger problemsFix Now →Outbyte Driver Updater FREEFix the driver behind crashes, sound loss and screen glitchesFind Drivers →Rank #3

- 4 EASY STEPS: Perfectly mitered corner joints in four easy steps.
- ELIMINATE TRIAL AND ERROR: Makes accurately cutting crown molding a snap, eliminating trial and error and saving time and money.
- PROFESSIONAL GRADE JOINTS: Cut perfectly mitered interior and exterior corner joints.
- MULTIPLE ANGLES: 45° spring angle crown molding jig with adapter for 52° and 38° angles.
- ELIMINATES: Difficult angle calculations, coping of joints or compound-angle cutting.
Cut an outside corner
An exposed outside corner uses two opposing miters, with their finished faces meeting at the outside point. For a conventional 90-degree corner, each cut is typically 45 degrees; measure and adjust if the corner is not square. Keep both pieces oriented consistently on the saw, and preserve their straight ends so you do not reverse or confuse the mating pieces. Test the pair on scrap, then dry-fit the finished cuts before fastening.
Independent reader supportYour contribution helps us test, update, and keep practical guides available for everyone.Join a long straight run or use corner blocks
Scarf splice
If a straight wall is longer than one piece of molding, join lengths with opposing miter cuts to form a scarf splice. Align the two cuts so the joint closes, and dry-fit the splice before fastening. The Home Depot guide covers scarf joints and saw setup (How to Cut Crown Moulding).
Rank #4

- [IDEAL FOR DIY & HOME IMPROVEMENT] The GARTOL miter shears are designed for fast, clean cuts. Perfect for cutting PVC trunking, quarter round moulding, chamfer, weather stripping, and softwoods (like Pine). Note: Max cutting thickness is 0.4 inches.
- [45°-135° ADJUSTABLE MULTI-ANGLE] Features a built-in engraved scale and an adjustable fence that clicks into place at 45°, 60°, 75°, 90°, 105°, 120°, and 135°. Easily measure and cut perfect miter joints without the need for a bulky electric saw.
- [PREMIUM SK5 STEEL & SPARE BLADES] Equipped with a heavy-duty, rust-resistant SK5 high-carbon steel blade for exceptional sharpness and longevity. We also include extra replacement blades in the package to ensure you are always ready for your next project.
- [EFFORT-SAVING ERGONOMIC DESIGN] The non-slip rubberized handles provide a comfortable grip. Pro Tip for Easier Cutting: To maximize leverage and reduce hand fatigue, always place the material as close to the pivot point (the back of the blade) as possible when cutting.
- QUALITY GUARANTEED- This American Heritage Industry product comes with our satisfaction guarantee. This trunking scissors set includes 2 additional spare sharp heavy-duty replaceable blades. Notice this shear is not suitable for cutting metal and stainless steel. If you have any issues, we will remedy the situation. Please feel free to contact us!
Corner blocks
Corner blocks are an alternative within a trim system designed to use them. They can reduce the need for angled corner cuts, but their style and dimensions need to suit the molding.
Quick Recap
Best Value
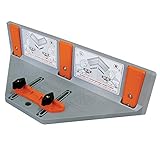
- Effortless Precision: Cutting crown molding doesn't have to be difficult! This crown molding jig for miter saw simplifies the complication of cutting crown and cove molding, giving you perfect miters, every time
- Universal Compatibility: Crafted to accommodate all 10" and larger miter saws, including both regular and sliding models, this crown molding coping jig enhances the versatility of your carpentry tools, making it an essential accessory for cutting projects
- Adjustable & Effective Setup: The Cutncrown crown molding jig has fence risers that hold crown and cove molding up to 6" wide at the desired angle for accurate cuts; the built-in setup guide reduces the risk of miscuts with minimal adjustments
- Portable Design: Designed for portability, the crown molding cutting tool can be used effortlessly without needing to be attached to your miter saw, allowing you to tackle work on the go while achieving remarkable precision
- What’s Included: The bench dog jig includes (1) The Crown Cut Jig itself, providing a complete solution for your crown molding cutting needs and streamlining the entire cutting process
Check the fit before fastening
- Confirm the wall and ceiling edges of the molding and maintain the chosen saw orientation.
- Measure corners that may be out of square; do not assume every corner is 90 degrees.
- Use scrap to verify nested or compound settings before cutting finished pieces.
- Dry-fit corner joints and scarf splices, then refine a coped edge as needed.
- Wear eye, ear, and dust protection when operating a power miter saw.
Product prices and availability are accurate as of the date/time indicated and are subject to change. Any price and availability information displayed on Amazon at the time of purchase will apply.