To lay a herringbone brick pattern, build a drained, compacted aggregate base, install perimeter restraints, screed an even bedding-sand layer, and begin the rectangular pavers from a verified 90-degree corner. Keep the repeating V-shaped weave aligned with reference lines, cut the perimeter units, then compact and fill the joints using the selected paver system’s instructions. Excavation and base depths must be designed for the soil, drainage, frost exposure and traffic at your site.
What a herringbone pattern is—and what it requires
Herringbone uses rectangular units set in an interlocking, repeated V-shaped arrangement. The pattern is visually strong, but it magnifies small layout errors, so the first corner and reference lines must be accurate. Belgard’s paver pattern guide identifies rectangular pavers for this layout, while its Brick Stone product is listed in a 4 × 8 × 2 3/8-inch size and for residential vehicular use. Availability and approved applications vary by location.
The detailed sequence below describes a typical aggregate-and-sand installation for concrete pavers. Clay brick, mortar-set work, permeable paving and products with proprietary jointing systems can require different materials and dimensions.
Before excavation: choose the system and set the layout
Match the paver to the load
- For a patio or walkway, use units and a base design approved for pedestrian loading.
- For a driveway or other vehicular area, use a paver rated for that application and design the base for the expected load.
- Confirm the manufacturer’s joint width, bedding material, restraint type and compaction instructions before ordering materials.
Plan drainage and access
Stake the outline and establish finished elevations before digging. Slope the subgrade and finished surface away from buildings toward the planned drainage route; the exact slope is project-specific. Keep cleanouts, drains and other access points reachable. Decide where the pattern will be most visible and where access is easiest, because those considerations can determine the most practical starting corner.
#1 Best Overall
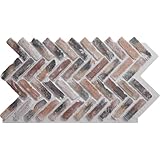
- FAST DIY INSTALLATION: Our lightweight polyurethane panels are designed for quick and easy installation, saving you time and professional labor costs. Unlike heavy real brick, these panels are easy to handle and can be installed by a single person using basic tools—perfect for a weekend DIY project.
- LOW MAINTENANCE & DURABLE: Made from high-quality urethane material, this faux brick siding offers lasting beauty with minimal upkeep. It is UV-resistant and water-resistant, ensuring a long-term solution for both interior accents and exterior wall cladding that stands up to the elements.
- SEAMLESS INTERLOCKING DESIGN: Each panel is molded with realistic clarity to emulate authentic stacked brick. Featuring a clever tongue and groove system, the panels interlock for a seamless, professional finish that hides joints and creates a continuous stone accent wall or foundation wrap.
- VERSATILE ARCHITECTURAL UPGRADES: Perfect for transforming modern homes, commercial businesses, and retail spaces. These panels provide a high-end brick look for restaurant interiors, office lobbies, or home porches. Whether you are creating a professional TV backdrop, or upgrading exterior foundation walls, these panels offer a sophisticated finish that fits any residential or commercial project.
- PREMIUM BRICK LOOK: Achieve the high-end appearance of real masonry without the cost or weight. Our panels feature authentic 3D textures and natural color tones that look and feel like genuine brick. It is the easiest way to add immediate character and value to any residential or commercial project.
Contact local utility companies before excavation, as recommended in Belgard’s Paving Systems Installation Guide.
Materials, tools and system-specific dimensions
- Rectangular pavers approved for the application
- Dense-graded aggregate base
- The bedding sand specified by the paver manufacturer
- Perimeter edge restraints and their fixing hardware
- Stakes, string lines, a level or laser, screed rails and a straightedge
- A diamond blade or approved paver saw for cuts
- A plate compactor and protective mat or other surface protection recommended for the paver
- Jointing sand or other specified joint material
Do not treat one manufacturer’s dimensions as universal. Belgard’s guide gives a minimum excavation and a range of base depths, with greater depths sometimes needed for freeze-thaw climates or particular designs. Mutual Materials gives a different example sequence in its Paver Installation Instructions. Soil, drainage, climate, use and available excavation depth determine the correct design.
Step-by-step installation
1. Excavate to the designed depth
Remove topsoil and unsuitable material to the depth calculated for the paver, bedding layer, aggregate base and local ground conditions. Shape the exposed subgrade to the planned drainage fall. Compact the subgrade with suitable equipment; soft areas must be corrected rather than covered.
Rank #2

- Straight from a popular Chicago neighborhood, this redefined classic is tough to beat. Well-worn, textured masonry in herringbone layout. Slight brick undulations for authentic surface presentation.
- Incredible unique variation found from no other manufacturer. Professional concrete stamping tools which provide the best natural detail in the industry. Sturdiest polyurethane stamp material and toughest handles available on the market (and they come with a lifetime warranty).
- Dimensions: 24"x 31”. Mildly weathered bricks with 1/4" joints. Even depth joints make it very suitable for overlay.
- Perfect or driveways, patios, sidewalks, walkways, courtyards, outdoor kitchens - anywhere you want a rustic city brick feel.
- Set Includes: 6 rigid stamps, 1 floppy/flex mat, and a touch-up skin. Also available in singles - Just check our Amazon brand store! All concrete stamps will require the use of a release agent, either liquid or powder, to prevent them from sticking to the concrete.
2. Place and compact the aggregate base
Install dense-graded aggregate in lifts appropriate to the compactor. Compact every lift before adding the next. Check elevations and slope as you work. Mutual Materials warns that the finished pavement follows the base elevation, so correct high and low spots with additional base material. Do not try to hide an uneven base by making the sand bed thicker in places.
What’s actually slowing this PC down?
Pick the symptom - the matching free tool is one click away.
3. Install the edge restraints
Use restraint wherever the paving edge is not held by a rigid structure. Follow the restraint manufacturer’s anchors and sequence: the cited guides differ on whether restraints are fitted before or after the pavers. A weak perimeter allows the pattern and joint lines to spread under load.
4. Screed the bedding sand
Set parallel pipes or rails on the prepared base and screed the specified sand to a uniform layer. Mutual Materials describes a one-inch screeded bed; Belgard’s guide excerpt specifies nominal one-inch uncompacted concrete sand and cautions against substituting masonry sand, screenings or stone dust. These are system instructions, not a universal specification.
Rank #3

- Straight from a popular Chicago neighborhood, this redefined classic is tough to beat. Well-worn, textured masonry in herringbone layout. Slight brick undulations for authentic surface presentation.
- Incredible unique variation found from no other manufacturer. Professional concrete stamping tools which provide the best natural detail in the industry. Sturdiest polyurethane stamp material and toughest handles available on the market (and they come with a lifetime warranty).
- Dimensions: 24"x 31”. Mildly weathered bricks with 1/4" joints. Even depth joints make it very suitable for overlay.
- Perfect or driveways, patios, sidewalks, walkways, courtyards, outdoor kitchens - anywhere you want a rustic city brick feel.
- Set Includes: 3 rigid stamps, 1 floppy/flex mat, and a touch-up texture skin. Also available in singles - Just check our Amazon brand store! All concrete stamps will require the use of a release agent, either liquid or powder, to prevent them from sticking to the concrete.
Once screeded, do not compact the sand, walk on it or drag tools across it. Work from the installed surface or from boards positioned outside the prepared bed so the layer remains even and undisturbed.
5. Establish a true starting corner
Verify a 90-degree corner with a framing square or diagonal measurements, then stretch straight reference strings along both legs. The first units determine every repeating V, so correct the layout before placing a large area. Belgard’s technical resource guide describes starting rectangular-paver herringbone from a true corner and maintaining consistent joints; see the Technical Resource Guide.
6. Lay the repeating V-shaped weave
Follow the pattern diagram for your exact paver dimensions and orientation. Bring each new unit tightly against the established row, then lower it into place without pushing adjacent units out of alignment. Check the string line frequently. Belgard’s technical guidance cites approximately 1/8-inch joints within a stated 1/16- to 3/16-inch range; use the joint width required for your product rather than applying that range to every brick.
Rank #4

- Includes 5 Pieces per Case | 8.7 Square Ft. Per Case | Case Weight 34.4 lb |TILE SIZE: 12.5 in. W x 25.5 in. L x 0.5 in. T
- Material: Clay Brick mosaic, mounted on mesh backing for easy installation
- Finish: Tumbled finish with slight variation in tone
- Application: Suitable for fireplace facades, living room accent walls, mudroom floors, and patio surfaces
- Water Performance: Water-resistant; appropriate for wet areas such as kitchens and bathrooms, natural stone requires sealing
7. Work to the perimeter and make cuts
Continue the pattern toward all edges, preserving the orientation rather than filling gaps with randomly rotated pieces. Measure each border opening and cut stable edge units with a diamond blade, as specified in Belgard’s installation guide. Avoid creating fragile slivers where the design permits a wider cut or a border course. Keep drains, cleanouts and access covers serviceable.
8. Compact the finished field
When the field and restraints are ready, make overlapping plate-compactor passes according to the paver instructions. Use the recommended protective measures to prevent scuffing or chipping. Mutual Materials describes overlapping passes and notes that a plate compactor can be rented from hardware stores, which is often sensible for a one-off patio.
9. Fill the joints
Sweep the specified jointing sand across the compacted surface until the joints are full. Make additional compactor passes if the system calls for them, then sweep in more material. Continue until the joints remain filled to the required level, and remove excess sand from the surface as directed by the product instructions.
The Tool Desk
Outbyte PC Repair FREEClear out junk files and repair common Windows errorsFree Scan →Outbyte Driver Updater FREEFix the driver behind crashes, sound loss and screen glitchesFind Drivers →Best Value

- The timeless & clean look of pavers, but with the durability and stamina of concrete. Tight-fitting common pavers in a herringbone layout. Great for indoor and outdoor applications. Mild texture and joints are perfect when surface texture and safety are a concern. Distinct v-shaped weaving pattern.
- Stamp Dimensions: 24” x 28”; Brick Dimensions: 8.25" x 4”. Butt joint, little to no "grout lines”. Overlay friendly. Approx. 3/4" thick mats; floppy is 1/2”.
- Incredible unique variation found from no other manufacturer. Professional concrete stamping tools which provide the best natural detail in the industry. All concrete stamps will require the use of a release agent, either liquid or power, to prevent sticking.
- Perfect stamp for patios, sidewalks, driveways, courtyards, walkways, parking lots, and anywhere where you want a classic and elegant brick pattern look.
Common failure points and corrections
The pattern drifts out of square
The usual cause is an inaccurate starting corner or loss of the reference line. Stop early, recheck the two layout lines and reset the affected units before the error reaches the edge. Do not force later courses to compensate for a crooked first course.
Low spots remain after installation
Low spots usually reflect an incorrect or poorly compacted base. Lift the affected pavers, correct and compact the aggregate base, then re-screed the bedding sand. Adding loose sand on top of an existing low area produces an unstable section.
Edges spread
Check that restraints are the specified type, correctly anchored and installed in the required sequence. Edge movement is not fixed by sweeping in more joint sand alone.
Surface damage appears during compaction
Confirm that the pavers are ready for compaction, the plate has the required protection and the machine is suitable for the surface. Follow the paver manufacturer’s limits rather than making extra passes to compensate for underfilled joints.
Free tools Windows power users keep installed
One-click scans. No signup required.
Quick Recap
Quick decision guide
| Project factor | What to verify |
|---|---|
| Patio or walkway | Pedestrian-rated pavers, drainage and the manufacturer’s residential base design |
| Driveway or vehicle area | Vehicular-rated units and a base designed for the expected loading |
| Freeze-thaw exposure | Whether the system requires a deeper base or additional frost protection |
| Clay brick or permeable paving | Product-specific bedding, jointing and drainage details; do not assume the concrete-paver sequence applies unchanged |
| One-time project | Whether renting a plate compactor is more practical than purchasing one |
Product prices and availability are accurate as of the date/time indicated and are subject to change. Any price and availability information displayed on Amazon at the time of purchase will apply.




