The best HACS projects do more than make a dashboard look better: they add local camera intelligence, AI image analysis, local device control, adaptive lighting, diagnostics, and configuration maintenance. This list focuses on community-built custom integrations, not dashboard cards, themes, blueprints, or add-ons.
“Coolest” here means unusually capable or useful—not necessarily easy. Before installing any of them, remember that HACS projects are community-maintained and can break after a Home Assistant update. Back up your system, install one project at a time, and check each repository’s current compatibility notes.
As an Amazon Associate I earn from qualifying purchases.
Quick comparison
| Integration | Best for | Main dependency | Cloud required? | Difficulty |
|---|---|---|---|---|
| Frigate | Local camera intelligence | Frigate and MQTT | Not necessarily | Advanced |
| LLM Vision | AI camera summaries | AI provider or local model | Optional | Intermediate |
| Tuya Local | Local Tuya-device control | Compatible Tuya device | Device-dependent | Intermediate |
| Adaptive Lighting | Automatic lighting comfort | Compatible lights | No | Beginner/intermediate |
| Spook | Power-user tooling | Home Assistant | No | Advanced |
| The Watchman | Finding broken references | Home Assistant configuration | No | Beginner/intermediate |
This is an editorial comparison, not a compatibility guarantee. Device models, firmware, Home Assistant releases, and repository maintenance status can change.
First, what counts as a HACS integration?
HACS is a community-store and distribution system for Home Assistant extensions. A custom integration adds entities, services, devices, or backend functionality to Home Assistant and is normally installed under custom_components/.
#1 Best Overall

- EASIEST WAY TO GET STARTED WITH HOME ASSISTANT: With Home Assistant already installed, it only requires plugging the included power supply and Ethernet cable to get started
- DESIGNED FOR THE HOME: The small, fanless, and silent design packs a quad-core processor, 32GB of storage, and 4GB of RAM
- ONE HUB TO CONTROL YOUR WHOLE HOME: Simplify your smart home with HA70. Built with official Home Assistant OS and a professional Zigbee coordinator, it brings local control, powerful automation, and seamless device management into one compact hub
- AUTOMATE EVERYTHING: Make all the devices in your home work in harmony - have your lights dim when you start watching a movie, or turn off your heat when you're away from home
- YOUR HOME, YOUR DATA: Your home's data will be kept in the home on your HomeAssistant. You can easily view, share, and export that data anywhere you want
That is different from:
- A dashboard card or plugin: changes the Lovelace interface.
- A blueprint: provides a reusable automation template.
- An add-on: runs a separate service, usually on Home Assistant OS or Supervised.
- An external server: is a separate application, such as Frigate, that may also have a Home Assistant integration.
Frigate demonstrates the distinction clearly: its HACS integration connects Home Assistant to the separate Frigate NVR application. Installing the integration alone does not create an NVR or perform object detection.
How to install HACS
The process depends on your Home Assistant installation type. HACS documents different paths for Home Assistant OS, Supervised, Container, and Core installations.
Home Assistant OS and Supervised
- Add the HACS app repository.
- Go to Settings → Apps → Install app.
- Select Get HACS, install it, and start the app.
- Follow the instructions shown in the app logs.
- Restart Home Assistant and complete HACS setup.
Container and Core
The current HACS documentation provides this download command:
The Tool Desk
Outbyte Driver Updater FREEFix the driver behind crashes, sound loss and screen glitchesFind Drivers →Outbyte PC Repair FREERepair Windows errors before they cause bigger problemsFix Now →wget -O - https://get.hacs.xyz | bash -Restart Home Assistant afterward, then complete the HACS integration setup. Use the official HACS installation documentation if you are unsure which path applies to your installation. HACS itself does not automatically configure every project you install.
1. Frigate: local camera intelligence
Frigate is a local NVR and object-detection platform. Its Home Assistant integration exposes camera entities, object-detection snapshots, motion sensors, detection and recording controls, statistics, event services, PTZ-related services, and a media browser. It also supports multiple Frigate instances.
Why it is useful
Instead of triggering an automation on generic motion, you can respond to a detected person, vehicle, animal, or activity in a particular zone. For example, Home Assistant can turn on exterior lights when a person enters the driveway, announce that someone is at the front door, or notify you only when a vehicle is detected.
Rank #2
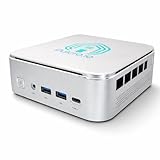
- 🌍 𝗔𝘀𝘀𝗲𝗺𝗯𝗹𝗲𝗱 𝗶𝗻 𝘁𝗵𝗲 𝗨𝗦𝗔 – Built and quality-checked in Texas with a 2-Year US-Based Limited Warranty for dependable long-term support.
- 🏠 𝗛𝗼𝗺𝗲 𝗔𝘀𝘀𝗶𝘀𝘁𝗮𝗻𝘁 𝗢𝗦 𝗣𝗿𝗲𝗶𝗻𝘀𝘁𝗮𝗹𝗹𝗲𝗱 – Ready to power your smart home locally with fast, reliable automation and no mandatory cloud dependence. A truly powerful smart home hub.
- ⚙️ 𝗗𝗲𝘀𝗶𝗴𝗻𝗲𝗱 𝗳𝗼𝗿 𝗖𝗼𝗻𝘁𝗶𝗻𝘂𝗼𝘂𝘀 𝗢𝗽𝗲𝗿𝗮𝘁𝗶𝗼𝗻 – Built for reliable 24/7 performance powering virtualization, automation, containers, storage, and professional workloads.
- 🧠 𝗖𝗵𝗼𝗼𝘀𝗲 𝗬𝗼𝘂𝗿 𝗣𝗿𝗼𝗰𝗲𝘀𝘀𝗼𝗿 𝗣𝗲𝗿𝗳𝗼𝗿𝗺𝗮𝗻𝗰𝗲 – Available with AMD R2314 (efficient 4-core), AMD R2514 (8-thread multitasking), or Intel Core i3-1215U (hybrid 6-core performance) to match your workload.
- 💾 𝗘𝘅𝗽𝗮𝗻𝗱𝗮𝗯𝗹𝗲 𝗥𝗔𝗠 & 𝗨𝗽 𝘁𝗼 𝟰𝗧𝗕 𝗡𝗩𝗠𝗲 𝗦𝘁𝗼𝗿𝗮𝗴𝗲 – Dual SO-DIMM slots support up to 64GB RAM. Dual NVMe SSD slots support up to 4TB total storage. Select installed memory and storage based on your needs.
Prerequisites and installation
- Frigate must already be installed and running.
- MQTT must be configured in both Frigate and Home Assistant, using the same broker.
media_sourceis needed for the media browser.- Your cameras, storage, network, and detection hardware must support the workload.
- Install and configure Frigate.
- Configure MQTT in Home Assistant and Frigate.
- In HACS, choose Integrations → Explore & Add Repositories.
- Search for Frigate and install it.
- Restart Home Assistant.
- Go to Settings → Devices & services and add Frigate.
The Frigate documentation has the current integration requirements. The optional Frigate Lovelace card is a separate project.
Quick wins for a faster PC:
Clear out junk files and repair common Windows errorsFree Scan →Scan for outdated or missing drivers - takes under a minuteDriver Scan →Main drawback
Camera codecs, streams, storage retention, network paths, and object-detection performance are separate concerns from the Home Assistant integration. Installing the HACS component without a working Frigate installation and MQTT broker will not produce useful camera entities.
2. LLM Vision: AI descriptions for camera events
LLM Vision uses multimodal AI models to analyze images, video, live camera feeds, and Frigate events. It can describe scenes, summarize events, track objects, maintain an event timeline, and update Home Assistant sensors with extracted information.
Why it is useful
A normal motion notification might say “motion detected.” An AI-generated notification could describe a person leaving a cardboard package beside the front door. You can use it to summarize Frigate events, distinguish a package from an animal, or store descriptions that can later be reviewed through Home Assistant.
Installation and setup
- Install LLM Vision from HACS.
- Restart Home Assistant.
- Go to Settings → Devices & services and search for LLM Vision.
- Complete the initial setup and configure the media folder.
- Add an AI provider from the integration page.
- Create automations using its documented services or blueprints.
Documented provider options include cloud and local services such as OpenAI, Anthropic, Google Gemini, AWS Bedrock, Groq, Ollama, LocalAI, Open WebUI, and OpenAI-compatible endpoints.
What’s actually slowing this PC down?
Pick the symptom - the matching free tool is one click away.
Privacy, cost, and accuracy
LLM Vision itself does not make image analysis free or automatically private. Cloud providers may charge for image or video requests, and images may leave your network. Local models reduce cloud exposure but require suitable hardware and additional maintenance.
Rank #3

- 7.3 Color E Ink Spectra6 Display: Enjoy vibrant colors and sharp text with the 7.3-inch 800480 E Ink Spectra 6 display. It stays clear in bright light and uses almost no power while holding an image for home dashboards, smart displays, reminders and daily information boards
- Ultra-Low Power with Up to 3-Month Battery Life: The built-in 2000mAh battery and ultra-efficient design allow the reTerminal E1002 to run for up to 3 months in deep-sleep mode with 6-hour refresh interval. Place it anywhere on your desk, bedside table or wall without worrying about wires or frequent charging
- No-Code Dashboard Design with SenseCraft HMI: Create custom dashboards using SenseCraft HMI, an AI-powered no-code platform. Simply drag and drop UI elements, choose from ready-made templates or let AI generate layouts for you. Connect live data from sensors, APIs or smart home systems and deploy your design to the E1002 with just a few clicks
- Works with Home Assistant, ESPHome & Maker Tools: Enjoy smooth integration with popular smart home and developer ecosystems. Build TRMNL dashboards with 300+ plugins, connect instantly to Home Assistant via ESPHome, or create your own applications using Arduino, PlatformIO or ESP-IDF for makers and DIY smart home enthusiasts
- Customizable Hardware & Flexible Expansion: Designed with makers in mind, the reTerminal E1002 supports GPIO/IC/SPI expansion and Grove modules, allowing you to easily add buttons, sensors or other accessories for smart home displays, creative DIY builds, educational projects and personal productivity boards
AI descriptions are probabilistic interpretations. Poor lighting, camera angles, compression, and occlusion can produce incorrect or inconsistent results. Do not rely on them as the sole basis for safety-critical decisions. Monitor request frequency and provider billing if you use a cloud model.
3. Tuya Local: control compatible devices over your LAN
Tuya Local communicates with many Tuya-firmware devices over the local network. That can make compatible plugs, lights, switches, fans, heaters, and covers faster and less dependent on Tuya’s cloud service.
Why it is useful
Tuya products are sold under many brand names. If you already own compatible hardware, Tuya Local can provide a more local control path without replacing every device.
Free tools Windows power users keep installed
One-click scans. No signup required.
Installation and setup
- Install Tuya Local through HACS.
- Go to Settings → Devices & services.
- Select Add integration and choose Tuya Local.
- Use the cloud-assisted or manual setup path.
- Provide the device IP address, device ID, local key, and protocol version when requested.
- Select the matching device type and finish setup.
Supported protocol choices include auto, 3.1, 3.2, 3.3, 3.4, 3.5, and 3.22. A listed retail model is not a guarantee of compatibility: firmware variants can behave differently.
Important limitations
- Many battery-powered devices are unsuitable because power-saving behavior prevents a persistent local connection.
- Some devices allow only one local connection at a time.
- Re-pairing a device can change its local key.
- Rapid commands can make some devices reboot or temporarily go offline.
- Hubs and sub-devices can have connection limits.
- Local control does not guarantee that a device stops sending telemetry to Tuya’s cloud.
Check the supported-device information before buying new hardware. If local operation is the priority, also consider compatible Zigbee or Matter devices, Zigbee Home Automation, or Zigbee2MQTT.
4. Adaptive Lighting: automatic brightness and color temperature
Adaptive Lighting automatically adjusts compatible lights during the day, usually using the sun’s position or a configured schedule. It can provide brighter, cooler light during the day and warmer, dimmer light in the evening, with gradual changes rather than a collection of manually timed automations.
Rank #4

- 【All in One Control Panel With】 Enjoy a larger view with the 4.7-inch display that Control your home with just a tap—whether it’s monitoring energy use, viewing live cameras, adjusting the thermostat, managing your lighting or even browsing the web
- 【Home Security】Customize 3 modes by setting different arming devices. When a sensor is triggered, the panel will sound an alarm and send a notification to your phone
- 【Power Consumption】 You can select devices with energy statistics functions to track their daily energy consumption over a week
- 【Camera Viewer】 NSPanel Pro can be used as a display and supports adding the following four types of cameras for live monitoring, allowing real-time views of your living room, garage, bedroom, and more
- 【Explore Webpages】Listening to music, watching videos, or checking out the latest advice? Save the address in NSPanel Pro’s Webpages, start it quickly with one click, and relax anytime
Best use cases
- Living rooms and bedrooms where comfort matters more than fixed scenes.
- Lower brightness and warmer light after bedtime.
- Homes where several lights should follow the same daily rhythm.
It works best with lights that support brightness and color temperature. On/off-only and RGB-only bulbs may expose fewer useful controls.
Start with one room
- Install the current Adaptive Lighting project from its HACS entry.
- Apply it to one room or light group.
- Set practical minimum and maximum brightness levels.
- Decide how manual changes, scenes, movies, and bedtime routines should override it.
- Expand only after confirming that the lights do not unexpectedly change back.
Adaptive Lighting can conflict with scenes, manual commands, and other lighting automations. Exclude porch and security lights if they need fixed behavior. Verify the project’s current repository and documentation through HACS before installation; compatibility and configuration details can change.
Independent reader supportYour contribution helps us test, update, and keep practical guides available for everyone.5. Spook: a toolbox for advanced Home Assistant users
Spook is a power-user-oriented toolbox that exposes additional sensors, services, templates, and diagnostics. It is intended to make Home Assistant’s internal state and automation possibilities more visible.
Why it is interesting
Spook can help experienced users inspect entity behavior, work with more advanced templates and services, and diagnose why an automation or integration is not behaving as expected. Its value is less about a single headline feature and more about extending Home Assistant’s administrative and automation toolkit.
Who should install it?
Install it when you have a specific problem or feature in mind. Do not install it solely because it is popular. Read the current documentation before enabling individual features, check whether Home Assistant now provides an equivalent built-in capability, and disable or remove features you do not use.
Spook is best treated as an advanced utility rather than a beginner-focused consumer feature. Its available features and entity names may change, so consult the current HACS repository entry before relying on a particular one.
Best Value

- Only mount plastic mount is included. Home assistant device is not included.
- Made In USA from High Quality Materials.
- Secure Mounting — Uses #6 flat head screws (Not Included) for a stable, reliable installation.
- Easy Access Ports: Design ensures all bottom ports are fully accessible for power, network, and peripheral connections.
- Cooling-Friendly Design: Open structure allows airflow around cooling fins to help maintain optimal operating temperature.
6. The Watchman: find broken entity references
The Watchman scans Home Assistant configuration for references to missing entities or services, including references in automations and scripts.
Why it is useful
Renaming, removing, or replacing devices can leave stale entity IDs behind. Those references may silently stop an automation from doing what you expect. The Watchman turns that invisible failure into a maintenance report.
When to run it
- After replacing or renaming devices.
- After migrating Home Assistant to a new installation.
- After large automation or script changes.
- As periodic maintenance in a large configuration.
A reported reference is not automatically an error. Some references may be intentional or generated dynamically, so verify each result before deleting or changing configuration. The Watchman complements—not replaces—automation traces, logs, and normal testing.
Before installing community integrations
Back up first
Create a restorable Home Assistant backup before installing or updating several custom integrations. Install one at a time so a failure is easier to identify.
Check maintenance and compatibility
Read recent releases, open issues, documentation, and compatibility notes. GitHub stars are not a substitute for active maintenance, clear documentation, or a security review. Avoid abandoned repositories and unofficial forks unless you understand the risks.
Understand external dependencies
Some projects depend on MQTT, an external server, a cloud API, Python packages, special hardware, or another application. HACS installs the code; it does not necessarily install or configure those dependencies.
Consider privacy and cost
Frigate can keep camera processing local, but it may require more capable hardware and storage. LLM Vision can use local models or cloud providers, with different trade-offs in cost, privacy, speed, and quality. Tuya Local can reduce cloud dependence but does not guarantee that Tuya devices stop communicating with Tuya’s servers.
Do these 3 things before closing this tab:
1Scan for outdated or missing drivers - takes under a minute2Clear out junk files and repair common Windows errors3Fix the driver behind crashes, sound loss and screen glitchesRemove unused integrations
Keep a record of your custom integrations. If a project is abandoned or no longer needed, remove it through HACS when possible and follow its documentation for cleanup. Do not leave unused code in custom_components/ indefinitely.
Which one should you choose?
- You own cameras: Start with Frigate if you want local object detection and can support its MQTT, storage, and hardware requirements.
- You want natural-language camera alerts: Add LLM Vision, but choose a provider with a privacy and cost model you accept.
- You already own Tuya devices: Try Tuya Local only after checking the exact model and firmware.
- You want better everyday lighting: Adaptive Lighting is the most approachable option, provided your bulbs support useful brightness and color-temperature controls.
- You are an advanced Home Assistant tinkerer: Spook can provide useful diagnostic and automation tools, but install it for a defined purpose.
- You have a large automation library: The Watchman is valuable after device changes and during configuration maintenance.
The safest approach is not to install all six at once. Choose the project that solves a current problem, confirm its dependencies, test it in one part of your home, and keep a rollback path.
Quick Recap
Product prices and availability are accurate as of the date/time indicated and are subject to change. Any price and availability information displayed on Amazon at the time of purchase will apply.

