Paper is one of the easiest ways to make a holiday room feel finished without buying a matching set of decorations. A few sheets can become tree ornaments, garlands, mantel trees, village houses, window snowflakes, or battery-lit luminarias—and most designs can be stored flat afterward.
Paper is one of the easiest ways to make a holiday room feel finished without buying a matching set of decorations. A few sheets of paper can become tree ornaments, garlands, mantel trees, village houses, window snowflakes, or battery-lit luminarias. Paper is lightweight, inexpensive, easy to customize, and—when made from cardstock or stored flat—simple to pack away after the season.
As an Amazon Associate I earn from qualifying purchases.
Below are 36 ideas, arranged by where they work best and how much cutting, folding, or assembly they require. Most can be made with scissors and glue; sturdier cardstock, a scoring tool, or a paper trimmer simply makes repeated or dimensional designs easier.
Basic supplies for paper Christmas decorations
- Regular printer paper for snowflakes, templates, and lightweight garlands
- Medium-weight or colored cardstock for ornaments, trees, houses, lanterns, and pieces that need to stand
- Craft scissors for snowflakes, leaves, stars, and silhouettes
- Pencil, ruler, and eraser
- Glue stick, liquid craft glue, or double-sided tape
- Ribbon, baker’s twine, embroidery floss, or monofilament for hanging
- Paper punch for repeated stars, circles, berries, or luminaria patterns
- Craft knife and self-healing cutting mat for intricate cutouts; use a knife only with appropriate adult supervision
- Scoring board or scoring tool for crisp folds in boxes, houses, lanterns, and dimensional trees
- Battery-operated LED tea lights for illuminated paper projects
Scissors are enough for simple snowflakes and small projects. If you are making many banners, strips, panels, or layered trees, an optional paper trimmer can produce faster, straighter cuts. Choose paper by the job: thin paper folds easily, while heavier cardstock gives a freestanding tree or ornament more structure. A cutting machine is not required for any of these ideas.
Paper ornaments for the Christmas tree
1. Classic folded paper snowflakes
Fold printer paper into a wedge, cut small triangles, curves, and notches along the edges, then unfold it to reveal a symmetrical snowflake. Trim the paper into smaller squares for a collection of different sizes. Punch a small hole near one point and add thread, or hang several snowflakes together as a cluster.
#1 Best Overall

- Professional Guillotine: Present the clean straight cutting along printed line. No drag! And easy to replace the blade when it become blunt
- Size and Materials: Design to cut A3,A4,A5 Paper, Photos, Cards, Laminated Stuff (within 1.5 mm) and more. Max cut 10 sheets paper (80 g/m2) every time. Cut a little lesser prolongs blades' service life better
- Accurate Measurement: With 45-degree to 90-degree angle measuring plate and cm/inch scale. Ensure to trim the angle and length you wanted
- Portable and Safe: This cutter is lightweight and convenience. Only work when you press the blade, perfectly protect user especially children
- Versatile Making: Your ideal cutting tool for making craft projects, wedding invitation cards and greeting card. Suit for home, office, and school
2. Layered cardstock snowflakes
Make two or three snowflakes in graduated sizes and stack them with small pieces of foam tape or folded paper spacers between the layers. White, icy blue, silver, cream, and kraft cardstock create a restrained winter palette. Keep the layers light enough that the branch is not overloaded.
3. Accordion-fold stars
Cut two matching paper strips or circles, fold each into even pleats, and join the pieces at the center so they fan into a star. A narrow ribbon or thread can be glued between the sections before the final join. Use a ruler to mark fold intervals when making a coordinated group.
What’s actually slowing this PC down?
Pick the symptom - the matching free tool is one click away.
4. Paper fan ornaments
Pleat two or more rectangular sheets, fold each fan in half, and glue the adjoining edges together to form a round ornament. Mix solid and patterned paper, or place a small circle of contrasting paper over the center to hide the join. Add a loop before sealing the final edge.
5. Origami Christmas trees
Fold paper into simple tree shapes, then cut a graduated set from the same design. The smallest trees work as ornaments, while larger versions can sit on a mantel or shelf. Use scrapbook paper on one side and plain paper on the other for a subtle change of color as the tree turns.
6. Faceted paper baubles from circles
Cut several equal paper circles, fold each one in half, and glue the folded halves together around a thread loop. When opened, the joined circles form a faceted sphere. More circles create a fuller bauble; fewer circles produce a flatter, more graphic ornament.
Garlands and hanging paper décor
7. Classic paper-chain garland
Cut equal strips, loop the first into a ring, and interlock each new strip through the previous ring before gluing or taping it closed. Alternate two colors for a traditional look, or use one neutral with one accent color. Paper chains are especially useful for filling a long mantel, bookcase, or stair rail.
8. Star-chain garland
Cut repeated stars with scissors or a punch and connect them with thread, narrow ribbon, or a line of adhesive tape on the back. Vary the star sizes at the ends of the garland so it tapers naturally. Metallic paper adds sparkle without requiring glitter.
9. Paper snowflake garland
Make small snowflakes and thread or tie them along twine or monofilament. Leave uneven gaps for a loose, falling-snow effect, or space them regularly for a cleaner border. Indoors, hang the garland across a window, mantel, or wall; do not treat ordinary paper as weatherproof outdoor décor.
Rank #2
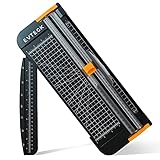
- Professional School Paper Cutter: with sharp blade, easily to cut straight along the transparent wire. Very smooth and no resistance.Portable and simple operation, meets the basically cutting needs , the best choice for school, home and office.
- Size: 14.17x 5.90x 0.78 inch. Suitable for cutting A3, A4, A5 paper, photos, cards, decal, cardboard (within 1.2MM), label, card stock and etc.
- Security Design: This paper cutter trimmer is lightweight and safe. The blade works only when you press on it, which perfectly ensures the safety of users especially children.It is a good helper to accompany children to make handmade works.
- Anti-slip Design: There are 6 non-slip round sponges at the bottom of the slide paper cutter, which can prevent the paper trimmer from moving when cutting paper. If you use it on glass, the non-slip sponges can be well fixed, too.
- Multifunctional Paper Cutter: With 45 degree to 90 degree angle measuring plate and cm/inch scale that can help trim the angle and length you wanted. This is an great paper slicer for school,home,and office.
10. Paper-tree garland
Cut rows of simple evergreen silhouettes from green, white, kraft, or patterned paper and string them across a mantel or bookcase. A center fold gives each tree a small amount of dimension. Use a single template to create a calm repeated rhythm, or alternate tall and short trees.
11. Holly-leaf and berry garland
Cut pointed green leaves and red paper circles, then attach them to twine in alternating groups. Add vein lines with a pencil or fine marker if desired. For a table, keep the same leaf-and-berry pieces flat and arrange them as a runner instead of stringing them.
Quick wins for a faster PC:
Repair Windows errors before they cause bigger problemsFix Now →Fix the driver behind crashes, sound loss and screen glitchesFind Drivers →12. Paper-strip curtain garland
Attach long paper strips vertically to a horizontal cord, then fold, curl, or gently spiral the strips so they hang with movement. This works as a doorway accent or a backdrop behind a dessert table. Use lightweight paper and secure the top cord well; the finished curtain should remain decorative rather than load-bearing.
Tabletop and mantel decorations
13. Accordion paper trees
Fold a large sheet into even pleats, cut a triangular tree profile through the folded stack, and open it into a freestanding tree. Make the base wide enough for stability. A row of trees in different heights looks more intentional than several identical pieces.
14. Cone-shaped paper trees
Roll patterned or glitter cardstock into cones and secure the seam with glue or double-sided tape. Arrange several sizes together as a tabletop forest. Add a narrow paper strip around the bottom edge, or leave the cones plain for a simple Scandinavian-inspired display.
15. Layered paper-tree forest
Cut repeated tree shapes, score or fold a center line in each, and join several layers at the fold. The result is a dimensional silhouette that can stand on a shelf. Combining white trees with kraft or muted green trees creates depth without needing many colors.
16. Paper village houses
Draw or print a simple house template with walls, roof flaps, windows, and a door. Cut it from white, kraft, or muted cardstock, score the fold lines, and glue the tabs. Group houses of different heights with paper trees, leaving enough space between them to read as separate buildings.
17. Paper mantel holly
Make oversized holly leaves and berries from paper and arrange them flat along a mantel or shelf. Overlap the pieces to create a garland-like sweep, or place one larger cluster at each end. Removable adhesive is useful if the mantel surface must not be marked.
Rank #3
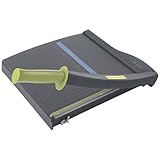
- Easy to use trimmer – Lite trimmer is simple and easy to use, with a sharp guillotine blade and a handy alignment grid. Built with a sturdy plastic base, it's also light enough for easy transport.
- 12” cutting Length – with a 12” cutting Length, It's a convenient choice for most common trimming tasks. Ideal for use in the home or at the office.
- Cuts 10 sheets – excellent for everyday use, this neat little trimmer cuts through paper, photos and more, cleanly cutting up to 10 sheets at a time (20 pounds paper)
- Accurate cuts - designed for accuracy, with an alignment grid for precision. Dual scale ruler, with marks in inches and centimeters, assists with measuring, regardless of which system You prefer.
- Safety features - guard rail keeps fingers safely away from the blade while it's in use. Blade latch hook securely locks the trimmer arm when not in use.
18. Paper place-card trees
Fold small paper trees that can stand on their own and write each guest’s name across the front. Use a heavier paper for the base, or add a small slit so two folded halves lock together. Guests can take the trees home as lightweight ornaments after the meal.
Windows, walls, and doors
19. Window snowflake collection
Tape snowflakes to glass at varied heights and sizes. They do not need to be white: cream, pale blue, kraft, or even a restrained patterned paper can work. Keep the largest pieces toward the center or lower portion of the window and use small snowflakes around them for balance.
20. Hanging snowflake mobile
Suspend snowflakes from a circular frame, bare branch, or embroidery hoop using thread or monofilament. Cut each snowflake a slightly different size and hang the strands at different lengths. Place the mobile where it will not brush a light fixture, heater, or doorway.
21. Paper-star wall constellation
Fold or cut stars in several sizes and arrange them in a diagonal sweep above a mantel, bed, console, or entryway. Begin with the largest stars, then fill the gaps with smaller ones. Test the composition on the floor before attaching anything to the wall.
22. Paper Christmas-tree wall
Create a tree silhouette from paper circles, stars, folded leaves, or small evergreen shapes attached with removable tape. Start with a wide bottom row, reduce the width gradually, and finish with one star at the top. This is a useful alternative where a full-size tree would block a walkway or occupy too much floor space.
23. Paper wreath
Cut a ring from sturdy cardboard and cover it with folded leaves, circles, snowflakes, or small trees. Overlap the pieces so the base disappears, then finish with ribbon. A wreath made from thin paper may bend, so reinforce the ring and store it flat between sheets of cardboard.
Free tools Windows power users keep installed
One-click scans. No signup required.
24. Paper door banner
Cut block letters spelling “Merry Christmas,” “Joy,” or “Noel,” then string or tape them across a doorway. Use a simple type shape if cutting by hand. Leave clearance around hinges, handles, and door edges so the banner does not catch when the door moves.
Paper trees and alternative displays
25. Stacked book-page trees
Fold or trim discarded book pages into cone forms and arrange them in a small forest. Use only pages that are safe and appropriate to repurpose; do not damage valuable or borrowed books. Because paper is combustible, keep these trees well away from candles, fireplaces, radiators, and other heat sources.
26. Newspaper or kraft-paper trees
Use recycled newspaper or kraft paper for a neutral, rustic display. Roll or fold the paper into cones, then vary the height and orientation. A narrow band of twine around each base can unify the group without adding much color.
Rank #4
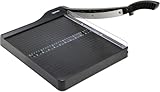
- PRECISE CUTTING: The 12-inch self-sharpening steel blade of this paper slicer cuts cleanly and accurately
- SAFE OPERATION: Equipped with a blade guardrail and blade lock mechanism, this heavy-duty paper trimmer keeps your fingers safe during use and secures the blade when stored
- VERSATILE USE: Ideal for both home and office settings, this paper cutter guillotine style is able to cut a variety of paper materials including construction paper, cardstock, and photos
- EASY ALIGNMENT: To assist in the precision and consistency of cuts, the plastic base of this paper cutter has white 1/2-inch gridlines and a ruler
- PORTABLE DESIGN: Measuring 20.5 by 13.5 by 2.5 inches and weighing only 2.5 pounds, this heavy duty paper cutter is easy to transport and store
27. Patterned scrapbook-paper forest
Choose two or three coordinated patterns rather than mixing every print available. Cut or roll the paper into trees of different heights and place the strongest pattern on one or two focal pieces. Plain paper between patterned trees keeps the display from looking crowded.
Do these 3 things before closing this tab:
1Clear out junk files and repair common Windows errors2Scan for outdated or missing drivers - takes under a minute3Repair Windows errors before they cause bigger problems28. Paper-strip spiral trees
Cut a spiral from a circle or triangle and suspend it from its center so the strip drops into a lightweight tree-like shape. Make several spirals at different sizes for a window or ceiling display. Use a strong hanging point and avoid placing them near fans or air vents.
29. Paper-doily trees
Layer or roll paper doilies into cones for a lacy, vintage look. Secure the overlap on the back with double-sided tape and place the finished trees on a tray or shelf. A cardstock cone inside can help a thin doily hold its shape.
30. Mini paper trees in jars
Place small folded trees in clear jars or cloches to create a contained tabletop scene. Add a few paper snowflakes or a kraft-paper base, but avoid loose pieces that could be mistaken for food by young children or pets. Keep the jars stable and away from the edge of a table.
Independent reader supportYour contribution helps us test, update, and keep practical guides available for everyone.Luminarias and special-effect pieces
31. Paper-bag star luminarias
Punch or carefully cut star patterns into paper bags, open the bags, and place a battery-operated LED light inside each one. Leave the top open for access to the light switch and battery compartment. These are a craft display, not certified outdoor weatherproof products, so use them indoors unless every material and electrical component is specifically rated for outdoor use.
The Tool Desk
Outbyte PC Repair FREERepair Windows errors before they cause bigger problemsFix Now →Outbyte Driver Updater FREEFix the driver behind crashes, sound loss and screen glitchesFind Drivers →32. Perforated paper lanterns
Score cardstock, cut a repeated pattern into the panel, and join the ends into a cylinder. Add a paper base if needed, but keep the LED source separate from the paper with enough room to prevent heat buildup. Never use a candle or any open flame inside a paper lantern.
33. Paper-village light display
Cut windows and doors into folded cardstock houses and place flameless LEDs behind them. Use a shallow tray to keep the village together and leave gaps between houses so the light does not become trapped. White paper gives a snowy appearance; kraft cardstock produces a warmer architectural look.
34. Hanging paper icicles
Cut tapered strips or folded diamond shapes and hang them in groups from a mantel, window, or ceiling line. Use several lengths and rotate some pieces slightly to catch the light. Keep the arrangement clear of hot bulbs and heating vents.
Best Value

- ACCURATE CUTTING WITH SURECUT TECHNOLOGY: Stainless steel wire cut-line ensures precise cuts every time
- TRIPLETRACK SYSTEM FOR STEADY CUTS: Interlocks blade and rail to prevent curved or wobbly cuts
- EASY BLADE SWITCHING: Features a 6.0 mm straight-cut arm extending to 15.6 inches for versatile use
- ERGONOMIC DESIGN FOR COMFORT: High-profile blade carriage offers an easier grip compared to other trimmers
- PORTABLE AND STABLE: Lightweight with rubberized feet for stability, protecting your work surface during use
35. Paper shooting-star cluster
Cut stars in several sizes, attach them to clear thread, and suspend the strands at different lengths. Hang the largest stars lowest or closest to the visual center, then add smaller stars around them. This works particularly well above a table or in an entryway with a high ceiling.
PC Slower Than It Used to Be?
A free scan shows the junk files, broken settings and background clutter dragging Windows down - then fixes them in one click.Free scan · Windows 10 & 11Outdated Drivers Are Slowing You Down
One free scan finds every outdated or missing driver and matches the right update for your exact hardware.Free scan · exact hardware match36. Recycled-paper gift-box ornaments
Cover small paper boxes with holiday paper, add ribbon, and hang them as lightweight faux presents. If the box has a lid, secure it before hanging so it does not separate. Use thin, empty boxes only; the idea is decorative and should not be treated as a way to hang heavy objects from a tree.
How to make the collection look cohesive
- Choose a base color. White, cream, kraft, or muted green can anchor the decorations.
- Add only one or two accents. Red and green feel traditional; icy blue and silver feel wintry; kraft, cream, and muted green create a quieter handmade scheme.
- Vary scale by location. Large snowflakes and stars work on windows and walls, medium ornaments suit the tree, and small trees or houses fill shelves and tables.
- Repeat a shape. A star used on the tree, mantel, and banner creates continuity even when the projects are different.
- Match the hanging material to the mood. Baker’s twine feels rustic, ribbon feels traditional, and monofilament makes light pieces appear suspended.
- Distribute weight carefully. Lightweight paper ornaments can sit near branch ends; heavier cardstock pieces belong closer to stronger interior branches.
- Plan before attaching. Lay out a wall constellation, wreath, or banner on the floor first, and use removable attachment methods where the surface requires it.
Storage after the holidays
Paper is one of the easiest decoration materials to store, but not every project will survive repeated use equally well. Separate flat snowflakes, banners, templates, and garlands into shallow boxes, folders, or a paper portfolio. Store dimensional houses and trees in a box with tissue or plain paper between pieces so they are not crushed. Thin printer-paper decorations may crease or tear; reinforced cardstock designs generally tolerate handling better, but do not assume every project is reusable.
Paper decoration safety
Paper burns. Keep every paper decoration away from candles, fireplaces, radiators, heaters, hot bulbs, and other heat sources. Fire-safety guidance recommends keeping candles at least 12 inches from anything that can burn; for paper décor, the safest choice is to avoid open flames altogether and use battery-operated flameless lights.
- Use battery-operated LED tea lights in luminarias, lanterns, and paper villages—never candles.
- Do not place paper against a hot light bulb or inside a light fitting.
- Inspect electrical holiday lights for frayed, pinched, or damaged wires and follow the manufacturer’s connection limits.
- Keep hanging pieces away from heaters, fans, fireplaces, and moving doors.
- Use craft knives and cutting mats carefully, with adult supervision where appropriate.
- In homes with young children or pets, avoid small detachable pieces, exposed sharp edges, and decorations that resemble food.
- Do not call ordinary paper luminarias waterproof, weatherproof, fireproof, or outdoor-rated unless the complete material and electrical setup is specifically labeled for that use.
Which project should you make first?
For the quickest results, start with folded snowflakes, paper chains, star garlands, or window snowflakes. Choose accordion trees, cone trees, paper baubles, and place-card trees when you want simple folds with a three-dimensional result. Paper houses, perforated lanterns, wreaths, and layered ornaments take more measuring and assembly but create the strongest focal points. A coordinated set does not need all 36 ideas: three repeated shapes, two accent colors, and a mix of large, medium, and small pieces are enough to make a room feel deliberately decorated.
Recommended Free Tools
Frequently Asked Questions
What paper is best for DIY Christmas decorations?
Regular printer paper works well for folded snowflakes, lightweight garlands, templates, and delicate hanging pieces. Use medium-weight or colored cardstock when a project must stand, hold a crease, support layers, or survive repeated handling. No single paper weight is ideal for every decoration.
Can I make these paper decorations without a cutting machine?
Yes. Most of these ideas can be made with scissors, a pencil, a ruler, glue or double-sided tape, and ribbon or twine. A paper trimmer, punch, scoring tool, craft knife, or cutting machine is optional and mainly helps with repeated straight cuts, intricate patterns, and crisp dimensional folds.
Are paper-bag luminarias safe to use with candles?
Use only battery-operated LED tea lights or other flameless lights in paper bags, lanterns, and paper villages. Never place an open flame inside paper décor, and keep all paper away from candles, fireplaces, heaters, radiators, and hot bulbs.
How should paper Christmas decorations be stored?
Store flat snowflakes, banners, and garlands in a shallow box, folder, or portfolio. Protect dimensional trees and houses with tissue or plain paper so they are not crushed. Thin printer-paper pieces may crease or tear, so do not assume every decoration can be reused for many seasons.
Free tools Windows power users keep installed
One-click scans. No signup required.
The Bottom Line
The most effective paper Christmas decorations combine easy materials with varied scale: snowflakes and stars for walls and windows, garlands for long lines, cardstock trees and houses for shelves, and battery-lit paper pieces for a safe glow. Start with scissors and paper, then add a trimmer, punch, or scoring tool only when the project demands faster or more precise repetition.
Quick Recap
Product prices and availability are accurate as of the date/time indicated and are subject to change. Any price and availability information displayed on Amazon at the time of purchase will apply.




