Recommended Free Tools
The IKEA IVAR cabinet is best treated as a flexible starting point, not a finished style. On IKEA Canada’s current listing, the pine cabinet with doors measures 80 × 30 × 83 cm; dimensions and combinations vary by market and catalog version. These 24 ideas range from reversible paint and hardware changes to larger storage-wall projects. They are inspiration directions drawn from owner reports and published makeovers, so measure your cabinet and verify the current hardware before cutting, drilling or fixing anything permanently.
For system planning, see IKEA’s IVAR shelving-system planning guide and the IKEA Canada IVAR cabinet listing.
As an Amazon Associate I earn from qualifying purchases.
Start with the right IVAR cabinet
IVAR is a modular pine storage system. Cabinets can be combined with side units, shelves, drawers and doors, but not every arrangement has the same depth or dimensions. Confirm the exact product and market before designing a wall, worktop or trim package.
1. Map the cabinet before customizing
Record the cabinet’s outside dimensions, door overlay, hinge positions and clearance to skirting boards. This simple drawing prevents a decorative front or worktop from interfering with the doors.
#1 Best Overall

- [Maximize Your Space]: This modern sideboard cabinet features a 38" x 15.5" spacious countertop and 4-cube inner space, creating a neat living space for you. It's perfect for storing a coffee maker, kitchenware, tableware, snacks and more.
- [Sleek & Stylish Look]: With beautifully crafted wood textures, this storage organizer looks stylish and fits different decorations. Its smooth surface also allows for simple cleaning, maintaining a fresh and polished appearance in your home.
- [Multi-Room Application]: With spacious storage space and elegant appearance, this storage cabinet fits perfectly in kitchens or dining rooms as a buffet or a coffee station, and also serves well in living rooms or entryways for everyday storage needs.
- [Stable & Reliable Structure]: Built with reliability in mind, the floor cabinet comes with 2 L-shaped anti-toppling brackets for added safety. Moreover, the non-slip foot pads and the fasteners with screws ensure enhanced stability.
- [Easy Access Doors]: Each of the 2 cabinet doors comes with an easy-to-grip handle and sturdy metal hinges, allowing smooth and secure opening and closing for reliable storage access.
2. Decide whether the change is reversible
Paint, removable labels and replacement knobs are comparatively easy to undo. MDF trim, new hinge holes and built-in framing are permanent modifications that deserve a full-size layout first.
Paint and surface-finish hacks
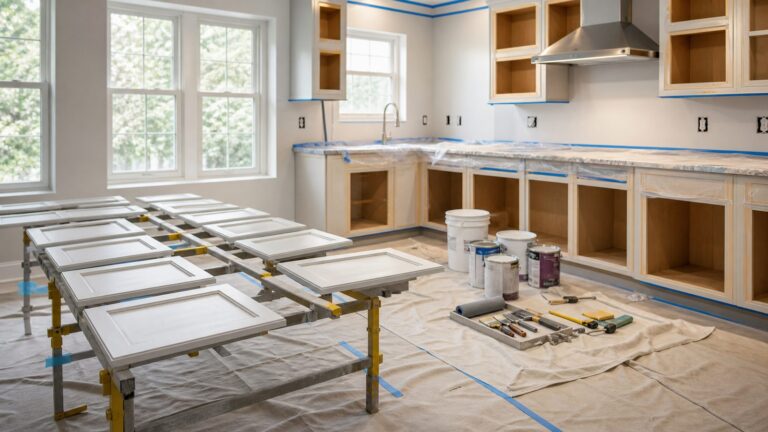
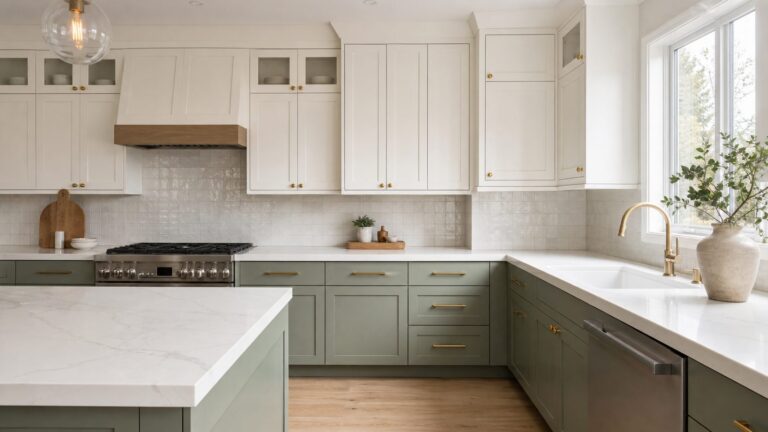
3. Try a sage-green finish
A reviewer on IKEA Canada’s IVAR listing reports sanding and painting two cabinets sage green. Treat that as an owner’s experience, not an IKEA coating recommendation. Test preparation and paint on an inconspicuous area, and follow the coating maker’s drying and curing instructions.
4. Use a two-tone cabinet
Keep the pine visible on the carcass or legs and paint only the doors, or reverse the arrangement. Mask hinge plates and allow the finish to cure before reinstalling hardware.
5. Paint the interior a contrasting color
A colored interior turns an open door into a deliberate backdrop for books, ceramics or pantry containers while leaving the exterior quieter.
Rank #2

- Striking Design & Style ❥❥❥The exquisite style complements the white cabinet body, and the simple design is elegant and graceful. The narrow sideboard cabinet features a classic white color paired with metal handles, which can be adapted to various decorative styles. It is very suitable to be placed anywhere in the room, bringing a brand new style to your home.
- Multi Functional and Practical ❥❥❥The narrow buffet cabinet has been specially designed with multiple functions, which can not only be used as a white storage cabinet, but also as a entryway table with storage or console cabinet. Unrestricted by usage scenarios, this cabinet can be used according to your needs and can be effective in any corner of your home. This is the charm of this sideboard buffet cabinet with storage.
- Spacious Storage Space❥❥❥As a small cabinet, this narrow sideboard cabinet has a large storage space. The design has two cabinet doors and two shelves. Aromatherapy, photo frames, and other items can be placed on the flat surface, while privacy items can be stored in the storage space behind the cabinet door to effectively prevent dust. With this sideboard buffet cabinet with storage, I'll give you a tidy space!
- High specification quality❥❥❥This narrow entryway cabinet is made of high-quality medium density fiberboard wood, with excellent quality and high-quality materials. The structure of the white cabinet with doors is sturdy and stable, while also being very durable. An anti tipping device is designed behind the credenza storage cabinet, making it safer and more reassuring for daily use
- Easy assembly❥❥❥Each skinny buffet cabinet is shipped with an instruction manual included in the packaging, which is clear and easy to understand. Additionally, each component is numbered for faster assembly. No extra time is needed, even one person can easily assemble white sideboard cabinet.
6. Add a tonal wash instead of opaque color
A translucent wood finish can preserve some grain character. Check that the product is intended for pine and for the level of handling your cabinet will receive; no universal finish system is established.
7. Refresh only the door fronts
Painting the fronts is a lower-commitment project than coating the whole cabinet and makes it easier to change direction later.
8. Finish with a clear matte protective coat
Ideal Home’s makeover roundup describes furniture paint followed by clear matte varnish. Use the combination as a visual reference, not a guaranteed recipe for every IVAR surface, and respect the paint and varnish manufacturers’ recoat times.
Free tools Windows power users keep installed
One-click scans. No signup required.
Door, hinge and hardware hacks
9. Tune the hinges to reduce the center gap
The IVAR-specific guide “See these ideas before you customize the IVAR cabinet” explains that hinge adjustment can reduce the gap between the two doors. Open the hinge-adjustment screws gradually, support the door, and check the reveal after each small change.
Rank #3

- Vintage Aesthetic: The designer has blended vintage style with modern aesthetics, giving this rattan cabinet a unique retro-chic look. The rattan on the cabinet doors is hand-woven by skilled artisans, with natural rattan offering moisture and heat absorption for a perfect visual effect.
- Spacious Adjustable Storage: This rattan storage cabinet features rattan doors that open on both sides, providing hidden storage space. The shelves are adjustable in height from 0-64 mm, allowing you to customize the storage. It can accommodate kitchen items like dishware and glassware, or other essentials such as bags, gloves, and books.
- Stable and Sturdy Structure: Our buffet cabinet excels in weight capacity and stability. The top shelf supports up to 50 lbs (22.7 kg), the internal shelves support 30 lbs (13.6 kg), and the bottom shelf supports 50 lbs (22.7 kg), making it suitable for heavy items like coffee machines and small ovens. An anti-tip kit is included, and we recommend installing it for added safety and stability.
- User-Friendly Details: The support legs are 15 cm/5.7 in tall, allowing enough clearance for a robot vacuum to clean underneath. The back panel has cable management holes to help hide cluttered wires. The magnetic door design ensures a better closure.
- Versatile Use: This rattan buffet cabinet offers the perfect storage solution while adding style to any room. It can be used as a kitchen sideboard, bar cabinet, or entryway shoe cabinet. The friendly materials are safe and easy to clean, making this cabinet suitable for any setting. Note: When assembling, do not use power tools directly.
10. Treat the 7 mm measurement as setup-specific
That article discusses a 7 mm hinge-hole measurement in its own configuration. It is not a universal IVAR drilling specification. Measure your cabinet and consult the hardware instructions before drilling new holes.
11. Use a rear wood strip as an alternative gap solution
The same author describes adding a wood strip behind one door. This can change how the doors meet, but it also affects clearance and load on the hinges; make a removable test piece before fixing it.
12. Replace the knobs
New knobs or pulls can change the cabinet’s character more quickly than paint. Existing hole spacing, screw length and door thickness vary, so measure before buying or drilling.
Do these 3 things before closing this tab:
1Clear out junk files and repair common Windows errors2Scan for outdated or missing drivers - takes under a minute3Repair Windows errors before they cause bigger problems13. Align hardware as a visual grid
Place knobs at matching heights across several IVAR cabinets, or deliberately offset them for a more informal look. Mark with a template and check that the handle clears adjacent doors and walls.
Rank #4

- Multiple-Tier Layout: This wooden cabinet features a spacious tabletop, four drawers, and a side cupboard, efficiently organizing your daily essentials. Ideal for bathrooms, kitchens, or living rooms, it keeps your space tidy and adds practical storage
- Customizable Storage Space: This bathroom cabinet includes a side cupboard with an adjustable shelf offering three height options (8″, 10.4″, 13″ in 2.5″ increments). Easily adapt the space to store toiletries, towels, or other essentials with flexible organization
- Premium Materials: Made from sturdy CARB P2-compliant MDF and sturdy metal hardware, this side cabinet boasts durability and quality craftsmanship. Its waterproof, scratch-resistant surface ensures easy cleaning and long-lasting use in any space
- Solid Structure: Crafted from durable MDF boards, this floor storage cabinet holds up to 88 lb on the top, 33 lb per shelf, and 11 lb in the drawer—ideal for storing bathroom essentials and displaying candles, vases, or photos to enhance your space
- Easy Setup: This freestanding floor cabinet comes with easy-to-read instructions and anti-toppling fittings. Fix the cabinet with the fittings before use. Safe for family use
Decorative-front hacks
14. Add geometric MDF strips
Ideal Home’s IKEA makeover roundup shows MDF strips arranged on cabinet fronts, then painted, fitted with knobs and protected with clear matte varnish. This supports a raised or geometric IVAR look, but it does not provide an IVAR-specific cut list. Lay out the pattern full-size and account for hinge-side clearance.
15. Create a simple framed panel
Apply narrow trim around each door to suggest a traditional frame. Keep trim light enough that the hinges can carry the altered door weight, and dry-fit it with the door open and closed.
16. Use asymmetrical lines
Diagonal or offset strips make a pair of plain doors read as a graphic feature. Tape the proposed geometry first; once attached, the change is difficult to reverse.
What’s actually slowing this PC down?
Pick the symptom - the matching free tool is one click away.
17. Combine smooth and textured doors
Leave one door painted flat and give the other a trim pattern, cane-style insert or contrasting panel only if the added material is compatible with the door’s movement and hinge capacity. No universal insert method is established, so treat this as a design concept requiring a measured build.
Best Value

- Please check item description for more details
- Made in Sweden
Storage and layout hacks
18. Build an IVAR storage wall
Use cabinets as closed lower storage and side units, shelves or drawers above them. IKEA’s planning guide illustrates multiple combinations; design around the exact modules you own rather than assuming every IVAR section shares one size.
19. Add a continuous worktop
An interior-design contributor describes using IVAR pine cabinets as base units beneath custom surroundings. A worktop can visually unify separate cabinets, but the top, wall fixing and support structure must be designed for the actual span and load.
20. Frame the cabinet like fitted furniture
Custom side panels, a top infill and a plinth can close gaps around an IVAR run. Natalie Jahangiry’s account in Ideal Home also mentions arches, artwork, wallpaper and frames as ways to mix IKEA basics with bespoke details. This is design guidance, not a structural plan; do not assume the cabinet itself supports the framing.
21. Turn a run into a pantry
Ideal Home presents IVAR shelving as a customizable kitchen-storage option, with modular sizes and add-on baskets or drawers. Use it for dry goods, serving pieces or small appliances, while checking ventilation, moisture exposure and cleaning access in your kitchen.
22. Add baskets or drawers for concealed organization
Open shelving is useful for frequently reached items; baskets and drawers hide visual clutter. Confirm that the chosen insert fits the specific IVAR depth and does not obstruct a neighboring door.
23. Mix open and closed bays
Alternate cabinets with open shelves to display books or objects while hiding less attractive supplies. Keep frequently used heavy items low and anchor the overall arrangement according to IKEA’s instructions.
24. Extend the system vertically or horizontally
Plan a longer or taller composition with side units, shelves, cabinets and drawers, then check every connection and wall condition. For larger shelving arrangements, IKEA recommends fitting a cross-brace to every other section to ensure stability; follow that guidance rather than estimating a load rating.
The Tool Desk
Outbyte Driver Updater FREEFix the driver behind crashes, sound loss and screen glitchesFind Drivers →Outbyte PC Repair FREEClear out junk files and repair common Windows errorsFree Scan →Quick Recap
Choose a hack by risk and effort
| Project type | Typical change | What to verify first |
|---|---|---|
| Surface-only | Paint, interior color or clear finish | Surface preparation, compatibility and cure time |
| Hardware adjustment | Hinge tuning or replacement knobs | Current hinge instructions, clearances and measurements |
| Added trim | MDF strips or framed fronts | Door weight, hinge clearance and a measured layout |
| System expansion | Cabinet-and-shelf wall, pantry or worktop run | Exact module dimensions, wall fixing and cross-brace placement |
| Built-in integration | Plinths, infills, arches or custom framing | Independent support for the surrounding construction |
A safe order for your project
- Confirm the exact IVAR model, market dimensions and intended location.
- Photograph and measure the doors, hinges, reveals and nearby obstructions.
- Choose a reversible finish or make a full-size paper/cardboard mock-up before permanent work.
- Test paint, trim or hardware on one door or a sample piece.
- Recheck door swing, center gaps and neighboring clearances after every change.
- For a multi-section arrangement, install the required cross-braces and secure the system as IKEA specifies.
Product prices and availability are accurate as of the date/time indicated and are subject to change. Any price and availability information displayed on Amazon at the time of purchase will apply.