Outdated Drivers Are Slowing You Down
One free scan finds every outdated or missing driver and matches the right update for your exact hardware.Free scan · exact hardware matchPC Slower Than It Used to Be?
A free scan shows the junk files, broken settings and background clutter dragging Windows down - then fixes them in one click.Free scan · Windows 10 & 11Some links on this page are affiliate links: if you buy through them we may earn a commission, at no extra cost to you.
A 12V battery autocut controller built around an ATmega328P can monitor battery voltage and disconnect an external charger when a configured limit is reached. For a typical 12V lead-acid battery, an example cycle-charge cutoff is about 14.4V, with charging restarted at a lower, battery-specific voltage.
This is a voltage-based supervisory controller, not a complete universal battery charger. The external charger must already provide suitable current limiting and charging characteristics. The design below is intended primarily for specified 12V lead-acid batteries—not lithium-ion or LiFePO4 packs.
As an Amazon Associate I earn from qualifying purchases.
Free tools Windows power users keep installed
One-click scans. No signup required.
What the controller does
The operating sequence is straightforward:
- An appropriate DC charger supplies the battery.
- A resistor divider reduces battery voltage to a safe ADC voltage.
- The ATmega328P measures and filters that voltage.
- When the configured upper threshold is reached, the controller de-energizes a relay or turns off a MOSFET.
- Charging resumes only after the battery falls below a lower restart threshold.
The separation between the cutoff and restart thresholds is called hysteresis. It prevents the switching device from chattering when the battery voltage fluctuates near one value.
The ATmega328P does not itself regulate charging current, perform absorption timing, compensate for temperature, balance cells, or identify battery chemistry. A dedicated lead-acid charger IC such as TI’s BQ24450, or a suitable commercial charger, is a better foundation for unattended or safety-critical charging.
Popular on Amazon
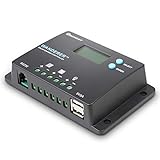
- 𝐒𝐦𝐚𝐫𝐭 𝟒-𝐒𝐭𝐚𝐠𝐞 12V/24V Solar Charge Controller: Renogy charge controller 𝐦𝐚𝐱𝐢𝐦𝐢𝐳𝐞𝐬 𝐁𝐚𝐭𝐭𝐞𝐫𝐲 𝐋𝐢𝐟𝐞 & 𝐒𝐨𝐥𝐚𝐫 𝐄𝐟𝐟𝐢𝐜𝐢𝐞𝐧𝐜𝐲, this advanced pwm solar charge controller utilizes intelligent 4-stage charging (Bulk/Boost/ Float/Equalization) to optimize power delivery for AGM, Gel, Flooded and Lithium batteries. RV solar charge controller prevents overcharging and gas buildup while 𝐚𝐜𝐡𝐢𝐞𝐯𝐢𝐧𝐠 𝟑𝟎% 𝐥𝐨𝐧𝐠𝐞𝐫 𝐛𝐚𝐭𝐭𝐞𝐫𝐲 𝐥𝐢𝐟𝐞𝐬𝐩𝐚𝐧 compared to basic charge controllers.
- 𝐀𝐝𝐯𝐚𝐧𝐜𝐞𝐝 𝐋𝐨𝐚𝐝 𝐌𝐚𝐧𝐚𝐠𝐞𝐦𝐞𝐧𝐭 & 𝐒𝐲𝐬𝐭𝐞𝐦 𝐏𝐫𝐨𝐭𝐞𝐜𝐭𝐢𝐨𝐧:Renogy Wanderer 10A charger controller offers 𝐮𝐧𝐩𝐚𝐫𝐚𝐥𝐥𝐞𝐥𝐞𝐝 𝐟𝐥𝐞𝐱𝐢𝐛𝐢𝐥𝐢𝐭𝐲 with manual/automatic/timed load control modes, allowing direct parameter adjustment for lighting, pumps and other DC loads. Solar panel charge controller has overcharge/over-discharge/ overload/ short-circuit/reverse polarity/temperature compensation) with 𝐋𝐂𝐃 𝐞𝐫𝐫𝐨𝐫 𝐜𝐨𝐝𝐞𝐬 𝐩𝐫𝐨𝐯𝐢𝐝𝐞 complete system security. Negative ground design making solar panel charge controller for RV and Marine 𝟗𝟎% 𝐬𝐚𝐟𝐞𝐫 𝐭𝐡𝐚𝐧 𝐜𝐨𝐦𝐩𝐞𝐭𝐢𝐭𝐨𝐫𝐬.
- 𝐇𝐢𝐠𝐡-𝐄𝐟𝐟𝐢𝐜𝐢𝐞𝐧𝐜𝐲 Renogy Solar Power Controller: 𝐈𝐧𝐝𝐮𝐬𝐭𝐫𝐲-𝐋𝐞𝐚𝐝𝐢𝐧𝐠 <𝟏𝟎𝐦𝐀 𝐒𝐞𝐥𝐟-𝐂𝐨𝐧𝐬𝐮𝐦𝐩𝐭𝐢𝐨𝐧, unlike standard charge controllers that drain your batteries, our Wanderer 10A Controller ultra-low power design maximizes every watt from your solar panels. Renogy Renewable energy controllers compact size (𝟓.𝟐×𝟑.𝟏 𝐢𝐧𝐜𝐡𝐞𝐬) fits perfectly in RV electrical cabinets or marine control panels. With IP32 waterproof rating, this solar controller withstands 𝐡𝐚𝐫𝐬𝐡 𝐨𝐮𝐭𝐝𝐨𝐨𝐫 𝐜𝐨𝐧𝐝𝐢𝐭𝐢𝐨𝐧𝐬 while maintaining optimal performance.
- 𝐕𝐞𝐫𝐬𝐚𝐭𝐢𝐥𝐞 Solar Charge Controller : Universal 12V/24V Battery Compatibility, whether you need a solar controller for lithium batteries (𝐰𝐢𝐭𝐡 𝐦𝐚𝐧𝐮𝐚𝐥 𝐚𝐜𝐭𝐢𝐯𝐚𝐭𝐢𝐨𝐧 𝐬𝐞𝐭𝐭𝐢𝐧𝐠𝐬) or traditional AGM/Gel systems delivers precise charging for all types. Lithium solar charge controller has rugged construction &𝐰𝐢𝐝𝐞 𝐨𝐩𝐞𝐫𝐚𝐭𝐢𝐧𝐠 𝐭𝐞𝐦𝐩𝐞𝐫𝐚𝐭𝐮𝐫𝐞 𝐫𝐚𝐧𝐠𝐞 make the go-to choice for professional solar installations and DIY off-grid projects alike.
- 𝐒𝐦𝐚𝐫𝐭 𝐌𝐨𝐧𝐢𝐭𝐨𝐫𝐢𝐧𝐠 Renogy Charge Controller: 𝐑𝐞𝐚𝐥-𝐓𝐢𝐦𝐞 𝐃𝐚𝐭𝐚 𝐓𝐫𝐚𝐜𝐤𝐢𝐧𝐠 & 𝐔𝐒𝐁 𝐂𝐡𝐚𝐫𝐠𝐢𝐧𝐠, upgrade your solar power controller with our backlit LCD that clearly displays voltage, current, and system status. The integrated RS232 port connects to Renogy's DC Home App via BT-1 Bluetooth module(𝐬𝐨𝐥𝐝 𝐬𝐞𝐩𝐚𝐫𝐚𝐭𝐞𝐥𝐲) for remote monitoring. 𝟓𝐕/𝟐𝐀 𝐔𝐒𝐁 𝐩𝐨𝐫𝐭 lets you charge phones/tablets directly - a must-have feature for 12V solar charge controllers used in off-grid living.
Choose the battery chemistry first
“12V battery” describes nominal voltage, not charging requirements. The example thresholds in this article are for a conventional 12V lead-acid system, subject to the battery manufacturer’s specification.
| Battery type | Can this design be used unchanged? | Reason |
|---|---|---|
| SLA/VRLA lead-acid | Only with the manufacturer’s limits | Cycle and float voltages vary by model and temperature. |
| AGM lead-acid | Only with the manufacturer’s limits | It may require different absorption, float, and temperature settings. |
| Gel lead-acid | Do not assume compatibility | Overvoltage can permanently damage the gel electrolyte. |
| Flooded lead-acid | Only with an appropriate charger | Ventilation, electrolyte maintenance, and possible equalization matter. |
| 3-series lithium-ion | No | It requires a chemistry-specific charger, cell monitoring, and protection. |
| 4-series LiFePO4 | No | It requires a LiFePO4 charging profile and suitable BMS. |
For one cited 12V lead-acid product family, Power-Sonic specifies approximately 14.1–14.7V for cyclic charging and 13.5–13.8V for float service at 20°C. Those figures are not universal; use the data sheet for the exact battery.
Do these 3 things before closing this tab:
1Repair Windows errors before they cause bigger problems2Scan for outdated or missing drivers - takes under a minute3Clear out junk files and repair common Windows errorsRecommended system arrangement
DC charger positive -- fuse -- relay contact or MOSFET -- battery positive
DC charger negative ------------------------------- battery negative
                                                        |
                                             controller ground

Battery positive -- resistor divider -- ATmega328P ADC input
Measure as close as practical to the battery terminals. Measuring on the charger side of a relay or at the end of a long cable can include voltage drop and produce a misleading cutoff point.
For a first prototype, keep the switched circuit at the charger’s low-voltage DC output. Do not use a beginner relay circuit to switch mains casually. AC mains switching requires appropriate isolation, creepage and clearance, fusing, enclosure, strain relief, and compliance with local electrical requirements.
Parts list
Required
- Arduino Uno Rev3 for the easiest prototype, or an ATmega328P on a custom board.
- 5V regulated supply for the controller and relay, preferably from an efficient buck converter.
- 10kΩ resistor from battery positive to the ADC node.
- 3.3kΩ resistor from the ADC node to controller ground.
- 5V relay with contacts rated for the charger output current, voltage, inrush, and load type—or a correctly designed logic-level MOSFET switch.
- BC547 or another suitably rated transistor for the relay coil.
- 1kΩ base resistor.
- 1N4007 flyback diode across the relay coil.
- Battery-side fuse, reverse-polarity protection, wiring, connectors, and decoupling capacitors.
Optional
- 16×2 LCD using the Arduino
LiquidCrystallibrary. - Small capacitor from the ADC node to ground for noise filtering.
- Temperature sensor positioned to measure battery temperature.
- Hardware comparator or independent overvoltage cutoff.
- Manual service disconnect and status LED.
Voltage-divider design
The divider protects the ADC by scaling the battery voltage:
Vadc = Vbattery × R2 / (R1 + R2)
Vbattery = ADC reading × Vref / 1023 × (R1 + R2) / R2
With R1 = 10kΩ and R2 = 3.3kΩ:
Divider multiplier = (10,000 + 3,300) / 3,300 ≈ 4.03
At 14.4V battery voltage: Vadc ≈ 14.4 / 4.03 ≈ 3.57V
That is below a nominal 5V ADC reference. The divider must nevertheless be checked for charger transients, wiring errors, resistor failure, and the highest voltage that can actually appear in the system. Add input protection where appropriate, and use 1% resistors when the cutoff voltage matters.
Also popular on Amazon

- 【UPGRADED SOLAR CONTROLLER】This solar charge controller helps you manage the working of solar panels and batteries in solar systems automatically with the build-in industrial microcontroller. You don't need to reset it when the battery runs out cause it will memorize various parameters set by the user
- 【WIDE COMPATIBILITY BY AUTOMATIC ADAPTATION】Compatible with 12V and 24V systems (automatic adaptation, depends on your systems's voltage, no manual adjustments required). A little amplitude voltage deviation is normal. You can also charge your mobile phone, tablet, and PC through the Dual USB output 5V/2.5A (max)
- 【COMPATIBLE BATTERY TYPE】This solar controller is ONLY suitable for various Lead-acid batteries (including open, sealed, colloid, etc.) Please DO NOT charge to lithium or nickel-metal hydride batteries, etc. Auto-recognizing battery voltage function can protect the battery from misuse and better control the charging process. Note: When installing the controller for the first time, please ensure the battery is fully charged to recognize the battery type correctly
- 【SAFE TO USE】With Intelligent protection against overcurrent, short-circuit, open-circuit, inverse, low voltage, and overcharge, all of which are automatic recovery types, do not damage the controller. It also has a dual MOS anti-backflow circuit and low heat. This 30A solar charge controller will help you improve the system efficiency and prolong the battery life. But still note to install the controller on a flat, well-ventilated surface
- 【LCD DISPLAY】Let you know the working status and data with the LCD. The regulator equips load time control and a manual setting function, so you can switch modes and configure parameters conveniently. A good choice for use at home, industrial, commercial, etc. See the instruction manual for specific parameter settings and adjustment methods
The ATmega328P has a 10-bit ADC, so its code ranges from 0 to 1023. It supports AVCC, an internal nominal 1.1V reference, and an external AREF reference. Using 5.0 in software assumes the 5V rail is exactly 5.000V. Measure the real rail with a trusted multimeter, use a precision reference, or apply a calibration factor. If switching to the internal reference, discard the first conversion after changing the reference because it may be inaccurate.
Battery thresholds: cutoff is not full-charge detection
| Function | Illustrative value | Qualification |
|---|---|---|
| Lead-acid cycle-charge range | 14.1–14.7V at 20°C | Example range from one battery family; follow the exact manufacturer data. |
| Example upper cutoff | 14.4V | A plausible absorption/cutoff value for some lead-acid applications. |
| Lead-acid float range | 13.5–13.8V at 20°C | Float charging is a different operating mode, not simply repeated cutoff. |
| Illustrative restart | 12.8–13.0V | Must be validated for the battery, load, and charger. |
| Original project example | 10.8V | Project-specific; not a general charging restart recommendation. |
Voltage changes with charging current, temperature, cable resistance, surface charge, battery age, state of health, and connected loads. Consequently, “battery full” is too strong a description for a voltage-only decision. A more accurate status is cutoff threshold reached.
Do not confuse the restart threshold with a low-battery load disconnect. A 10.8V reading may indicate severe discharge under load. Waiting for that voltage before restarting can leave a battery deeply discharged. Conversely, a restart value set too high can cause frequent charge cycling. Select both values from the battery documentation and validate them under the real load and charging conditions.
Relay driver circuit
ATmega328P output pin -- 1kΩ -- BC547 base
BC547 emitter ------------------ GND
BC547 collector ---------------- relay coil negative
Relay coil positive ------------ regulated 5V
1N4007 cathode ----------------- relay coil positive
1N4007 anode ------------------- relay coil negative
The ATmega328P must not power a relay coil directly. Confirm the relay coil voltage and current, transistor ratings, base drive, and contact ratings. The contacts must handle the charger’s maximum DC voltage and current, including inrush and inductive effects. Decide whether normally-open or normally-closed contacts produce the safer failure state.
A MOSFET can be preferable for low-voltage DC: it is silent, efficient, and has no contact wear. It requires correct polarity, gate drive, heat management, and attention to body-diode behavior. A failed MOSFET may fail short, so it is not automatically a fail-safe replacement.
Power supply and protection
If an L7805 linear regulator is fed from a 12–15V source, its heat is approximately:
Also popular on Amazon

- 12V Universal Solar Charge Controller- Renogy Solar controller optimizes charging for 𝐋𝐢𝐭𝐡𝐢𝐮𝐦, 𝐀𝐆𝐌, 𝐆𝐞𝐥, & 𝐅𝐥𝐨𝐨𝐝𝐞𝐝 𝐛𝐚𝐭𝐭𝐞𝐫𝐢𝐞𝐬. Smart PWM solar panel controller technology auto-selects the perfect charging curve (𝐁𝐮𝐥𝐤/𝐁𝐨𝐨𝐬𝐭/ 𝐅𝐥𝐨𝐚𝐭/ 𝐄𝐪𝐮𝐚𝐥𝐢𝐳𝐚𝐭𝐢𝐨𝐧) for your RV, boat, or off-grid setup. Renewable energy controllers easily switch battery types and monitor real-time charging stages via intuitive LEDs, mmaximizing battery lifespan.
- 𝟒-𝐒𝐭𝐚𝐠𝐞 PWM Charging Controller 𝐰𝐢𝐭𝐡 𝐅𝐮𝐥𝐥 𝐏𝐫𝐨𝐭𝐞𝐜𝐭𝐢𝐨𝐧- Lithium solar charge controller 12v maximize performance with 30A Bulk Charge (80% fast charging), Boost Charge (120-minute voltage stabilization), Float Charge (micro-current maintenance), and auto Equalization. Built-in safeguards prevent reverse polarity, overcharging, overload, and short circuits—ideal charge controllers for Renogy solar panels in harsh climates.
- 𝐔𝐥𝐭𝐫𝐚-𝐂𝐨𝐦𝐩𝐚𝐜𝐭 & 𝐖𝐚𝐭𝐞𝐫𝐩𝐫𝐨𝐨𝐟 Solar Controller- Fits tight spaces (𝟓.𝟓”𝐱𝟑.𝟗”𝐱𝟏.𝟖”) in RV panels or marine compartments. Solar PWM charge controller has IP32-rated waterproof casing and corrosion-resistant materials ensure durability. 𝐓𝐨𝐨𝐥-𝐟𝐫𝐞𝐞 𝐃𝐈𝐍 rail or wall mounting makes this 30A solar panel charger ideal for outdoor use.
- Smart 12V Solar Controller with 𝐰𝐢𝐭𝐡 𝐌𝐮𝐥𝐭𝐢-𝐁𝐚𝐭𝐭𝐞𝐫𝐲 𝐒𝐮𝐩𝐩𝐨𝐫𝐭- Engineered as Renogy's ultimate RV solar charge controller and off-grid solar power controller, this precision 12V controller delivers chemistry-specific optimization for LiFePO4, AGM, gel, and flooded batteries. For climate resilience, activate temperature compensation (-𝟒°𝐅 𝐭𝐨 𝟏𝟒𝟎°𝐅) by adding the 𝐁𝐓-𝟏 𝐦𝐨𝐝𝐮𝐥𝐞 preventing winter undercharge and summer overvoltage in your LiFePO4 solar charge controller setup.
- Smart Renogy Controller Monitoring Real-Time Bluetooth Intelligence- Unlock advanced solar charger capabilities by pairing the 𝐁𝐓-𝟏 𝐦𝐨𝐝𝐮𝐥𝐞 (𝐬𝐨𝐥𝐝 𝐬𝐞𝐩𝐚𝐫𝐚𝐭𝐞𝐥𝐲). Monitor solar input, battery SOC, and fault alerts via the DC Home App – transforming your Renogy solar charge controller into a smart solar power controller for off-grid systems. Experience next-level control beyond conventional RV solar charge controllers.
Pheat ≈ (Vin − 5V) × IloadThat can become significant when the MCU, LCD, relay, and indicators run continuously. A buck converter usually wastes less power, although its switching noise may require careful ADC routing and filtering.
- Place a fuse close to the battery positive terminal.
- Add reverse-polarity protection before the divider and switching hardware.
- Use local bypass capacitors at the ATmega328P and relay supply.
- Keep high-current charger wiring separate from the ADC trace.
- Provide a manual disconnect for servicing.
- Where unattended operation matters, add an independent hardware overvoltage cutoff or use a certified charger.
Improved ATmega328P firmware
This example averages 16 samples, uses hysteresis, starts with charging disabled, rejects implausible readings, and makes the relay polarity explicit. It is a design example, not a verified drop-in implementation for every schematic.
Quick wins for a faster PC:
Fix the driver behind crashes, sound loss and screen glitchesFind Drivers →Clear out junk files and repair common Windows errorsFree Scan →#include <avr/wdt.h>
const uint8_t relayPin = 12;
const uint8_t sensePin = A0;
const bool relayActiveHigh = true;
const float cutoffVoltage = 14.40;
const float restartVoltage = 13.00;
const float vref = 5.00; // Replace with measured/calibrated value
const float dividerRatio = (10000.0 + 3300.0) / 3300.0;
bool chargingEnabled = false;
void setCharger(bool enabled) {
chargingEnabled = enabled;
bool pinState = relayActiveHigh ? enabled : !enabled;
digitalWrite(relayPin, pinState ? HIGH : LOW);
}
float readBatteryVoltage() {
const uint8_t samples = 16;
uint32_t total = 0;
for (uint8_t i = 0; i < samples; i++) {
total += analogRead(sensePin);
delay(2);
}
float adc = total / (float)samples;
return adc * vref / 1023.0 * dividerRatio;
}
void setup() {
pinMode(relayPin, OUTPUT);
setCharger(false); // Safe startup state
analogReference(DEFAULT);
delay(100); // Allow reference and input to settle
wdt_enable(WDTO_4S);
}
void loop() {
wdt_reset();
float batteryVoltage = readBatteryVoltage();
if (batteryVoltage < 0.5 || batteryVoltage > 18.0) {
setCharger(false); // Battery/sensor fault: do not charge
} else if (chargingEnabled && batteryVoltage >= cutoffVoltage) {
setCharger(false);
} else if (!chargingEnabled && batteryVoltage <= restartVoltage) {
setCharger(true);
}
delay(1000);
}The original project uses A0, relay pin 12, 10kΩ/3.3kΩ divider values, a 14.4V cutoff, a 10.8V low/restart value, and a one-second loop. The improved example deliberately uses a battery-specific-looking restart value only as an illustration. Change it after consulting the battery data sheet.
For a finished controller, replace blocking delays with timed sampling, require the voltage to remain above or below a threshold for a defined period, and display a distinct sensor-fault state. Add a hardware pull-up or pull-down so the relay driver remains disabled while the MCU is resetting. The ATmega328P watchdog, with selectable timeouts up to 8 seconds, can recover from firmware lockups—but it cannot repair welded relay contacts or failed power hardware.
Independent reader supportYour contribution helps us test, update, and keep practical guides available for everyone.LCD status
A 16×2 LCD is useful during development but is not required for control. It might display:
Battery: 13.72 V
Status: CHARGING

Battery: 14.41 V
Status: CUT OFF
Omitting the LCD reduces wiring, power consumption, and software complexity. A status LED and serial output may be sufficient for a workshop prototype.
The Tool Desk
Outbyte PC Repair FREEClear out junk files and repair common Windows errorsFree Scan →Outbyte Driver Updater FREEScan for outdated or missing drivers - takes under a minuteDriver Scan →Also popular on Amazon

- [100% Waterproof] The solar charge controller is built to last in any weather. It has a waterproof seal that keeps it safe from rain, snow, and dust. It’s perfect for outdoor use.
- [Strong Safety Protection] This solar controller has six safety features to protect your battery and prevent any accidents. It can prevent reverse current, overheating, short circuit, overcharging, over-voltage, and reverse polarity. You can charge your battery with peace of mind.
- [Intteligent LED Display] SOLPERK solar charge controller 12v has two LED lights that show you the charging status. You can easily see if the battery is charging or fully charged.
- [Zero Consumption from Battery] This solar panel controller uses solar power to charge your battery, and it doesn’t drain your battery at night. It has zero power consumption when there is no sunlight.
- [Compatibility] This solar panel charge controller is designed for 12V solar panels with a maximum current of 8A, and 12V rechargeable batteries. It works with 12V batteries such as LiFePO₄, AGM, GEL, and more.
Assembly, calibration, and testing
- Prototype the firmware on an Arduino Uno. The Uno provides the ATmega328P, 5V operation, USB programming, 16MHz clock, and six 10-bit analog inputs.
- Build only the sensing circuit first. Power the controller from a current-limited supply and verify that the ADC node never exceeds the reference.
- Calibrate the divider. With the charger disconnected, measure battery-terminal voltage using a trusted multimeter and compare it with the displayed or serial value.
- Adjust the calibration constant. Correct
vrefor apply a multiplier, then verify at a second voltage near the intended cutoff. - Test with a bench supply or safe substitute. Sweep slowly through the restart and cutoff thresholds before connecting a battery.
- Test the relay without a live high-current load. Confirm that the chosen contact is open when charging is disabled and that reset leaves it in the safe state.
- Connect the charger and battery only after verification. Use the fuse and confirm polarity.
- Repeat with charger ripple and the intended load. Check that filtering prevents chatter and that the voltage at the battery terminals—not merely at the charger—is being used.
Useful fault tests include a disconnected divider wire, missing battery, power interruption, charger removal, reverse-polarity protection, and a simulated sensor reading outside the valid range. The recommended response to an invalid or missing measurement is to disable charging, not to guess that the battery needs charging.
Limitations and safer alternatives
A relay cutoff can reduce the risk of continued charging above a programmed voltage when the electronics, relay, charger, and battery are all functioning correctly. It cannot guarantee protection against a welded contact, failed transistor, drifting reference, excessive charger current, high battery temperature, or incorrect chemistry.
Use a dedicated charger or charge-controller IC when the system needs controlled current, bulk/absorption/float stages, storage mode, temperature compensation, fault handling, or dependable unattended operation. Commercial multi-stage chargers such as the Victron Phoenix Charger illustrate the difference: they manage charging stages rather than simply opening a relay at one voltage.
For learning, an Arduino Uno Rev3 is the simplest route. For a custom board, a bare ATmega328P reduces size and cost but requires its own clock, reset circuit, decoupling, programming connector, and power design. Microchip currently marks the ATmega328P as “Not Recommended for new designs,” so a new commercial product should evaluate current AVR or other MCU alternatives before committing.
Final design position
This project is best treated as an educational supervisory controller for one specified 12V lead-acid battery and one suitable current-limited charger. Use the battery manufacturer’s voltage and temperature limits, calibrate the measurement, implement hysteresis and fault lockout, fuse the battery connection, and keep the beginner version on the low-voltage DC side. If the requirement is a reliable charger rather than a demonstration of voltage-controlled switching, choose a battery-specific commercial charger or dedicated charge-controller architecture.
Reference material: matching ATmega328P project, Microchip ATmega328P documentation, AVR ADC reference guidance, Power-Sonic battery specifications, and Victron charging-stage information.
Quick Recap
Product prices and availability are accurate as of the date/time indicated and are subject to change. Any price and availability information displayed on Amazon at the time of purchase will apply.

