Yes—you can paint many countertops. Laminate, Formica, ceramic tile, porcelain tile, wood, vinyl, concrete, and some previously coated surfaces can be good candidates for a budget-friendly makeover. But this is not the same as brushing ordinary wall paint over the counter. A durable result requires the right coating system, thorough degreasing, an adhesion test, a protective topcoat, and enough time to cure.
The safest rule is to choose the product based on the countertop’s substrate—not its color or appearance—and follow that product’s label over any general online tutorial. Painting valuable granite, marble, quartz, or other high-end stone is a much riskier decision and is usually better approached as professional refinishing or replacement.
As an Amazon Associate I earn from qualifying purchases.
What countertop painting actually involves
A painted countertop is generally a coating system, not a single coat of decorative paint. Depending on the product, the system may include:
Quick wins for a faster PC:
Scan for outdated or missing drivers - takes under a minuteDriver Scan →Repair Windows errors before they cause bigger problemsFix Now →- A cleaner and degreaser.
- An adhesion-promoting basecoat or primer.
- Optional decorative flecks, veining, or faux-stone effects.
- A clear protective topcoat.
- A waiting period for drying and full curing.
Purpose-built countertop products are formulated for more exposure to moisture, staining, cleaning, and everyday wear than ordinary interior wall paint. Rust-Oleum explains the distinction between wall paint and countertop coating and recommends using a countertop system with a basecoat and protective topcoat rather than relying on standard wall paint alone. Learn more about countertop paint from Rust-Oleum.
#1 Best Overall

- Transform the look of outdated countertops with a faux marble kit
- Easy 3-step application uses ultra white base coat, gray veining paint, and satin top coat
- Countertop coating kit covers 75-100 sq. ft. per kit; ready for full use after 24 hours
- No stripping, sanding, or priming required for a complete countertop refresh
- Satin sheen offers maximum wear and stain resistance with Life Tested protection
For example, Rust-Oleum HOME is a two-step system consisting of a basecoat and topcoat. Its technical documentation describes a kit containing the basecoat, satin topcoat, heavy-duty cleaner, and, in the marble version, veining paint. Beyond Paint’s process uses a first coat, decorative flecks, a second coat, light sanding with 320-grit paper, and two or three light sealer coats. Those processes are not interchangeable, so use the instructions for the exact product you buy.
Should you paint your countertop?
Painting makes the most sense when the existing counter is structurally sound but visually dated. It can change the color and appearance of a serviceable surface without the cost, demolition, and installation work associated with replacement.
It is a poor choice when the countertop is swollen, loose, cracked, moving, or exposed to an unresolved plumbing problem. Coating can hide a cosmetic flaw; it cannot repair a failing substrate. Before buying supplies, use this decision check:
Free tools Windows power users keep installed
One-click scans. No signup required.
- Good DIY candidate: sound laminate or tile with no active leaks and manageable wear.
- Possible with careful product matching: wood, butcher block, vinyl, concrete, or a previously sealed/coated surface.
- High-risk candidate: valuable natural stone, quartz, severe damage, loose tile, swollen particleboard, or a heavily used food-preparation surface.
- Stop and repair first: failing caulk, water intrusion, loose laminate edges, damaged seams, or plumbing leaks.
Which countertop surfaces can be painted?
Laminate and Formica
Laminate is usually the most practical countertop for a first DIY coating project. It is common, relatively uniform, and less costly to replace if the finish does not meet expectations. Formica is a brand of laminate, so the same general preparation principles apply.
Thorough degreasing is essential. Cooking oils, wax, polish, and residue can remain even when the surface looks clean. Sherwin-Williams recommends carefully cleaning laminate, using light sanding and bonding primer where appropriate, applying multiple thin coats, and protecting the finished surface with a compatible sealer in a conventional paint workflow. See Sherwin-Williams’ countertop painting guidance.
Some newer kits advertise that sanding and priming are not normally required. That does not mean preparation can be skipped. For example, Rust-Oleum HOME calls for a small adhesion test. If more than 10% of the test coating is removed in its crosshatch-and-duct-tape test, the surface must be sanded with 60- to 80-grit paper before proceeding.
Ceramic and porcelain tile
Tile can be painted, but it is more demanding than laminate because the glaze is smooth and the grout creates joints where water, dirt, and coating buildup can become problems.
What’s actually slowing this PC down?
Pick the symptom - the matching free tool is one click away.
Clean the grout lines as carefully as the tile faces. Depending on the product, lightly scuff the tile and apply a primer made for ceramic or porcelain. Purpose-built countertop kits may use a different process, so their label controls. Pay particular attention to the sink perimeter, backsplash transition, grout lines, exposed edges, and caulk joints.
Existing silicone caulk should be removed before coating. Recaulk only after the coating has cured as directed and the manufacturer’s instructions permit it. Painting over failing or silicone-contaminated joints is a common route to early peeling.
Wood and butcher block
Wood and butcher block can be coated with some specialized systems, but wood moves with changes in moisture. End grain, sink cutouts, seams, and exposed edges deserve extra attention.
A decorative countertop coating is not automatically a cutting-board finish. If the surface is used for direct food preparation or cutting, verify the product’s food-contact documentation rather than assuming that “washable,” “water-resistant,” or “countertop” means food-safe. In practice, use a separate cutting board and do not cut directly on a painted surface.
Outdated Drivers Are Slowing You Down
One free scan finds every outdated or missing driver and matches the right update for your exact hardware.Free scan · exact hardware matchPC Slower Than It Used to Be?
A free scan shows the junk files, broken settings and background clutter dragging Windows down - then fixes them in one click.Free scan · Windows 10 & 11Vinyl, concrete, and previously coated counters
Some products list vinyl, concrete, sealed surfaces, and previously coated countertops as compatible. Compatibility depends on what is already on the surface. Old paint, sealer, wax, silicone, grease, and incompatible coatings can prevent bonding.
Rank #2
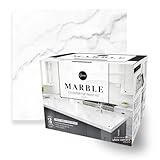
- Giani Countertop Paint is a simple, three-step application that will transform Formica, laminate, Corian, ceramic tile, butcher block, cultured marble, and traditional granite in a single weekend.
- Each kit contains all necessary tools and covers 35 square feet of surface, which is the average amount of countertop area in a kitchen.
- The updated Giani Marble Kit comes with a NEW extra-durable, high-gloss Epoxy Resin Topcoat that finishes and protects the application against the everyday use of your countertops.
- Giani Countertop Paint is safe for interior use, very low odor, and zero VOC. The specialized primer hides existing discoloration, burns, stains, and minor scratches, while the mineral colors create the characteristics of marbled quartz
- AVAILABLE AND IMPROVED! Giani Marble now includes our brand new Giani Epoxy Resin Topcoat for an even more durable and glossy finish. Stain and water-resistant and as tough as engineered quartz, this second generation of our countertop paint kit will help you remake your kitchen into the space you’ve always dreamed of.
Test a hidden area before committing to the whole counter. If the coating fails the manufacturer’s adhesion test, do not assume that an additional decorative coat will solve the problem; correct the preparation issue first.
Granite, marble, quartz, and other stone
Natural stone is where a qualified “yes” becomes a strong caution. Rust-Oleum’s consumer guidance advises against painting porous natural stone such as marble and granite. Sherwin-Williams also describes painting granite and quartz as generally inadvisable because of the material’s value, preparation demands, and possible effect on resale appeal.
A faux-stone coating can imitate the look of stone, but it is not the same as refinishing the original stone. Painting an intact, valuable granite, marble, quartz, or similar surface can reduce its repairability and may diminish the appeal of the original material. Confirm compatibility with the exact manufacturer before proceeding, and consider professional refinishing or replacement if failure would be expensive.
Supplies and product choices
For a dedicated kit, start with the manufacturer’s required materials rather than assembling unrelated products. A typical project may need:
- countertop paint kit with a compatible basecoat and topcoat.
- countertop cleaner-degreaser.
- painter’s tape, plastic sheeting, and drop cloths.
- A high-quality brush and the roller covers specified by the product.
- Sandpaper in the grit required by the label or adhesion test.
- Gloves and eye protection specified by the label and Safety Data Sheet.
- A cutting board and heat-resistant trivet for protecting the cured finish.
Do not substitute a random clear coat simply because it is labeled polyurethane or epoxy. The topcoat must be compatible with the basecoat and suitable for the intended use. If using a conventional primer-and-paint approach, verify compatibility among the substrate, bonding primer, paint, and sealer. Sherwin-Williams presents this route as a customizable option, but it requires more product matching than a dedicated kit.
How the main options compare
| System | Best fit | Important limitations |
|---|---|---|
| Rust-Oleum HOME Countertop Coating | Beginners wanting a purpose-built two-step system with broad stated compatibility. | Cleaning and adhesion testing are still required. If the test fails, sanding may be necessary. The white tint base requires two base coats when used ultra-white, according to the manufacturer. |
| Rust-Oleum Specialty Countertop Coating | Renewing laminate and certain cabinets, furniture, vinyl tile, wood, or metal surfaces. | Do not confuse it with the newer HOME two-step system. The manufacturer states that a 29-ounce can covers approximately 25 linear feet of an average countertop and recommends at least three days of drying before use. |
| Beyond Paint Countertop Makeover Kit | DIYers who want a decorative fleck finish. | The stated process includes two coats, light sanding with 320-grit paper to remove excess flecks, and two or three light sealer coats. Coverage is listed at approximately 50 square feet for a kit, but check the exact color and SKU. |
| Conventional primer-and-paint workflow | Experienced DIYers who want more control over color and product selection. | Requires careful substrate matching, multiple coats, and a compatible protective sealer. No generic polyurethane should be assumed to be food-safe. |
If you want the simplest path, a Rust-Oleum HOME Countertop Coating or another purpose-built kit is generally more foolproof than combining ordinary paint products. Availability, colors, coverage, and cure times vary by product and location, so verify the current label before purchase.
How to paint a countertop: the reliable workflow
1. Identify the substrate and inspect the damage
Determine whether you have laminate, tile, wood, concrete, vinyl, stone, or an existing coating. Check the front edge, sink cutout, backsplash, seams, and underside of exposed edges.
Repair or replace loose laminate, swollen particleboard, loose tiles, badly damaged edges, and failing caulk. Fix active leaks before coating. Paint is not a structural repair and will not stabilize a substrate that is moving or absorbing water.
2. Clear and protect the work area
Remove appliances and objects from the counter. Take off hardware where practical; otherwise tape faucets and fixtures carefully. Cover cabinets, appliances, backsplash areas, and flooring with appropriate plastic or drop cloths.
Rank #3

- Transform the look of outdated countertops with a faux marble kit
- Easy 3-step application uses ultra white base coat, gray veining paint, and satin top coat
- Countertop coating kit covers 75-100 sq. ft. per kit; ready for full use after 24 hours
- No stripping, sanding, or priming required for a complete countertop refresh
- Satin sheen offers maximum wear and stain resistance with Life Tested protection
Open windows and maintain steady room conditions while working. A clean, controlled work area reduces dust and helps the coating level properly. Keep children and pets out of the room.
3. Clean and degrease thoroughly
Use the cleaner specified by the coating manufacturer. Scrub the entire surface, including front edges, seams, corners, grout lines, backsplash transitions, and the area around the sink. Rinse away cleaner residue if the instructions require it, then allow the counter to dry completely.
Recommended Free Tools
Inadequate preparation is one of the main causes of poor adhesion. A counter that feels clean to the touch can still contain enough grease or polish to interfere with bonding.
4. Run the adhesion test
Use the manufacturer’s test procedure. As a specific example, the Rust-Oleum HOME technical data sheet calls for a 3-by-3-inch inconspicuous test area, a 12-hour drying period, an X cut through the coating, and a duct-tape pull test. If more than 10% of the coating is removed, sand the surface with 60- to 80-grit paper before full application.
Let the result—not the phrase “no sanding required”—determine whether additional preparation is needed.
5. Sand or prime only as directed
Do not apply one universal sanding routine to every countertop. Some systems are designed to go over a properly cleaned surface without sanding or priming. Others require scuffing or a bonding primer.
For comparison, conventional Sherwin-Williams guidance discusses approximately 220-grit sanding for laminate and 120-grit scuffing for tile, while Rust-Oleum HOME specifies 60- to 80-grit sanding if its adhesion test fails. These are product-specific instructions, not a general rule. Follow the label for your system.
Lead warning: If sanding or scraping an older painted surface, investigate lead-paint risk first. EPA recommends considering lead evaluation in homes built before 1978. Rust-Oleum warns that disturbing old paint can release lead dust and recommends appropriate respiratory protection and HEPA or wet cleanup methods. Do not dry-sweep or blow contaminated dust around the room.
6. Apply thin, controlled coats
Brush edges and corners, then use the roller size specified by the product. Rust-Oleum HOME calls for a 3/8-inch-nap roller for the basecoat and a 1/4-inch-nap roller for the topcoat. For conventional workflows, several thin coats with a maintained wet edge generally produce a better result than one heavy coat.
Do not keep brushing or rolling after the coating begins to set. Watch the front edge for drips, the sink area for pooling, and the roller for excess material that can leave texture. If the product uses decorative flecks or veining, apply them only during the specified wet window.
The Tool Desk
Outbyte Driver Updater FREEFix the driver behind crashes, sound loss and screen glitchesFind Drivers →Outbyte PC Repair FREERepair Windows errors before they cause bigger problemsFix Now →Rank #4
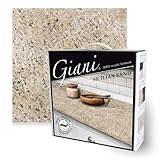
- 3 simple steps that will transform Formica, laminate, Corian, ceramic tile, butcher block, cultured marble, and traditional granite in a single weekend.
- Authentic granite finish offered in 5 contemporary colors, that cover 35 sq. ft. or 16 running ft. of 24 in. wide countertops.
- 100% Acrylic formula - Low odor, low VOC, water-based, durable, high-gloss, food safe topcoat that lasts for years.
- Simple sponge on and roll on application that is customizable to the look of your space. Step by step detailed instructions.
- All Giani Paints and Coatings are 100% Manufactured and Packaged in the USA.
7. Apply every required topcoat
The protective topcoat is not optional when the system requires one. It contributes much of the resistance to scratches, stains, moisture, and household cleaning. Apply it in the number of coats and thickness specified by the manufacturer; do not substitute an incompatible sealer.
8. Allow the finish to cure
Dry-to-touch does not mean fully cured. Cure times vary considerably between formulations. A Rust-Oleum HOME product page says light use is possible after 24 hours, while older Rust-Oleum Specialty Countertop Coating guidance recommends at least three days of drying before use.
Do not generalize either number to every countertop kit. Use the exact product’s light-use and full-cure schedule. During that period, keep water, heavy appliances, abrasive cleaners, hot cookware, and food-preparation activity off the surface unless the label expressly permits them.
Independent reader supportYour contribution helps us test, update, and keep practical guides available for everyone.What painted countertops can—and cannot—handle
Once cured, treat the coating as a durable decorative surface, not as a slab of stone or a cutting board.
- Use a separate cutting board; never cut directly on the coating.
- Use trivets for hot pans and appliances. Do not assume the coating is heatproof because it is rated for countertops.
- Lift rather than drag heavy appliances, cookware, or small appliances.
- Use only the cleaning products permitted by the product instructions.
- Wipe standing water from sink edges and seams instead of allowing it to sit.
- Repair failed caulk and plumbing leaks promptly.
“Food-safe” is a separate claim from “washable,” “water-resistant,” or “suitable for countertops.” The available product documentation supports countertop use and resistance claims, but does not establish universal approval for direct food contact. Confirm that specific use in the manufacturer’s documentation before preparing food directly on the coating.
Ventilation and personal safety
Paints, primers, clear coats, cleaners, degreasers, and related products can release VOCs indoors. The EPA recommends plenty of fresh air and ventilation when painting or using products that may emit VOCs, and notes that low-VOC labeling alone does not prove that a product is harmless. Review the EPA’s indoor-air guidance.
Read the product label and Safety Data Sheet. Wear the specified gloves and eye protection, keep the room ventilated, and keep children and pets away. Use respiratory protection only when appropriate for the product and task; a dust mask is not automatically suitable protection against chemical vapors.
If the project involves disturbing an older coating, take lead precautions before sanding. EPA’s guidance on improving the indoor environment includes information about lead and other indoor contaminants. See EPA’s indoor-environment recommendations.
Do these 3 things before closing this tab:
1Fix the driver behind crashes, sound loss and screen glitches2Repair Windows errors before they cause bigger problems3Scan for outdated or missing drivers - takes under a minuteCommon mistakes that cause failure
- Using ordinary wall paint without a countertop-rated system or compatible protective finish.
- Skipping degreasing because the counter appears clean.
- Painting over silicone caulk, loose laminate, failing grout, or an active leak.
- Assuming “no sanding” means no adhesion test.
- Applying one thick coat instead of several controlled coats.
- Omitting the required topcoat or substituting a sealer that has not been approved for the system.
- Using the countertop before the stated cure period.
- Cutting directly on the finish or placing hot cookware on it.
- Assuming a coating approved for laminate is automatically approved for stone, tile, wood, or every other substrate.
- Treating “low VOC” as a substitute for ventilation and label compliance.
When hiring a professional makes more sense
Consider professional help when the counter is valuable natural stone, has severe structural damage, includes complicated sink or backsplash transitions, or will receive unusually heavy heat, abrasion, or commercial-style use. A professional may also be the better choice if the surface contains an unknown old coating or if you cannot keep the kitchen unused for the required cure period.
Best Value

- Luxurious Aesthetic: Emulates the high-end look of white quartz with a glassy sheen, ideal for adding a touch of elegance to both traditional and contemporary spaces.
- Easy Transformation: A simple three-step process designed to revitalize Formica, laminate, Corian, butcher block, cultured marble, and traditional granite countertops in just one weekend.
- Comprehensive Kit: Comes with all necessary components, including primer, epoxy resin, rollers, brushes, and more, sufficient to cover up to 35 square feet of countertop space.
- Safe and Low Odor: Formulated for safe indoor use with very low odor and zero VOCs, ensuring a comfortable and eco-friendly application process.
- Durable and Protective Finish: Includes a high-gloss, crystal clear Epoxy Resin Topcoat that not only enhances the finish but also provides long-lasting protection against daily wear and tear.
Before hiring anyone, ask which preparation method and coating system they use, how they handle sink edges and caulk, what the warranty excludes, how long the counter must remain unused, and whether they have experience with your exact substrate. Do not accept a generic promise that the finish is “permanent” or “food-safe” without supporting documentation.
Frequently Asked Questions
Can I paint laminate or Formica countertops?
Usually, yes. Laminate is one of the more practical countertop substrates for painting. Clean and degrease it thoroughly, perform the selected product’s adhesion test, sand or prime only as directed, and use the complete basecoat-and-topcoat system.
Do painted countertops last?
They can provide a useful cosmetic update when properly prepared and protected, but they are still coated surfaces. Their longevity depends on the substrate, product, cure time, moisture exposure, heat, cleaning, and impact. Use cutting boards and trivets and avoid abrasive cleaners.
Free tools Windows power users keep installed
One-click scans. No signup required.
Can I use regular wall paint on a countertop?
It is not the preferred approach. Ordinary wall paint is not designed for the same wear, moisture, staining, and cleaning exposure. A purpose-built countertop system is generally the more reliable choice for a beginner.
How long before I can use a painted countertop?
It varies by formulation. One Rust-Oleum HOME product page states light use after 24 hours, while older Rust-Oleum Specialty guidance recommends at least three days of drying. Follow the exact product label and distinguish light use from full cure.
Is a painted countertop safe for direct food preparation?
Do not assume so. Countertop use, washability, and water resistance do not automatically establish direct food-contact approval. Verify the manufacturer’s specific documentation and use a separate cutting board unless direct contact is expressly supported.
Should I paint granite, marble, or quartz?
Usually not as a beginner project. Natural stone can be valuable and difficult to prepare, and painting may reduce its original appeal and repairability. Confirm exact compatibility with the coating manufacturer or consider professional refinishing or replacement.
Quick wins for a faster PC:
Scan for outdated or missing drivers - takes under a minuteDriver Scan →Repair Windows errors before they cause bigger problemsFix Now →The Bottom Line
Bottom line: Painting is a realistic, budget-conscious update for many sound laminate and tile countertops, and some products also support wood, vinyl, concrete, and previously coated surfaces. The dependable approach is substrate-first: repair damage, degrease thoroughly, test adhesion, follow the exact coating system, apply the required topcoat, and respect the full cure schedule. Treat the finished counter gently with cutting boards, trivets, and approved cleaners—and think twice before coating valuable stone or a heavily used food-preparation surface.
Quick Recap
Product prices and availability are accurate as of the date/time indicated and are subject to change. Any price and availability information displayed on Amazon at the time of purchase will apply.

