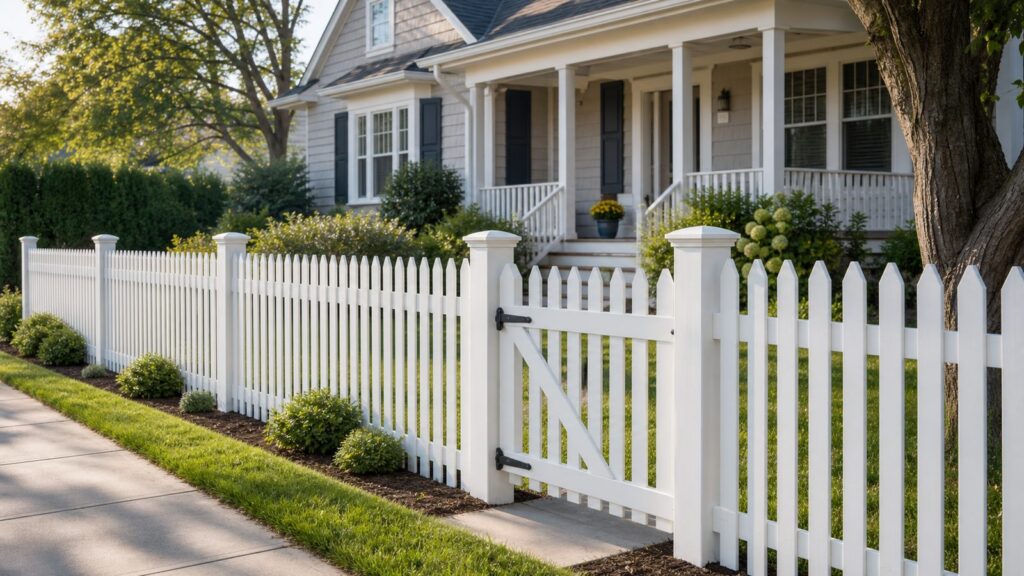
A white picket fence is still one of the most reliable ways to give a front yard structure, charm, and a clear boundary without making the property feel boxed in. The installation, however, is less forgiving than it looks. A 3- or 4-foot fence puts every crooked post, uneven picket gap, and sagging gate right at eye level from the street.
For most homes, a white picket fence costs about $2,000 to $5,000 for 100 linear feet of wood or $3,000 to $6,000 for 100 linear feet of vinyl installed in 2026. A 200-linear-foot project often lands around $4,000 to $10,000 for wood and $6,000 to $12,000 for vinyl, depending on site conditions, material quality, gates, old fence removal, and local labor rates.
As an Amazon Associate I earn from qualifying purchases.
The job itself follows a straightforward sequence: confirm the property line, check fence rules, call 811, lay out the corners and gates, set posts correctly, attach rails, install pickets, hang gates, and finish or clean the fence. The difference between a fence that looks timeless for years and one that looks tired after two seasons is in the details: post depth, drainage, alignment, fasteners, cut-end sealing, and gate reinforcement.
Quick wins for a faster PC:
Scan for outdated or missing drivers - takes under a minuteDriver Scan →Repair Windows errors before they cause bigger problemsFix Now →Start With the Look, Location, and Rules
On our job sites, we do not start a picket fence by digging holes. We start by confirming where the fence is allowed to go and what it needs to line up with visually. A picket fence is a front-yard feature, so small layout decisions affect the whole face of the property.
#1 Best Overall

- Order is for a 4-Pack of fencing, giving a total of 32 feet of fencing in length
- Made from Cedar Wood painted with a white water-based paint
- Sustainably sourced and eco-friendly
- Can be used to protect trees, plants, and flowers as they grow
- Acts as a trellis to support climbing or trailing plants
Most traditional white picket fences are 3 to 4 feet tall. That height gives a visible boundary while keeping the house, porch, landscaping, and walkway open to the street. Many cities allow lower front-yard fences more readily than taller side or rear fences because of visibility, driveway sight lines, and corner-lot safety.
Fence codes are local. Seattle, for example, generally does not require a permit for fences 8 feet or less unless certain masonry or concrete conditions apply. San Francisco states that permits are not required for front fences 3 feet or less or side and rear fences 6 feet or less. Salt Lake City is stricter and requires a building permit before construction of any fence or wall, with many front-yard fences limited to 4 feet. Those examples show why you should never assume your city follows the same rule as a neighboring town.
Before buying materials, check these items:
- Property line: Use a survey, plat, or verified boundary marker. Do not build from a mowing line, old fence, or hedge unless it has been confirmed.
- Setbacks and easements: Utility easements, drainage easements, and right-of-way areas may limit fence placement.
- Front-yard height limit: Many municipalities treat front-yard fences differently from side and rear fences.
- Corner-lot sight triangle: Fences near intersections and driveways may need to stay lower or farther back.
- HOA or historic-district approval: White picket fences are often welcome, but style, height, material, and gate details may still need approval.
- Utility locating: Contact 811 a few business days before digging. The national 811 system exists specifically for projects such as fence posts, landscaping, and other excavation work.
Photograph utility marks, layout stakes, permit approvals, and HOA approvals before construction. That documentation is useful if there is ever a question about the work later.
What’s actually slowing this PC down?
Pick the symptom - the matching free tool is one click away.
Choose the Right White Picket Fence Material
The classic version is painted wood, but many homeowners now choose white vinyl or composite because they want the look without repainting. Both can work. The right choice depends on budget, maintenance tolerance, neighborhood character, and how much repair flexibility you want later.
Painted Wood
Wood gives the most traditional appearance. Cedar, redwood, pine, and pressure-treated lumber are common options. Cedar and redwood cost more, but they resist decay better and usually hold paint well when prepared correctly. Pine and pressure-treated lumber are cheaper, but they need more attention to drying time, primer, paint quality, and cut-end sealing.
Wood material often runs about $10 to $30 per linear foot. Installed wood fencing commonly ranges from $20 to $50 per linear foot in current national pricing. A 100-foot wood picket fence can be a modest project on level, open ground or a much more expensive one if the crew is hand digging near utilities, removing old concrete footings, or building custom gates.
For a white painted wood fence, do not skip primer. Bare wood absorbs moisture unevenly, and white paint shows every rust streak, knot bleed, and failed end grain. We prefer to prime all sides when possible and seal cut ends before installation. The bottom of each picket should stay above grade so it is not sitting in wet soil or constant splashback.
Free tools Windows power users keep installed
One-click scans. No signup required.
White Vinyl or PVC
Vinyl costs more upfront than basic wood in many markets, but it does not rot, does not attract insects, and does not need repainting. Current installed vinyl fencing commonly runs about $30 to $60 per linear foot, with privacy styles usually costing more than picket styles. Vinyl material alone often falls around $25 to $45 per linear foot, depending on wall thickness, UV inhibitors, posts, caps, style, and gate package.
Vinyl is not maintenance-free; it is lower maintenance. It still needs washing. Lower-grade vinyl can discolor, chalk, or become brittle faster than better products. In cold climates, impact can crack rails or pickets. Repairs can also be more noticeable because matching an older white vinyl profile and color is not always easy.
Vinyl also moves with temperature. Follow the manufacturer’s instructions for rail engagement, fastener placement, and expansion clearance. Fastening vinyl too rigidly can lead to buckling, cracked components, or noisy movement during seasonal temperature swings.
Wood vs Vinyl Cost and Maintenance
| Factor | Painted Wood Picket Fence | White Vinyl Picket Fence |
|---|---|---|
| Typical installed cost in 2026 | $20 to $50 per linear foot | $30 to $60 per linear foot |
| 100 linear feet installed | About $2,000 to $5,000 | About $3,000 to $6,000 |
| Material-only range | About $10 to $30 per linear foot | About $25 to $45 per linear foot |
| Best strengths | Traditional appearance, easy field repairs, custom spacing and profiles | Low repainting burden, rot resistance, clean factory-white finish |
| Main maintenance | Primer, paint or stain, touch-ups, rot prevention | Washing, occasional component replacement, checking movement |
| Common weak point | End-grain moisture, peeling paint, soil contact | Cracking from impact, color mismatch, thermal movement issues |
Plan the Layout Before Digging
A picket fence should look intentional from the street. That means the gate, corners, and end posts should control the layout, not whatever spacing happens after the first hole is dug.
Windows Errors? Fix Them Before They Spread
Repair common Windows errors and clear accumulated junk for a smoother, more stable PC - no reinstall needed.Free scan · no reinstallOutdated Drivers Are Slowing You Down
One free scan finds every outdated or missing driver and matches the right update for your exact hardware.Free scan · exact hardware matchRank #2
- Order is for a 6-Pack of fencing, giving a total of 48 feet of fencing in length
- Made from Cedar Wood painted with a white water-based paint
- Sustainably sourced and eco-friendly
- Can be used to protect trees, plants, and flowers as they grow
- Acts as a trellis to support climbing or trailing plants
Start by marking the corners, ends, gate openings, and major changes in direction. Then measure each run and divide the spacing so you avoid a strange narrow panel or an awkward half-picket at the end. Common post spacing is 6 to 8 feet on center, but the exact number depends on panel length, rail stock, terrain, gates, and manufacturer instructions.
If you are using prebuilt panels, dry-fit or mark the full run before setting intermediate posts. Panels allow less adjustment than stick-built pickets. A 1-inch layout error repeated across several bays can force a bad-looking short panel at the end of the run.
For a stick-built fence, decide the picket gap before installation. Many classic picket fences use gaps in the 2- to 3-inch range, but the right spacing depends on picket width, fence height, and the level of openness you want. The key is consistency. Use a spacer jig or story pole instead of measuring every picket independently.
A simple story pole can mark post height, rail height, picket top, picket bottom clearance, and gap spacing. On a long run, that tool saves time and prevents cumulative layout errors.
Tools and Materials You Will Need
The exact list changes between wood and vinyl, but most white picket fence projects need the same basic job-site setup.
- Wood or vinyl pickets, panels, rails, posts, caps, and gates
- exterior-rated screws, ring-shank nails, brackets, or manufacturer-approved fasteners
- corrosion-resistant gate hinges, latch, drop rod if needed, and handle hardware
- concrete mix or approved post-setting material
- Gravel for drainage at post bases where appropriate
- string line, stakes, mason’s line, tape measure, marking paint, and level
- post-hole digger or auger
- speed square, circular saw or miter saw for wood, and drill or impact driver
- Primer, exterior paint, stain, or cut-end sealer for wood
- safety glasses, gloves, hearing protection, and dust protection when cutting
Use exterior-rated fasteners. Interior screws or cheap non-galvanized hardware can rust quickly and leave brown streaks down a white fence. For coastal areas or irrigation-heavy yards, stainless steel or high-quality coated fasteners are usually worth the upgrade.
Set the Posts Correctly
Posts are the structure. If they move, the fence moves. A picket fence is light compared with a privacy fence, but shallow or poorly aligned posts will still lean, wave, or rack over time.
A common best-practice rule is to bury roughly one-third of the post length, while also accounting for local frost depth where applicable. For a 4-foot finished fence, that often means posts around 6 feet long with about 2 feet below grade, but local soil and frost conditions matter. In colder climates, footings may need to extend below frost depth to reduce heaving.
The Tool Desk
Outbyte PC Repair FREERepair Windows errors before they cause bigger problemsFix Now →Outbyte Driver Updater FREEScan for outdated or missing drivers - takes under a minuteDriver Scan →Set terminal posts first: corners, ends, and gate posts. Brace them plumb and let the concrete cure before using them as the reference for the rest of the fence. After those posts are stable, run tight string lines between them for intermediate posts. Keep the string slightly off the face of the posts so it remains a clean reference line.
Post holes should be consistent. A typical hole may be about 8 to 12 inches in diameter for many residential picket fence posts, but verify against the post size, soil, height, wind exposure, and local practice. Loose, sandy, wet, or expansive soils may need wider or deeper footings.
For wood posts, slope the concrete crown away from the post so water sheds away instead of sitting at the base. For vinyl sleeves, follow the manufacturer’s post and insert requirements. Some vinyl systems need internal aluminum or wood reinforcement, especially at gates and corners.
Install Rails, Pickets, and Panels
Once the posts are set and cured, install the horizontal rails or fence panels. For a 3- to 4-foot picket fence, two rails are common. Taller or heavier designs may need more support. Rails should be level on flat ground or follow the planned slope method on uneven ground.
Recommended Free Tools
Rank #3
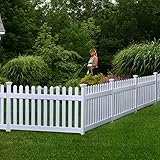
- PET & CHILD SAFE: Create a safe outdoor play area for fur babies and children. Rest assured that this fence will create a sturdy barrier to protect your family.
- PERMANENT & STURDY: Built for strength and simplicity—this no-dig post delivers the durability of a traditional concrete footing without the hassle. Permanently installs with a steel anchor (included), no concrete needed.
- EASY INSTALLATION: Simply pound your permanent steel anchor into the ground, attach your vinyl post sleeve, and build your fence panel in less than an hour. No experience? NO problem! Our detailed guides will help you along the way.
- LIMITED LIFETIME WARRANTY: Made with high quality PVC and backed by a limited lifetime warranty. We are confident in our product and we want you to be too!
- EASY ORDERING: Everything you need for your fence project is in the box except for the final post. Only ONE additional post [ZP19003] is required for the end of your project. Compatible gate [ZP19004] is available.
On flat yards, a level top line usually gives the cleanest traditional look. Snap or mark a consistent reference height, then install rails and pickets from that line. Do not let small grade changes pull the top of the fence up and down every few feet. That is how a new fence ends up looking wavy.
Keep wood pickets above soil. A clearance of roughly 2 inches is often enough for mowing, drainage, and splash reduction, though you may adjust for landscaping, mulch depth, or local conditions. If mulch will be added later, account for it now. Burying the bottom inch of a picket under fresh mulch is a common way to shorten the life of a good fence.
Use a spacer jig for picket gaps and a story pole for height. Check plumb often, but do not overcorrect every board based on a warped neighbor. Stand back every 10 to 15 feet and sight the line from the street side. That is the side everyone will see.
For vinyl panels, do not assume you can trim everything like wood. Some systems allow field trimming; others rely on factory notches, routed posts, or specific rail engagement depths. Read the product instructions before cutting. Leave the required expansion space so rails can move with temperature.
Handle Sloped Yards Deliberately
Slopes are where many picket fences lose their clean look. You have two main options: stepped sections or racked sections.
Stepped fencing keeps each panel level and drops each section down at the post. This works well with prebuilt panels, steeper grades, and formal designs. The tradeoff is that the bottom gap changes from one end of a panel to the other, so you may need to plan landscaping or bottom clearance carefully.
Racked fencing follows the slope more smoothly by angling the rails and pickets with the grade. This often looks more natural on gentle slopes, but not every vinyl panel or prebuilt wood panel can rack. Stick-built wood gives the most flexibility because the rails and pickets can be adjusted in the field.
Do not follow every dip and bump in the lawn. Grade can be uneven because of roots, settlement, old landscaping, or drainage swales. Establish a clean visual line first, then adjust the bottom clearance where needed. A fence can be technically parallel to the ground and still look wrong from the curb.
Build the Gate Like It Is the Hardest Part
Most fence callbacks happen at gates. Straight runs can tolerate small imperfections. Gates cannot. They swing, carry weight, catch wind, and get slammed by daily use.
Gate posts need more stiffness than line posts. For a typical 3- to 4-foot picket gate, we often use larger posts, deeper footings, better bracing, or internal reinforcement depending on the material. Vinyl gate posts commonly need inserts. Wood gate posts should be straight, dry enough for the application, and set with careful hinge-side alignment.
Plan the gate opening before setting the posts. Allow for the gate leaf, hinge clearance, latch clearance, and seasonal movement. A single walk gate is often around 36 to 42 inches wide. Wider lawn-equipment gates may use double leaves, such as two 4-foot gates for an 8-foot opening, but wider gates increase the need for stronger posts and better hardware.
Use quality hinges and a latch made for exterior fence gates. On a white fence, cheap hardware will show rust quickly. For wood gates, diagonal bracing or a properly built anti-sag frame is critical. For vinyl gates, use the manufacturer’s gate kit and reinforcement system instead of improvising with line-panel parts.
Rank #4
- Order is for a 2-Pack of fencing, giving a total of 16 feet of fencing in length
- Made from Cedar Wood painted with a white water-based paint
- Sustainably sourced and eco-friendly
- Can be used to protect trees, plants, and flowers as they grow
- Acts as a trellis to support climbing or trailing plants
Finish the Fence for Long-Term Curb Appeal
If the fence is wood, finishing is part of the build, not an afterthought. White paint looks sharp only when the substrate is dry, clean, primed, and sealed. Paint applied over damp pressure-treated lumber can fail early because trapped moisture pushes against the coating.
Back-prime or seal cut ends when possible. End grain absorbs moisture fastest, especially at picket bottoms and rail cuts. Use an exterior primer compatible with the wood species and topcoat. Follow the coating manufacturer’s temperature, humidity, and recoat window instructions.
Expect painted wood to need touch-ups and periodic repainting. In many climates, a white wood fence may need attention every few years, especially on sun-facing elevations, sprinkler-hit sections, and areas near soil or mulch. Cedar and redwood often age better than low-cost pine, but they still need a proper coating system if the goal is a bright white finish.
Vinyl usually needs washing rather than painting. A soft brush, hose, and mild cleaner can remove dirt, pollen, and mildew. Avoid harsh abrasives that scratch the surface. Inspect caps, brackets, gates, and rail connections annually so small movement problems do not become broken components.
Do these 3 things before closing this tab:
1Clear out junk files and repair common Windows errors2Fix the driver behind crashes, sound loss and screen glitches3Repair Windows errors before they cause bigger problemsWhat a White Picket Fence Costs in 2026
For planning purposes, use linear footage first, then adjust for site complexity. A straight 100-foot run on level soil with one simple gate is very different from a 100-foot fence with two gates, three corners, demolition, roots, a slope, and limited access.
| Project Scope | Wood Picket Fence | Vinyl Picket Fence |
|---|---|---|
| Material only | $10 to $30 per linear foot | $25 to $45 per linear foot |
| Installed per linear foot | $20 to $50 per linear foot | $30 to $60 per linear foot |
| 100 linear feet installed | $2,000 to $5,000 | $3,000 to $6,000 |
| 200 linear feet installed | $4,000 to $10,000 | $6,000 to $12,000 |
| Typical maintenance cost pattern | Lower upfront cost, repainting or staining over time | Higher upfront cost, washing and component repairs over time |
Labor costs rise when crews run into rocky soil, dense roots, hand digging near marked utilities, old fence removal, concrete demolition, tight urban access, custom gates, short runs with many posts, permit drawings, or high local wage markets. Material costs rise with cedar or redwood, thicker vinyl, UV-stabilized products, decorative caps, scalloped or arched pickets, premium hardware, and custom gate assemblies.
Permit fees vary heavily. One current Washington, D.C. example puts fencing permits roughly in the $20 to $60 range, but many jurisdictions use different fee schedules, and some low front-yard fences may not require a permit at all. Always verify locally before digging.
When to DIY vs When to Hire a Pro
A white picket fence can be a good DIY project if the run is short, the yard is mostly flat, utilities are clearly marked, local rules are simple, and you are comfortable setting posts accurately. A homeowner with basic carpentry skills can often handle a 40- to 80-foot straight wood picket fence over a weekend or two, not counting painting time and concrete cure time.
Do these 3 things before closing this tab:
1Clear out junk files and repair common Windows errors2Fix the driver behind crashes, sound loss and screen glitches3Repair Windows errors before they cause bigger problemsDIY makes the most sense when you are using stick-built wood, have easy access, and can take the time to lay out each bay carefully. The work is not technically complicated, but it is physically repetitive. Digging 15 to 25 post holes by hand in rocky soil is a very different job than assembling panels on open, soft ground.
Hire a contractor when the fence is close to a property line, sidewalk, driveway, utility easement, retaining wall, or drainage feature. Also hire a pro for corner lots, historic districts, significant slopes, custom gates, long runs, old fence removal, or vinyl systems that require precise post spacing. If the fence will define the front of the property for the next 15 to 25 years, professional layout and post setting are usually worth the money.
For many homeowners, the best middle ground is to hire the post and gate work and self-perform painting or simple picket installation. Posts and gates create most of the long-term performance problems; painting and touch-ups are easier to control as owner work.
Common Mistakes That Make Picket Fences Look Bad
The most expensive picket fence mistakes are usually made before the first picket goes on. Skipping 811, assuming the property line, ignoring front-yard height limits, or failing to plan gate locations can turn a simple curb-appeal project into a dispute or rebuild.
Best Value

- Value Pack: 22 pieces garden fence with 22 pieces fence insert to fix it on the ground and beautify your garden
- Quite easy for assemble and disassemble, even easy for clean and maintenance
- Size: each of which measures 6.66inches L * 7.87inches H; allows you to perform edge treatment in larger and smaller areas that are curved or straight
- Beautiful simple style appearance, lightweight, sturdy and durability for last for years. It fits for all weather and with anti-UV protection
- Multi-function Adjustment: This kind of landscape edge can be easily adjusted, which is very suitable for creating curves around trees or flower beds at a 90-degree angle. Customers can shape delicate gardens according to their own preferences
Post errors are next. Shallow holes, inconsistent depth, unbraced posts, and posts that shift while concrete cures all create a wavy fence. A taut string line and a level are basic tools, but they only work if you slow down enough to use them on every post.
Another common mistake is spacing posts only by panel length without checking the full run. That can leave a narrow leftover bay at the end or force uneven picket spacing near a gate. Start with fixed points, divide the run, and make small adjustments across multiple bays instead of dumping the whole error in one place.
With wood, the main failures are soil contact, unsealed cut ends, painting damp lumber, skipping primer, and using hardware that rusts. With vinyl, the common errors are posts set out of plane, rails cut too short, insufficient expansion room, and line-post details used at gate posts.
A good picket fence should not call attention to the labor behind it. It should look level where it should be level, follow slopes where that was the chosen design, swing cleanly at the gate, and frame the yard without looking heavy.
Step-by-Step Installation Summary
- Confirm rules and boundaries. Verify the property line, check city or county requirements, review HOA or historic-district rules, and identify easements.
- Call 811. Contact the local 811 center a few business days before digging and wait for utilities to be marked.
- Mark corners, ends, and gates. Lay out the visual structure before setting intermediate posts.
- Measure the full runs. Divide post spacing and picket spacing so the finished fence avoids awkward short sections.
- Set terminal and gate posts. Plumb, brace, and let them cure before pulling final string lines.
- Set line posts. Use consistent depth, proper footing diameter, and drainage-conscious concrete crowns.
- Install rails or panels. Keep the top line level on flat yards, and use a planned stepped or racked method on slopes.
- Install pickets. Use a spacer jig and story pole for consistent height and gap spacing.
- Hang gates. Use reinforced posts, quality hardware, and proper clearance for swing and seasonal movement.
- Finish and inspect. Prime and paint wood, wash vinyl, check fasteners, and document the completed fence.
The Bottom Line
A white picket fence is a simple idea with visible craftsmanship. The best installations are not defined by fancy parts; they are defined by straight layout, durable posts, consistent spacing, reliable gates, and material choices that match the homeowner’s maintenance expectations.
If you want the most traditional look and easy future repairs, painted wood is hard to beat. If you want a cleaner maintenance schedule and are willing to pay more upfront, quality white vinyl is a practical choice. Either way, the project should begin with rules, property lines, utilities, and layout before any holes are dug.
Done well, a 3- to 4-foot white picket fence gives a yard definition without closing it off. It frames the house, guides visitors to the gate, protects planting beds, and adds curb appeal that still feels at home in American neighborhoods.
Frequently Asked Questions
How much does it cost to install a white picket fence in 2026?
A 100-linear-foot white picket fence typically costs about $2,000 to $5,000 for wood or $3,000 to $6,000 for vinyl installed. For 200 linear feet, plan around $4,000 to $10,000 for wood and $6,000 to $12,000 for vinyl, before unusual grading, demolition, custom gates, or high-cost labor markets.
Do I need a permit to build a white picket fence in my front yard?
Maybe. Fence permits and height rules are local. Many cities allow low front-yard fences with fewer requirements, but others require permits for any fence or limit front-yard fences to around 3 or 4 feet. Check your city, county, HOA, and any historic-district rules before digging.
Is wood or vinyl better for a white picket fence?
Wood is best for a traditional look, custom details, and easier field repairs, but it needs primer, paint, and periodic touch-ups. Vinyl costs more upfront in many markets but resists rot and insects and usually only needs washing, though cracked or discolored pieces can be harder to repair invisibly.
How deep should picket fence posts be set?
A common rule is to bury about one-third of the post length, while also accounting for local frost depth. For a 4-foot finished fence, that often means using a 6-foot post with roughly 2 feet below grade, but soil, frost, wind exposure, and local code can change the requirement.
How far apart should picket fence posts and pickets be?
Post spacing is commonly 6 to 8 feet on center, adjusted for panel size, terrain, gates, and manufacturer instructions. Picket gaps are often around 2 to 3 inches, but consistency matters more than the exact number. Use a spacer jig or story pole for a clean finished line.
Can a picket fence be installed on a sloped yard?
Yes. A sloped yard usually needs either stepped sections, where each panel stays level and drops at the post, or racked sections, where the fence follows the slope. Prebuilt panels often limit your options, while stick-built wood gives the most field flexibility.
Quick Recap
Product prices and availability are accurate as of the date/time indicated and are subject to change. Any price and availability information displayed on Amazon at the time of purchase will apply.

