The right sandpaper grit depends on what you are sanding and what you need the surface to do next. As a practical starting point, use 60–100 grit for heavy removal, 120–150 grit for general smoothing, 180–220 grit for final preparation, and 220–320 grit for light sanding between coats. Automotive paint and clear-coat work may require P320 through P2500 or finer.
Choose the coarsest grit that will solve the immediate problem without damaging the substrate. Then move through progressively finer grits until the surface is ready for stain, paint, primer, clear finish, or polishing. A higher number is not automatically better: sanding wood too finely can affect stain absorption, while sanding a painted surface too finely may leave too little texture for the next coat to grip.
As an Amazon Associate I earn from qualifying purchases.
Quick sandpaper grit guide
Use this table as a starting point, not as a substitute for the instructions on the specific paint, primer, filler, or finish. Automotive products in particular often require a specified FEPA P-grade sequence.
| Project or material | Start with | Progress to or stop at | Important caution |
|---|---|---|---|
| Smooth planed or milled wood | 120–150 | 180–220 | Start finer if the surface is already uniform. |
| Rough wood, glue joints, dents, or old finish | 60–100 | 120 → 150/180 → 220 | Use coarse grit only where it is needed to level the defect. |
| Bare wood before clear finish or oil | 120–150 | Usually 150–180 | Excessively fine sanding can reduce finish penetration. |
| Bare wood before stain or dye | 120–150 | Usually 180–220 | Test on scrap because wood species and stain chemistry affect absorption. |
| Between coats of paint or finish | — | 220–320 | Scuff lightly; do not expose the substrate. |
| Drywall joint compound | 120–150 | 180–220 | Protect the drywall face paper and avoid creating low spots. |
| Existing painted wood or trim | 120 | 180–220 | The objective may be to remove gloss rather than strip the coating. |
| Rust or heavy coating on steel | 60–80 | 120–180, then the primer’s specified grade | Coarse scratches can remain visible through paint. |
| Sound aluminum or other soft metal | 180–220 | 320–400 or the coating manufacturer’s specification | Use light pressure because aluminum scratches easily. |
| Automotive primer or body filler | P180–P320 | P400–P600 | Follow the complete paint-system instructions. |
| Plastic before painting | P320–P400 | P400–P600; sometimes P800–P1000 | Plastic can gouge, melt, or show scratches through paint. |
| Automotive clear-coat defect removal | 1000–1500 | 2000–2500, then compound and polish | Use waterproof wet/dry abrasive and avoid sanding through the clear coat. |
| Concrete, masonry, or stone | Specialized silicon-carbide, diamond, or masonry abrasive | Product- and machine-specific | Ordinary paper sandpaper is usually the wrong tool for substantial stock removal. |
These ranges synthesize guidance from abrasive, paint, drywall, and automotive manufacturers, including Norton’s general sanding guidance, Norton’s bare-wood recommendations, Benjamin Moore’s paint-preparation guidance, and the automotive procedures from 3M and PPG.
#1 Best Overall

- Multi-Stage Sandpaper Assortment: This Shineboc 9x3.6 inch sandpaper pack includes 21 sheets with 7 grits (120/220/400/600/800/1000/2000), 3 sheets per grit, suitable for all sanding stages from rough to fine
- Premium Material: Crafted from high-quality silicon carbide, it is electrostatically coated to ensure an uniform distribution of grit. This results in long-lasting performance and high resistance to damage
- Wet and Dry Use: It can be utilized for both wet and dry sanding. Wet sanding helps reduce the occurrence of scratches and minimizes dust emissions, while dry sanding offers faster material removal and convenience
- Anti-Clogging: With excellent anti-clogging properties, it resists the accumulation of dust and debris. This guarantees a sharp cutting edge and less frequent replacement
- Tear-Resistant: A reinforced backing layer is incorporated, which prevents the sanding sheets from tearing under high pressure or when used on irregular surfaces
What do sandpaper grit numbers mean?
Grit is a classification of abrasive grain size. In ordinary use, a lower number means a coarser abrasive with larger, more aggressive grains. A higher number means a finer abrasive with smaller grains that leave shallower scratches.
- Coarse grits remove paint, rust, glue, damaged wood, ridges, and other material quickly.
- Medium grits level the scratches left by coarse abrasives and smooth general defects.
- Fine grits refine the surface, remove light scratches, dull a coating, or prepare a finish for polishing.
Grit does not precisely mean the number of abrasive particles in one square inch. Coated abrasives are graded under different standards, and the final cutting behavior also depends on the abrasive mineral, backing, coating density, and product construction.
ANSI/CAMI, FEPA P, and micron grades
In the United States, consumer sandpaper is commonly labeled using the ANSI/CAMI system. Imported and professional abrasives may use the FEPA system, identified by a P, such as P180 or P400. Some specialized abrasives state the particle size directly in micrometers, while JIS and other grading systems also appear in imported or technical products.
Crashes, No Sound, or Screen Glitches?
Random freezes, missing sound and display glitches usually trace back to one bad driver. Find and replace yours safely.Free scan · under a minutePC Slower Than It Used to Be?
A free scan shows the junk files, broken settings and background clutter dragging Windows down - then fixes them in one click.Free scan · Windows 10 & 11Do not assume that 400 grit and P400 are identical. The scales are not interchangeable at the fine end. Follow the standard printed on the package and, for automotive or industrial work, use the conversion chart supplied by the abrasive or coating manufacturer. Klingspor’s coated-abrasive explanation provides useful background on the grading systems; conversion charts such as the one from Metallography.org should be treated as approximate rather than as a replacement for the product specification.
How to choose a starting grit
The material alone does not determine the starting grit. A smooth hardwood board and a heavily painted wood door need different abrasives even though both are wood-based. Choose the grit by following this sequence:
- Identify the substrate. Determine whether you are sanding solid wood, veneer, paint, drywall compound, steel, aluminum, plastic, concrete, or a cured finish film.
- Identify the job. Are you removing material, leveling a defect, smoothing scratches, dulling gloss for adhesion, preparing primer, or polishing a finish?
- Choose the least aggressive grit that can complete that immediate task. Starting unnecessarily coarse creates scratches and damage that later grits must remove.
- Test an inconspicuous area. Check the scratch pattern, color, coating adhesion, and amount of material removed before sanding the visible surface.
- Stop the starting grit when the defect is uniformly removed. Do not continue with coarse paper after the surface has become even.
- Clean before changing grits. Coarse particles left on the workpiece can create fresh scratches during the finer pass.
A fine abrasive cannot efficiently correct a deep gouge because its grains cut too shallowly. A coarse abrasive can do more harm than good on veneer, drywall paper, aluminum, thin finish films, and already-smooth wood.
Sandpaper grits for wood
Bare wood and ordinary woodworking
For rough lumber, glue joints, dents, or uneven areas, start locally with 80–100 grit. Once the defect is level, use a progression such as 80 → 120 → 150 or 180 → 220, depending on the final finish.
What’s actually slowing this PC down?
Pick the symptom - the matching free tool is one click away.
For planed, milled, or already-uniform wood, begin around 120–150 grit. A typical sequence is 120 or 150 → 180 → 220. If the surface is exceptionally smooth and free of machine marks, beginning at 180 may be appropriate.
Do not automatically sand every project to 220. The correct stopping point depends on the wood species, whether it is face grain or end grain, and what will be applied next.
| Wood project | Common final grit | Why |
|---|---|---|
| Clear finish or penetrating oil | 150–180 | A slightly more open surface can help some finishes penetrate and avoids unnecessary burnishing. |
| Stain or dye | 180–220 | Stain can emphasize coarse scratches, but sanding too fine can reduce absorption. |
| Wood before paint | 120–220 | Use enough sanding to smooth defects and create a clean, dull surface; maximum smoothness is not always necessary. |
| End grain | Often one step finer than face grain | End grain absorbs more readily and may otherwise appear darker or uneven. |
| Thin veneer or plywood face | 150 or finer unless directed otherwise | Aggressive sanding can break through the face veneer. |
For stain or dye, test the entire sanding sequence on a piece of the same species whenever possible. Wood Magazine discusses the relationship between grit progression, stain, and clear finishes in its wood-sanding grit guide. Norton also distinguishes finish-specific stopping points in its bare-wood sanding guidance.
Raising the grain before a water-based finish
Water-based products can raise loose wood fibers. If a very smooth result is important, lightly dampen the bare wood with water, allow it to dry fully, then sand the raised fibers with the final grit. Use a light touch: the purpose is to remove the raised fibers, not to reshape the surface.
Quick wins for a faster PC:
Repair Windows errors before they cause bigger problemsFix Now →Scan for outdated or missing drivers - takes under a minuteDriver Scan →Clear out junk files and repair common Windows errorsFree Scan →Rank #2

- [Boshcraft Sandpaper Assortment] The 1/4 sheet sandpaper is 4.5" x 5.5”, 8 sheets of each 80/150/320/400 grit 9 sheets of each 120/220 grit, you can distinguish sandpaper from coarse to fine by the grit number at a glance. Assorted sandpaper is excellent to sanding for hand/ block/ palm sander/machine.
- [2 × Longer Lasting] Highly abrasives sandpaper are made of premium aluminum oxide for a sharp cut and uniform finish, which is 2× longer lasting than conventional abrasive papers. These sand papers provide perfect sanding performance with lower cost, fewer sheets, and less waste.
- [Strong Adhesives and No Slip] Double adhesives of other ordinary sandpaper, easy on, no-slip, and convenient to replace. Firm sandpaper produce the perfect polishing effects.
- [Anti-Clogging Coating] Sandpaper with an additional no-clog coating which has the maximum resistance to clogging, anti-static ability, and not easy to drop the sand. Provide exceptional sanding performance to increase your productivity, reduce material consumption and save costs.
- [Widely used sandpaper] Coarse to fine sandpaper sheets are ideal for sanding on all types of surfaces. Use them for aggressive sanding on automotive paint,fillers. Removing scratches on metal, wood, paint, and wood furniture.
Wood before paint
If an existing painted or stained surface is sound, you often do not need to sand back to bare wood. Start around 120 grit to level minor defects and dull gloss, then use 180–220 grit to refine the surface before painting.
Between coats, use 220–320 grit with light pressure only when the coating manufacturer permits sanding. Remove dust completely before recoating. Sanding too aggressively can expose the substrate, cut through corners, or create a repair job where none was needed.
Veneer and engineered wood
Veneer requires restraint. A factory-sanded plywood face or thin furniture veneer may need only a light pass with 150 grit or finer. Do not use coarse paper to remove a defect that extends through the veneer; once the face layer is breached, changing grits cannot repair it. Consider filling, scraping, or replacing the part instead.
Sandpaper grits for drywall and joint compound
For dry sanding joint compound, start with 120–150 grit to level ridges, seams, and tool marks. Finish with 180–220 grit before primer and paint. USG recommends 150-grit sandpaper or finer, or 220-grit mesh or finer, for drywall finishing; its gypsum-panel finishing guidance also addresses wet sanding and protection of the panel surface.
Recommended Free Tools
- Use a sanding block or drywall sanding tool on broad, flat areas.
- Mesh abrasives can resist clogging and work well with dust-extraction equipment.
- A damp sanding sponge is useful for small repairs and dust reduction, but it is inefficient for removing large amounts of compound.
- Stop when the compound is flush and smooth. Do not keep sanding until you damage the drywall face paper.
The objective is to level the compound, not to sand the surrounding panel. Scratched face paper, exposed tape, low spots, or raised paper fibers can remain visible after painting. If the paper is damaged, repair it with fresh compound rather than sanding the area deeper.
Sandpaper grits for painted surfaces and trim
For painted wood, trim, and other sound coatings, first decide whether you are removing the coating or merely preparing it for another coat.
- Removing substantial paint or leveling damage: begin around 80–120 grit, using the least aggressive option that works.
- Dulling a sound glossy coating: 120–180 grit is often sufficient.
- Final smoothing before paint: 180–220 grit.
- Light sanding between coats: 220–320 grit, with a very light touch.
A uniformly dull, clean, sound surface is usually more useful than a surface sanded to bare material. Follow the paint manufacturer’s instructions for gloss removal, recoating, and between-coat sanding. Benjamin Moore’s sandpaper guide and Sherwin-Williams’ guidance on preparing painted trim provide product-oriented examples.
Sandpaper grits for metal
Metal selection matters because steel and aluminum respond differently to abrasion. Also decide whether you are removing rust or paint, smoothing a repair, or preparing a sound coating for primer.
Free tools Windows power users keep installed
One-click scans. No signup required.
Steel and iron
- 60–80 grit: heavy rust, old paint, or substantial surface correction.
- 120–180 grit: refine coarse scratches and feather repair edges.
- 180–220 grit: smooth a sound existing coating before repainting.
- P280–P400: common automotive primer and filler ranges, but the exact grade depends on the product system.
Do not assume that removing every trace of a sound coating is necessary. If the coating is firmly attached, cleaning it and creating an even, dull surface may be the better approach. If you do start with coarse abrasive, continue through enough intermediate grades that its deep scratches are gone before applying a thin finish.
Aluminum and other soft metals
For sound aluminum, begin around 180–220 grit and progress to 320–400 grit or the coating manufacturer’s specified grade. Use light pressure, especially on curved surfaces. Aluminum scratches easily, and deep scratches may remain visible after painting.
Paint-system instructions take priority. Benjamin Moore’s guidance on removing paint from metal distinguishes preparation concerns for steel and aluminum.
Rank #3

- What You Get: This all-in-one sanding kit includes a compact micro sanding block and 180 sandpapers in 9 grits 80/120/180/220/320/400/600/800/1000
- 3-Color Grit System: Red (coarse), yellow (medium), grey (fine) – grab the right grit instantly, no more guessing
- Quick-Change Hook & Loop Backing: Tool-free backing lets you change sandpapers in seconds for uninterrupted work
- Ergonomic Mini Sander: Measuring just 3.5 x 1.1 inches, this compact PU foam hand sander glides effortlessly into corners and grooves. The lightweight ergonomic design reduces hand fatigue
- Premium Material: Made with durable aluminum oxide abrasive, these sandpapers resist tearing, clogging, and crumbling. Built to last on wood, metal, plastic, and painted surfaces
Sandpaper grits for automotive primer, filler, plastic, and clear coat
Automotive abrasives commonly use FEPA P-grades, so read the letter and number together. A sequence specified as P320 → P400 → P600 should not be casually replaced with an unrelated consumer grit sequence.
Primer and body filler
Many automotive systems use approximately P180–P320 to shape or refine primer and body filler, followed by P400–P600 for final preparation. The appropriate grade depends on whether the product is a high-build primer, primer surfacer, sealer, or body filler. Use the technical data sheet for the coating system, such as the procedure published by PPG for primer surfacer sanding.
Plastic before painting
Plastic is easy to gouge and can soften or heat under aggressive power sanding. Common automotive ranges are:
- P320–P400: initial preparation of primer or a plastic bumper, depending on the product.
- P400–P600: final primer sanding or preparation of rigid plastic.
- P800–P1000: uniform scuffing or blend preparation in some systems.
Use a flexible foam abrasive or sanding sponge on contours. The correct grade depends on the plastic, primer, paint, and repair system. 3M’s automotive foam-abrasive range illustrates why backing and flexibility matter as much as the nominal grade.
Clear-coat defects and wet sanding
For small defects in a cured automotive clear coat, a common range is 1000–1500 grit, followed by 2000–2500 grit and then compound and polish. This work removes very small amounts of material. It is not appropriate for deep scratches that have penetrated the clear coat, and careless sanding can expose the color coat or substrate.
Use waterproof silicon-carbide wet/dry paper intended for wet use. The 3M wet-sanding product guidance covers fine automotive finishing grades. Follow the coating manufacturer’s system rather than treating these numbers as universal.
What wet sanding does—and does not—change
Wet sanding is primarily a technique and abrasive-format choice, not simply a synonym for finer sanding. Water can carry away debris, reduce loading, and reduce airborne dust. Waterproof paper or an abrasive explicitly rated for wet use is required; ordinary paper can soften, delaminate, or fail.
Silicon-carbide wet/dry paper is common for paint, metal, plastic, primer, and clear-coat work. Keep water away from power tools and electrical equipment that are not approved for wet applications. Wet sanding can reduce dust, but it does not make lead paint or asbestos-containing material safe to disturb.
For small drywall repairs, a damp sanding sponge can control dust. For larger areas, use appropriate dust extraction and a system designed for drywall work. The 3M wet/dry abrasive information explains the intended use of waterproof finishing abrasives.
The Tool Desk
Outbyte PC Repair FREEClear out junk files and repair common Windows errorsFree Scan →Outbyte Driver Updater FREEScan for outdated or missing drivers - takes under a minuteDriver Scan →Grit is only half the abrasive choice
Two products carrying the same nominal grit can cut and wear differently. Mineral type, backing, bond, coating density, loading resistance, and whether the abrasive is flexible all affect the result.
| Abrasive or construction | Where it is useful | Trade-off or limitation |
|---|---|---|
| Aluminum oxide | Versatile general-purpose sanding on wood and metal. | Performance varies with the product’s backing and coating; not automatically best for every finish. |
| Silicon carbide | Sharp fine finishing, paint and metal preparation, and wet sanding. | Can wear differently or more quickly than aluminum oxide in some applications. |
| Zirconia or ceramic aluminum oxide | Aggressive metal stock removal and specialized power-sanding products. | Often unnecessary for light hand-finishing. |
| Garnet | Found in some woodworking abrasives and used for finish work. | Product construction and the wood surface still determine performance. |
| Mesh abrasive | Drywall and other dusty work where reduced loading and dust extraction are useful. | Needs compatible backing or sanding equipment. |
| Foam-backed abrasive | Curves, profiles, edges, and plastic or automotive contours. | Less suitable than a rigid block for keeping a broad flat surface perfectly flat. |
| Open-coat abrasive | Wood and painted surfaces where clogging is a concern. | May cut or finish differently from a dense closed-coat product. |
| Closed-coat abrasive | Dense, consistent coverage and fine finishing. | Can load more quickly on soft or gummy materials unless it has an anti-loading design. |
3M’s silicon-carbide product information and Mirka’s abrasive guidance provide examples of how mineral and construction affect use. A product’s label and technical data sheet should determine whether it is intended for hand sanding, a random-orbit sander, wet use, drywall, metal, or a particular coating.
Rank #4
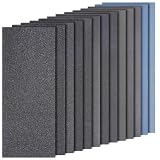
- 【Abundant Grit Range】Includes 13 gradually graded grit sizes from coarse to fine. You can select the right grit for specific tasks, covering all stages from rough sanding to fine sanding. Truly an indispensable addition to your garage toolkit
- 【Adequate Quantity】Each grit size comes with four sheets, sufficient to handle wear during use. For standard small-scale sanding projects, one set generally completes the entire workflow without mid-task additional purchases
- 【Dry & Wet Compatibility】Low and medium grits work well for dry sanding with stable efficiency. For high grits, usually wet sanding is recommended to reduce dust and improve surface smoothness, ensuring both safety and quality results
- 【Considerate Packaging】Packaged in double-layer 0.16 mm resealable plastic bags, which is tough enough to protect the sheets from damage and to preserve their performance for repeated use over time
- 【Cost-Effective】The assortment provides a reasonable quantity of each grit. No overspending. A single purchase meets full workflow needs. Skip the hassle of hunting down individual grit sheets in the markets
How to progress through grits
The purpose of progressive sanding is to replace the previous scratch pattern with a smaller one. You do not need to use every available grit, but you must use enough intermediate grades for each abrasive to remove the scratches left by the previous one.
A useful woodworking rule of thumb is to keep the next grit no more than approximately 50% higher than the preceding grit, for example 100 → 150 → 220. Another common recommendation is not to skip more than one grit in a sequence. These are guidelines, not laws: the visible scratch pattern is the final test.
Common sequences
- Rough wood: 80 → 120 → 150 or 180 → 220.
- Planed wood: 120 or 150 → 180 → 220.
- Wood before clear finish: 120 or 150 → 180, then stop if the finish and wood species call for it.
- Wood before stain: 120 or 150 → 180 → 220, after testing the result on scrap.
- Painted trim: 120 → 180 or 220; use 220–320 between coats.
- Drywall compound: 120–150 → 180–220.
- Steel repair: 60–80 → 120 → 180, then follow the primer specification.
- Automotive clear coat: 1000 or 1500 → 2000 or 2500 → compound and polish, only for suitable defects.
Do not jump from 80 directly to 220 on visible wood unless you have verified under strong light that the 220 has removed every coarse scratch. A fine abrasive can smooth the high points while leaving coarse scratches in the low points.
How to know when to change grit or stop
Inspect the workpiece under strong, low-angle light. A grit has done its job when the original defect is uniformly removed and its scratch pattern is consistent across the area.
- After changing grits, the previous scratch direction or pattern should gradually disappear.
- If you can still see scratches from the previous grit, keep working with the current grit or return to the preceding one.
- If the abrasive creates dust but little visible change, it may be too fine, worn, clogged, or being used with too little cutting action.
- If the surface becomes glossy instead of uniformly abraded, the abrasive may be burnishing rather than cutting.
- Stop when the surface is appropriate for the next coating. A larger grit number is not a goal by itself.
On wood, sand final passes with the grain. On flat surfaces, use a sanding block to distribute pressure and reduce finger grooves. On curves and profiles, use a flexible sponge or foam abrasive. Keep a power sander moving; holding it stationary can create dips, swirl marks, or heat damage.
Recommended sanding procedure
- Read the product instructions first. The filler, primer, paint, stain, or clear finish’s technical data sheet takes priority over a general grit chart.
- Clean the surface. Dirt, grease, wax, and loose debris clog abrasive and can create uneven scratches. Use a cleaning method compatible with the material and coating.
- Choose and test the least aggressive effective grit. Test where a mistake will not be conspicuous.
- Use the right support. A block keeps flat areas flat; a foam pad or sponge follows contours.
- Sand with light, even pressure. Pressing harder usually clogs or wears the abrasive faster and can deform soft material.
- Keep the tool moving. Use dust extraction when power sanding and do not hold the tool in one place.
- Inspect frequently. Stop coarse sanding as soon as the defect is level and stop fine sanding once the surface meets the finish requirement.
- Remove dust between grits. Vacuum or otherwise clean using a method suitable for the material; coarse particles can create new scratches.
- Repeat with the next grit. Change only when the previous scratch pattern is uniform and the defect has been removed.
- Clean before finishing. Residual dust can interfere with stain, paint, primer, and clear finishes.
Common sanding problems and fixes
The paper clogs immediately
Soft wood, gummy paint, uncured filler, and some finishes can load an abrasive quickly. Make sure the coating is fully cured, use an open-coat or anti-loading product where appropriate, choose mesh for dusty drywall work, or use wet/dry paper with water only when the product permits wet use. Replace loaded paper instead of pressing harder. Anti-loading abrasive products are designed for this type of problem.
Do these 3 things before closing this tab:
1Fix the driver behind crashes, sound loss and screen glitches2Clear out junk files and repair common Windows errors3Scan for outdated or missing drivers - takes under a minuteThe sandpaper produces heat but removes little material
The abrasive may be worn, clogged, too fine, or used with excessive pressure. Replace it, reduce pressure, or move to a moderately coarser grit. Excessive pressure can make a dull abrasive burnish the surface rather than cut it.
Deep scratches remain after painting or staining
The starting grit was too coarse, too many grits were skipped, or the fine pass did not continue long enough. Return to a grit capable of removing the scratches, then progress through intermediate grades. Clean between grits and inspect under raking light before applying finish.
Stain looks blotchy or too light
Uneven sanding, end grain, wood species, and sanding too fine can all affect absorption. Test the complete preparation and staining process on scrap from the same wood. Do not assume that sanding to 220—or beyond—will improve every stain result.
Drywall paper is exposed
Stop sanding. Further abrasion will enlarge the damaged area. Seal or repair the exposed paper according to the joint-compound or primer system, then apply fresh compound as needed and sand only until smooth.
Aluminum has visible scratches
Move to finer abrasive, use less pressure, and avoid continuing to strip a sound coating unless removal is necessary. Deep scratches may require additional repair rather than simply a finer final grit.
Best Value

- Wide Variety of Grit - Perfect selection of different grits, Including 5 sheets of each grit: 400/ 600/ 800/ 1000/ 1200/ 1500/ 2000/ 2500/ 3000, total 45 sheets.
- Suits Your Needs Perfectly - Wet and dry sandpaper, great assortment of fine to superfine sandpaper, you can use fine grit sandpaper for fine woodworking, cleaning and polishing metal, sanding clay, wood furniture finishing, wood turning finishing, automotive jobs and more.
- Handy Sizes - Silicon carbide sandpaper size 9 x 3.6 inches, It can be easily cut and folded to fit any hand tool or work piece crevice.
- High Quality Sandpaper - Made of waterproof silicon carbide, electro coated, It works well dry and wet sanding. Each product we need to do 100% quality-check before shipping to ensure the paper not easily fall off when in use.
- Easy to Identify - Good variety of grits from coarse to smooth, so you have a good choice to fit any type of projects, the grit is on the back of sandpaper for easy identification.
The veneer is nearly sanded through
Stop immediately. Do not attempt to correct the problem with a coarser or finer grit. A thin face veneer may need filling, coloring, or replacement instead of more sanding.
The new paint peels
Peeling is not always a grit problem. Contamination, loose old coating, insufficient cleaning, incompatible products, inadequate cure time, or failure to follow the primer’s preparation requirements may be responsible. Sanding a surface finer does not compensate for poor cleaning or an incompatible coating system.
When sanding is not the best first method
Grit selection is sometimes the wrong first question. Choose another method when it removes the defect more accurately or avoids unnecessary dust and substrate damage:
Recommended Free Tools
- Cabinet scraper or hand scraper: useful for glue squeeze-out and controlled shaving on flat wood.
- Plane: can level wood more efficiently than coarse sanding when the operator has the skill and suitable equipment.
- Chemical stripper: useful for thick or intricate paint and finish, subject to the product’s hazards, ventilation, and disposal requirements.
- Heat gun: appropriate only for suitable coatings and conditions; never use a prohibited method on lead paint.
- Wire brush or dedicated stripping abrasive: useful for some rust and coating-removal jobs.
- Drywall sponge or wet sanding: useful for small joint-compound repairs where dust control matters.
- Diamond, silicon-carbide, or masonry abrasive: appropriate for concrete, stone, tile, and masonry instead of ordinary paper.
- Nonwoven abrasive pad: useful for light scuffing and contours when you need to dull a surface rather than remove measurable stock.
Safety: when to stop before sanding
Pre-1978 painted surfaces may contain lead
In the United States, paint in homes built before 1978 may contain lead. Sanding—even light scuff-sanding—can create hazardous lead dust. Before disturbing an older painted surface, determine whether lead is present and follow the EPA’s lead-safe renovation guidance, including containment, dust minimization, appropriate wet methods or HEPA-equipped tools where applicable, and thorough cleanup. Contractors performing covered renovation work for compensation generally have additional EPA Renovation, Repair, and Painting requirements.
Suspected asbestos-containing material
Do not sand, scrape, drill, or otherwise disturb material that may contain asbestos. Suspect materials can include some older flooring, textured coatings, insulation, and patching compounds. Stop work and consult an appropriately trained and accredited asbestos professional. See the EPA’s asbestos guidance.
For ordinary wood, drywall, paint, and metal work, use eye protection and control dust at the source. Power sanding can produce substantial airborne dust. Use tool-connected extraction where compatible, ventilate appropriately, and select respiratory protection based on the material, exposure, fit, and applicable requirements rather than assuming one generic dust mask is adequate. The CDC and NIOSH wood-dust guidance emphasizes source control.
Wet sanding may reduce airborne dust, but it does not make lead or asbestos safe. Also keep water away from electrical equipment not designed for wet applications.
Printable sandpaper cheat sheet
| Grit range | Main purpose | Typical examples |
|---|---|---|
| 40–80 | Heavy stock removal | Severe rust, thick coatings, major defects, rough shaping |
| 80–120 | Shaping and leveling | Rough wood, glue joints, dents, heavy paint removal |
| 120–150 | General smoothing | Planed wood, painted trim, initial drywall sanding |
| 180–220 | Final preparation | Stain preparation, final drywall sanding, smooth paint preparation, soft-metal preparation |
| 220–320 | Light finish or paint scuffing | Between coats, furniture and cabinetry preparation |
| 320–600 | Fine coating and automotive preparation | Plastic, primer, filler, aluminum, fine paint preparation |
| 800–1500 | Very fine finishing | Plastic blending, clear-coat preparation, fine wet sanding |
| 2000–2500+ | Polishing preparation | Final clear-coat wet sanding before compound and polish |
This summary hides important differences between ANSI/CAMI, FEPA P, micron, and other grading systems. It also cannot account for the exact coating system, abrasive mineral, backing, or tool. When the product manufacturer gives a sanding grade, follow that instruction.
Frequently Asked Questions
Is 220 grit always the best final sandpaper for wood?
No. Wood before stain or dye often ends around 180–220, while wood before some clear or oil finishes commonly stops around 150–180. Sanding too fine can burnish the surface or reduce stain and finish penetration. Test the complete preparation and finish on scrap from the same species.
Can I use P400 as the same thing as 400-grit sandpaper?
Not automatically. P400 is a FEPA grade, while an unqualified 400 may use ANSI/CAMI or another system. The scales are not interchangeable at the fine end. Follow the grading system printed on the product and the coating manufacturer’s specification.
What is the best grit for sanding between coats of paint?
A light pass with approximately 220–320 grit is common, but follow the coating instructions. Use enough pressure to remove dust nibs or provide a light scuff, not enough to expose the substrate.
The Tool Desk
Outbyte PC Repair FREERepair Windows errors before they cause bigger problemsFix Now →Outbyte Driver Updater FREEFix the driver behind crashes, sound loss and screen glitchesFind Drivers →Should drywall be wet-sanded?
A damp sanding sponge can be useful for small joint-compound repairs and can reduce dust. For larger areas, dry sanding with suitable mesh abrasive and dust extraction may be more practical. Do not sand through the compound into the drywall face paper.
What grit should I use on an old painted wall or door?
If the coating is sound and you only need to remove gloss, begin around 120–180 grit and finish around 180–220 as needed. If the paint may contain lead—particularly in a U.S. home built before 1978—evaluate the hazard and follow EPA lead-safe procedures before sanding.
The Bottom Line
Choose the coarsest grit that solves the immediate problem, then work progressively finer until the surface is ready for its next finish. For many household projects, that means 80–120 grit for removal, 120–180 for smoothing, and 180–220 for final preparation. Use 220–320 for light between-coat scuffing and much finer, product-specified P-grades for automotive plastic and clear coat. Always test first, clean between grits, protect delicate substrates, and stop when the surface is ready—rather than sanding simply because a higher number is available.
Quick Recap
Product prices and availability are accurate as of the date/time indicated and are subject to change. Any price and availability information displayed on Amazon at the time of purchase will apply.




