A wheelbarrow is one of those tools that feels easy to ignore until it is blocking the car door, collecting rainwater, or tripping someone in the shed. Most homeowner wheelbarrows are roughly 4 to 7 cubic feet, about 58 to 62 inches long, around 26 to 28 inches high, and often 27 to 30 inches wide. Empty weight matters too: a 6 cubic foot poly wheelbarrow is commonly around 30 to 35 pounds, while larger steel models can approach 55 pounds before you add dirt, tools, or water.
The best wheelbarrow storage setup does three things: it supports the weight through studs, posts, rafters, or proper blocking; it keeps the wheelbarrow low enough to handle safely; and it preserves the normal use of the garage, shed, or yard. On our job sites, we treat this like a small load-path problem, not a decorating project. A hook rated for 50 pounds is only useful if the wall, screws, and framing behind it can handle the leverage of a long, awkward tool being lifted and bumped week after week.
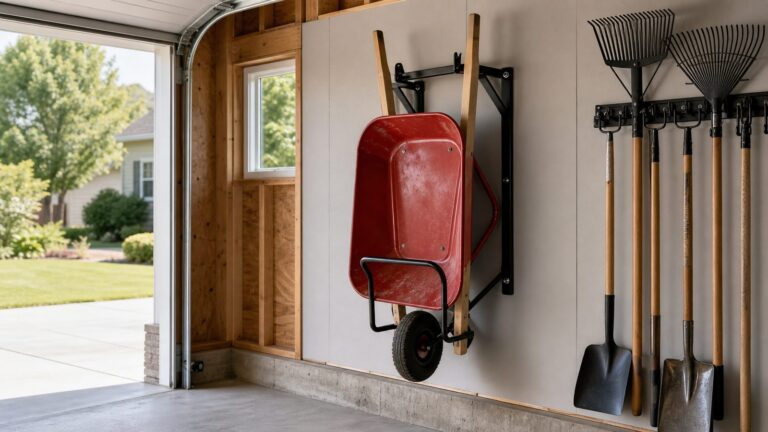
For most homeowners, the best DIY answer is a wall-mounted hanger or a simple 2×4 cleat rack installed into studs, with the wheel near the floor and a top latch or hook securing the handles. Expect to spend about $10 to $50 in materials for a typical DIY setup, or about $125 to $300 if you hire a handyman for a straightforward install.
Start With the Wheelbarrow, Not the Wall
Before you buy hardware or drill holes, measure the actual wheelbarrow. Retail dimensions vary, but a common 6 cubic foot model is close to 25.5 inches wide, 58.75 inches deep, and 27 inches high. Another typical storage footprint is around 58 inches long by 27.5 inches wide by 26 inches high. That is a lot of space for a single yard tool, especially in a one-car garage.
#1 Best Overall

- Compared to ordinary hooks our hooks are wrapped with a layer of moulded silicone hook pads, which is a good way to avoid friction between the trolley and the hooks leading to paint wear and tear, and also solves the problem of paint peeling off the product due to long time hanging of heavy objects.
- You can also install it in a garage or shed or on the side of an existing building outdoors, it saves more space in your garage or workshop and makes them look organized. Don't worry, the paint technology keeps the unicycle hitch from rusting even when exposed to air.
- Our wheelbarrow holders are made from heavy gauge solid steel and can easily hold the weight of any wheelbarrow, including heavy duty contractor types. Equipped with a spring-loaded lift latch for safety against accidental release. Note that it does not fit plastic carts.
- Easy installation, no need for professional skills, 1. Install the collet on the bottom first, then tighten the screws. 2. Tilt the trolley up and push it forward, mark the appropriate height, then screw the upper bracket, making sure the bottom of the wheelbarrow fits in the lower bracket. 4. Push the top of the wheelbarrow against the top brake to lock the wheelbarrow in place.
- The Wheelbarrow holder consists of several parts, a set of Wheelbarrow holder, 16 screw kits are included in the package, 8 screws are included with each ladder wall mount, 8 spare screws, 8 plastic inserts.
Measure four things: overall length from tire to handle ends, widest point at the tray or handles, height from tire to tray lip, and the distance between the wheel and the point you want to latch near the handles. Also weigh or estimate the empty weight. A small poly yard cart may be under 35 pounds, while a steel contractor-style wheelbarrow may be closer to 50 or 55 pounds.
Do not design storage for a loaded wheelbarrow. Hanging a wheelbarrow with soil, concrete splatter, water, pavers, hand tools, or firewood in the tray is asking too much from most garage hardware. Storage ratings should be compared with the empty wheelbarrow plus real-world dynamic force from lifting, dropping into the hook, and bumping it while moving around the space.
The Five Best DIY Wheelbarrow Storage Options
There is no single best method for every house. A dry framed garage wall is different from thin metal shed siding, and a light poly wheelbarrow is different from a steel tray model used for gravel and concrete work. The comparison below is the practical starting point.
| Storage method | Best use | Typical DIY cost | Skill level | Main caution |
|---|---|---|---|---|
| Commercial wall hanger | Garage or framed shed wall | $8-$50 | Easy | Must fasten into studs, blocking, or a ledger |
| 2×4 cleat with lower chock | Custom fit for odd wheelbarrows | $10-$35 | Easy to moderate | Needs solid screw placement and smooth retrieval |
| Slatwall or track hook | Garages with existing rail systems | $15-$30 if track exists | Easy | Track system must be rated and properly installed |
| Ceiling or rafter hook | Low-use wheelbarrows in tall garages | $10-$40 | Moderate | Overhead lifting and head clearance risks |
| Outdoor upside-down storage | No garage or shed space available | $0-$75 | Easy | Steel trays need rust protection and drainage control |
1. Commercial Wall Hanger
A basic steel wheelbarrow hanger is the fastest solution for many garages. Common wall-mounted hooks and brackets advertise capacities in the 50 to 90 pound range. Basic hooks often cost about $8 to $35, while heavier latch-style hangers usually land around $20 to $50 online depending on rating, coating, latch design, and included fasteners.
Crashes, No Sound, or Screen Glitches?
Random freezes, missing sound and display glitches usually trace back to one bad driver. Find and replace yours safely.Free scan · under a minutePC Slower Than It Used to Be?
A free scan shows the junk files, broken settings and background clutter dragging Windows down - then fixes them in one click.Free scan · Windows 10 & 11The usual setup is simple: the wheel or front frame rests low against the wall, and the handles lift up into a latch or hook. That means the wall is not just holding a dead vertical load. The wheelbarrow is trying to pull away from the wall because it is roughly 5 feet long. Fasteners must go into studs, posts, masonry structure, or a properly fastened ledger board.
If the ideal hanger location does not line up with a stud, install a horizontal 2×4 or 1×4 ledger across two studs first. Use structural screws or lag screws long enough to bite well into framing, then mount the hanger to the ledger. In a typical framed garage, a 2×4 ledger spanning two studs gives you more freedom to place the hook exactly where the wheelbarrow balances and clears doors.
2. DIY 2×4 Cleat and Lower Chock
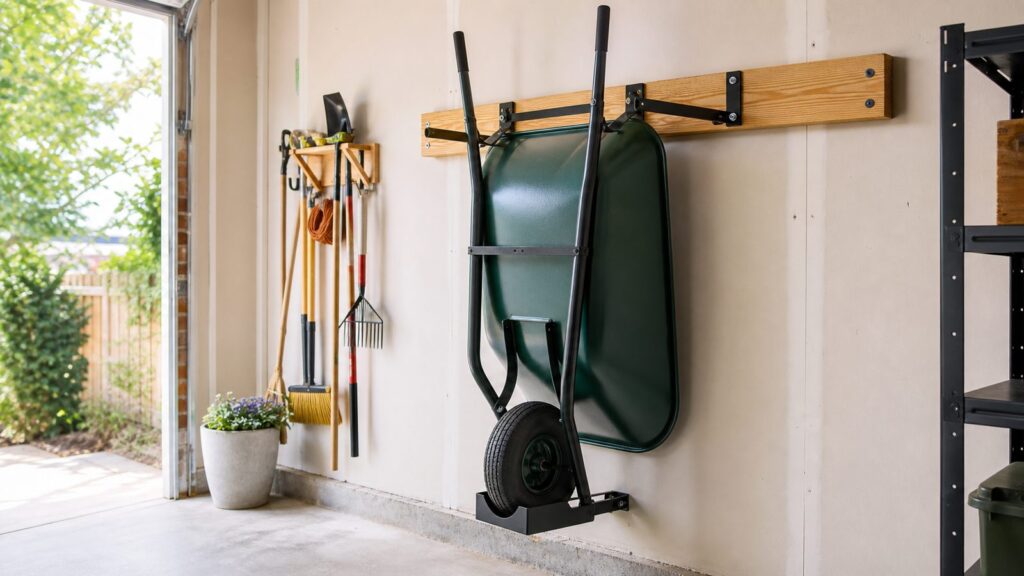
A wood cleat rack is cheap, strong, and easy to repair. Materials usually run $10 to $35 if you buy a short 2×4 or 1×4, two to four lag or structural screws, washers, and a scrap rubber bumper or lower wheel stop. If you have clean scrap lumber, the cost can be close to zero.
The basic layout is a lower chock or block that catches the wheel or front frame, plus an upper cleat, hook, strap, or latch that holds the handles against the wall. The lower point carries much of the load. The upper point keeps the tool from tipping away. That is why a lower stop matters. Without it, the wheelbarrow can swing, rattle, scrape drywall, or work the fasteners loose over time.
What’s actually slowing this PC down?
Pick the symptom - the matching free tool is one click away.
For a clean install, mount the lower block 8 to 16 inches above the floor depending on tire size and wall base trim. Then lift the handles until the wheelbarrow sits comfortably against the wall, mark the handle position, and place the upper latch where you can operate it without reaching above shoulder height. Add a piece of old hose, rubber pad, or scrap carpet where the tray or handles touch the wall. It prevents paint damage and cuts down on noise.
3. Slatwall, Gear Track, or Garage Rail Hook
If your garage already has a rated wall track system, a wheelbarrow hook can be a clean solution. The hook itself may cost about $15 to $30, but that assumes the track or panel system is already installed. Adding a full rail system just for one wheelbarrow can make this the most expensive option.
The key is to verify the rating of the whole system, not just the hook. A 50 pound hook on a poorly anchored rail is not a 50 pound storage system. Track should be fastened into studs according to the manufacturer instructions, and the wheelbarrow should hang in a way that does not twist the rail excessively. For a heavy steel wheelbarrow, we prefer a dedicated wall hanger or ledger unless the track system is clearly rated for the load.
4. Ceiling or Rafter Hook
Overhead storage sounds appealing because it saves wall space, but it is usually our last choice for a wheelbarrow that gets used often. Ceiling hooks, straps, or simple pulley parts may only cost $10 to $40, but the handling is awkward. You are lifting a 30 to 55 pound, 5-foot-long tool above your body. That is manageable for some homeowners and a bad idea for others.
Recommended Free Tools
If you use ceiling storage, fasten only into structural joists or rafters, never just drywall, thin paneling, or decorative ceiling material. Keep the wheelbarrow clear of garage door tracks, opener arms, lighting, sprinkler heads, and vehicle roof lines. Also account for the path of the handles while lifting. A wheelbarrow that technically fits overhead can still scrape a vehicle or hit the garage door when the door is open.
5. Outdoor Upside-Down Storage
If the wheelbarrow has to live outside, store it upside down or under a small cover so the tray does not collect water. Poly trays tolerate wet conditions better than steel, but all wheelbarrows benefit from being kept out of standing water. Steel trays need more care: clean off soil and concrete residue, touch up chipped paint, and avoid leaving the tray cupped upward in the rain.
An outdoor fence or shed-side rack may cost $20 to $75 depending on hooks, pressure-treated blocking, corrosion-resistant screws, and whether you add a small roof or cover. Do not mount a wheelbarrow to fence pickets or thin shed siding alone. Tie into fence posts, shed studs, or added blocking. For damp sheds and exterior racks, use galvanized, stainless, exterior-rated, or powder-coated hardware, and seal cut ends of wood.
Rank #2

- wide Usage: Our products are suitable for a wide range of applications, suitable for most wheelbarrow and heavy duty contractor types. But it does not fit plastic wheelbarrow.
- Product Advantages: You can install it in a garage or shed as you see fit, or on the side of an existing building outside. Using a unicycle stand not only allows better storage of unicycles, but also greatly saves space in your garage and outdoor shed. Make your tools look organized and neat.
- Product features: The hook is wrapped with a layer of molded silicone hook pad, a good solution to the product for a long time hanging heavy objects caused by the product paint off, Avoid paint wear when hanging iron items, played a good protective role.
- Product material: Our products are made of heavy duty solid steel, Strong bearing capacity, Wheelbarrow Storage Bracket/Hook -90 lbs Capacity, with excellent high and low temperature resistance, indoor and outdoor use. The paint protects the hooks well and doesn't cause rust problems even outside.
- Product installation: Our products include a set of hooks and 8 screws. Equipped with a spring-loaded lift latch for safety against accidental release.
How to Build a Simple Wall Rack
This is the rack we would build for a typical 6 cubic foot homeowner wheelbarrow in a framed garage or wood shed. It is inexpensive, forgiving, and strong when fastened properly.
The Tool Desk
Outbyte PC Repair FREEClear out junk files and repair common Windows errorsFree Scan →Outbyte Driver Updater FREEScan for outdated or missing drivers - takes under a minuteDriver Scan →Materials
- One straight 2×4 or 1×4, 36 to 48 inches long, for a horizontal ledger
- One lower wheel block or short 2×4 chock, 6 to 10 inches long
- Two to four structural screws or lag screws, commonly 3 inches to 3-1/2 inches long for wood framing
- Washers if using lag screws
- One rated hook, latch, strap, or heavy screw-in utility hook for the upper hold point
- Rubber bumper, hose sleeve, or scrap carpet
- Stud finder, level, drill/driver, tape measure, pencil, and socket or bit set
Step 1: Choose the Storage Zone
Park the vehicle where it normally sits and open the doors. Mark the door-swing envelope with painter’s tape before drilling. Also check walking paths, entry doors, stairs, electrical panels, water heaters, garage door sensors, garage door tracks, and the path to stored ladders or bicycles. A wheelbarrow that clears the car when the doors are closed may still block daily use.
Keep the wheelbarrow low enough that you lift the handles, not the full tub, above shoulder height. For many adults, that means the upper latch lands somewhere around 48 to 60 inches above the floor, but the exact number depends on the wheelbarrow geometry and the user’s height.
Step 2: Find Framing and Install the Ledger
Locate two studs and mark their centers. If the wall is open framing, this is easy. If the garage is finished with drywall, use a stud finder and confirm with small pilot holes where appropriate. Fasten the ledger level across the studs. A 36 to 48 inch ledger usually gives enough room to position the upper hook where the handles naturally land.
Do not rely on drywall anchors for a wheelbarrow. They may hold a picture or a light shelf, but they are not a proper load path for a long tool that gets lifted and bumped. Also avoid mounting into pegboard unless the pegboard and its backing system are specifically rated and framed for that kind of load.
Do these 3 things before closing this tab:
1Fix the driver behind crashes, sound loss and screen glitches2Repair Windows errors before they cause bigger problems3Scan for outdated or missing drivers - takes under a minuteStep 3: Set the Lower Bearing Point
Roll the wheelbarrow into position with the wheel or nose against the wall. Add a lower chock where it prevents the wheel from sliding sideways or outward. This block can be mounted to the wall framing, to the base of the ledger system, or to a small floor stop if that suits the layout better. The goal is to make the wheelbarrow repeatably land in the same place.
On our projects, we like the lower support to do real work. The upper hook should not be the only thing resisting movement. A good lower stop makes the rack feel stable and makes one-handed retrieval possible.
Step 4: Mark the Upper Latch
With the wheelbarrow resting on the lower stop, lift the handles into the storage position. The best setup lets the wheel sit low, the handles lift into a latch, and the user step back without twisting. Mark the handle height and width, then mount the upper hardware to the ledger or directly into a stud.
Test the motion several times before tightening everything fully. Make sure the tray does not scrape the wall, the handles do not hit shelves, and the user does not have to stand on tiptoe to secure the latch.
Step 5: Add Bumpers and Label the Zone
Add a rubber bumper, hose sleeve, or scrap carpet where metal touches wall. If the rack is in a shared garage, mark the floor or wall lightly so the wheelbarrow returns to the same position. This is especially useful near parked vehicles, where a 2 inch shift can make the difference between clean clearance and a scratched door.
Costs and Time: What to Expect in 2026
Most wheelbarrow storage projects are small, but the cost range is wider than people expect because wall type and access matter. A simple DIY hanger in a framed garage may take 30 to 60 minutes. A custom rack in masonry, a damp shed, or a crowded garage can turn into a half-day project.
Rank #3
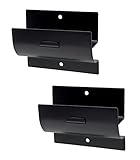
- Heavy-duty rock-solid garage wall hanger made of powder-coated steel with epoxy finish that offers strong resistance against corrosion and outstanding tolerance for extreme temperatures, suitable for both indoors and outdoors applications
- An inexpensive, simple, effective, and durable organizer to free up floor space, and keep your garage, basement, shed, barn, attic, closet, backyard, pantry, or laundry room tidy, organized, free of clutters and hazards
- Maximum weight capacity 50 lbs if stud mounted, versatile for bulky or heavy lawn furniture or equipment, such as wheelbarrows, ladders, lawn chairs, wagons, ironing boards, foldable truck ramps, strollers, laundry baskets, drying racks and etc.
- Simplistic, sleek, unobtrusive, and sturdy design holds the hanging object tight and secure with a near-flush and dangling-free mount, easy to hang and fetch
- Easy and effortless installation with no assembly required: 2 pre-drilled holes vertically positioned for secure attachment to 1 single stud, or use multiple to hang tall objects horizontally; recommended tools for installation include a power drill, a level, and a stud finder. Drywall mounting hardware is included. (NOT recommended for items over 20 lbs)
| Project type | Material cost | Typical time | Notes |
|---|---|---|---|
| Basic commercial wall hanger | $8-$35 | 30-60 minutes | Works well for light to medium wheelbarrows when mounted into framing |
| Heavy latch-style hanger | $20-$50 | 45-90 minutes | Better for frequent use and heavier models |
| DIY wood cleat rack | $10-$35 | 1-2 hours | Best value when stud spacing or handle geometry is awkward |
| Track-system hook | $15-$30 | 15-45 minutes | Low cost only if the rated rail system already exists |
| Outdoor rack or cover | $20-$75 | 1-3 hours | Use exterior-rated fasteners and solid posts or blocking |
| Professional install | $125-$300 | Minimum service call | More for masonry, blocking, ceiling work, or multiple carts |
For professional installation, 2026 handyman pricing commonly falls around $50 to $150 per hour, with many simple jobs subject to a minimum service charge. Some national task pricing lands around $120 to $220 per completed task. A realistic installed price for one or two wheelbarrow hangers is about $125 to $300, assuming straightforward access and no major framing work.
Cost drivers include wall type, stud or rafter access, concrete or masonry anchoring, the need for added blocking, corrosion exposure, garage ceiling height, number of carts, premium rail systems, and local labor minimums.
Free tools Windows power users keep installed
One-click scans. No signup required.
Mounting Rules That Prevent Failures
The most common failure is not the hook breaking. It is the wall failing, the fasteners pulling out, or the wheelbarrow becoming too awkward to use safely. Treat the rated hook as only one part of the system.
Fasten Into Structure
Use studs, posts, rafters, joists, masonry structure, or a ledger fastened into framing. Drywall, thin shed siding, fence pickets, masonry veneer, and light pegboard are not enough by themselves. If you are working in a metal shed, find the structural ribs or add blocking that transfers the load to the frame. If the shed wall flexes when you push on it, it is not ready for a hanging wheelbarrow without reinforcement.
Use the Right Fasteners
For wood framing, structural screws or lag screws are a better choice than small drywall screws. Drywall screws are brittle and not intended for this kind of repeated loading. For exterior or damp locations, use corrosion-resistant fasteners. In concrete or masonry, use anchors appropriate for the material and load, and avoid anchoring into loose block faces or veneer without understanding what is behind them.
Respect Leverage
A 35 pound wheelbarrow can exert more stress than a 35 pound box because the load is long and handled roughly. Every time someone lifts the handles into the latch or lets the wheel drop onto the stop, the rack sees dynamic force. That is why we like two-point support: a lower wheel or frame stop plus an upper latch.
Quick wins for a faster PC:
Clear out junk files and repair common Windows errorsFree Scan →Fix the driver behind crashes, sound loss and screen glitchesFind Drivers →Repair Windows errors before they cause bigger problemsFix Now →Do Not Store It Dirty or Loaded
Soil, mulch, wet leaves, concrete residue, and hand tools add weight and trap moisture. Concrete and mortar residue are especially hard on steel trays. Rinse and dry the tray when practical, and touch up chipped paint before rust spreads. A two-minute cleanup after use is cheaper than replacing the tray or rebuilding the rack later.
Independent reader supportYour contribution helps us test, update, and keep practical guides available for everyone.Safety, Clearance, and Permit Notes
Wheelbarrow storage usually does not require a permit when you are simply hanging a tool inside an existing garage or shed. Building a new storage shed may be different. Permit thresholds vary by city, county, and state, and some jurisdictions have size limits, setback rules, anchoring requirements, or zoning restrictions for accessory buildings. Before building a new shed just for yard tools, check your local building department’s accessory structure rules.
Inside a garage, preserve access to exits, electrical panels, water heaters, furnaces, attic hatches, fire extinguishers, garage door sensors, and garage door tracks. Keep walking paths clear enough that someone can move through the space carrying groceries or tools without ducking around handles. If the garage is used by children, older adults, or anyone with limited mobility, choose a lower wall rack instead of overhead storage.
For ceiling-mounted storage, check head clearance with the garage door both open and closed. Also check vehicle hatchbacks and truck tailgates. A stored wheelbarrow can clear a sedan roof and still block a raised SUV hatch.
When to DIY and When to Hire a Pro
DIY is a good fit when you have a framed garage or shed wall, can identify studs confidently, and are storing one empty homeowner wheelbarrow. A basic wall hanger or 2×4 cleat rack is well within the reach of a careful homeowner with a drill, level, tape measure, and stud finder.
Rank #4
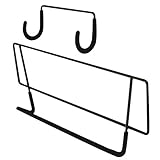
- Ideal for hanging a wheelbarrow
- Holds up to 35-pounds
- Measures 7. 5-inches (H) by 17. 75-inches (W) by 82. 5-inches (D) and comes in an attractive black finish
- Installation is easy with the included hardware
- Easy to install
Hire a pro when the wall is masonry, the shed wall is thin or flexible, the rack needs ceiling attachment, the wheelbarrow is heavy steel, or you are storing multiple carts. Also hire help if the rack location is near electrical equipment, plumbing, garage door hardware, or finished surfaces you do not want damaged. Paying $125 to $300 for a clean, secure install is reasonable when the alternative is a rack pulling out of the wall above a vehicle.
A pro should be able to explain the load path clearly: where the weight bears, which framing members or anchors carry it, and how the wheelbarrow is prevented from swinging. If the answer is just bigger anchors in drywall, that is not a good plan.
Best Choices by Situation
| Situation | Best storage choice | Why |
|---|---|---|
| Framed garage wall | Commercial hanger or 2×4 ledger rack | Strong, inexpensive, and easy to use daily |
| Thin shed wall | Rack tied into studs or added blocking | Siding alone is not a safe load path |
| Low ceiling | Wall rack | Avoids overhead lifting and head-clearance issues |
| Renter | Freestanding floor stand or outdoor upside-down storage | Reduces permanent wall damage |
| Heavy steel wheelbarrow | Ledger-mounted latch rack | Spreads load across framing and controls tipping |
| Outdoor-only storage | Upside down with cover or post-mounted rack | Prevents water collection and reduces rust |
| Multiple carts | Custom rack or dedicated shed bay | Prevents tangled handles and unsafe stacking |
Maintenance After You Store It
Good storage should make maintenance easier. Before hanging the wheelbarrow, dump all material, brush out the tray, and rinse corrosive residue. Let it dry before long-term storage. For steel trays, touch up chipped paint and keep the tray out of standing water. For poly trays, inspect cracks near bolts and handle mounts. For pneumatic tires, check air pressure before the busy season. For flat-free tires, inspect axle hardware and cotter pins.
Once or twice a year, check the storage hardware. Tighten loose screws, look for rust stains around fasteners, and inspect the wall for crushing, cracking, or movement. If the rack creaks, shifts, or feels different than it did when installed, unload it and fix the problem before using it again.
Bottom Line
The best wheelbarrow storage is simple: keep the wheel low, latch the handles, fasten into real structure, and protect the tool from water. A $20 hanger can work very well when installed into studs or a ledger. A scrap-wood rack can be just as good if it has a lower chock and solid fasteners. What does not work is a heavy, dirty wheelbarrow hanging from drywall anchors, thin shed siding, or a hook placed so high that every use feels like a shoulder workout.
Build the rack around the actual wheelbarrow and the actual user. That small amount of planning is what turns a clever garage trick into storage that still works five years from now.
Frequently Asked Questions
What is the best way to store a wheelbarrow in a garage?
For most garages, the best method is a wall-mounted hanger or 2×4 ledger rack fastened into studs. Keep the wheel low, use a lower stop or chock, and latch the handles so the wheelbarrow does not swing away from the wall.
Can you hang a wheelbarrow on drywall?
No. Do not rely on drywall or drywall anchors for wheelbarrow storage. Fasten the hanger into studs, blocking, masonry structure, or a ledger board secured to framing.
How high should a wheelbarrow hanger be mounted?
Mount it low enough that the user lifts the handles comfortably, not the whole tub above shoulder height. Many setups place the upper latch around 48 to 60 inches from the floor, but the exact height depends on the wheelbarrow and user.
How much weight can a wheelbarrow wall hanger hold?
Many common hangers advertise 50 to 90 pound ratings, but the full system matters. The wall, fasteners, ledger, and repeated lifting force must all be considered. Store the wheelbarrow empty.
Is it better to store a wheelbarrow upside down or hanging?
Indoors, hanging saves floor space when the rack is properly mounted. Outdoors, upside-down storage is often better because it keeps rain from collecting in the tray. Steel trays need dry storage and paint touch-ups to limit rust.
Quick wins for a faster PC:
Clear out junk files and repair common Windows errorsFree Scan →Fix the driver behind crashes, sound loss and screen glitchesFind Drivers →Repair Windows errors before they cause bigger problemsFix Now →Do I need a permit to build a small wheelbarrow storage shed?
Hanging a wheelbarrow inside an existing garage or shed usually does not require a permit. Building a new shed may trigger local rules for size, setbacks, anchoring, and zoning, so check your local building department before construction.
Quick Recap
Product prices and availability are accurate as of the date/time indicated and are subject to change. Any price and availability information displayed on Amazon at the time of purchase will apply.