Recommended Free Tools
A good DIY headboard can change a bedroom in one Saturday. The trick is choosing the right type before you buy material. A painted arch may cost $25 and take two hours. A plywood upholstered queen headboard often lands between $75 and $250. A slat wall, trim grid, or built-in headboard can run $125 to $1,500 or more depending on wood, finish quality, outlets, and whether you need professional help.
On our job sites, the headboards that look best are not always the most complicated. They are the ones sized correctly, fastened correctly, and planned around real bedroom constraints: outlets, baseboards, nightstands, windows, lamps, pillow height, and kids climbing on furniture. Use this guide as a practical idea list and a screening tool. If you want the fastest win, start with paint, textiles, peel-and-stick panels, or a simple upholstered board. If you want a permanent architectural feature, plan it like finish carpentry.
As an Amazon Associate I earn from qualifying purchases.
Quick Comparison: Best DIY Headboard Types by Budget and Skill
| Headboard Type | Typical 2026 DIY Cost | Time | Skill level | Best For |
|---|---|---|---|---|
| Painted, taped, or wallpaper headboard | $25-$100 | 2-6 hours | Beginner | Renters, small rooms, tight budgets |
| Fabric, tapestry, curtain, or pillow rail | $30-$200 | 1-4 hours | Beginner | No-saw projects, soft texture, renters |
| Basic upholstered plywood panel | $75-$250 | 4-8 hours | Beginner to intermediate | Hotel-style comfort, queen and king beds |
| Tufted or channel upholstered panel | $150-$450 | 1-2 days | Intermediate | Luxury look, primary bedrooms |
| Wood slat, shiplap, trim, or geometric board | $125-$500 | 1-2 days | Intermediate | Warm wood, modern or craftsman rooms |
| Reclaimed door, shutter, or salvaged panel | $40-$300+ | Half day to 2 days | Varies | Character, farmhouse, vintage rooms |
| Built-in wall panel, shelf, or storage headboard | $300-$1,500+ | Weekend to several days | Advanced | Permanent remodels, custom bedrooms |
For sizing, a queen headboard commonly finishes at 60 to 66 inches wide. A king usually finishes at 76 to 82 inches wide. A practical height is 36 to 48 inches from the floor, while a tall statement headboard may run 54 to 72 inches. For a designer-looking proportion, either make the headboard bed width plus 2 to 6 inches per side, or run it intentionally wall-to-wall behind both nightstands. The awkward middle width is what usually looks accidental.
The 62 Best DIY Headboard Ideas for a Weekend Build
Under-$50 and No-Saw Ideas
- Painted arch headboard: Tape a half circle or soft arch behind the bed and paint it in a durable interior finish. Budget $25-$60, plus primer if covering a dark wall.
- Painted rectangle headboard: Use a clean rectangular block 4 to 8 inches wider than the bed. This is the cheapest way to fake a built-in look.
- Color-block wall band: Paint a horizontal band from nightstand to nightstand, typically 42 to 54 inches high.
- peel-and-stick wallpaper panel: Frame the bed area with removable wallpaper. Expect $40-$100 depending on pattern repeat and wall size.
- Removable wall decals: Good for rentals and kids’ rooms. Keep the layout simple so it reads intentional, not scattered.
- Washi tape geometric headboard: A low-cost temporary option for dorms and short leases. Use a full-size tape mockup before committing to the pattern.
- Fabric wall hanging: Hang a washable textile from a rod or wood dowel. Budget $30-$150.
- Tapestry headboard: Works best when the fabric is wider than the mattress and mounted taut.
- Curtain panel headboard: Mount a curtain rod 6 to 12 inches above pillow height and hang one or two panels.
- Quilt or vintage blanket headboard: Use a clip rail, rod pocket, or compression-style quilt hanger to avoid damage to the textile.
- Macrame hanging headboard: Lightweight and renter-friendly if hung from rated hooks or a rod mounted into studs.
- Large framed fabric panel: Wrap fabric around foam board or a light rigid panel, then hang like art.
Simple Upholstered Headboards
- Basic plywood upholstered headboard: Use at least 1/2-inch plywood for queen and king sizes, 1 to 3 inches of foam, batting, fabric, staples, and wall or bed-frame hardware. Budget $75-$250.
- Rounded-corner upholstered panel: Cut large-radius top corners before foam and fabric go on. It softens the profile without adding much cost.
- Slipcovered headboard: Build a simple rectangular panel and sew or order a removable cover. This is smart for kids, pets, and guest rooms.
- Performance-fabric headboard: Spend more on upholstery fabric if the room gets daily use. Fabric quality often matters more than foam thickness.
- Linen-look upholstered panel: Use a textured neutral fabric over 2-inch foam for a clean hotel feel.
- Velvet upholstered headboard: Budget closer to $150-$350 because velvet, batting layers, and careful stapling matter.
- Leather or faux-leather panel: Easier to wipe clean, but unforgiving if stretched unevenly.
- Nailhead trim headboard: Add trim only after the fabric is tight and square. Use a guide strip for straight spacing.
- Button-tufted headboard: A weekend project for patient DIYers. Expect $150-$450 depending on foam, fabric, and button count.
- Channel-tufted vertical headboard: Build individual padded strips or sew channels over foam. It looks custom but requires careful layout.
- Horizontal channel headboard: Easier to align across a wide king bed than vertical channels.
- Pillow headboard on a rail: Hang two or three large upholstered cushions from leather or cotton straps. Budget $80-$250 depending on inserts and fabric.
Wood, Trim, and Panel Headboards
- Plain plywood headboard: Sand a 4-by-8 panel, round the top edges, stain or paint it, and mount it securely. Big-box 4-by-8 sheet goods can range from low-teens OSB to $40-$50+ plywood and cabinet-grade panels.
- Plywood with picture-frame trim: Add 1x or molding around the perimeter for depth.
- Board-and-batten headboard: Use MDF or pine battens over a plywood backer. Budget $125-$350.
- Shiplap headboard: Run boards horizontally for a cottage or coastal look. Pre-finish boards before installation.
- Vertical slat headboard: Use evenly spaced 1×2 or 1×3 boards. It works well wall-to-wall behind nightstands.
- Wide-plank headboard: Use 1×6 or 1×8 boards for a more rustic profile.
- Chevron wood headboard: Good visual payoff, but angled cuts increase waste. Budget extra material.
- Herringbone wood headboard: More layout work than chevron. Best for confident saw users.
- Geometric trim headboard: Use thin molding over a painted panel. Mark the pattern full size before cutting.
- Reeded or fluted panel headboard: Use fluted trim or tambour-style panels for a high-end look.
- Caned inset headboard: Add cane webbing inside a wood frame. Keep cane away from rough pillow friction if durability matters.
- Pegboard headboard: Useful in kids’ rooms or small bedrooms. Keep heavy items off the pegs above pillows.
- Live-edge slab headboard: Beautiful but heavy. This is a stud, cleat, and helper project.
- Painted MDF panel headboard: Smooth, inexpensive, and stable, but seal edges well before painting.
Salvaged and Repurposed Headboards
- Reclaimed door headboard: Mount horizontally or vertically depending on bed size. Confirm it is not warped and treat old paint carefully.
- Pair of old shutters: Works for twin, full, or queen beds. Clean, secure loose louvers, and mount to studs.
- Salvaged mantel headboard: Architectural, but heavy and often uneven. Use a cleat and avoid loose objects on top.
- Pallet board headboard: Only use clean, safe, pest-free lumber. Sand thoroughly and avoid unknown chemical exposure.
- Old fence board headboard: Rustic, low cost, and splinter-prone unless cleaned and sealed.
- Room divider screen: Fastest vintage solution. Anchor it so it cannot fold or fall forward.
- Bifold closet doors: Paint or cane the panels, then mount as a wide headboard.
- Vintage window frame: Use only if glass is removed or replaced with a safe backing. Do not mount glass over a bed.
- Salvaged trim grid: Assemble old trim over a new backer panel for character without relying on brittle old joints.
- Barn-style plank panel: Build the look from new boards if the salvaged piece is too heavy or suspect.
Renter-Friendly and Small-Space Ideas
- Freestanding upholstered headboard: Let the bed hold it against the wall, but add anti-tip hardware if children are present.
- Bed-frame-mounted headboard: Bolt a panel to the metal bed frame using matching bracket holes.
- Command-strip lightweight panel: Only for very light foam, fabric, or paper-based panels. Do not use adhesive strips for wood or shelves.
- Leaned floor mirror substitute: Instead of an actual mirror above pillows, use a lightweight mirrored acrylic panel or skip the reflective material entirely for safety.
- modular foam tiles: Adhesive upholstered tiles can create a soft headboard zone. Verify removability before installing in a rental.
- acoustic felt panels: Lightweight, modern, and useful for apartments. Use a layout wider than the bed.
- Bookshelf-as-headboard: Use a low, stable shelf behind the bed only if anchored. Avoid heavy decor over sleeping areas.
- Floating cushion panels: Individual cushions mounted on a rail can move with you.
Built-In and Pro-Level Weekend Projects
- Wall-to-wall ledge headboard: A shallow ledge can replace nightstand clutter, but fasten it into studs and keep heavy objects off it.
- Built-in storage headboard: Useful in small rooms, but it needs square layout, secure anchoring, and child-safe hardware.
- Panel molding headboard wall: Treat it like finish carpentry. Layout, caulk, nail holes, and paint quality determine the result.
- Half-wall wainscot headboard: Run paneling 48 to 60 inches high behind the bed for an architectural look.
- Headboard with plug-in sconces: Use cord covers or visible plug-in wiring. Do not conceal regular lamp cords inside a wall.
- Headboard with hardwired lighting or relocated outlets: This is where a weekend decor project becomes electrical work. Hire a licensed electrician where required.
How to Choose the Right Headboard Before You Buy Materials
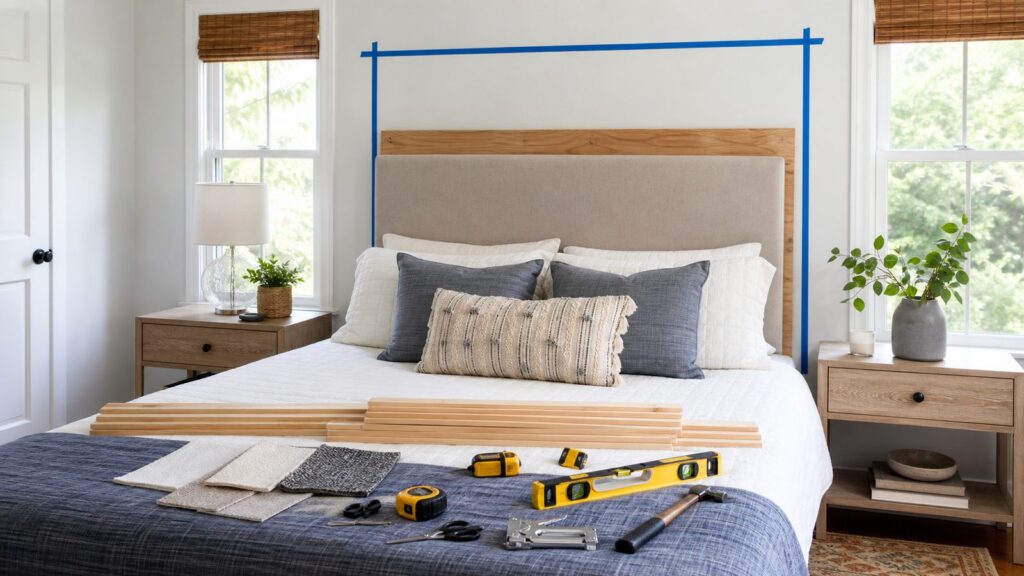
Start with a painter’s-tape mockup on the wall. Tape the exact width and height, then put the pillows back on the bed and view it from the doorway. This catches most mistakes before they become material waste. For a queen bed, test 64 to 72 inches wide if you want a little overhang. For a king, test 80 to 92 inches depending on nightstands. For height, 42 to 48 inches works in most rooms. Go 54 to 72 inches only if the ceiling height and wall space can carry it.
#1 Best Overall

- Versatile Fastening Tool - YEAHOME 4-in-1 Staple Gun accepts D-shaped, U-shaped, T-shaped, and Pin Staples. This kit comes with 1000pcs of each " D-Type, " T-Type, " U-Type , and " Pin Brad Nails for a wide variety of applications: general DIY repairs, crafting, decorating, upholstery projects, roofing, and more.
- Heavy-Duty Staple Gun - Features all chromed-steel construction and a chrome finish to provide strength and durability, and make the staple gun rust-proof. YEAHOME staple guns are assembled toughly so that it can handle the tough load and last as long as you need it!
- Power Adjustment - Change the pressure (between low to high) with the screw lever as per the requirement of your projects, to staple in soft as well as hard materials, make your projects easier.
- Easy to Use - Steel handle with over-molded grip to help provide comfortable usage and easy operation. Bottom load design and a steel magazine for quick and easy loading.
Measure more than the mattress. Check the outside width of the bed frame, nightstand height, outlet locations, switch plates, baseboards, window trim, wall lamps, and HVAC returns. A headboard that blocks an outlet may force you into electrical work. A headboard that lands half an inch into window casing will look like a measuring mistake forever.
Choose the material based on use. Upholstery is best when people sit up in bed to read. Painted and wallpaper headboards are best when the room is small or temporary. Wood slats and trim work best when you want architectural texture. Built-ins make sense when the room needs storage or the bed wall is being remodeled anyway.
Materials, Tools, and 2026 Cost Planning
For a basic upholstered queen headboard, a realistic shopping list is one 1/2-inch or 3/4-inch plywood panel, 1 to 3 inches of upholstery foam, batting, fabric, spray adhesive, staples, screws, and mounting hardware. Plan $75 to $250 for a straightforward build. For a tufted or channel design, expect $150 to $450 because thicker foam, better fabric, seams, buttons, and waste add up quickly.
Do these 3 things before closing this tab:
1Fix the driver behind crashes, sound loss and screen glitches2Repair Windows errors before they cause bigger problems3Scan for outdated or missing drivers - takes under a minuteFor wood headboards, the biggest cost variables are board quality, straightness, species, trim profile, and finish. Pine or MDF trim keeps a board-and-batten project closer to $125 to $300. Hardwood, fluted panels, or a wide wall-to-wall slat layout can push a weekend project toward $500 before labor. If you need to buy or rent a miter saw, brad nailer, sander, clamps, or a stud finder, include that in the real cost.
For salvaged headboards, do not assume free means cheap. Old doors, shutters, and trim may need cleaning, de-nailing, sanding, sealing, pest treatment, new backing, and safer mounting hardware. A reclaimed headboard can stay around $40 to $150 if the piece is clean and already sized well. It can hit $300 or more if it needs serious prep.
Mounting and Safety: Where DIY Headboards Fail
Most headboards are non-structural furniture projects, so a simple freestanding, bed-frame-mounted, or stud-mounted headboard usually does not require a building permit. Safety still matters. Large upholstered panels, wood slat walls, ledges, salvaged doors, and storage headboards should be fastened into studs whenever possible. Drywall-only anchors are a common failure point, especially when the headboard is wide, heavy, or touched daily.
A French cleat is one of the best ways to mount a large headboard because it spreads the load across multiple studs. Use properly rated fasteners, hit at least two studs for most queen projects, and use more for king or wall-to-wall builds. If the headboard is freestanding but tall or heavy, use anti-tip hardware. In homes with children, treat any shelf, storage headboard, dresser-style headboard, or leaning panel as a tip-over risk.
Do not mount glass, heavy mirrors, ceramic art, stone, or loose shelves above pillows. If you build a ledge headboard, keep it shallow and use it for light items only. Storage above the bed should be closed, anchored, and designed so objects cannot fall forward during sleep.
Rank #2
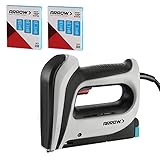
- Extra 3750 Pieces Staples: Package come with 3750 Pieces 1/4", 3/8", 1/2" Arrow T50 staples (Each 1250 Pieces), providing options for a variety of projects
- Professional Safety Stapler: This product has a contact safety mechanism at the nail outlet to prevent misfires. You need to press the top of the product firmly to make the staple outlet contact with the work surface to work. For safety and prevent accidental triggering, you need to press On switch first then press the trigger to shoot staples. Multiple air vents design for heat dissipation to protect the tool and your hand
- High Efficiency & 8 Foot Cord: The gun delivers max power with each shot, can fire at 60 staples per minute, which helps you secure large surfaces quickly. No need recharging method makes it continuous hitting. 8 Foot cord power cord offers an extended reach
- Easy Operation: Designed with convenient bottom-loading staple magazine, you can easily install the staples. Low staple indicator window lets users know when the magazine is nearing empty. Comfortable grip help reduce hand fatigue. Quick-release mechanism helps shoot staple smoothly and quickly
- Wide Application: The Arrow T50ACD electric stapler is compatible with 1/4"(6mm)-1/2"(12mm) T50 staples. Ideal for upholstery, carpentry, decorating, screen repair, cable fixed, crafts projects. Suitable for general repair and professional uses
Permits, Electrical, and Older Homes
The biggest code trigger is electrical work. Painting, upholstering, building a freestanding panel, or fastening a headboard to studs is usually furniture or finish work. Adding outlets, relocating receptacles, installing switches, hardwiring sconces, concealing wiring, or adding built-in lighting is different. Electrical work must comply with code, and many jurisdictions require a permit or licensed electrician.
Never bury a junction box behind a headboard, paneling, trim wall, or built-in cabinet. Junction boxes need to remain accessible. If paneling changes wall depth around an outlet, plan proper box extenders. For plug-in sconces, keep wiring visible or use listed cord covers as appropriate. Do not run a standard lamp cord inside a wall cavity.
In pre-1978 homes, be careful with old painted doors, shutters, trim, paneling, and salvaged material. Sanding, scraping, or cutting old paint can create lead-dust risk. If you are uncertain, use lead-safe work practices or choose new material that gives you the same look without the hazard.
Quick wins for a faster PC:
Fix the driver behind crashes, sound loss and screen glitchesFind Drivers →Clear out junk files and repair common Windows errorsFree Scan →When to DIY vs. When to Hire a Pro
DIY makes sense when the headboard is light, non-electrical, and within your tool comfort. Paint treatments, peel-and-stick panels, hanging textiles, bed-frame-mounted panels, basic upholstery, and simple wood trim projects are reasonable weekend work for a careful homeowner. A handyman or furniture assembler can also be cost-effective for mounting; simple assembly or mounting commonly lands around $50 to $150, with broader furniture assembly ranges around $50 to $550 depending on size and complexity.
Hire a carpenter, electrician, or qualified installer when the project includes hardwired lighting, outlet relocation, built-in storage, heavy reclaimed doors, plaster or brick mounting, custom millwork, tall wall paneling, luxury upholstery, or uncertainty about lead paint. Professional trim and panel work costs more because layout, fastening, caulking, wall repair, and finish quality are the job. On a permanent bedroom feature, that labor is often what separates a clean built-in from a weekend experiment.
Rank #3

- T50-FIRST FASTENING FOR EVERYDAY PROJECTS — T50 staples are the primary fastening function; 1/2 in. T50 staples are recommended for upholstery, fabric, foam, canvas, cardboard and thin softwood. Use 18GA brad nails up to 9/16 in. as a secondary option for light trim, picture frames and small finishing details.
- CORDLESS, LIGHTWEIGHT CONTROL — The 1.6 lb 4V tool keeps repair and decorating jobs mobile. Charge by Type-C in about 2 hours and work at up to 50 fasteners per minute.
- CHOOSE THE RIGHT MATERIAL BEFORE YOU START — Built for soft materials and thin softwood. Test on scrap first. It is not designed for hardwood, plywood, OSB, thick lumber, framing or heavy construction.
- BETTER RESULTS WITH CORRECT SETUP — Load the magazine from the bottom, use the specified T50 staple length, then press the contact nose flat at 90° before pulling the trigger.
- READY FOR LIGHT DIY — Includes 1,200 T50 staples and 400 brad nails to start common upholstery, display, décor and repair tasks. Use the safety switch and keep hands clear of the firing area.
A good rule: if a failed fastener could hurt someone, if the work hides wiring, or if the piece cannot be safely handled by two adults, price professional help before starting.
Independent reader supportYour contribution helps us test, update, and keep practical guides available for everyone.Best Picks by Situation
Cheapest: Painted arch, painted rectangle, washi tape geometry, peel-and-stick wallpaper, tapestry.
Best renter-friendly: Curtain panel, textile hanging, modular foam tiles, acoustic felt panels, freestanding upholstered panel.
Best no-power-tool projects: Paint, wallpaper, fabric hanging, pillow rail, adhesive foam tiles, lightweight framed fabric.
Best for comfort: Basic upholstered plywood, slipcovered headboard, channel upholstered headboard, pillow rail.
Rank #4
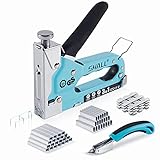
- 3-in-1 Application : It fits 3 kinds of different staples/nails such as D type staples, U type staples and T type nails; It's suitable for general models: T50, T18, Brad nail gauge 18
- More Accurate Positioning : The staple gun features 3 specific staple outlet laser-etched marking, which helps users more clearly know the outlet position of staples and then more accurately fasten objects
- Knob Stepless Adjustment : Unlike high/ low dual power adjustments, the stepless knob adjustment allows for much more levels of power adjustment; It allows the user to set different pressure depending on the desired effect of the stapling
- Easy to Use and Comfortable : Equipped with a jam clearing system that allows for the quick removal of stuck staples; It’s anti slip comfort grip also gives comfort to the user’s palm which reduces the pain while doing heavy/continuous work
- Cost-effective Kit : Includes an all-metal 3-in-1 stapler gun, 3000 PCs staples and a staple remover; Staples including 1000 PCs 5/16" D-type staples,1000 PCs 15/32" U-type staples (T18); 1000 PCs 25/64" T-type staples (Brad nail gauge 18); The set will meet your most needs
Best woodworking projects: Vertical slats, board-and-batten, shiplap, plywood with trim, chevron panel.
Best small-bedroom ideas: Painted wall band, wall-mounted cushion panels, pegboard, shallow ledge headboard, storage headboard.
Best luxury look: Velvet channel upholstery, fluted wood panel, wall-to-wall slats, panel molding wall, linen upholstered king headboard.
Common Mistakes to Avoid
The first mistake is measuring only the mattress. Always measure the full bed frame and the wall conditions around it. The second mistake is using weak backing. Thin cardboard, unsupported foam, warped pallet boards, and low-grade panels can bow, sag, or show staples through fabric. The third mistake is poor mounting. Large headboards need studs, rated hardware, or a cleat. Adhesive strips and random drywall anchors are not a plan for heavy wood.
The fourth mistake is skipping finish order. For slats, trim, and tight seams, pre-finish as much as possible before installation, then touch up nail holes after mounting. The fifth mistake is ignoring cleaning. Performance fabric, removable slipcovers, washable textile panels, and sealed wood are worth it in kids’ rooms, rentals, and pet-heavy homes.
What’s actually slowing this PC down?
Pick the symptom - the matching free tool is one click away.
Best Value
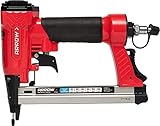
- READY FOR ACTION: The PT50 Pneumatic Staple Gun is great for household projects, like insulation, house wrap, roofing, flooring, or upholstery; This tool is great for large projects and stapling into harder materials
- COMFORT AND EFFICIENCY: The lightweight compact design, over mold rubber grip, and the exhaust cover that allows you to direct exiting air flow make for a comfortable stapling experience
- CONVENIENCE AND SAFETY: Unlike other pneumatic tools, the PT50 does not require oil for maintenance; The safety trigger feature requires two triggers to be pulled before firing to prevent misfires
- BUMP FIRE ACTION: Rapid firing of staples is possible by holding down the trigger and pressing against your work surface. The contact safety prevents misfires when shooting multiple staples in succession
- COMPATIBILITY: This staple gun comes with air inlet fittings and operates on home compressor units up to 100psi; This tool uses Arrow T50 staples (sold separately) in 1/4-Inch, 5/16-Inch, 3/8-Inch, 1/2-Inch, or 9/16-Inch
Build the headboard for the way the room is actually used, not just the photo you have in mind. If people read in bed, make it padded. If the room is temporary, make it removable. If the wall has outlets, plan around them before the first cut.
Frequently Asked Questions
How much does it cost to make a DIY headboard in 2026?
Most DIY headboards cost $25 to $500. Paint, tape, and peel-and-stick designs usually run $25-$100. Fabric or curtain headboards cost about $30-$200. A basic upholstered plywood headboard is typically $75-$250, while tufted, slatted, trim-built, or built-in designs can run $150-$1,500+.
Can you make a headboard without power tools?
Yes. Painted headboards, peel-and-stick wallpaper, tapestries, curtain panels, fabric wall hangings, modular foam tiles, and some pillow rail designs can be done with basic hand tools. Avoid heavy wood, shelves, and large panels unless you can fasten them safely.
Do you need a permit to build or mount a headboard?
Most freestanding, bed-frame-mounted, or stud-mounted headboards are treated as furniture or finish work and usually do not need a building permit. Electrical work is different. Adding outlets, moving receptacles, installing switches, or hardwiring lights may require code-compliant work and a permit depending on your location.
How do you attach a headboard to the wall safely?
Locate studs first, then use rated fasteners or a French cleat sized for the headboard’s weight. Avoid relying on drywall-only anchors for large upholstered, wood, salvaged, shelf, or storage headboards. Tall or freestanding pieces should also use anti-tip hardware, especially in homes with children.
What size should a headboard be for a queen or king bed?
A queen headboard commonly finishes 60-66 inches wide, while a king usually finishes 76-82 inches wide. For a more designed look, add 2-6 inches per side or run the headboard wall-to-wall behind nightstands. Common heights are 36-48 inches, with tall statement versions at 54-72 inches.
What materials are best for an upholstered headboard?
Use at least 1/2-inch plywood or another rigid panel for queen and king headboards, plus 1-3 inches of upholstery foam, batting, and durable fabric. Performance upholstery fabric or a removable slipcover is best for kids’ rooms, rentals, guest rooms, and homes with pets.
Quick Recap
Product prices and availability are accurate as of the date/time indicated and are subject to change. Any price and availability information displayed on Amazon at the time of purchase will apply.
The Tool Desk
Outbyte PC Repair FREERepair Windows errors before they cause bigger problemsFix Now →Outbyte Driver Updater FREEScan for outdated or missing drivers - takes under a minuteDriver Scan →
